Yeast breads
Parker House Rolls
Bake your own classic Parker House rolls, filling your kitchen with the tantalizing fragrance of yeast and butter. These from-scratch rolls are soft and rich, and even a novice baker can handle this recipe.
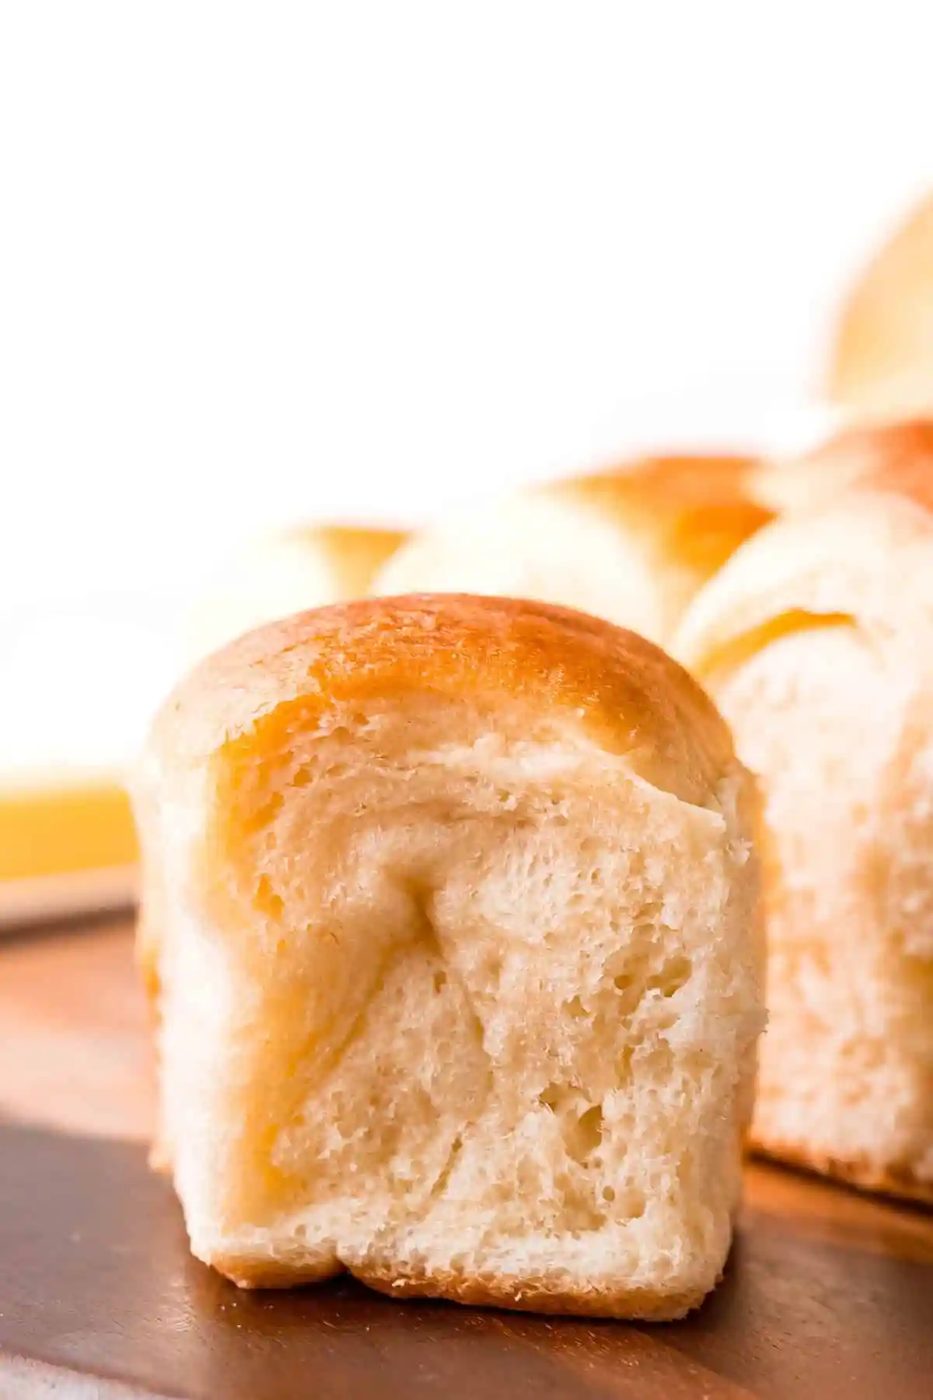
What stands out: Bake your own classic Parker House rolls, filling your kitchen with the tantalizing fragrance of yeast and butter. These from-scratch rolls are soft and rich, and even a novice baker can handle this recipe.
How long it takes: about 4 hours, including rising time
Equipment you’ll need: stand mixer, saucepan, 9 x 13-inch baking pan,
Servings: 24
Best From-scratch Rolls
Is there anything quite like from-scratch rolls? Hot out of the oven, crisp and brown on the outside, achingly soft on the inside, they just cry out for a pat of butter, or a drizzle of honey. And the smell of from-scratch rolls as they bake has got to be about a standby smell ever!
Parker House rolls are great with dinner but they are reliable for breakfast and lunch, too. Our kids just love eating them for a snack when they get home from school. We would say any time is a good time for freshly baked rolls!
This recipe is doable, even for novice bakers. You may be thinking that baking rolls is way above your skill level. It does take a little time to make from-scratch yeast breads like this but it’s not tricky and the effort is so worth it. Trust us, if we can do it, so can you! There’s a certain satisfaction about baking from scratch and you’ll be glad you took the time.
No kneading necessary! These rolls are no-knead rolls but you will need a stand mixer with a dough hook. The mixer actually does the kneading for you.
Richard Said:
“we haven’t always had luck with yeast bread recipes, but these came out great… Our family loved them. These will become our best rolls.”
See More Reader ReviewsWhat goes in
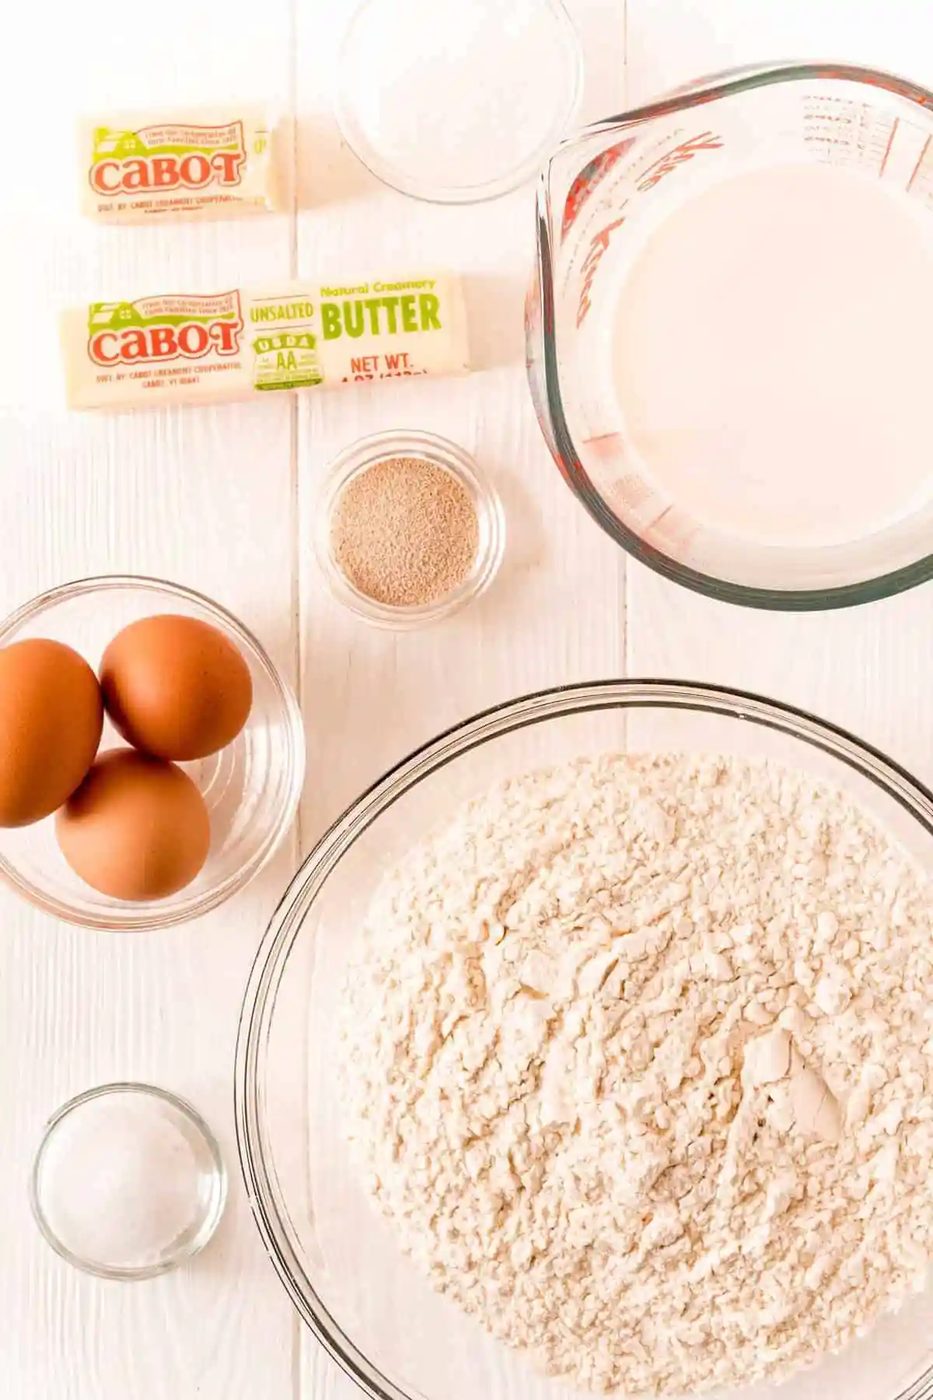
- All-purpose flour: You don’t need to buy special flour to make from-scratch rolls. We usually use King Arthur unbleached all-purpose flour.
- Instant yeast: There are also instructions on the recipe card for how to use regular active yeast, if you prefer.
- Sugar: Parker House rolls are lightly sweetened with a few tablespoons of granulated sugar.
- Warm milk: We like to use whole milk when we make the rolls just because it’s richer but 2% is fine, too.
- Butter: You can see there’s a fair amount of butter in the rolls, and we would say that’s what makes them taste so good! Always use unsalted butter for baking unless otherwise instructed.
- Eggs: These rolls are quite rich with three eggs.
- Salt: Don’t be tempted to skip the salt because not only does it keep the rolls from tasting flat, it keeps the dough from rising too fast or too much.
How it comes together
Measure the ingredients. Once you have the flour, salt, and yeast mixed together, combine the warm milk, sugar, eggs, and melted butter. Add the liquid ingredients to the flour mixture in the bowl of your stand mixer.
Knead. Now it’s time for the mixer to get a work-out. You don’t have to do a thing, just let the dough hook and mixer knead the dough for six to eight minutes.
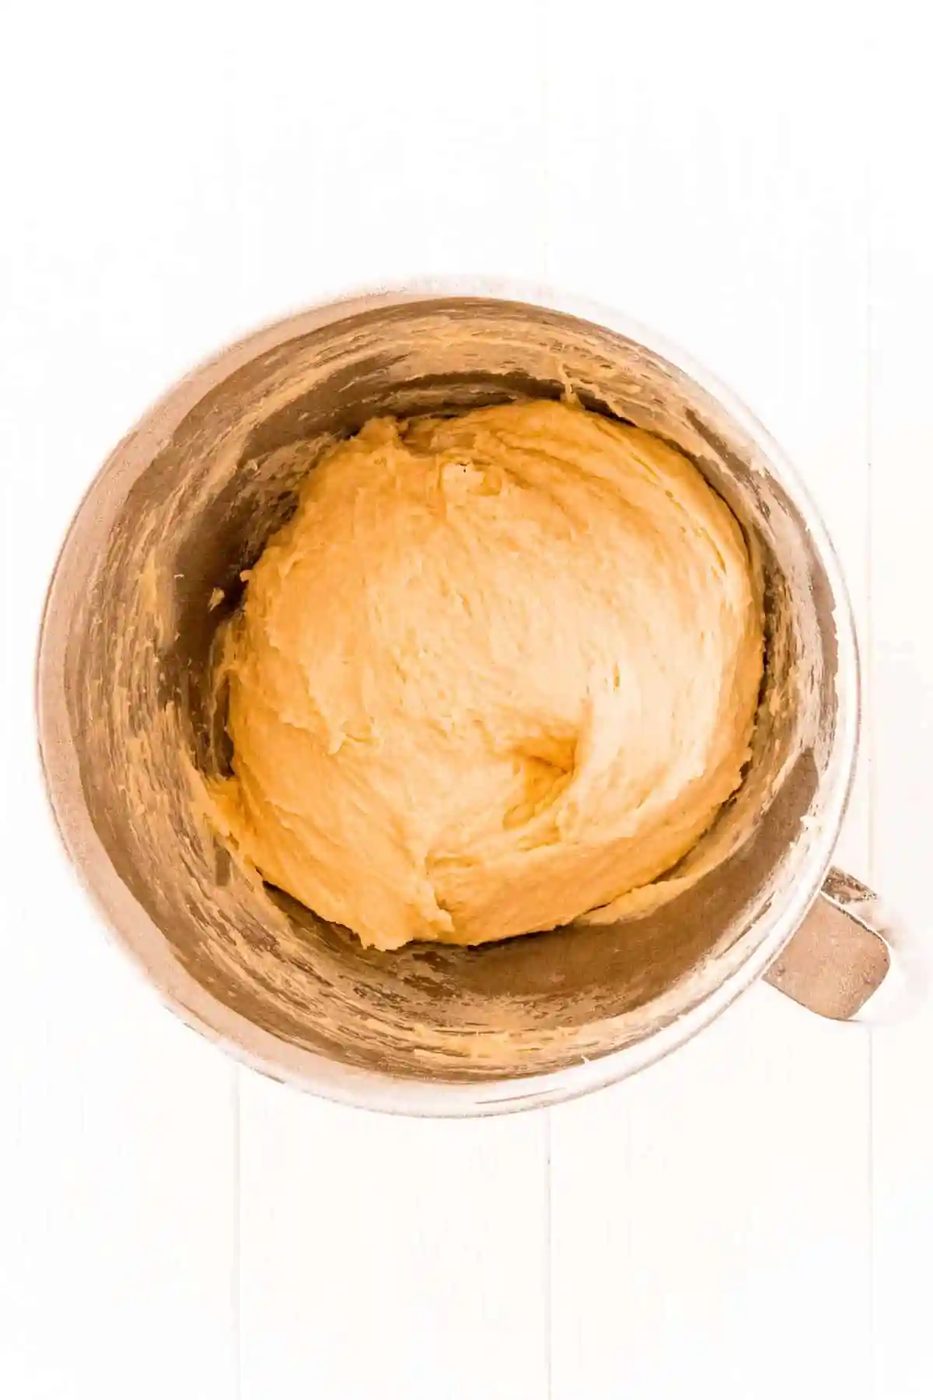
First rising. Remove the dough from the mixer, put it in a greased bowl and cover it with a nice cozy towel. Find a warm place for it to rise. Our oven has a Proofing function which works evenly. Another option is to turn your oven on warm (low) while you’re getting the dough ready, then turning the oven off when you put the dough in. Your oven will stay warm for quite a while. You could also put a big pan of hot water into the oven with the dough to keep it warm. It will take an hour to an hour and a half for the dough to double in volume.
Shape dough into rolls. Once the dough is ready, divide it into two equal pieces. Flatten out each piece, and then roll into a log, as pictured. Cut each log into 12 rolls. The dough is soft and squishy and it doesn’t stick to your hands. Really, you could make the rolls into any shape you like: cloverleaf, crescent, simple balls, whatever.
Arrange the rolls in a baking pan. This recipe makes 24 rolls, which snuggle up to each other in one 9 x 13 inch pan.
Second rising. The rolls need to rise one more time after they are in the pan, about one more hour.
Bake. Be sure to preheat your oven before you put the rolls in, otherwise they won’t bake evenly, and may burn on the bottoms. Bake until the rolls are golden brown. We like to brush them with melted butter when they come out of the oven for a nice glossy surface.
Ways to change it
Shape the dough differently. You can shape the rolls in whatever form you like. You can even make it into 12 large rolls to use for sandwiches.
Garnish the tops. We like to brush the tops of the rolls with melted butter when they come out of the oven but you could do an egg wash before baking, and then sprinkle the tops with Parmesan cheese, herbs, sea salt, or sesame seeds.
Use whole wheat flour. We haven’t tested this recipe with whole wheat flour but we would guess that you could substitute whole wheat flour for at least a portion of the all-purpose flour. Just keep in mind that the more whole wheat flour you use, the heavier/denser your rolls will be.
Make Ahead & Storage
Make ahead: Prepare the dough, cover the bowl tightly and refrigerate overnight. This is the first rising. The next day, form the dough into rolls, placing them into the baking pan, and let rise again. The second rise will take a bit longer since the dough is cold.
Alternatively, you could do the first rise normally, form the dough into rolls, cover tightly, and refrigerate. Let the rolls rise a bit after removing from the fridge, if necessary, before baking. Red Star Yeast has excellent tips for postponing baking.
Storing baked rolls: Baked rolls that are cooled completely can be stored in an airtight bag or container for a couple of days on the counter. To freeze rolls, wrap in plastic wrap and place in a freezer bag and freeze for up to 3 months. To thaw, unwrap and let thaw at room temperature. To thaw quickly, preheat the oven to 200°F, unwrap the rolls, place on a cookie sheet, and bake for about 15 minutes.
- Yield: 24
- Prep: 45 minutes
- Cook: 35 minutes
- Total: 3 hours 50 minutes
Ingredients
- 5 cups all-purpose flour
- 2 ¾ teaspoons instant yeast (you'll need 2 packets but won't use the entire amount; 1 packet contains 2 ¼ teaspoons)
- 2 teaspoons salt
- 3 large eggs
- 1 ¼ cups whole milk
- 12 tablespoons unsalted butter, divided
- 3 tablespoons granulated sugar
Method
- In the bowl of a stand mixer fitted with a dough hook, mix together the flour, yeast, and salt.
- In a medium bowl, lightly beat the eggs; set aside.
- In a medium saucepan, combine the milk, 9 tablespoons of butter, and the sugar and cook over medium-low heat until the butter melts, the sugar dissolves, and the mixture reaches a temperature between 125 and 130°F. It’s VERY important that your milk mixture is between 125 and 130°F because it needs to be hot enough to activate the yeast but not so hot that it kills the yeast.
- With the mixer running on low speed, slowly add milk mixture to bowl followed by the eggs and mix until no dry flour remains, about 1 to 2 minutes.
- Increase speed to medium and knead until dough is smooth, elastic, and mostly pulls away from the sides of the bowl, about 6 to 8 minutes. The dough will still be sticky, and may stick to the bottom of the bowl.
- Turn the dough out onto a lightly floured surface and knead by hand for 30 seconds. Form dough into a tight ball and transfer to a large, greased bowl. Spray the top of the bread lightly with nonstick spray, then cover the bowl with plastic wrap.
- Let dough proof (rise) in a warm place until doubled in size, 60 to 90 minutes.
- Line a 13 x 9-inch baking pan with two pieces of foil or parchment paper, overlapping foil and letting the ends hang over the long edges of the pan. Spray the foil/paper with nonstick spray; set aside.
- Melt remaining 3 tablespoons of butter. Turn the ball of dough out onto a clean lightly floured surface and divide in half. Stretch each half into a 24-inch long roll and use a rolling pin to flatten it so it’s about 5 inches wide. Brush the surface of the dough with 1 tablespoon of melted butter.
- Starting at the top long edge, fold a third of the dough down toward you. Then fold the bottom third of the dough over to meet the folded edge. Roll dough a couple of times to seal and reshape as necessary to form an even log.
- Using a sharp knife, trim 1 inch of dough off each end and discard, then cut dough into 12 equal pieces. Arrange rolls seam side down in the prepared pan in three rows of four. Repeat with the remaining half of the dough.
- Cover the pan with plastic wrap and let the rolls proof (rise) in a warm place until they are about double in size, about 1 hour.
- Preheat the oven to 375°F and bake the rolls until browned and centers register 200°F, 30 to 35 minutes, rotating the pan halfway through.
- Transfer the rolls to a wire rack using the foil for handles. Brush with the remaining tablespoon of melted butter.
Notes
Make classic dinner rolls: Divide the dough into even portions and shape into balls. Arrange in pan as instructed.
Make ahead: Prepare the dough, cover the bowl tightly and refrigerate overnight. This is the first rising. The next day, form the dough into rolls, placing them into the baking pan, and let rise again. The second rise will take a bit longer since the dough is cold. Alternatively, you could do the first rise normally, form the dough into rolls, cover tightly, and refrigerate. Let the rolls rise a bit after removing from the fridge, if necessary, before baking.
Storing baked rolls: Baked rolls that are cooled completely can be stored in an airtight bag or container for a couple of days on the counter. To freeze rolls, wrap in plastic wrap and place in a freezer bag and freeze for up to 3 months. To thaw, unwrap and let thaw at room temperature. To thaw quickly, preheat the oven to 200°F, unwrap the rolls, place on a cookie sheet, and bake for about 15 minutes.
Using active dry yeast: If you prefer to use active dry yeast instead of instant yeast, substitute 3 ½ teaspoons of dry active yeast and add it to ⅓ cup of the milk heated to 110°F with a teaspoon of sugar. Let it activate for 10 to 20 minutes until foamy. The milk and sugar amounts will be reduced from the amounts in the ingredients, so you will still use the full amounts called for but they will be divided. The milk and butter mixture doesn’t need to be between 125 and 130F °in this case since you’re activating the yeast separately. It simply just needs to be melted and warm but not hot. Using dry active yeast will require up to an additional 30 minutes of proofing each time and will add about 1½ hours to the total prep time.