Breakfast
No Knead Whole Wheat Bread
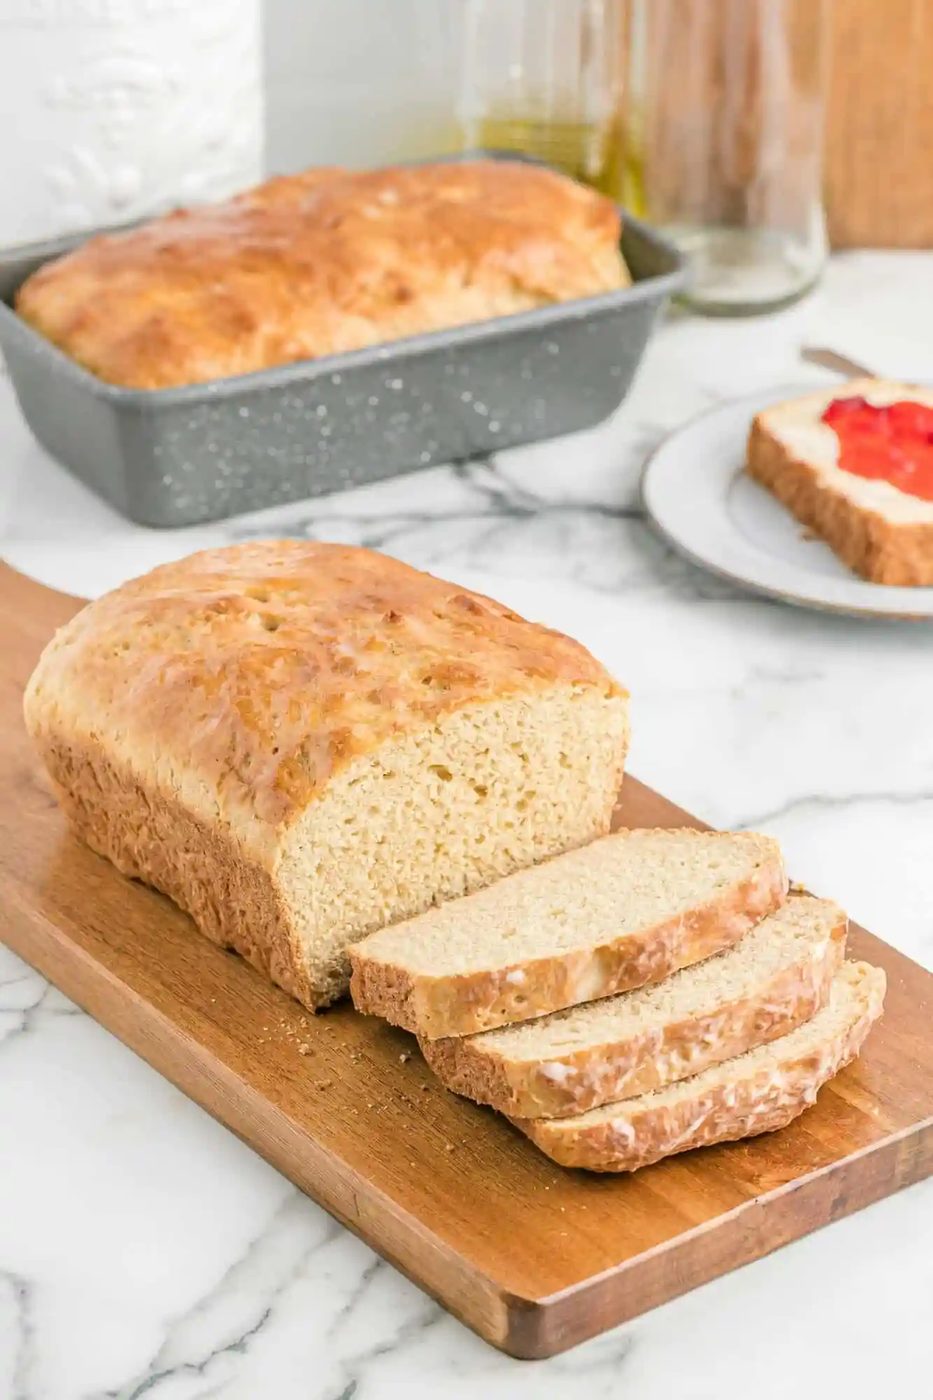
You can bake your own bread! It's straightforward with this no knead whole wheat bread recipe. Reliable for both beginners and experts.
At a glance
What stands out: It’s straightforward to bake your own bread with this no knead whole wheat bread recipe. Whether you’re an expert baker or you’ve never baked yeast breads before, you can do this! No kneading makes it straightforward.
How long it takes: about 2 hours
Equipment you’ll need: large bowl, 2 loaf tins, mixer, oven
Servings: makes 2 loaves
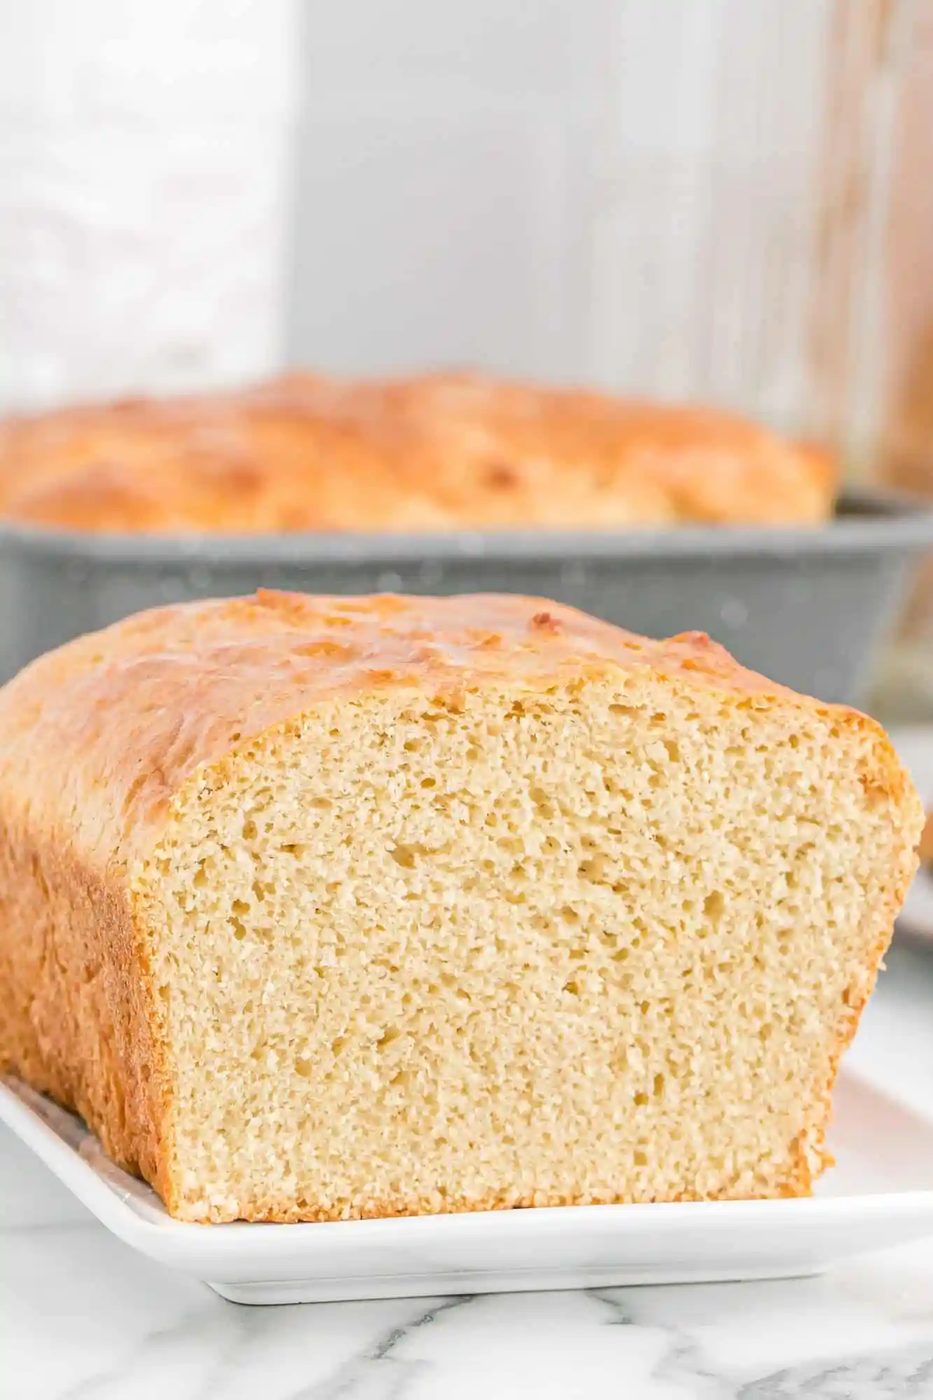
This wholesome bread is made with a mixture of bread flour and 100% whole wheat flour, and subtly sweetened with honey. The result is a light and fluffy bread with standout flavor and texture. It has a tender crust and is sturdy enough for a sandwich. Try it with egg salad, dill chicken salad, or make a pepperoni pizza grilled cheese.
This bread is so good toasted too! Next to eating it warm right out of the oven, toasting is our favorite thing to do with from-scratch bread. Butter, cream cheese, jam, avocados, fried eggs, whatever you like to top a slice of bread with, this bread is ready for it. Try strawberry basil freezer jam, gingerbread butter, or orange honey butter. So good!
We hadn’t made this recipe in a while and thought it was time to revisit it. With our kids’ allergies, it’s nearly impossible to find bakery bread that’s safe for them to eat. They could not get enough of this bread! We've made it again and again since then.
Straightforward Whole Wheat bread recipe
Reliable recipe for beginners. Even confident cooks may be a little uncertain when it comes to baking with yeast. But have no fear! You won’t be “kneading” any help with this simple bread recipe. (Sorry, couldn’t resist that little pun!)
No-knead yeast bread. No-knead breads are sometimes called “batterway bread” or “batter bread”. The dough is sticky and soft, somewhat like a thick batter. Like most bread recipes, the dough requires two rising times, 30 minutes each. Unlike most bread recipes, the dough does not need to be kneaded.
Seven simple ingredients. And one ingredient is water! If you look at a package of bread on the grocery store shelves, you’d be shocked by the long list of ingredients. This is pure and simple food.
Reliable for every day use. This whole wheat bread makes a conventional loaf; in fact, it makes two nice sized loaves which is plenty for a hungry family, or to give one loaf away. You can always stick one loaf in the freezer to use later on, too.
What goes in
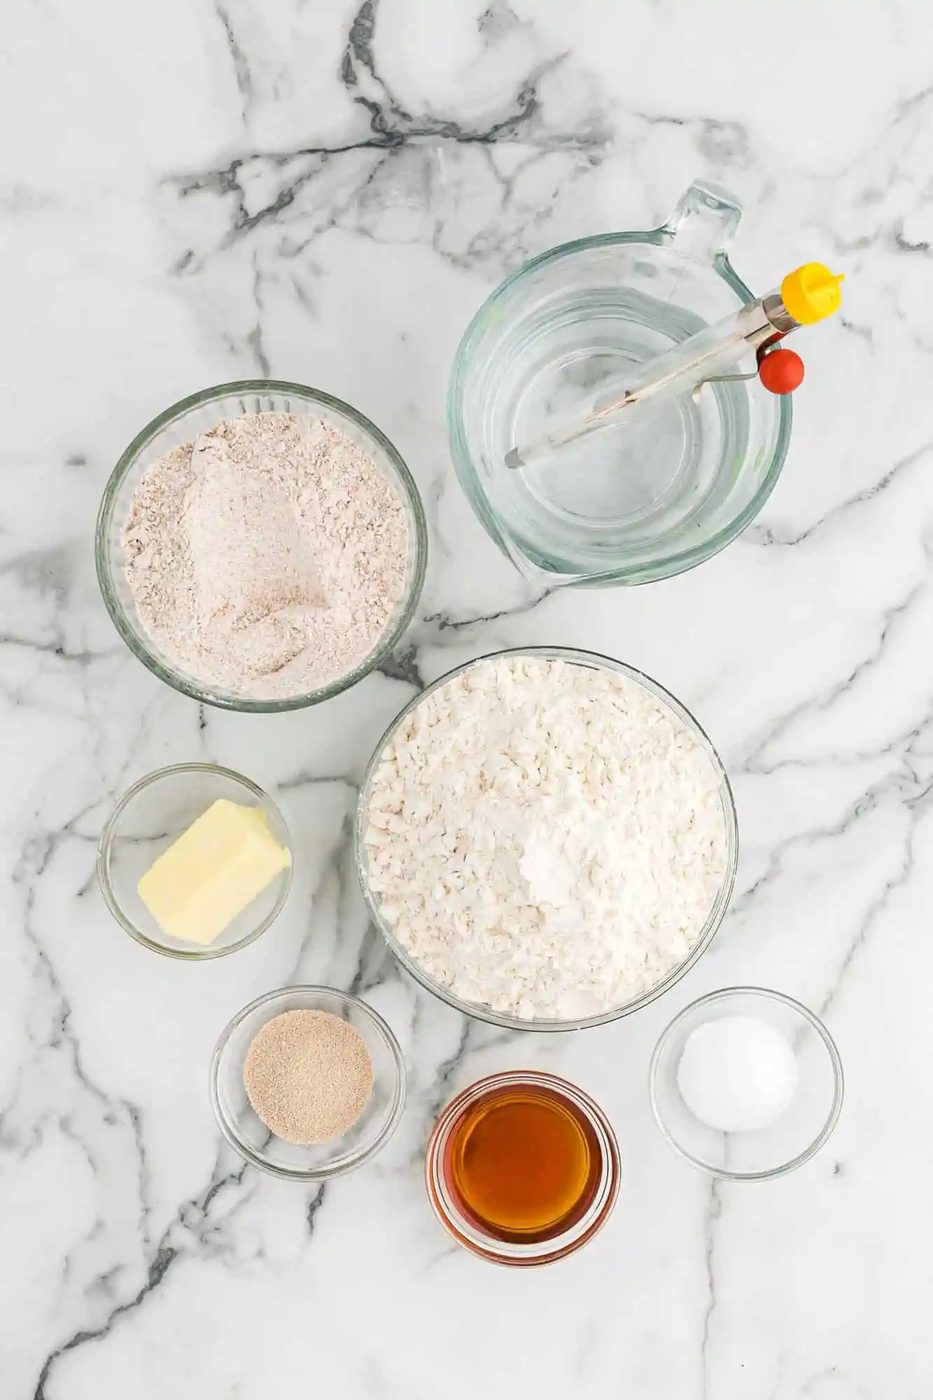
- Whole Wheat Flour: Whole wheat flour is more nutritious than all-purpose flour and adds a nutty grain flavor. Using a mixture of whole wheat and all-purpose flours keeps the bread from being too heavy.
- Bread Flour: Bread flour is ground from a different type of wheat than all-purpose flour. It has more protein which adds strength to the dough. For more about bread flour and how it differs from all-purpose flour, check out King Arthur’s website. They do a great side by side comparison.
- Salt: Needed for flavor, of course, but also as a yeast inhibitor. You’ll need three level teaspoons which may sound like a lot but remember it’s for two loaves, 10 servings each.
- Water: The water needs to be warm, between 110-115°F. We use our instant read thermometer to check. If you don’t have one, the water should feel hot but not so hot that you can’t put your hand in it. Water that’s too hot will kill the yeast; water that’s too cold won’t activate the yeast.
- Yeast: You’ll need two packets of regular active dry yeast, or 4 ½ teaspoons. Don’t buy instant or speedy-rise yeast for this recipe.
- Honey: Adds flavor, moisture and sweetness. It also helps the yeast grow.
- Butter: Choose unsalted butter and soften it to room temperature before using it. If desired, additional butter can be melted to brush on the crust after baking.
How it comes together
You can mix the bread dough by hand, or with a stand mixer. A stand mixer makes it straightforward and is the preferred method.
For best results, all the ingredients you’re using for the bread should be at room temperature, except for the water which needs to be warmer. If you store your whole wheat flour in the freezer, take it out an hour or so ahead to warm up. The butter should be softened, too.
In a large bowl, whisk together the bread flour, whole wheat flour, and salt. Set it aside. There are six cups of flour in this recipe so don’t lose count while you’re measuring.
Pour the warm water into another large bowl, or the mixing bowl that comes with your stand mixer. Add the yeast, without stirring it in, and let it proof in the warm water for three to five minutes. If it’s active, it will be a bit foamy or frothy, and will smell yeasty.
Stir the yeast into the water and add the honey, butter, and half of the flour mixture (no need to measure it, just guess).
On medium speed, using the paddle attachment, mix the batter for two minutes. You can also do it by hand, mixing until the batter is completely smooth.
Add the remaining flour and beat again, until the flour is incorporated and the batter/dough looks smooth. It will be thick. If you’re doing it by hand, you will need a sturdy wooden spoon or dough whisk.
What Is A Dough Whisk?
A dough whisk is used to mix thick dough, such as bread dough or pizza dough. It has a large sturdy handle and wire loops.
Buy on AmazonCover the bowl with plastic wrap or a clean lint-free dish towel. Put the dough in a warm place, 75°F to 80°F, to rise for thirty minutes, or until the dough is doubled in size.
Newer ovens may have a “Proofing” setting that is made just for this purpose. King Arthur Baking has some great ideas if your kitchen is too cool to proof bread dough properly.
The first time we tested this bread, our oven was on for another purpose so we set the dough near the back of the stovetop where the oven vented, a nice warm spot. Well, actually, it was pretty hot and our bread dough baked a bit around the edges. Oops! We pushed the cooked bits into the center of the dough and proceeded with the recipe and guess what? It turned out fine! This bread is quite fool-proof!
Grease a couple of bread tins with shortening, butter, or nonstick spray. Punch down the dough and divide it in half.
Shape the halves into 2 loaves, putting one into each tin.
Cover the tins with plastic wrap or a towel, put them in a warm place, and let the dough rise again until it’s nearly to the top of the pan.
Preheat the oven with the rack in the lower third of the oven. When the oven is completely preheated, put the bread on the rack to bake. Bake it about 35 minutes or until the top is nicely golden brown. Take time to enjoy the heavenly aroma as the bread bakes. If your family isn’t hanging around in your kitchen already, they’ll be there soon.
If you’re uncertain whether the bread is done, use your trusty instant read thermometer. The internal temperature should be 190°F.
Take the pans out of the oven and let the bread cool for five to ten minutes in the pan.
While it’s still warm, brush the tops of the loaves with butter for a nice shiny crust (plus it tastes rich!). If you want to keep things simple, just rub a stick of butter on the top of the loaf. It gets the job done!
Remove the loaves from the pan, putting them on a wire rack to cool completely.
Use a long serrated knife to slice the bread. It will slice best if it’s completely cool but we totally understand if you can’t wait that long! We never can wait either and always enjoy a slice while the bread is still warm. They may not be the most beautiful slices but they are sure are wonderful!
Aren’t you glad you baked your own honey whole wheat bread? With only seven simple ingredients, no added anything, and lots of love stirred in, this bread tastes far better than any bread you can purchase!
Make-Ahead Ideas
Make 2 loaves and freeze one loaf. It will keep for up to six months. If you have lots of bread tins, make 2 batches (4 loaves) so you have plenty of bread to last.
A loaf of from-scratch bread makes a wonderful gift that is always appreciated. Brighten someone’s day by dropping off bread that’s still warm from the oven! Try delivering it with some bread dipping oil!
We just know someone is going to ask if this bread dough can be frozen to be baked later. We haven’t tried it yet but we'd love to hear back from anyone who gives it a try! We often freeze pizza crust dough and that always turns out beautifully.
Keeping leftovers
Most store-bought breads are made with added preservatives so they have a longer shelf life. From-scratch bread is made without preservatives (yay!) or any other artificial ingredients so it won’t keep as long as the bread you buy.
To make sure your bread keeps well:
Cool the bread completely before storing it. Bread that is still warm when it’s sealed in a bag or container will produce condensation on the inside of the bag (steam). That condensation will cause your bread to get moldy more quickly which you definitely don’t want.
Refrigerate/freeze: If you don’t plan on eating all of the bread within a few days, keep it in the refrigerator or another cool place. It should keep for a week. If you want to keep it longer than a week, double wrap it and freeze it. It will keep for up to six months. Slice the loaf before you freeze it so you can remove a slice or two at a time. It will thaw quickly.
- Yield: 20
- Prep: 15 minutes
- Cook: 35 minutes
- Total: 2 hours
Ingredients
- 2 cups whole wheat flour
- 4 cups bread flour
- 3 teaspoons salt
- 2 ½ cups warm water (110°-115°F)
- 4 ½ teaspoons active dry yeast ( 2 packets)
- ¼ cup honey
- ¼ cup ( ½ stick) unsalted butter, softened
- additional butter for crust, optional
Method
- Have water at 110° to 115°F and all other ingredients at room temperature.
- Measure bread flour, whole wheat flour, and salt into a bowl; whisk to combine. Set aside.
- Proof the yeast: Pour the warm water into a large mixing bowl; add the yeast. Let stand for 3 to 5 minutes; stir.
- Add the honey, butter, and half of the flour mixture. Beat 2 minutes with a stand mixer on medium speed, or by hand until smooth.
- Add remaining flour mixture and beat again either with a stand mixer, using the paddle attachment, or by hand with a sturdy wooden spoon or dough whisk, until smooth and dough comes together. Cover. Let dough rise in a warm place until doubled, about 30 minutes. Meanwhile, grease two 5 x 9- or 4½ x 8½ – inch loaf pans.
- Punch down dough, and divide in half. Place dough in prepared pans. Let it rise again until the dough comes to within one inch of the tops of large pans or reaches the tops of smaller pans, about 30 minutes.
- Position oven rack in the lower third of your oven. Preheat oven to 375°F.
- Bake loaves for 35 minutes, or until well browned on sides and tops (internal temperature should be 190°F at the center of the loaf when measured with an instant read thermometer). Remove loaves from the oven. For a softer crust, brush tops with butter.
- Let bread cool for 5 to 10 minutes in the pans; remove from pans and cool completely on a wire rack before slicing.
Notes
Yield: Makes 2 loaves, 10 slices each. Nutrition information is based on 1 slice.
Storage: To store bread, cool completely before slicing and storing in an airtight container or resealable bag. It will keep at room temperature for a few days, in the refrigerator for up to a week, or in the freezer for up to six months.
Recipe developed in partnership with Red Star Yeast, 10/2013; revised 4/2022.