
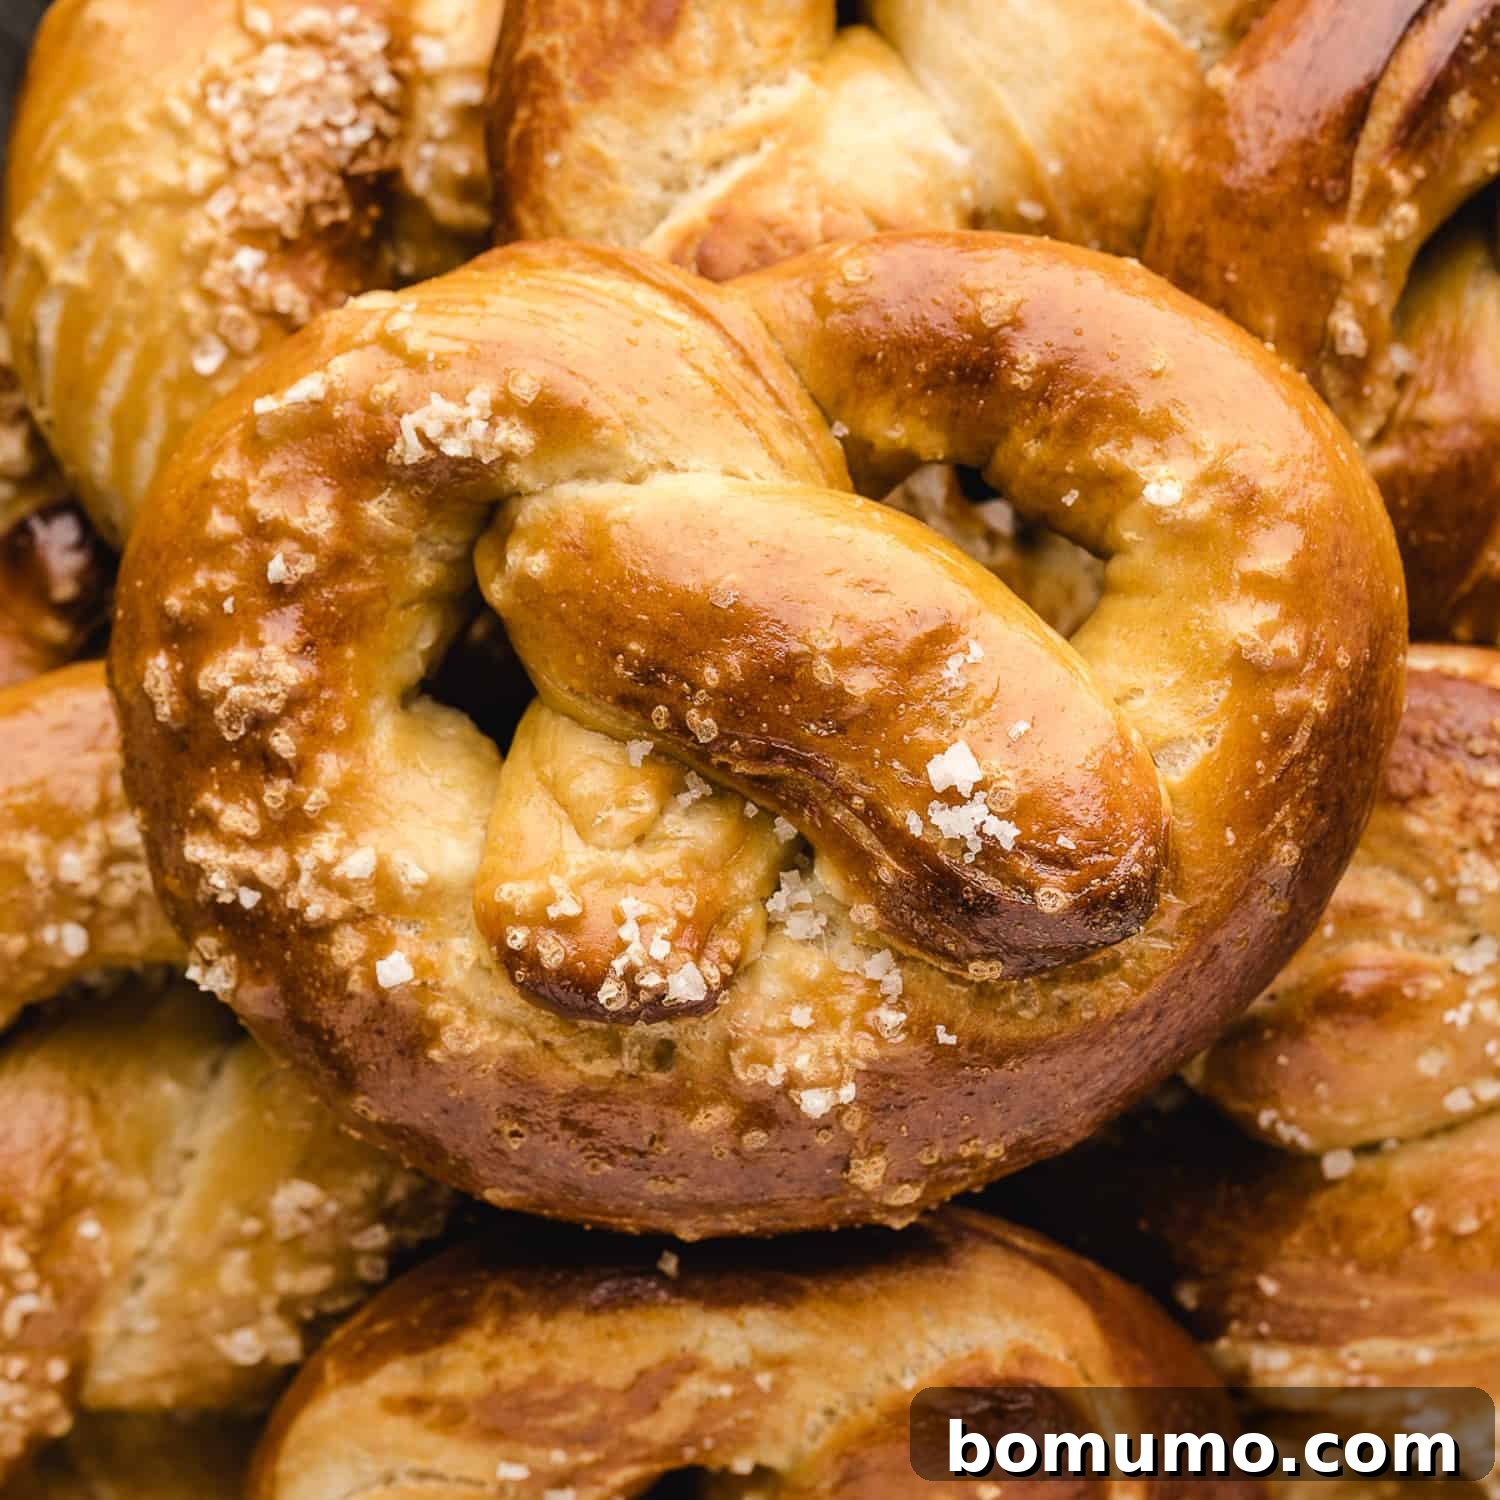
Homemade Soft Pretzels: Your Ultimate Guide
Why You’ll Love This Recipe: There’s an unparalleled joy in creating something delicious from scratch, and homemade soft pretzels are no exception. Far superior to any store-bought variety, these pretzels offer a wonderfully chewy exterior and a tender, fluffy interior that will impress everyone. This recipe is designed to be completely no-lye, making it accessible and safe for every home baker without requiring specialized equipment.
Total Time Commitment: Approximately 2 hours. This includes around an hour for the dough to rise to perfection, plus prep and baking time.
Essential Equipment: You’ll need a sturdy baking sheet, a large saucepan for the alkaline bath, a spacious mixing bowl for dough preparation, and a pastry brush for glazing. Simple tools for extraordinary results!
Yield: This recipe graciously yields 8 generously sized, delectable soft pretzels, perfect for sharing or savoring yourself.
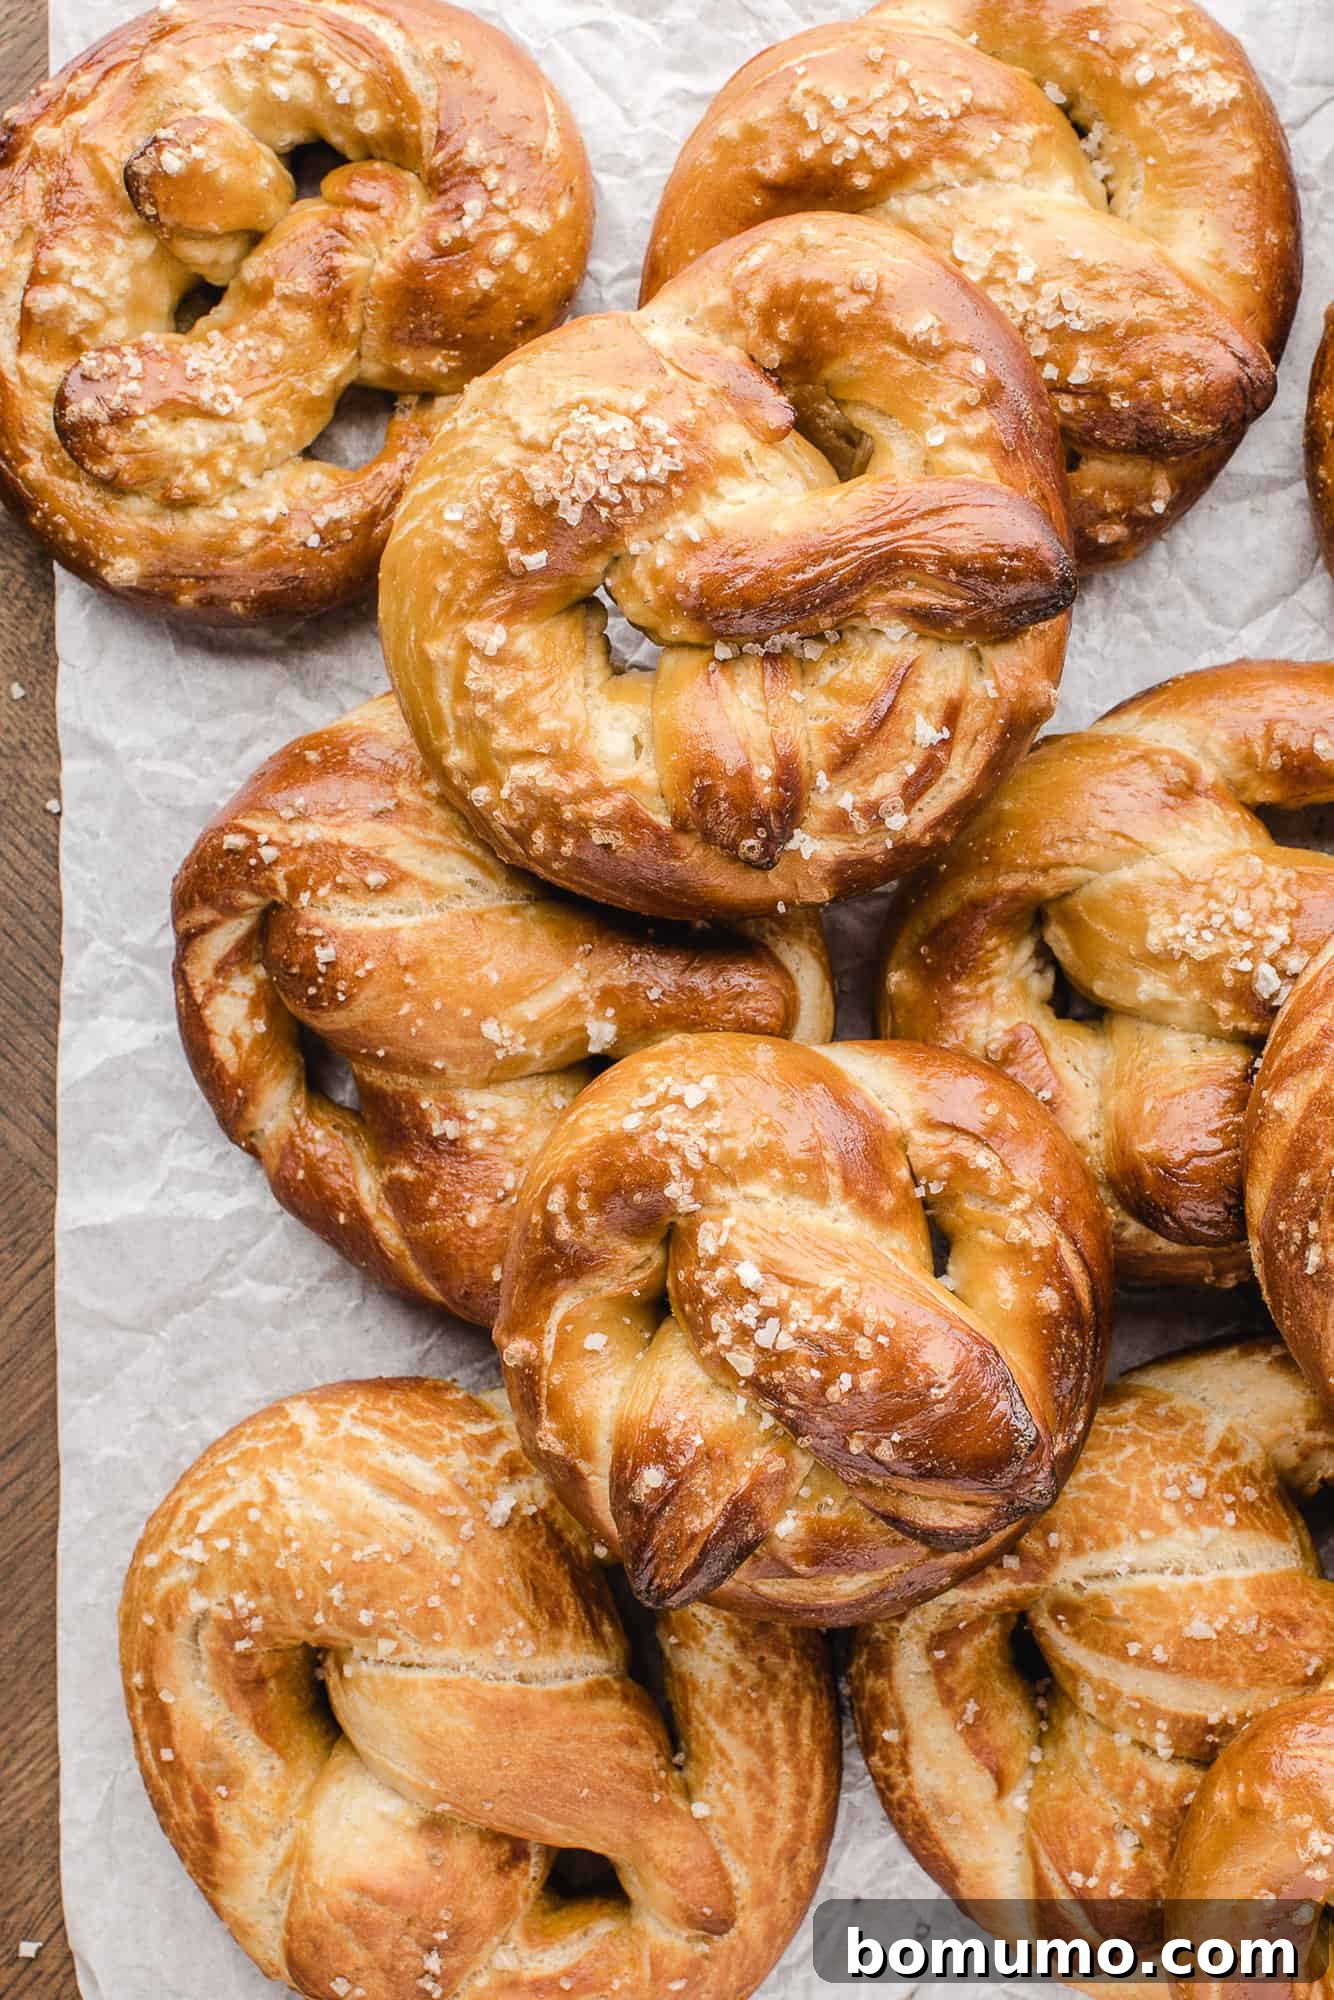
Embarking on the journey of baking homemade yeast bread, much like crafting my renowned no-knead whole wheat bread or rustic Dutch oven bread, is an experience that transcends mere cooking. It’s a deeply satisfying and almost meditative process, a true zen moment in the kitchen. The sheer gratification of biting into a warm, fragrant loaf that you’ve kneaded, nurtured, and baked with your own hands is an unparalleled joy. This exact sentiment of pride and culinary accomplishment is precisely what you’ll discover when you make these incredible homemade soft pretzels.
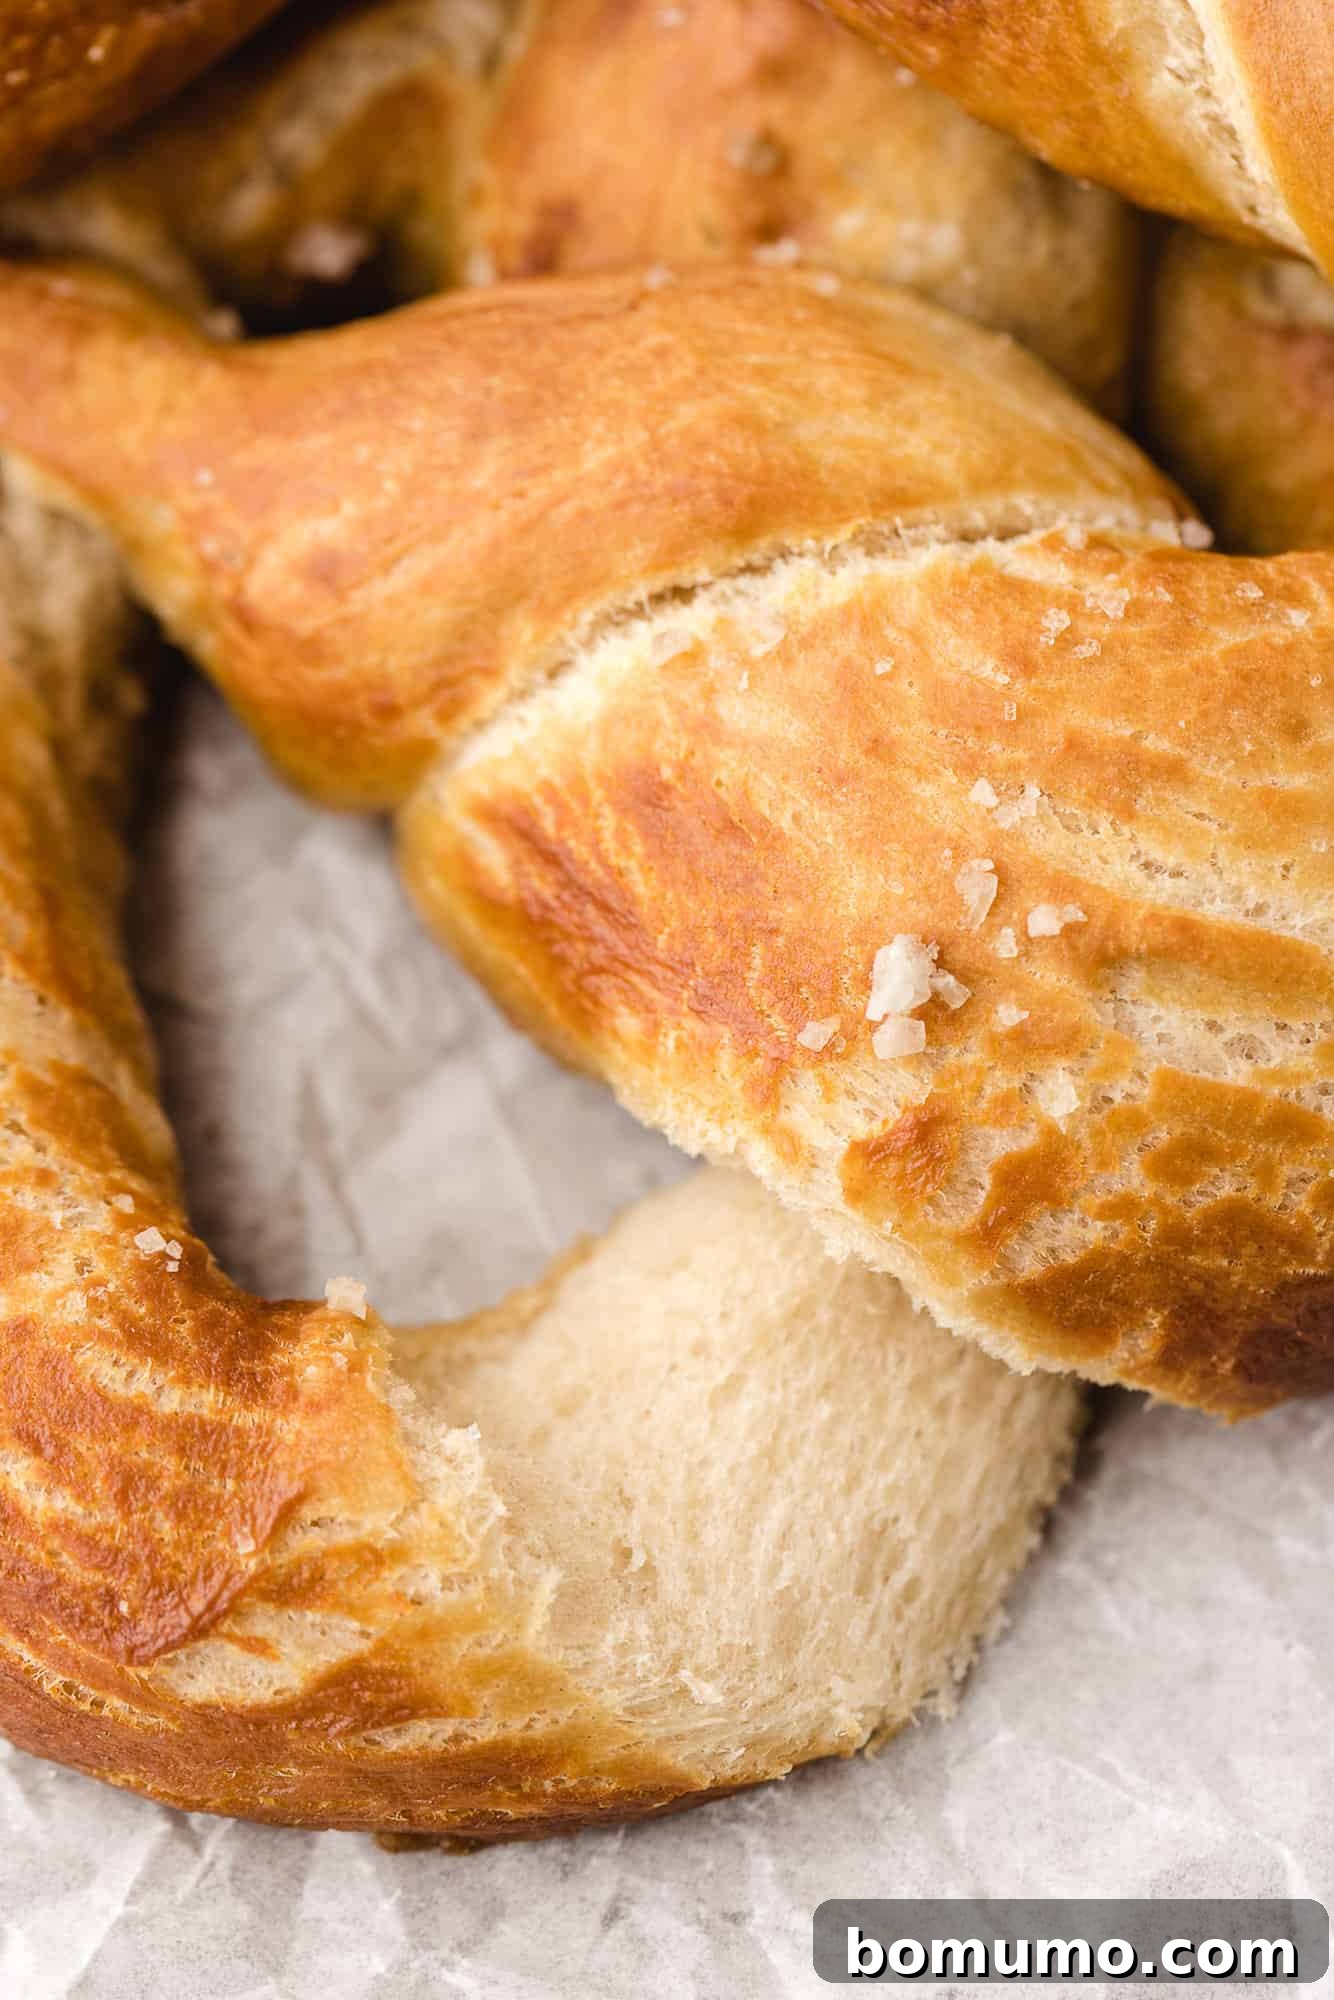
What truly distinguishes pretzels from other cherished yeasted baked goods is the transformative alkaline bath they undergo. Traditionally, this involves a lye solution, but for safety and convenience, we’ll be using a baking soda and water mixture. This crucial step is not just for flavor; it expertly gelatinizes the exterior of the pretzels, laying the foundation for that signature, irresistibly chewy crust and beautiful golden-brown color once baked. It’s the secret behind their unique texture and mouthfeel.
Why These Homemade Soft Pretzels Are a Must-Try
The Pinnacle of Pretzel Perfection: Without a doubt, there’s nothing quite like a pretzel that’s fresh out of the oven, still warm and slightly crispy on the outside, and incredibly soft within. While a trip to Bavaria might introduce you to authentic German pretzels, for most home bakers, this recipe will utterly redefine your expectations compared to typical American store-bought varieties. The depth of flavor, the perfect chew, and the overall freshness make homemade an undisputed winner.
An Engaging and Rewarding Baking Experience: Yes, crafting these pretzels requires a touch more effort than simply microwaving a frozen package, but this effort is genuinely enjoyable! From the moment you begin working with the pliable dough, to meticulously twisting each pretzel into its classic shape, and finally, gently dropping them into the simmering baking soda bath—each step offers a surprisingly satisfying, almost therapeutic activity. It’s a hands-on experience that results in pure deliciousness.
The Perfect Entry Point for Aspiring Yeast Bakers: If you’re venturing into the exciting world of yeast baking, soft pretzels are an excellent recipe to begin with. Consider no-knead bread recipes as your foundational learning experience; these pretzels represent the logical and equally rewarding next step, building confidence and honing your dough-handling skills without being overly complex. It’s a fantastic way to expand your baking repertoire.
Accessible Ingredients and Equipment: One of the greatest advantages of this recipe is its approachability. You won’t need to hunt for obscure components; all the ingredients are common kitchen staples, readily available at any grocery store. Furthermore, there’s no requirement for specialized, expensive equipment. And here’s the truly important part: we opt for a baking soda bath instead of traditional lye. While a lye bath delivers an ultra-authentic flavor and color, it necessitates strict safety precautions, including goggles and gloves. Our quick dip in a baking soda and water solution achieves that distinct chewy “skin” and rich browning without any of the hazards. This step is absolutely critical and should not be skipped, as it’s what fundamentally transforms a simple dough into a true, unmistakable pretzel!
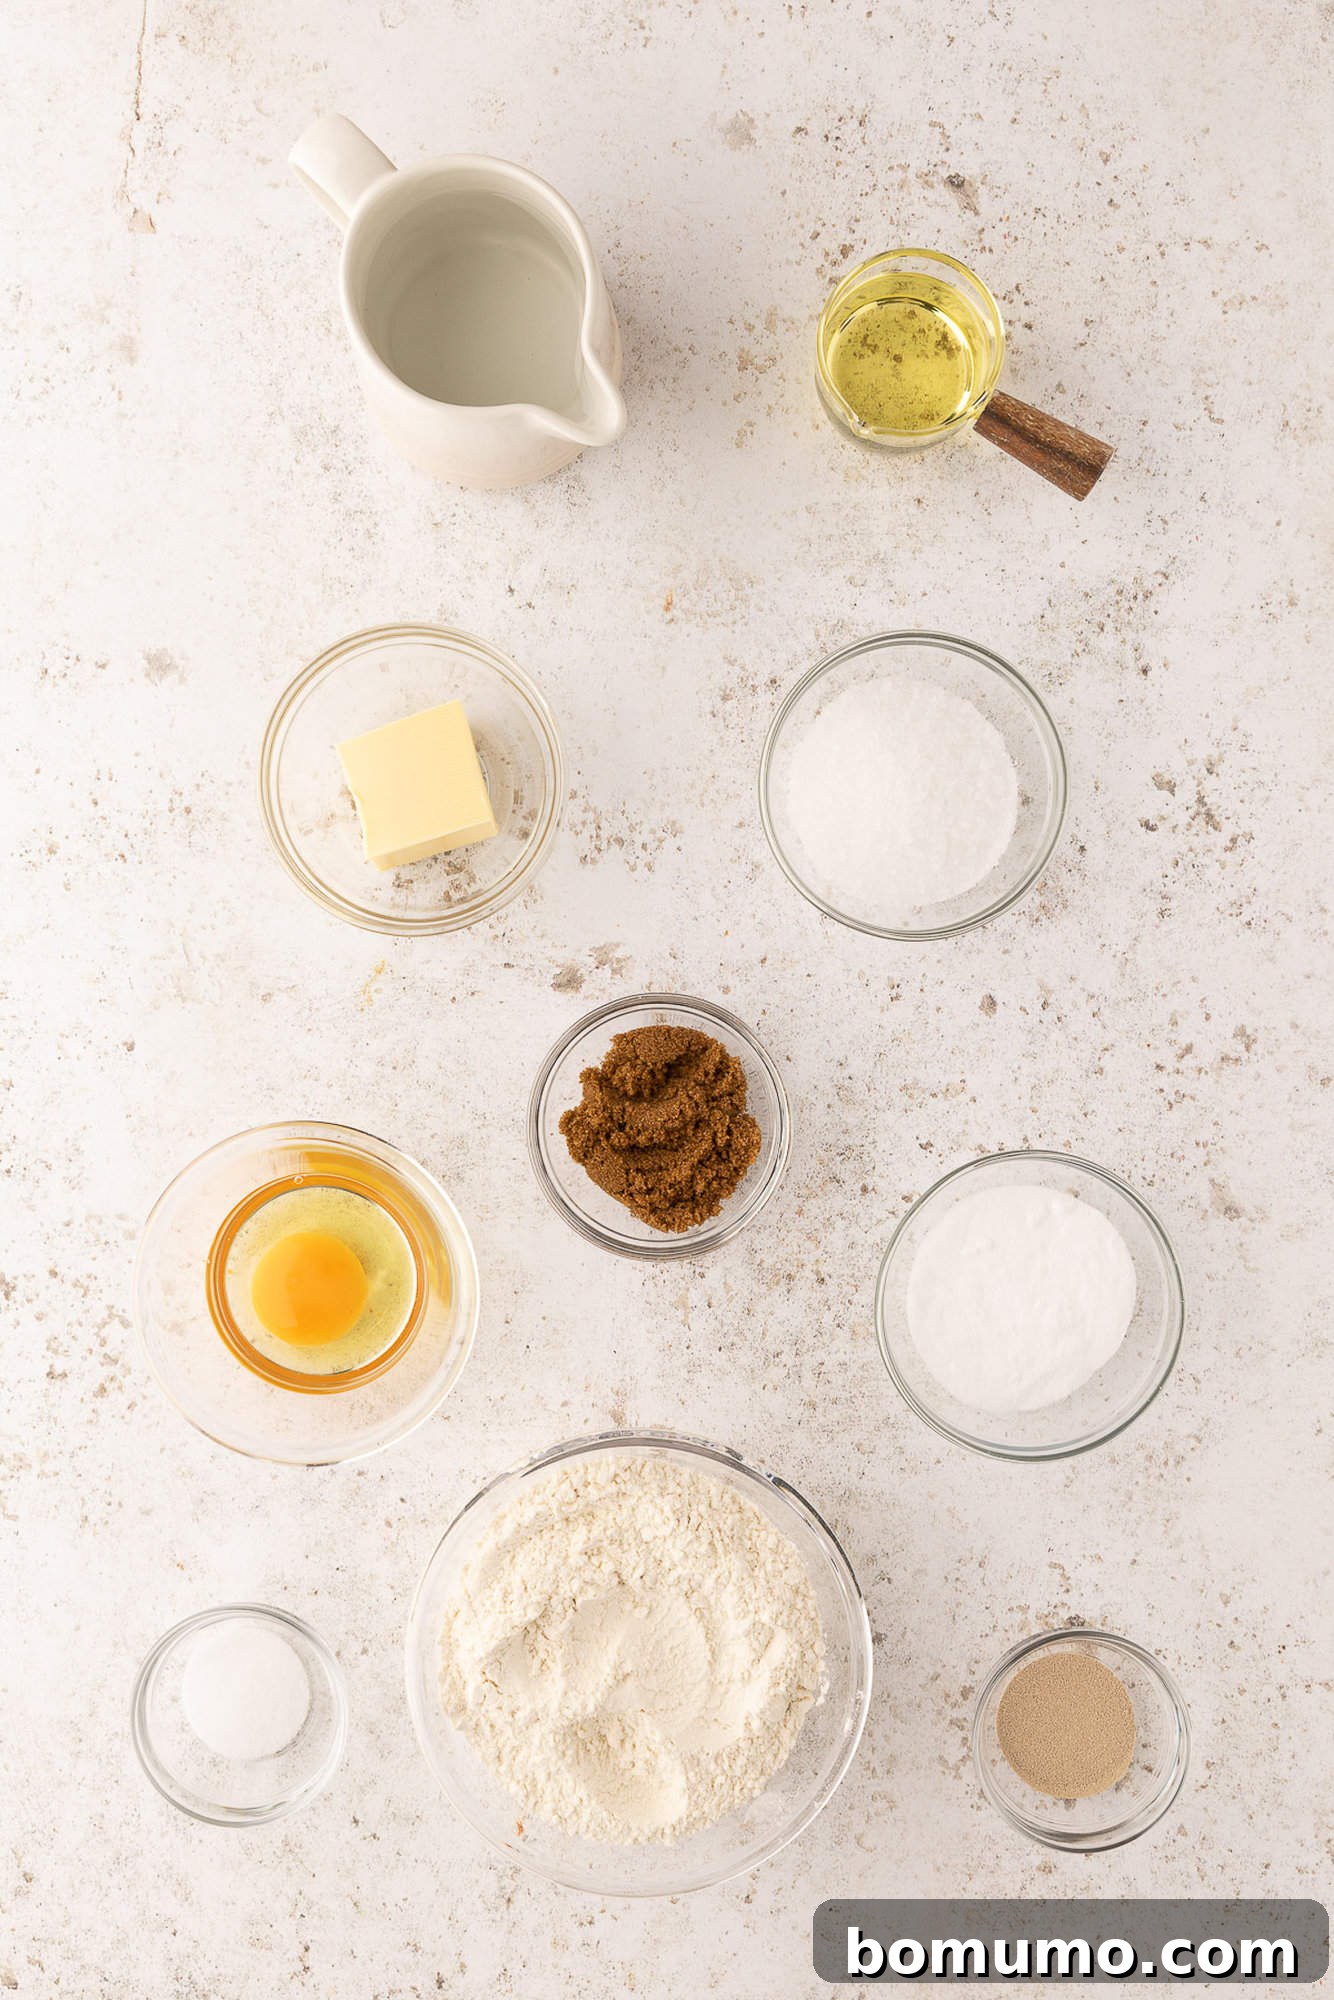
Understanding Your Ingredients for Perfect Pretzels
- All-Purpose White Flour: No need for exotic flours here. Your standard, reliable all-purpose white flour is perfect for achieving the desired texture and chewiness in these soft pretzels. It provides the essential structure for the dough.
- Instant Yeast: Also commonly referred to as rapid rise or quick rise yeast. This particular type of yeast is finely milled, which means it doesn’t require prior activation in water. Additionally, it contains enzymes and other additives that accelerate the dough’s rising process, making your baking journey quicker and more efficient.
- Salt: A crucial component, salt plays a dual role in yeast baking. Firstly, it acts as an inhibitor, preventing the yeast from fermenting too rapidly and ensuring a controlled rise. Secondly, and equally important, salt is vital for flavor. Without it, your pretzels would taste disappointingly bland and flat.
- Brown Sugar: Incorporated into the dough to impart a subtle touch of sweetness, which complements the savory notes of the pretzel. It also contributes to the beautiful browning during baking.
- Warm Water: The ideal temperature for your warm water should be between 120°F and 130°F (49°C-54°C). Precision here is key: water that’s too cold will fail to activate the yeast, leading to a flat dough, while water that’s too hot will unfortunately kill the yeast, rendering it inactive. Use a thermometer for accuracy.
- Unsalted Butter: Melted unsalted butter adds richness, tenderness, and flavor to the pretzel dough. Using unsalted butter allows you to control the overall salt content of the recipe precisely. It can be melted gently on the stovetop or quickly in the microwave.
- Baking Soda and Water (for the Bath): This is the game-changer! This alkaline mixture is a safe and effective substitute for traditional lye. The baking soda bath is responsible for creating that characteristic chewy “skin” and deep golden-brown color on the pretzel’s exterior. Without this essential step, your baked goods would resemble ordinary dinner rolls rather than authentic pretzels.
- Egg Wash: A simple wash made from a beaten egg, brushed over the shaped pretzels just before baking, achieves two important effects: it provides a beautiful, shiny, golden finish and acts as a adhesive, helping the coarse salt adhere perfectly to the pretzel surface.
- Pretzel Salt or Coarse Sea Salt: For the most authentic soft pretzel experience, pretzel salt is the ideal choice due to its large, irregular crystals that don’t melt away during baking. If you’re a frequent buyer of store-bought soft pretzels, you might even have a leftover salt packet to use! However, if you prefer not to purchase specialized salt, a flaky sea salt or any other coarse salt will work wonderfully. For an adventurous twist, consider sprinkling your pretzels with homemade everything bagel seasoning for a burst of savory flavor.
No Stand Mixer? No Problem!
While a stand mixer can certainly simplify the kneading process, it’s by no means a necessity for making fantastic soft pretzels. You can absolutely make this dough by hand! Simply combine all the dough ingredients in a large mixing bowl until a shaggy ball forms. Then, turn the dough out onto a lightly floured surface and knead it vigorously for 10 to 15 minutes. Continue kneading until the dough transforms into a soft, smooth, and pliable mass. Your hands are perfectly capable tools for achieving the ideal dough consistency!
Step-by-Step Guide: Crafting Your Perfect Soft Pretzels
Creating these delightful soft pretzels is a rewarding process, and following these steps carefully will ensure you achieve professional-quality results right in your own kitchen.
1. Prepare Your Dry Ingredients: Begin by attaching the dough hook to your stand mixer. In the stand mixer bowl, combine the all-purpose flour, instant yeast, salt, and brown sugar. Use a whisk to thoroughly combine these dry ingredients, ensuring they are evenly distributed. This initial step sets the foundation for a well-balanced dough.
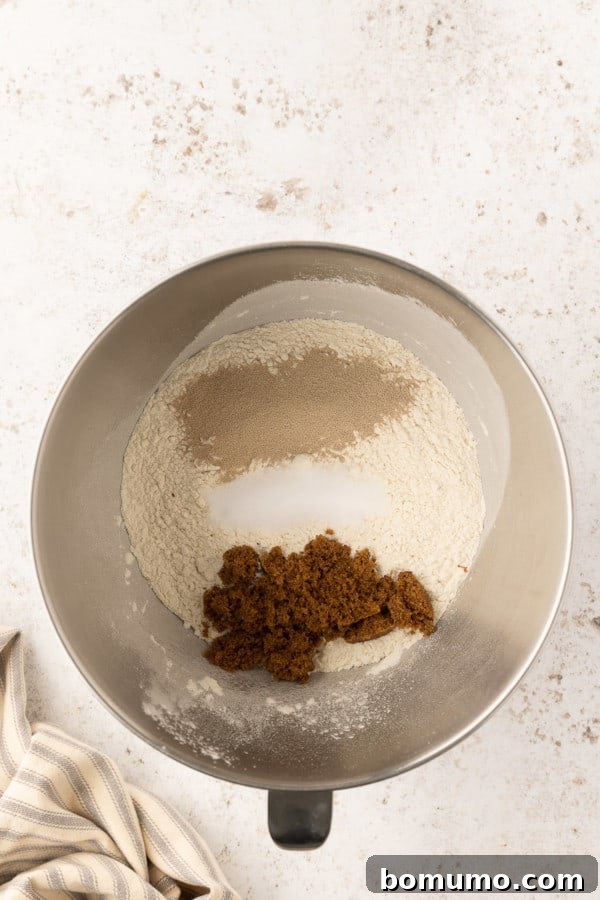
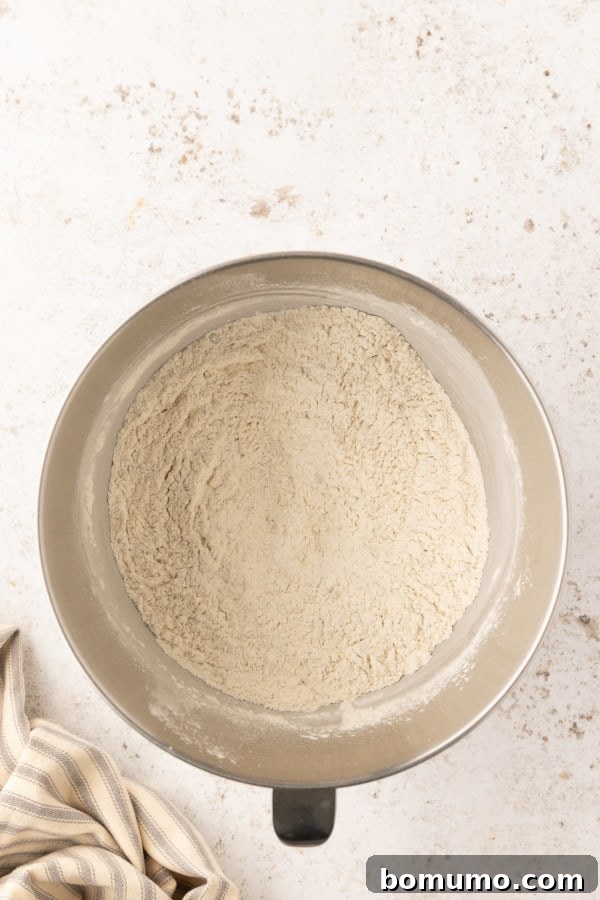
2. Incorporate Wet Ingredients and Knead the Dough: Carefully pour the measured warm water and melted unsalted butter into the mixing bowl with your dry ingredients. Turn your stand mixer to its lowest setting and allow the dough hook to work its magic for a full 8 minutes. During this time, you may need to periodically stop the mixer and scrape down the sides of the bowl with a spatula to ensure all ingredients are fully incorporated. By the end of the 8 minutes, the dough should have coalesced into a cohesive ball, pulling cleanly away from the sides of the mixing bowl. Test the dough: it should feel dry to the touch, and when you gently press a finger into it, it should slowly spring back, indicating proper gluten development.
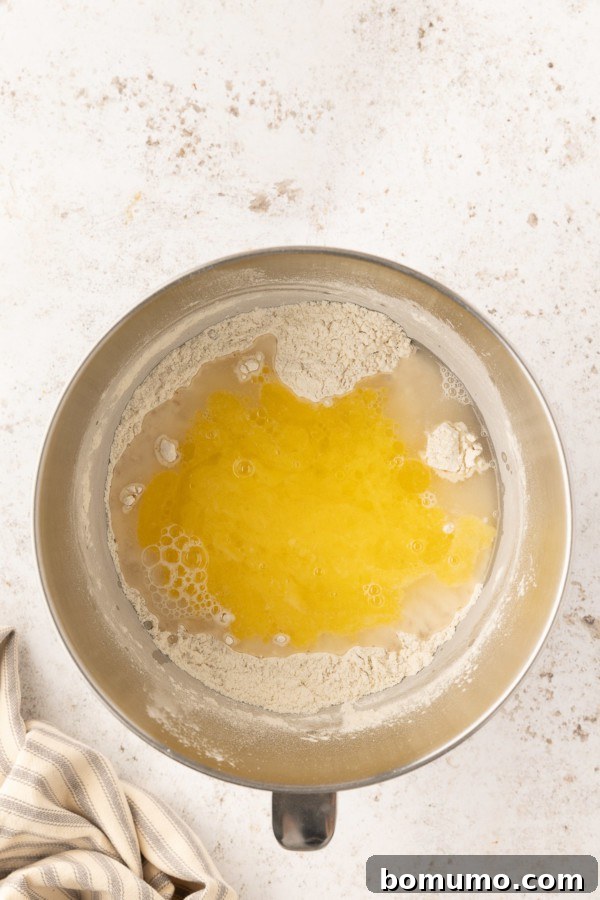
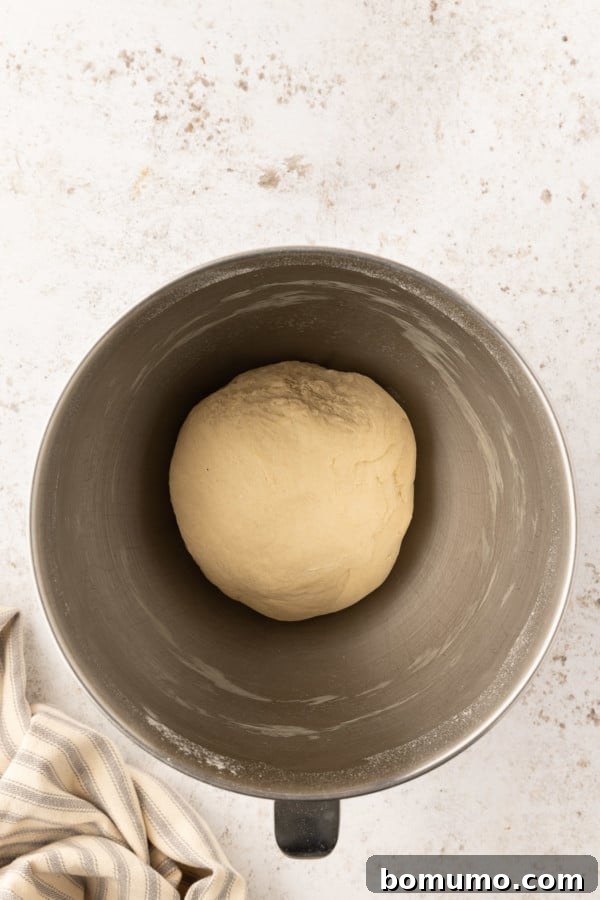
Expert Pretzel Making Tip: Adjusting Dough Consistency
Humidity levels in your kitchen can significantly impact the precise ratio of flour to water needed. If, after initial kneading, your dough feels overly sticky when touched with a clean, dry finger, don’t fret! Simply add additional all-purpose flour, one tablespoon at a time, while the mixer continues to run. Allow each addition to fully incorporate before adding more, until the dough reaches the desired smooth, slightly dry, and non-sticky consistency. This small adjustment ensures your pretzels have the perfect foundation.
3. The First Rise: Allowing the Dough to Double: Lightly oil a clean, spacious bowl. Transfer the prepared dough into this bowl, making sure to flip it once so that the entire surface is coated in a thin layer of oil. This prevents the dough from sticking as it rises. Cover the bowl securely with a clean, dry kitchen towel and place it in a warm, draft-free spot in your kitchen. Allow the dough to rise undisturbed for approximately 1 hour, or until it has visibly doubled in size. This crucial step develops the dough’s flavor and texture.
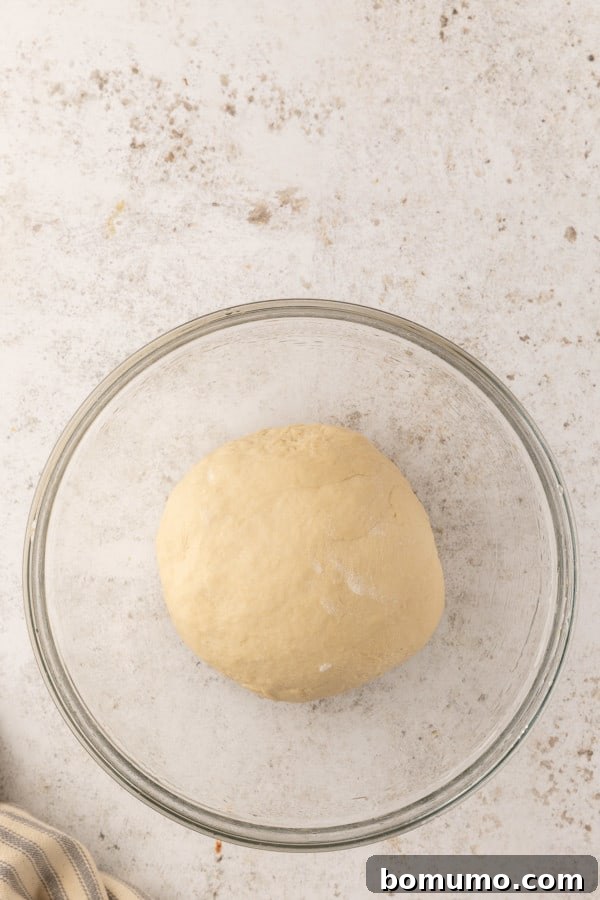
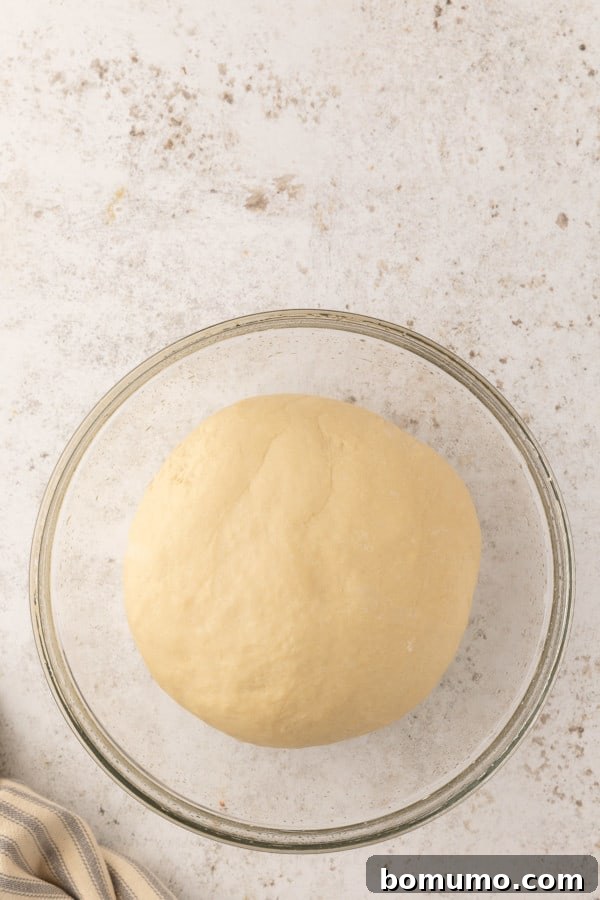
4. Divide and Shape the Dough: Once the dough has proudly risen, gently punch it down to release the accumulated gases. Transfer the dough to a clean, lightly floured work surface. Using a large, sharp knife or a sturdy bench scraper, divide the dough into 8 equal portions. If you find the dough resisting or feeling overly elastic at this stage, simply cover it loosely and allow it to rest for 10 minutes. This brief rest will relax the gluten, making the dough much easier to handle and roll. Take each piece of dough and, with a gentle, even pressure, roll it into a long, slender rope, aiming for a length of approximately 20 inches. Consistency in length will ensure uniform pretzels.
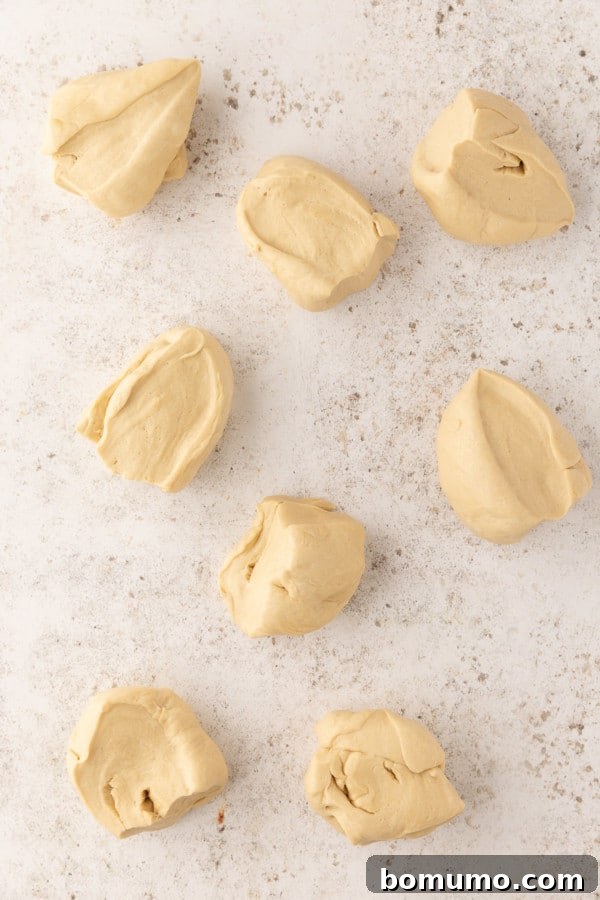
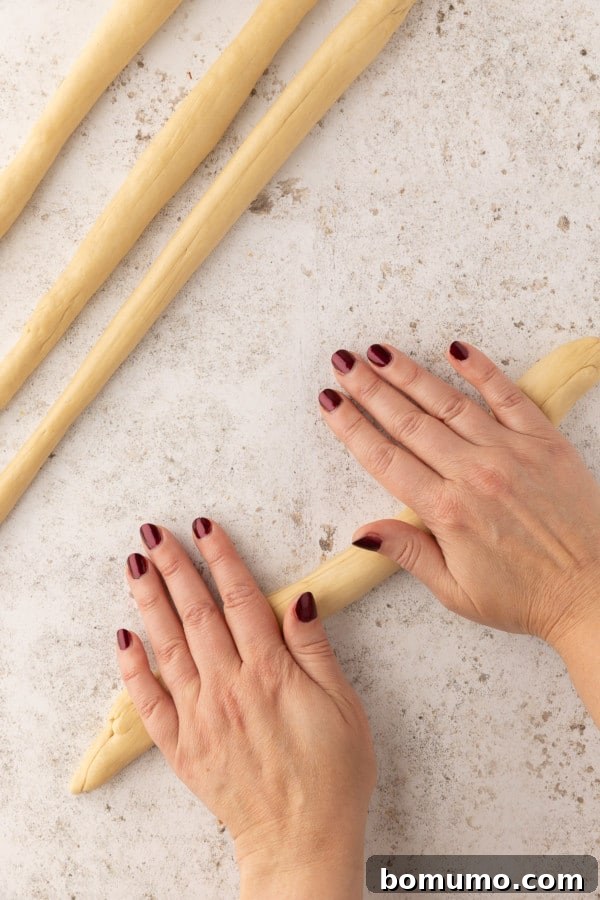
5. Master the Classic Pretzel Knot: To form the iconic pretzel shape, begin by creating an upside-down U shape with your dough rope. Then, take the two loose ends of the dough and wrap them around each other twice, creating a tight twist. Finally, elegantly fold these twisted ends upwards to meet the top curve of your upside-down U and gently press them down to secure the shape. This creates the classic pretzel knot. Carefully transfer each newly shaped pretzel onto a baking sheet that has been lined with parchment paper. Continue this process with the remaining dough portions until all 8 pretzels are perfectly shaped and arranged on the baking sheet.
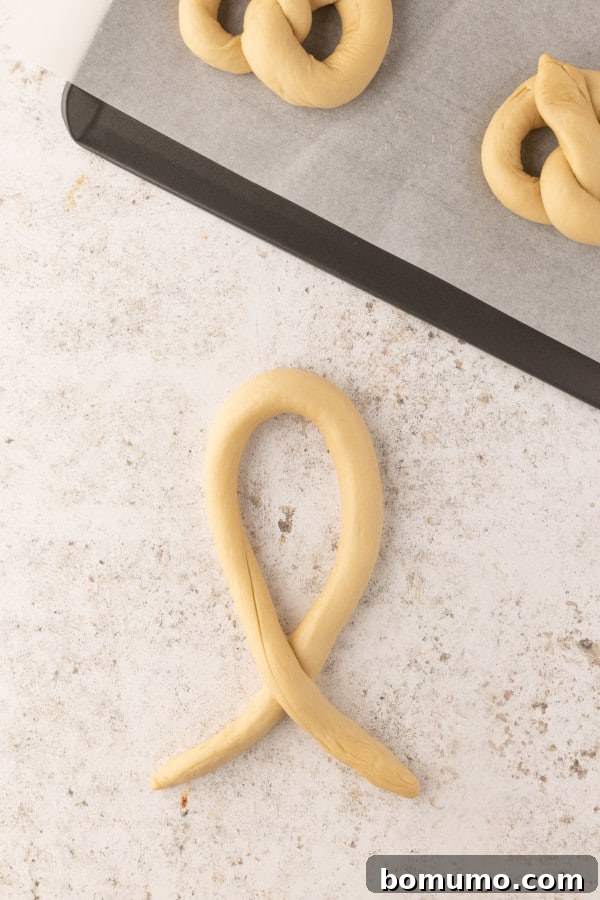
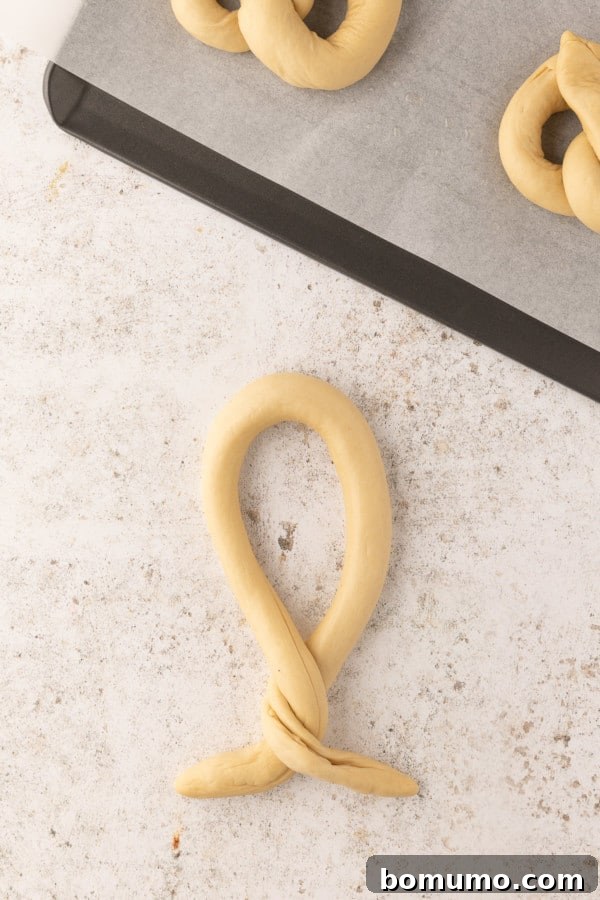
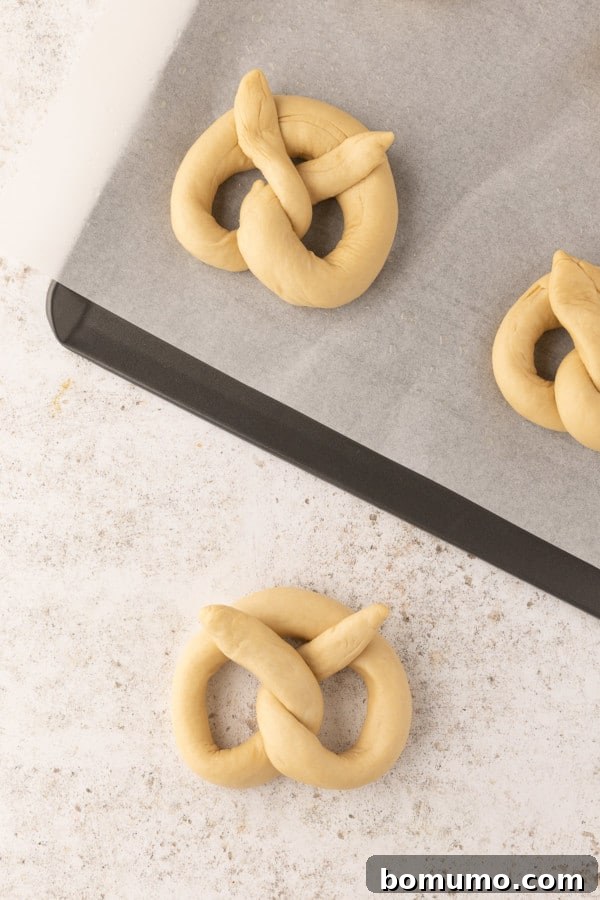
6. Prepare for Boiling and Preheat Oven: While your shaped pretzels rest, preheat your oven to a robust 400ºF (200ºC). This ensures it’s ready for baking as soon as your pretzels are prepared. Simultaneously, bring 8 cups of water to a rolling boil in a large saucepan. The pan should be wide enough to comfortably fit one pretzel without crowding. Once boiling, reduce the heat to a gentle simmer. Slowly and carefully add the baking soda to the simmering water. Be prepared for a vigorous fizzing and bubbling reaction; this is normal and indicates the alkaline bath is forming. If your pan is too full, it might bubble over, so exercise caution.
7. The Essential Baking Soda Bath: Working with one pretzel at a time, use a large slotted spatula, spider, or skimmer to carefully lower a shaped pretzel into the simmering baking soda bath. Allow it to boil for precisely 15 seconds on each side. It is absolutely crucial not to let the pretzels soak for longer than 30 seconds total, as extended exposure can impart an undesirable bitter, soapy flavor from the baking soda. After boiling, lift the pretzel out of the water with your slotted tool, allowing any excess water to drain thoroughly. Gently place the boiled pretzel back onto your prepared baking sheet. Repeat this delicate process for each remaining pretzel, ensuring consistent timing for optimal results.
8. The Finishing Touches: Egg Wash and Salt: Once all your pretzels have completed their baking soda bath and are resting on the baking sheet, it’s time for the final preparations before baking. Generously brush the entire surface of each pretzel with the beaten egg wash. This will give them a beautiful, glossy, deep golden-brown crust. Immediately after the egg wash, sprinkle each pretzel lightly but evenly with your chosen pretzel salt or coarse sea salt. The egg wash will help the salt adhere perfectly, providing that signature savory crunch.
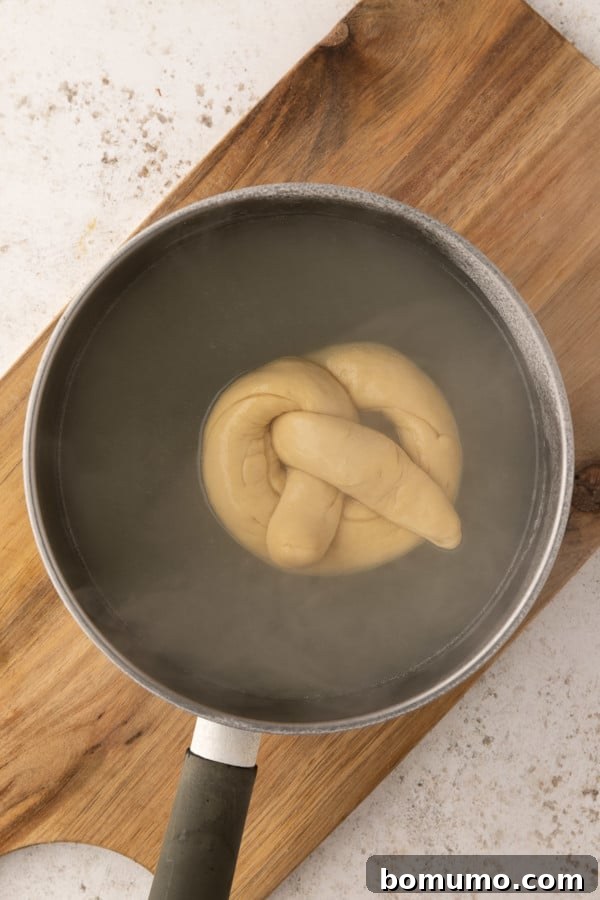
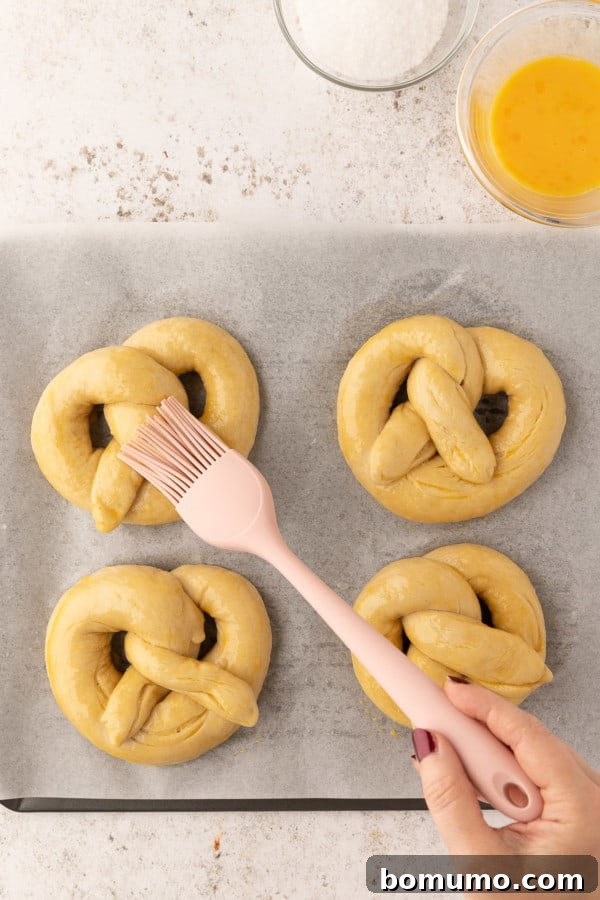
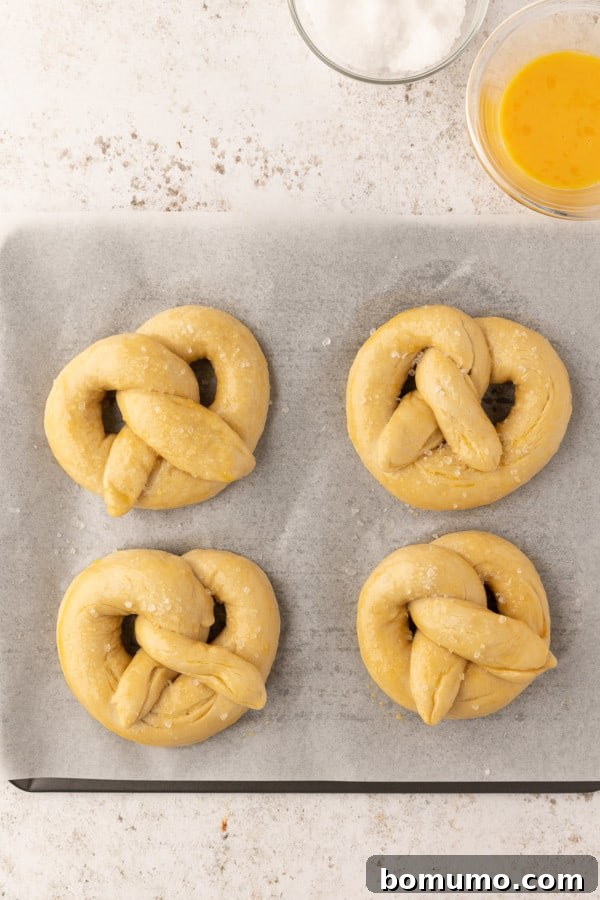
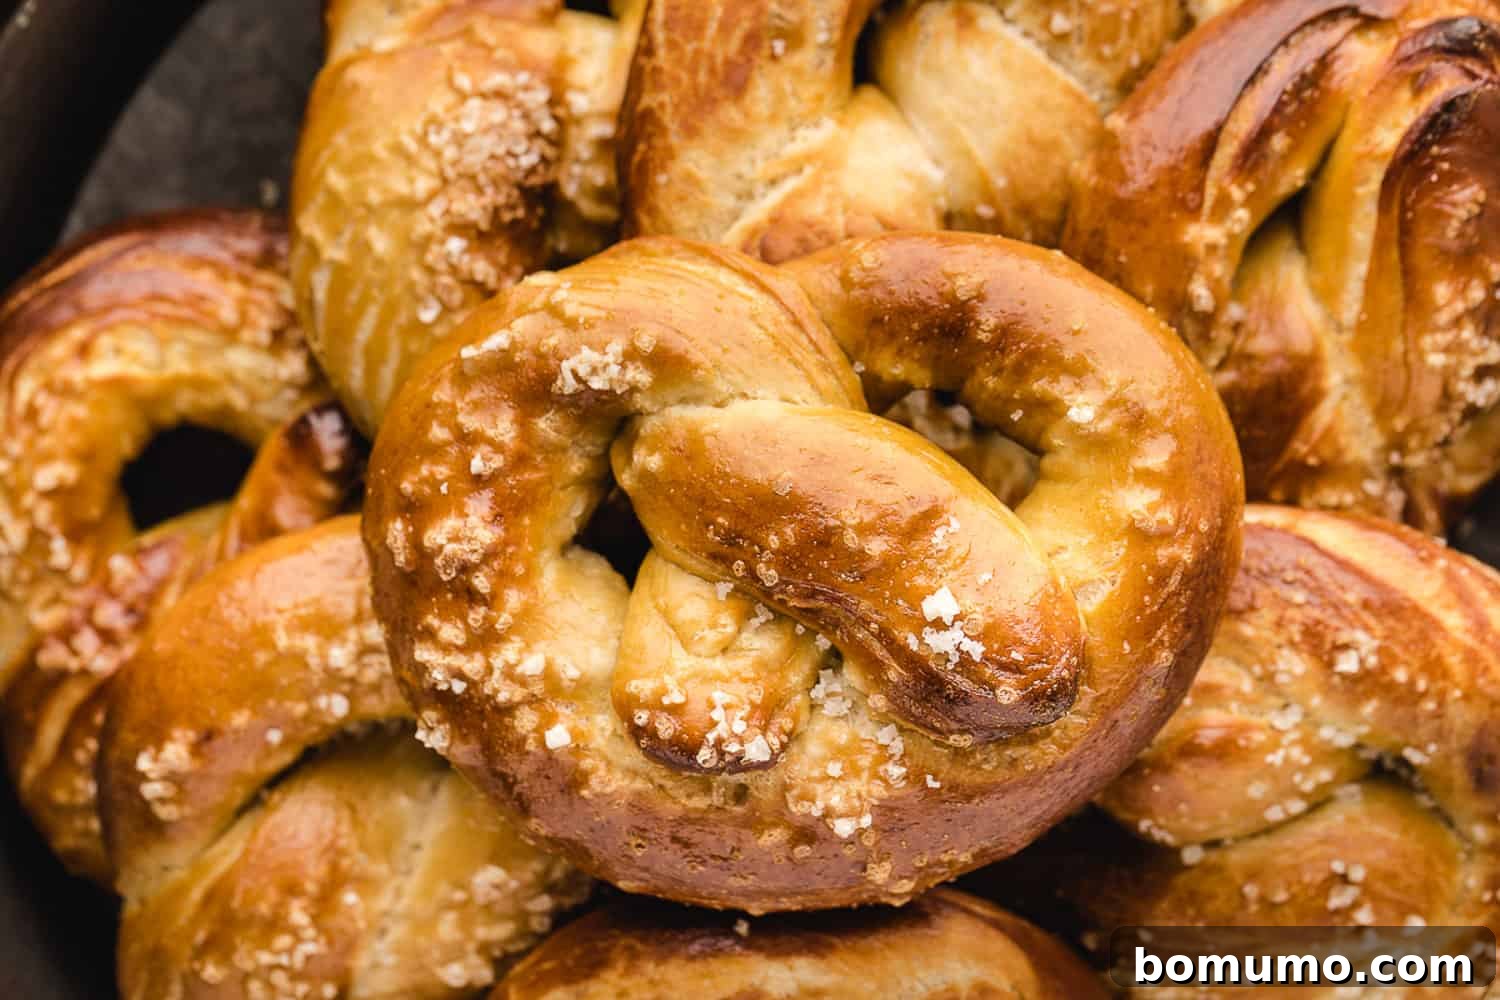
9. Bake to Golden Perfection: Place your prepared baking sheet with the egg-washed and salted pretzels into the preheated 400ºF (200ºC) oven. Bake for a duration of 14 to 17 minutes. Keep a close eye on them; the goal is a beautiful, deep golden-brown color. The baking time can vary slightly depending on your oven, so trust your eyes and the irresistible aroma that will fill your kitchen. Once baked, remove them from the oven and prepare to enjoy the fruits of your labor!
Elevate Your Pretzels with Perfect Dipping Sauces
While homemade soft pretzels are undoubtedly glorious on their own, pairing them with the right dipping sauce can elevate the experience to new culinary heights. The classic choices are always a hit, but don’t hesitate to get creative with your pairings!
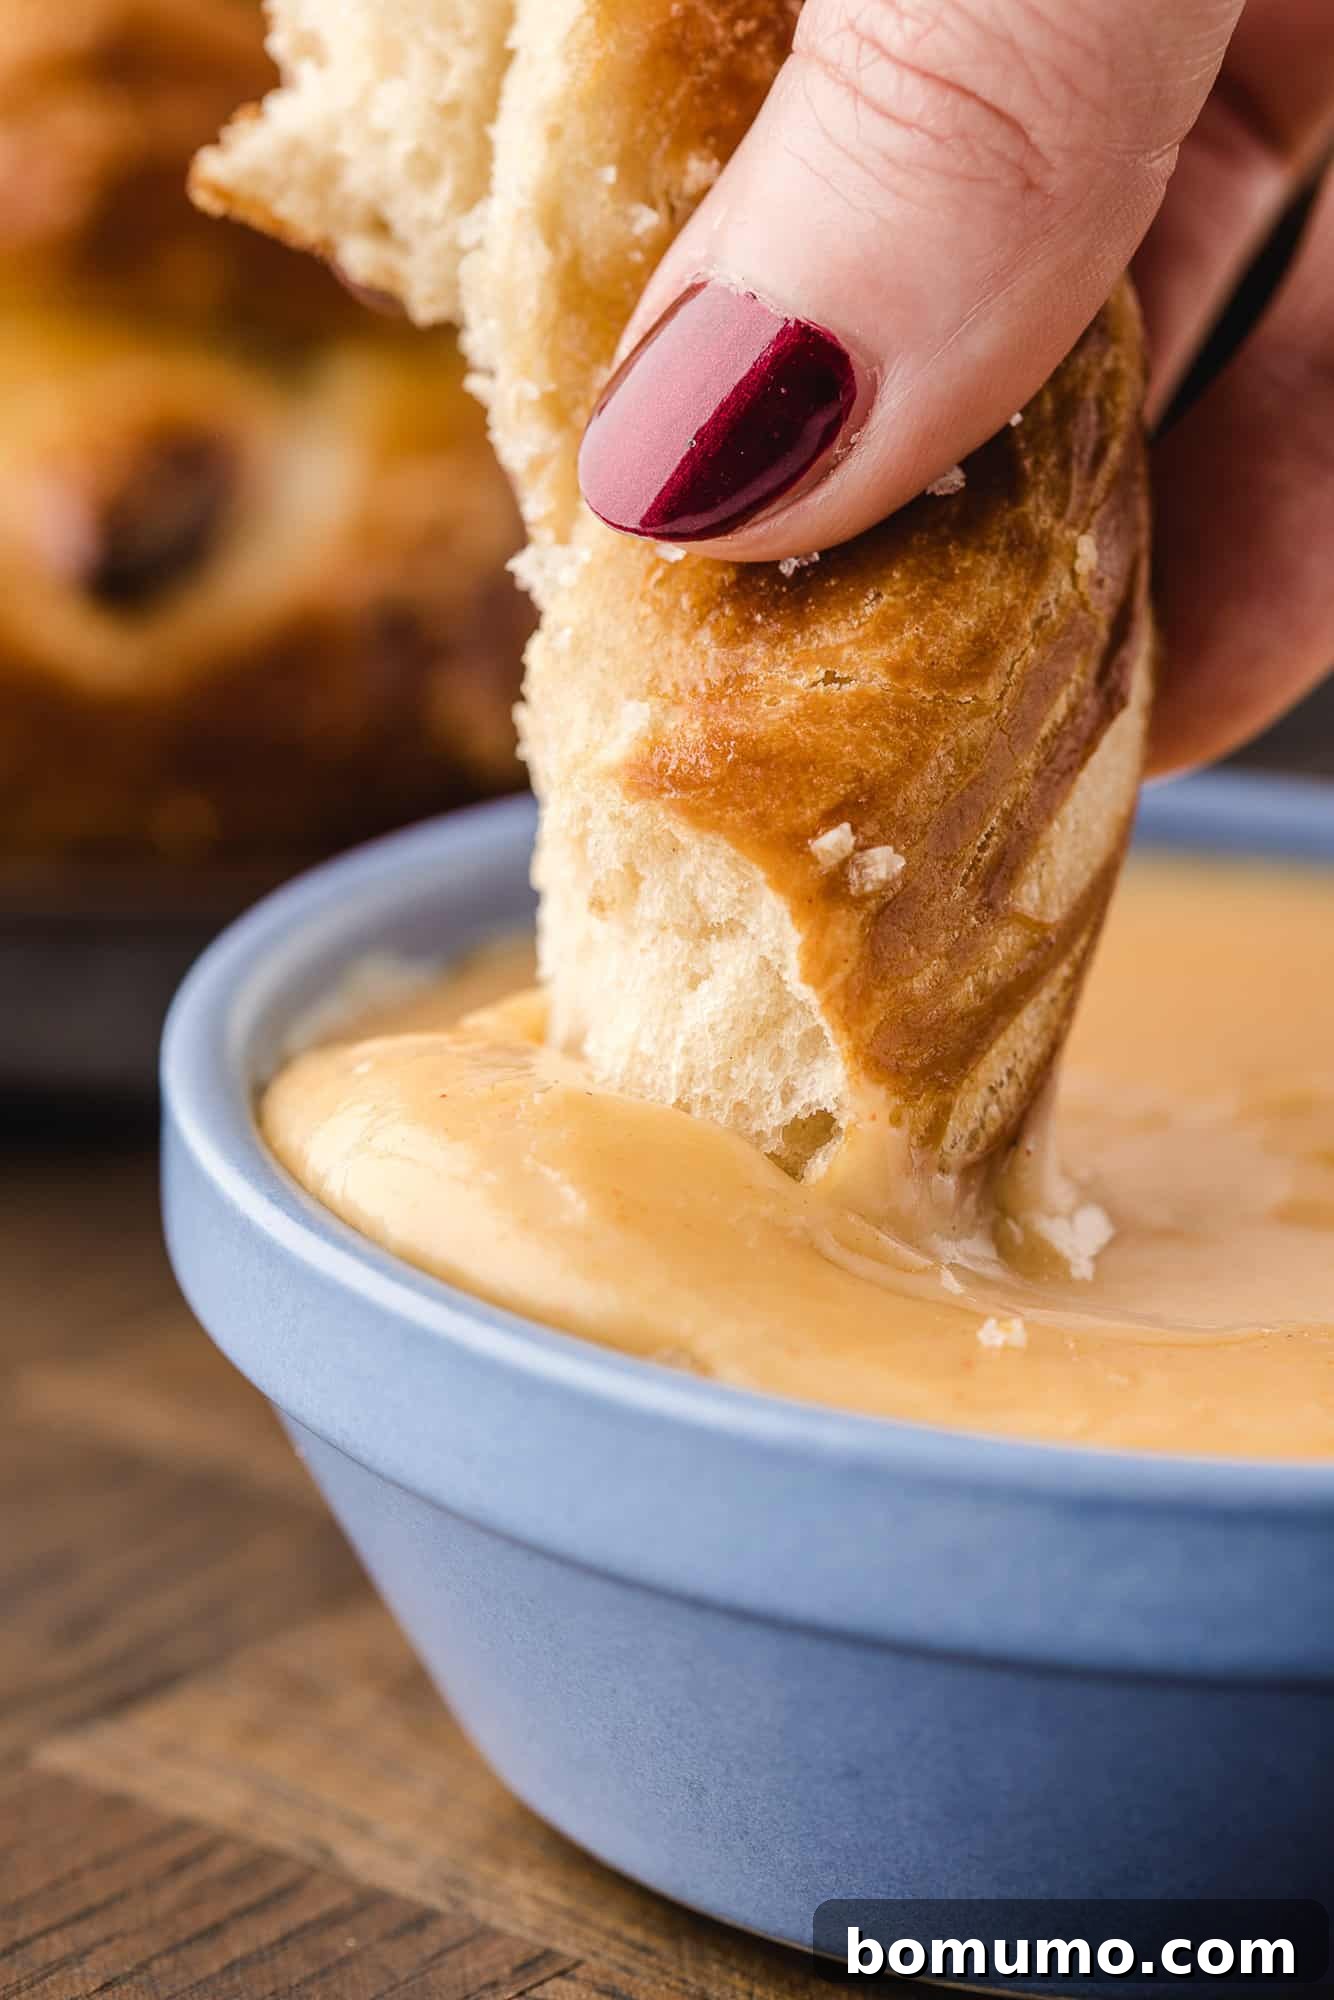
For a traditional savory experience, consider a gourmet fancy mustard, or perhaps even a creamy and tangy Dijon sauce. Nothing complements a warm pretzel quite like a rich and savory beer cheese dip. Another fantastic choice that strikes a balance between sweet and savory is a creamy honey mustard dressing.
If you’re in the mood for something cheesy and comforting, an easy cheese sauce, a velvety queso blanco, or a spicy poblano queso dip are all delicious options that will make your pretzels sing. For those who enjoy a delightful sweet-and-salty contrast, a dollop of Nutella is surprisingly irresistible. And for the barbecue enthusiasts, we highly recommend trying these pretzels with our homemade BBQ sauce. The possibilities are truly endless!
Exciting Soft Pretzel Variations
The versatility of this pretzel dough is truly remarkable! Once you’ve mastered the classic soft pretzel, you can easily adapt the same foundational dough recipe to create other incredible treats. Transform your dough into delightful soft pretzel bites, which are perfect for snacking and sharing. Or, for a sweet twist, turn them into irresistible cinnamon sugar pretzel bites. A single batch of this dough can yield approximately 60 pretzel bites, making them an excellent choice for parties or when you simply crave smaller, pop-able portions. What’s even better is that you can divide the dough and create a batch of both savory classic pretzels and sweet cinnamon sugar bites in one go, offering something for every palate!
Storage & Reheating Tips
Storage & Reheating Tips
To keep your homemade soft pretzels fresh and delicious, allow them to cool completely to room temperature after baking. Once cooled, store them in an airtight container to prevent them from drying out. They will remain wonderfully fresh at room temperature for up to 4 days. For that irresistible fresh-baked warmth, simply reheat your pretzels briefly in a warm oven (around 300°F/150°C for 5-7 minutes) or a hot air fryer (around 350°F/175°C for 2-3 minutes). This will revive their chewy crust and tender interior, making them taste as if they just came out of the oven.
More Irresistible Game Day Snacks
Air Fryer Potato Wedges
Mexicali Dip Recipe – Irresistible!
Pepperoni Pizza Dip
Chili Lime Chicken Wings & Dipping Sauce
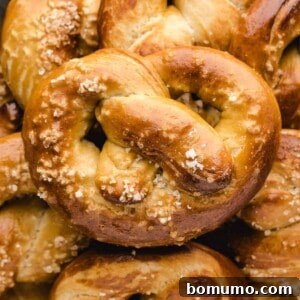
Classic Homemade Soft Pretzels
Ingredients
- 4 cups all-purpose white flour, more if needed
- 2 ¼ teaspoons instant (rapid rise or quick rise) yeast (1 packet)
- 1 teaspoon salt
- 2 tablespoons packed brown sugar
- 1 ¼ cups warm water, 120°F-130°F
- 3 tablespoons unsalted butter, melted
- 8 cups water (for baking soda bath)
- ¼ cup baking soda
- 1 large egg, beaten (for glazing)
- pretzel salt or coarse sea salt, for sprinkling
Instructions
-
Prepare your stand mixer by fitting it with the dough hook (refer to the “Equipment Note” if mixing by hand). In the mixer bowl, combine the flour, instant yeast, salt, and brown sugar. Whisk these dry ingredients together thoroughly by hand until they are completely integrated.4 cups all-purpose white flour, 2 ¼ teaspoons instant yeast, 1 teaspoon salt, 2 tablespoons packed brown sugar
-
Pour the measured warm water and melted unsalted butter into the mixing bowl. Engage the stand mixer on its lowest setting. Mix continuously with the dough hook for 8 minutes, stopping occasionally to scrape down the sides of the bowl as needed to ensure all ingredients are evenly incorporated.1 ¼ cups warm water, 3 tablespoons unsalted butter, melted
-
After 8 minutes, your dough should have formed a distinct ball and should effortlessly pull away from the sides of the mixing bowl. The dough should feel dry to the touch, and when gently pressed with a clean finger, it should slowly spring back. If the dough still feels sticky, add additional flour one tablespoon at a time, mixing until it reaches the correct consistency (refer to the “Pretzel Making Tip” above).
-
Lightly oil a clean bowl. Transfer the dough into it, flipping the dough once to ensure it’s fully coated in the oil. Cover the bowl with a clean, dry kitchen towel. Set the bowl aside in a warm, draft-free location for 1 hour to allow the dough to rise until it has approximately doubled in size.
-
While the dough is rising, prepare your baking sheet. Line it with parchment paper for easy release, or lightly oil it by drizzling a small amount of oil and spreading it with your hands, or by spraying with a non-stick cooking spray.
-
After 1 hour, the dough should have visibly doubled in size (note that rising time can vary based on kitchen temperature, see “Rising Note” below). Gently punch the air out of the risen dough and transfer it to a clean work surface. Using a large knife or a dough cutter, divide the dough into 8 equal pieces. If the dough seems overly elastic and difficult to roll, let it rest for an additional 10 minutes to relax the gluten.
-
With your hands, roll each individual piece of dough into a long, slender rope, aiming for a consistent length of approximately 20 inches. To form the classic pretzel shape, create an upside-down U shape with the rope. Take the loose ends and twist them around each other twice. Then, fold these twisted ends upwards to meet the top curve of the U and gently press them down to secure the shape. Place each shaped pretzel onto the prepared baking sheet. Repeat this process for all remaining dough pieces.
-
Once all the dough has been shaped into pretzels, set them aside on the baking sheet. Preheat your oven to 400ºF (200ºC) and begin preparing the baking soda water bath.
-
Fill a large saucepan halfway with 8 cups of water; bring it to a rolling boil. Once boiling, reduce the heat to a gentle simmer. Carefully and slowly add the ¼ cup of baking soda to the simmering water. Be aware that the baking soda will cause a fizzing and bubbling reaction, and may overflow if your pan is too full.¼ cup baking soda, 8 cups water
-
By now, your shaped pretzels will have slightly puffed up. Working one at a time, use a large slotted spatula, spider, or skimmer to carefully lower a pretzel into the simmering baking soda water bath. Allow it to soak for precisely 15 seconds on each side. It is critically important not to let the pretzels soak for longer than 30 seconds total, as prolonged soaking can impart an undesirable bitter flavor (refer to the “Water Bath Tip” below). Use your slotted tool to lift the pretzel out of the water, allowing excess liquid to drain off completely, then return it to the prepared baking sheet. Repeat this process for each pretzel.
-
Once all pretzels have been boiled and returned to the baking sheet, brush each one generously with the beaten egg wash. Immediately sprinkle lightly but evenly with pretzel salt or coarse sea salt. Transfer the baking sheet to your preheated oven and bake for 14 to 17 minutes, or until the pretzels achieve a beautiful, deep golden-brown color.1 large egg, beaten, pretzel salt or sea salt, for sprinkling
-
Carefully remove the baked pretzels from the oven and serve them warm, ideally with your favorite dipping sauce. Enjoy your delicious homemade creations!
Notes
- Don’t have a stand mixer? While a stand mixer simplifies the process, it’s not essential. If you’re mixing the dough by hand, combine all dough ingredients, then turn the shaggy ball out onto a lightly floured surface. Knead it thoroughly for 10 to 15 minutes until it becomes smooth, soft, and pliable.
- Rising Note: Keep an eye on your dough during the rising period. Depending on the ambient temperature and humidity of your kitchen, it might double in size faster than the estimated one hour. Adjust accordingly.
- Water Bath Tip: It is crucial to limit the time your pretzels spend in the baking soda water bath to no more than 30 seconds in total. Exceeding this time can negatively impact the flavor, leading to a noticeable bitterness from the baking soda. Stick to 15 seconds per side for best results.
- Storage: To maintain optimal freshness, ensure your homemade soft pretzels are completely cooled before storing them. Place them in an airtight container at room temperature, where they will keep well for up to 4 days. For reheating, a quick warm-up in a toaster oven, conventional oven, or air fryer will restore their delicious warmth and chewiness.
Nutrition
Nutrition information is automatically calculated, so should only be used as an approximation.
Did You Make This?Share a comment and rating below! I love hearing what you think!