
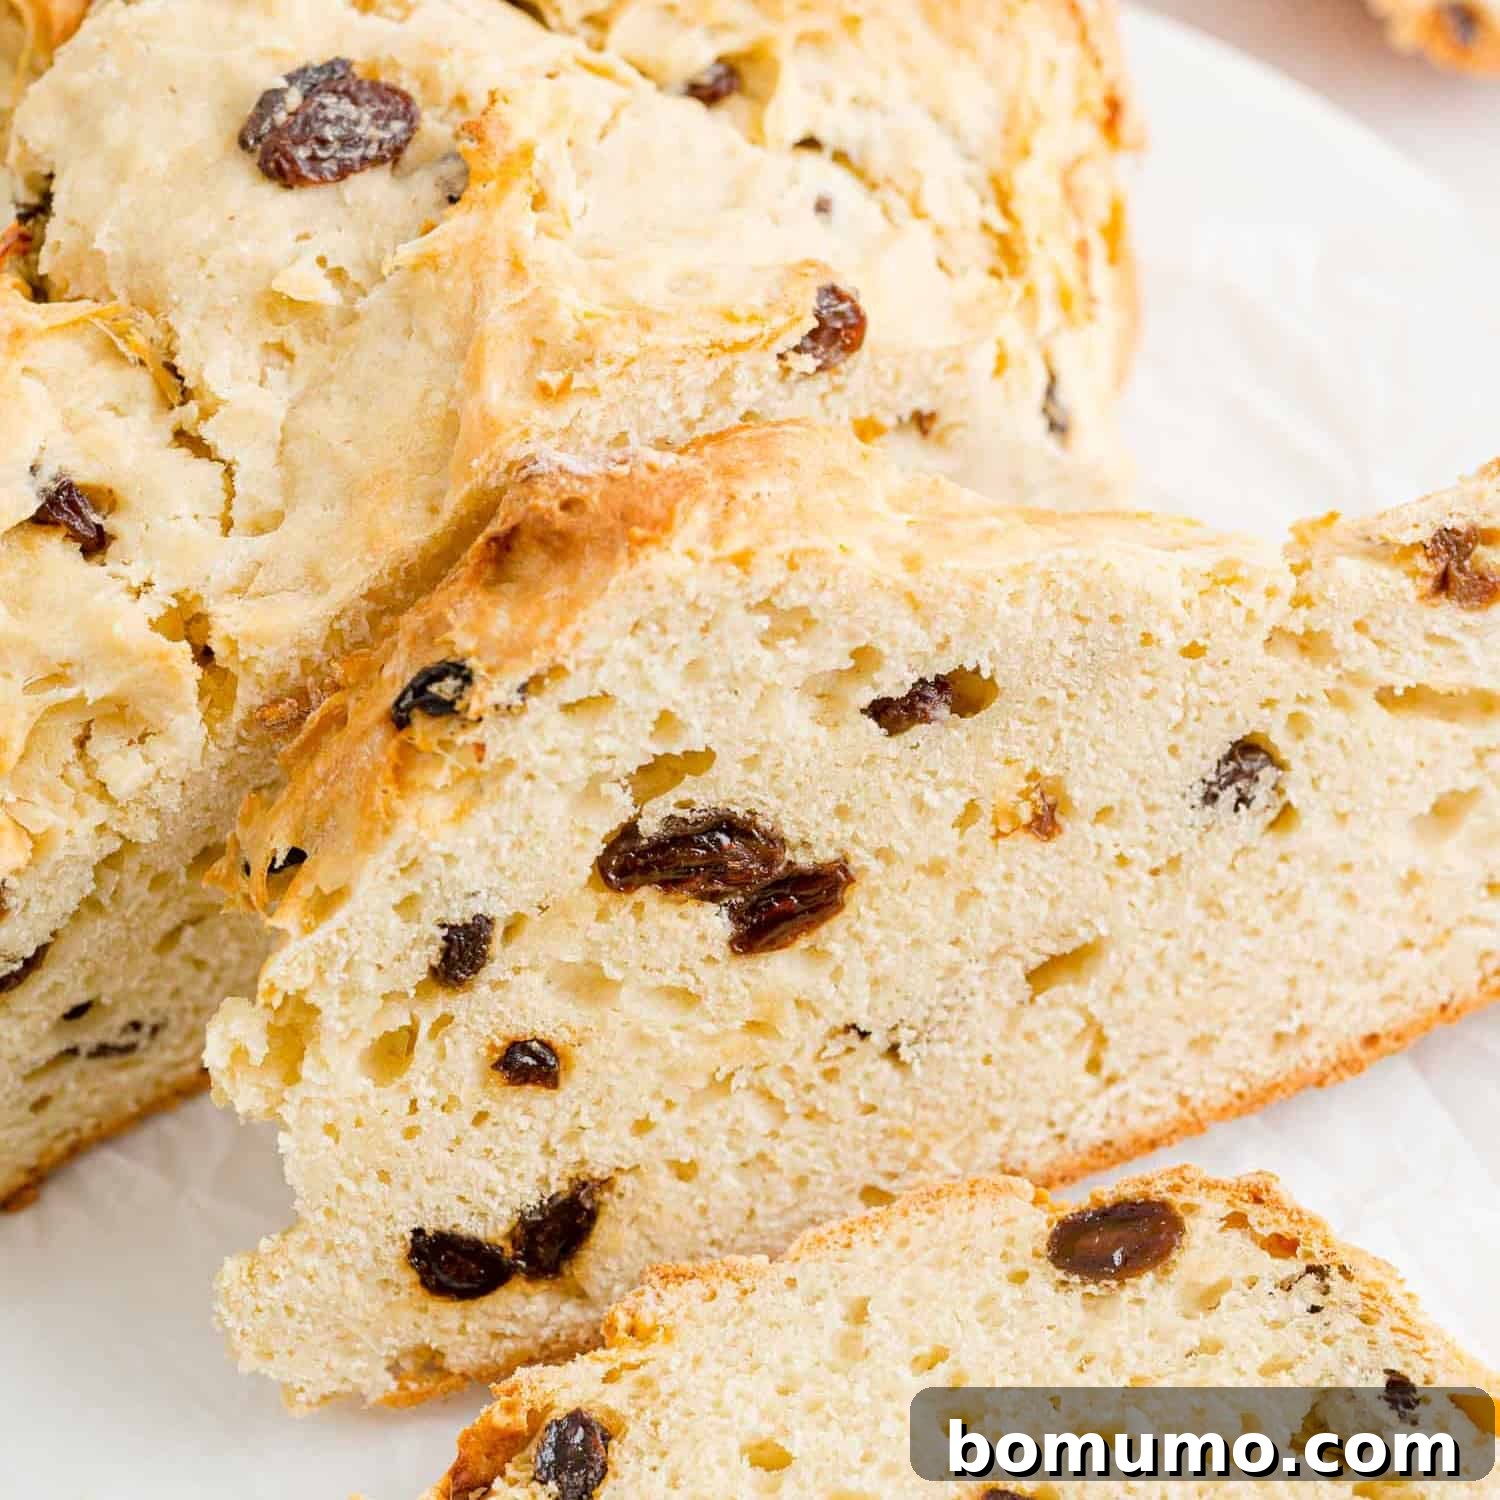
Bake a loaf of fresh, crusty bread to serve with dinner tonight, or any time you crave a taste of comforting homemade goodness. This traditional Irish Soda Bread recipe is not only incredibly delicious but also remarkably easy to make, even for novice bakers.
Recipe Overview: Why This Irish Soda Bread Shines
Why You’ll Love It: Freshly baked bread is always a treat, yet often feels like a time-consuming endeavor. Our Irish Soda Bread recipe offers all the warmth and aroma of homemade bread without the lengthy commitment. As a true “quick bread,” it requires no yeast and absolutely no rising time, making it perfect for last-minute baking.
How Long It Takes: From gathering your ingredients to pulling a golden-brown loaf from the oven, you’ll be enjoying warm, crusty bread in just over an hour.
Essential Equipment: You won’t need any specialized gadgets for this recipe. Just a large mixing bowl and a reliable baking sheet are all it takes.
Servings: This recipe yields one generous, round loaf, ideal for sharing with family and friends.
Across the United States, and particularly in regions like Michigan, the arrival of St. Patrick’s Day is met with eager anticipation. It’s a moment to embrace the color green, celebrate Irish heritage, and look forward to the promise of spring after long, grey winter days. While many partake in festivities purely for the joy of it, it’s worth remembering the historical figure behind the celebration: St. Patrick, the 5th-century missionary priest who introduced Christianity to Ireland, the fabled Emerald Isle. His legacy, entwined with the color green, later became a powerful symbol of Irish independence in the 18th century.
No true celebration is complete without an array of delicious food and drink. As you prepare for your St. Patrick’s Day feast, or simply seek to infuse your everyday meals with a touch of Irish tradition, this recipe for Irish Soda Bread is an absolute must-try. Often enjoyed around St. Patrick’s Day, its appeal extends far beyond the holiday. This is a quick bread, meaning it’s baked without yeast, simplifying the process and eliminating the need for lengthy rising times. This makes it an ideal recipe for anyone, from seasoned bakers to absolute beginners, eager to experience the satisfaction of baking bread from scratch.
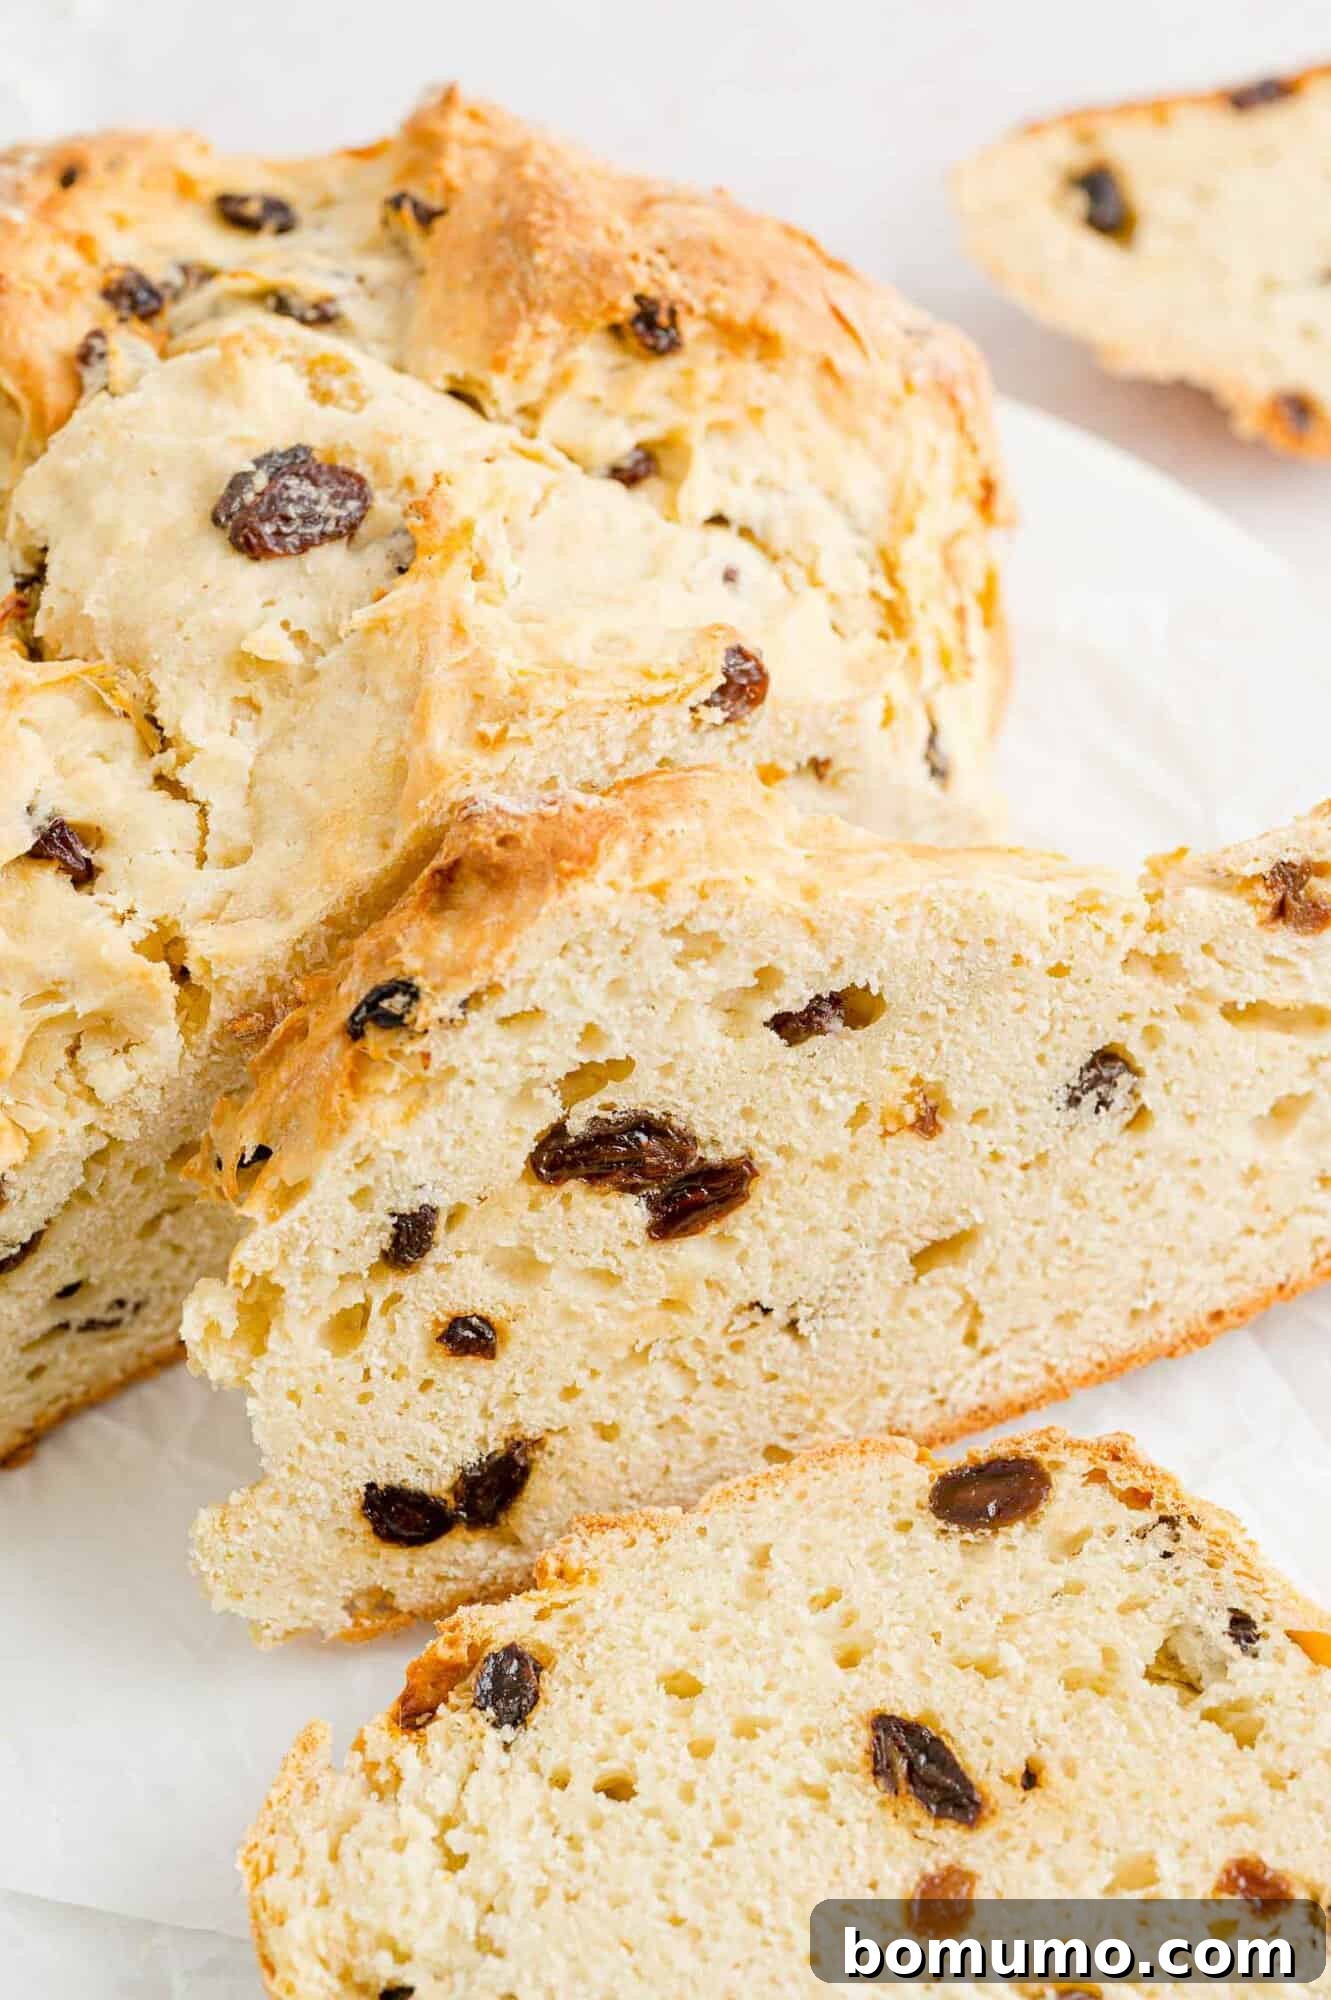
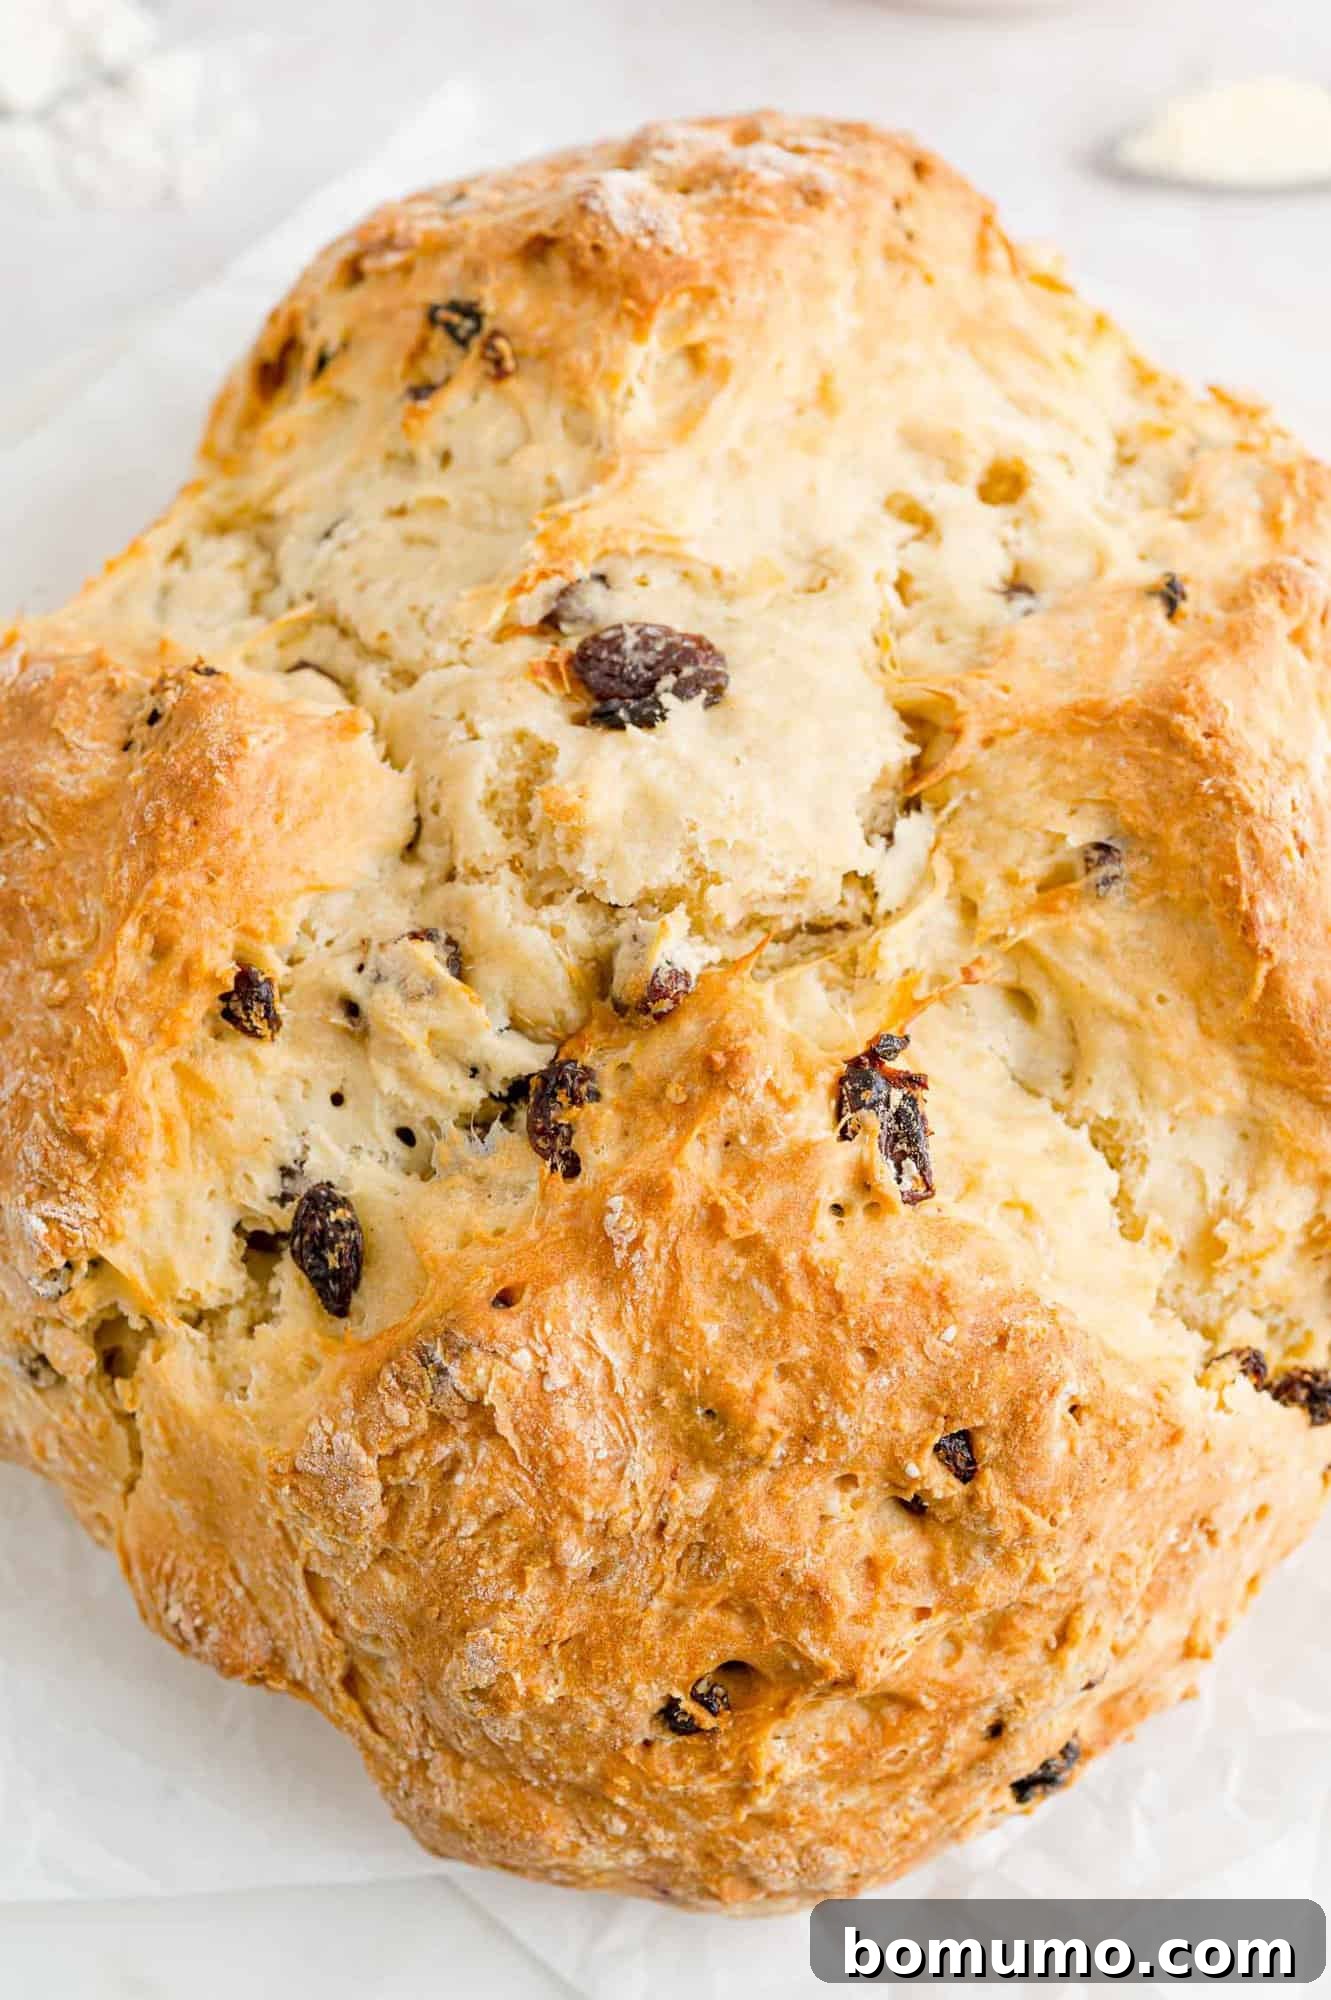
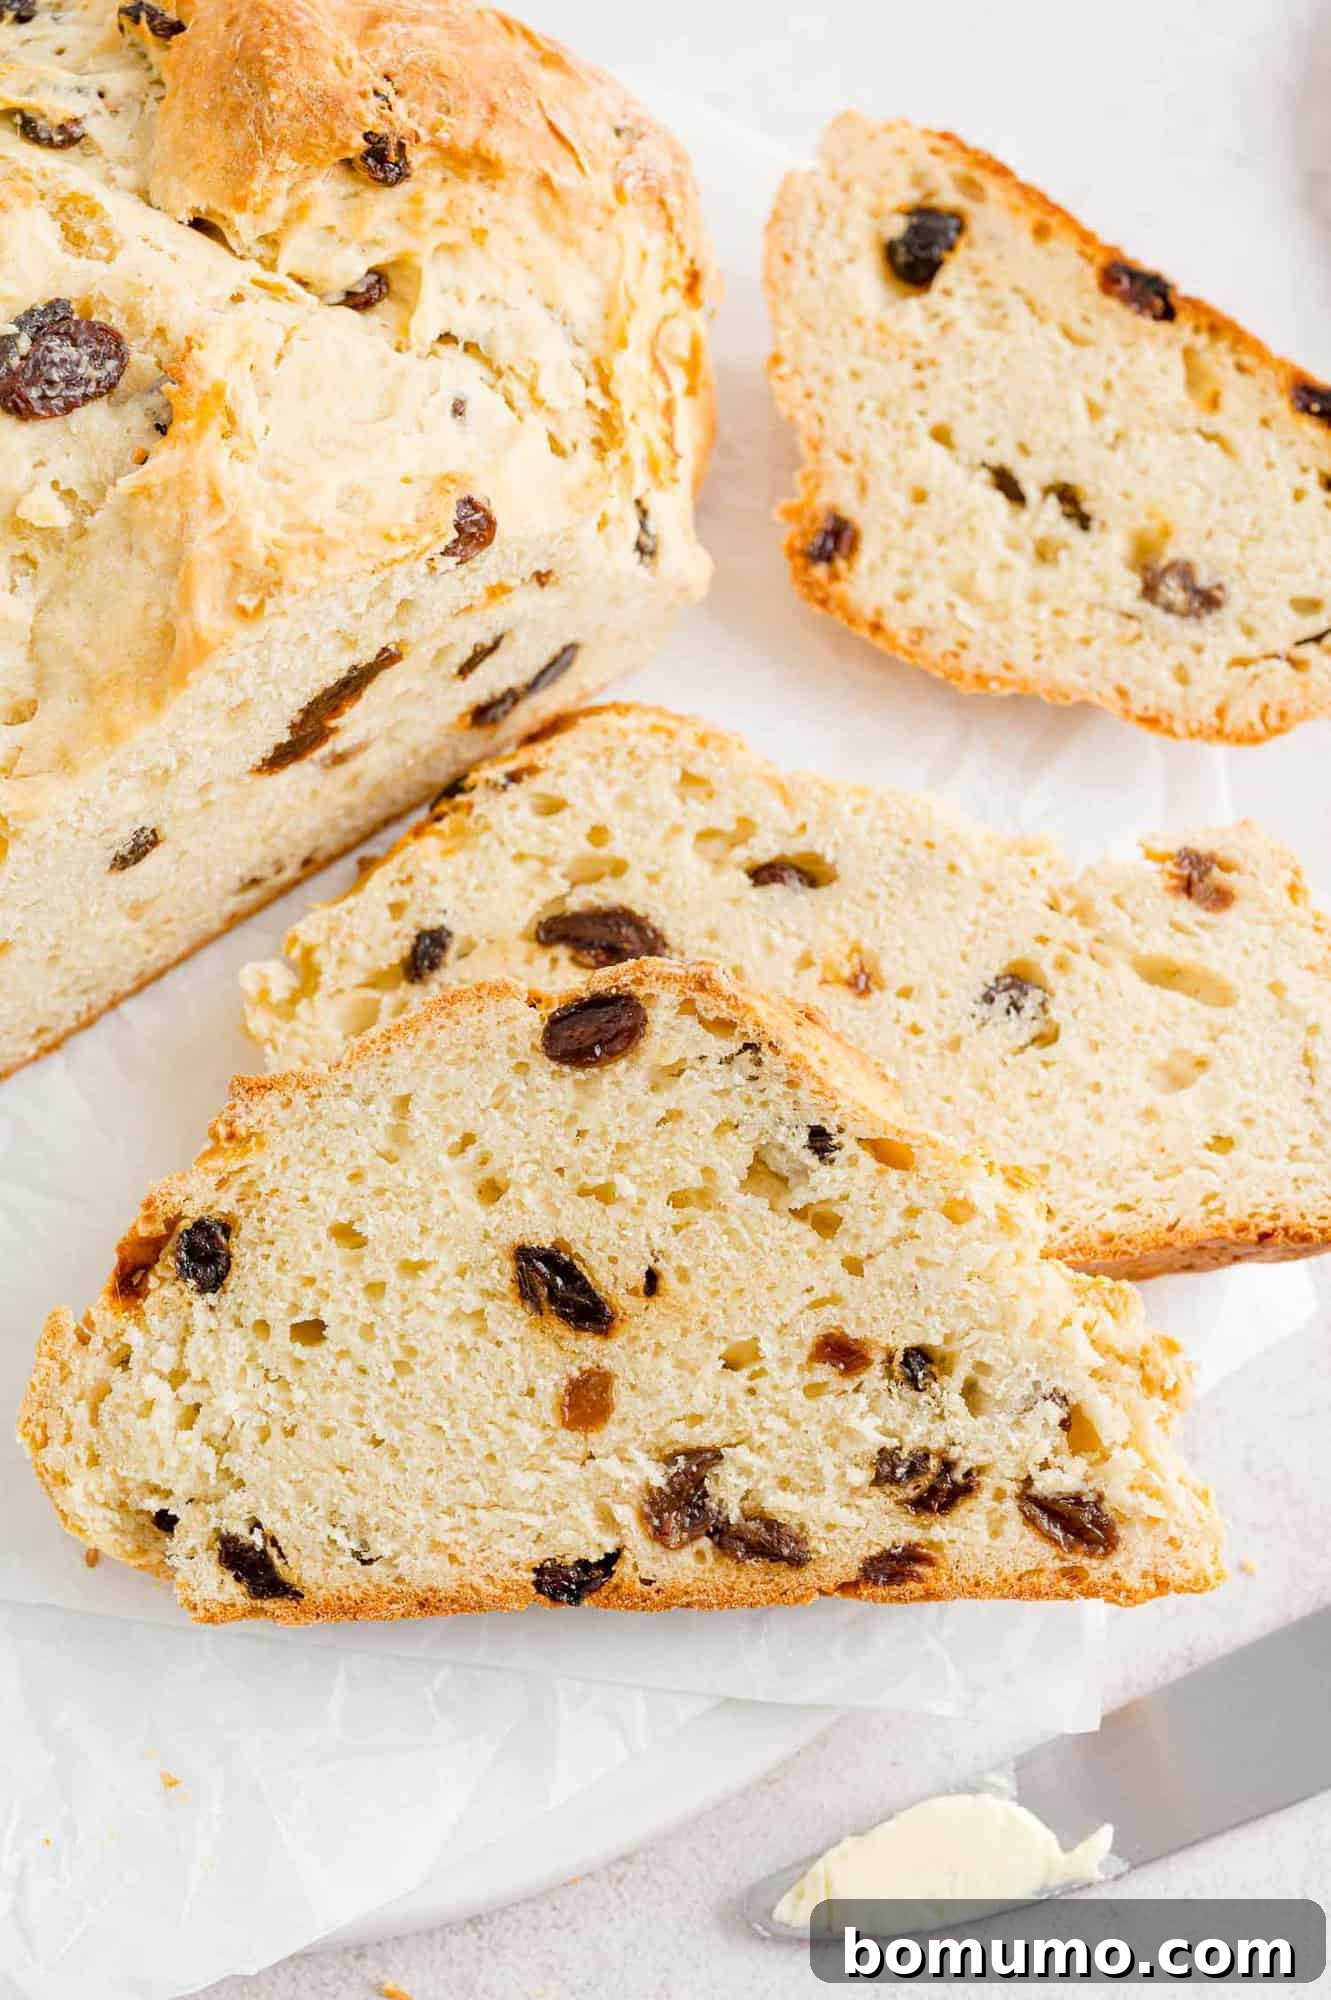
Just look at this magnificent loaf! Imagine it warm from the oven, its crust golden and inviting, studded with sweet raisins, and generously slathered with softened butter. Irish Soda Bread is a versatile delight, perfect at any time of year. Its texture is wonderfully moist, its flavor rich and subtly buttery, with just a hint of sweetness that complements rather than competes with other toppings. Drizzle it with honey for a morning treat, or spread your favorite jam for an afternoon snack. Its understated sweetness also makes it a superb accompaniment to savory dishes, soaking up rich flavors beautifully.
Irish Soda Bread is an excellent partner to hearty stews and warming soups. It pairs wonderfully with classic Irish and British fare, such as a comforting Shepherd’s Pie or a tender Slow Cooker Corned Beef and Cabbage. It also makes a welcome addition to brunch menus, elevating any spread with its rustic charm. And don’t forget the joy of leftover bread – a slice, lightly toasted, is simply divine!
Embracing the Simplicity of Irish Soda Bread
If the thought of baking bread from scratch usually brings on a wave of intimidation, Irish Soda Bread is here to change your perspective. It’s the perfect entry point into the world of baking, renowned for its straightforward approach and minimal fuss.
It’s a True Quick Bread: The magic of Irish Soda Bread lies in its simplicity. Unlike traditional yeast breads that demand precise kneading, multiple lengthy rises, and careful temperature control, this recipe sidesteps all of that. The leavening power comes from baking soda reacting with buttermilk, creating a rapid rise that makes baking incredibly accessible. If you’ve ever made Beer Bread, you’ll find the process refreshingly similar and equally rewarding.
From Start to Finish in Just Over an Hour: Time is often the biggest barrier to homemade baking. With Irish Soda Bread, you can whisk together the dough, shape your loaf, and have it in the oven in mere minutes. The total time commitment, including approximately 40 minutes of baking, means you can enjoy fresh, warm bread in roughly an hour – perfect for weeknight dinners or impromptu gatherings.
No Fancy Equipment Needed: Forget specialized bread machines, stand mixers, or elaborate baking tools. All you truly need for this recipe are common kitchen essentials: a large mixing bowl for combining ingredients and a baking sheet for baking your beautiful loaf. A dough whisk can be helpful for mixing sticky doughs, but a sturdy wooden spoon works just as effectively.
Visually Stunning & Deliciously Rewarding: Beyond its ease, Irish Soda Bread boasts a rustic beauty that is sure to impress. Its golden, crusty exterior and characteristic “X” score make it a feast for the eyes before you even take your first bite. And rest assured, it tastes every bit as good as it looks – wholesome, satisfying, and deeply comforting. Are you ready to embark on this simple yet rewarding baking adventure? Let’s get baking!
Key Ingredients for Authentic Irish Soda Bread
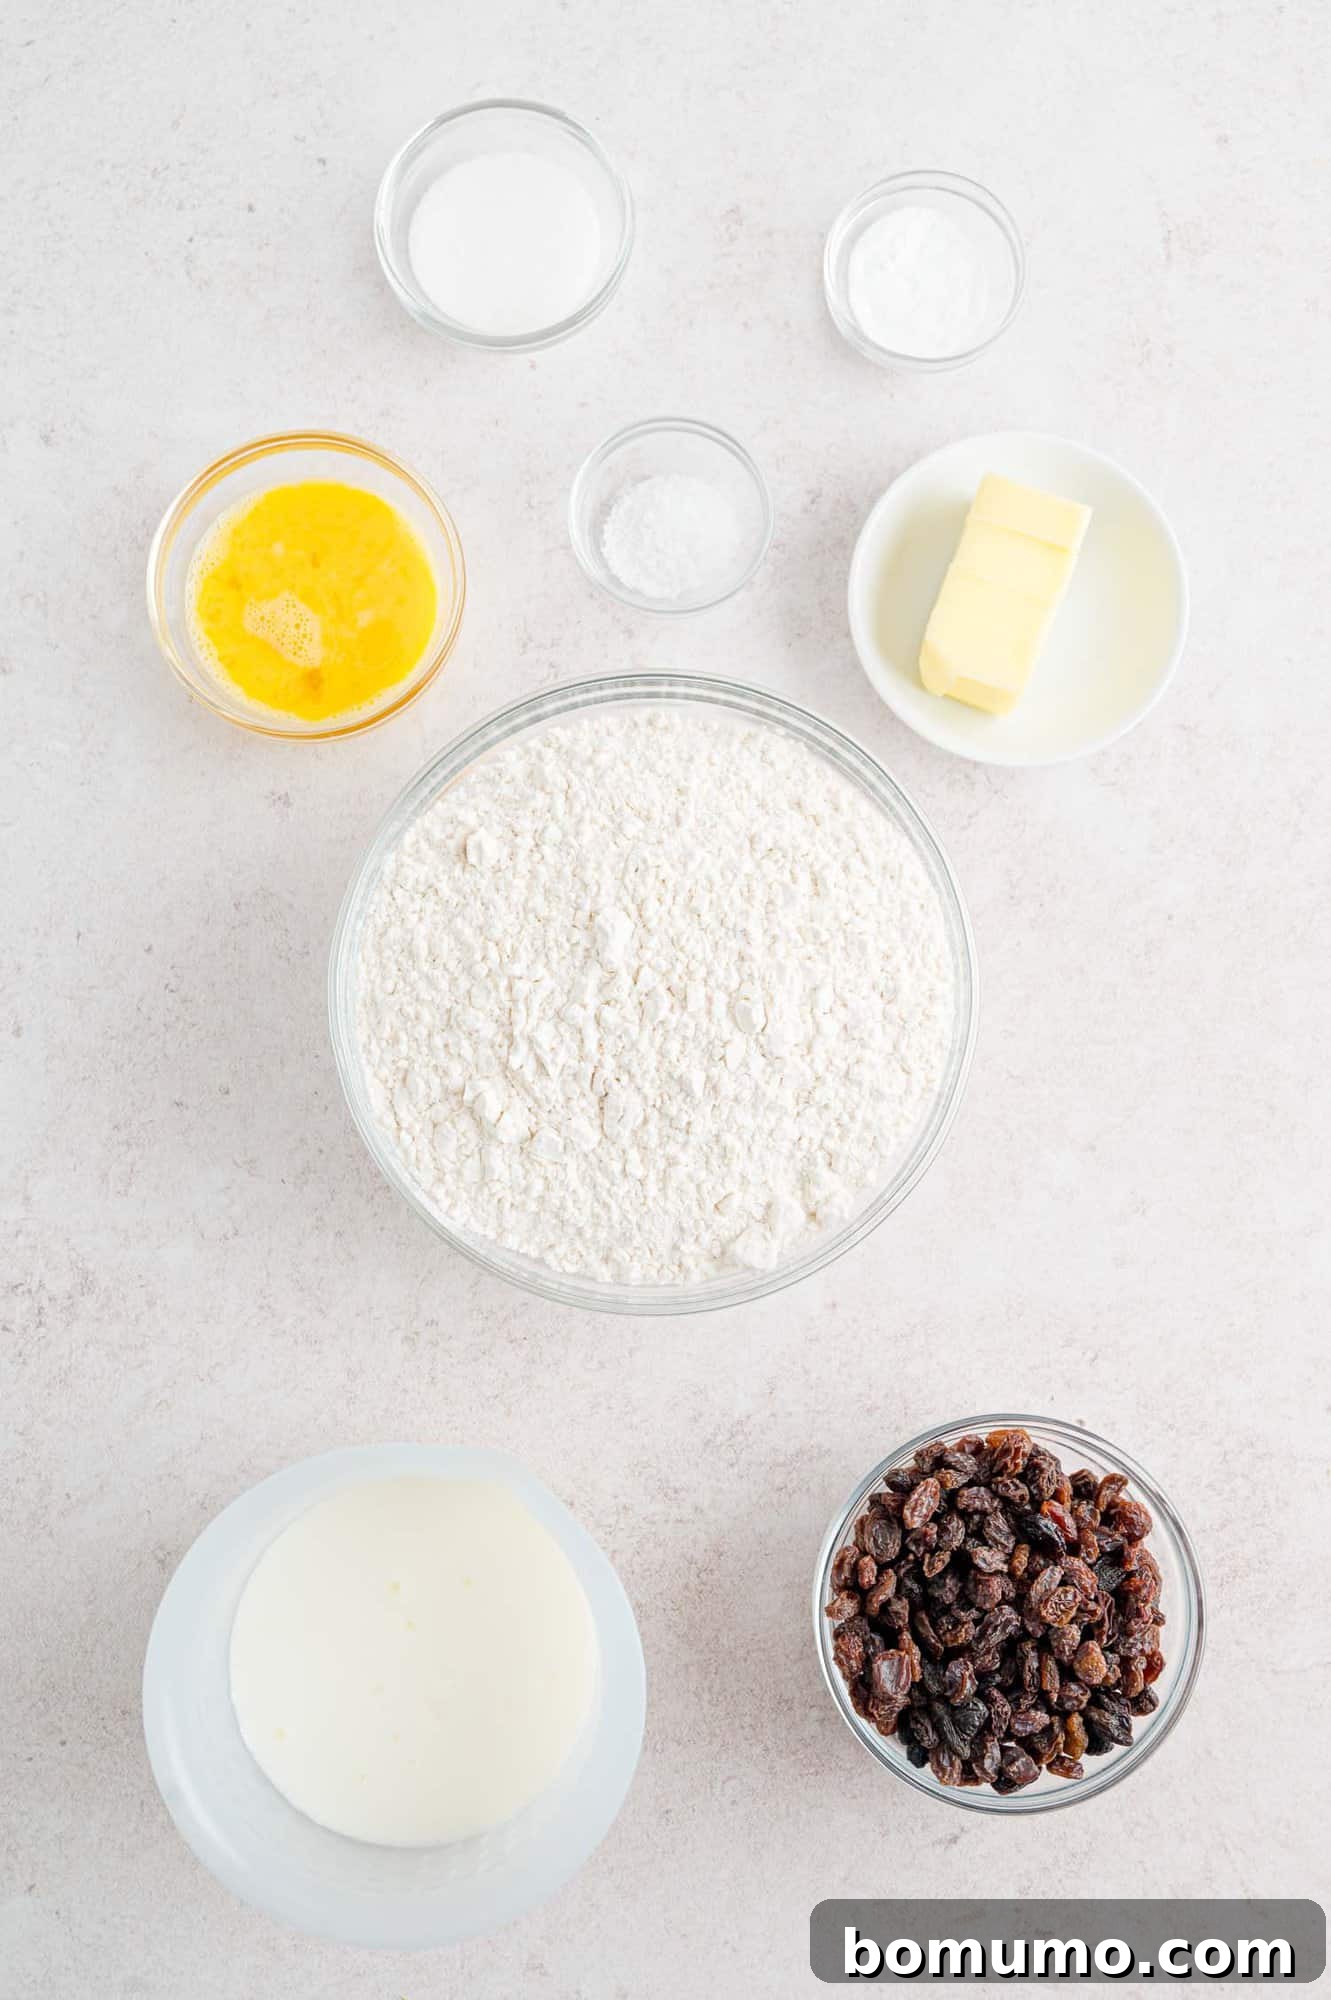
Crafting the perfect Irish Soda Bread relies on a handful of simple, wholesome ingredients. Each plays a vital role in achieving that distinct flavor and texture we all love:
- All-Purpose Flour: There’s no need to seek out special bread flour for this recipe. Standard all-purpose white flour works perfectly. For the best results, especially if you prioritize natural ingredients, opt for unbleached flour, which is what this recipe was developed with.
- Granulated Sugar: Irish Soda Bread is not meant to be overly sweet, but a modest amount of sugar—just two tablespoons—is crucial. It balances the flavors, enhances the browning of the crust, and adds a subtle sweetness that makes the bread so delightful.
- Large Egg: One large egg enriches the dough, contributing to a tender crumb and a more cohesive texture. It also adds a touch of moisture and boosts the nutritional profile of this simple bread.
- Unsalted Butter: You’ll need four tablespoons, or a quarter cup, of butter. It’s essential that the butter is softened to room temperature. This allows it to be easily “cut” or blended into the dry ingredients, ensuring even distribution and creating tender pockets within the bread. Unsalted butter is preferred for baking as it gives you control over the overall salt content.
- Buttermilk: The cornerstone of soda bread! Buttermilk is a fermented dairy product, typically made from nonfat or lowfat milk. Its abundance of lactic acid is key to this recipe’s success. When combined with baking soda, the acid reacts to produce carbon dioxide gas. This natural chemical reaction is what leavens the bread, causing it to rise beautifully without the need for yeast.
- Baking Soda: Scientifically known as sodium bicarbonate, baking soda is a dry white powder with a multitude of uses, especially in baking. Its reactive properties with the acidic buttermilk are so fundamental to this bread that it proudly bears the name “soda bread.”
- Kosher Salt: Salt is more than just a seasoning; it’s a flavor enhancer. A teaspoon of kosher salt elevates all the other ingredients, preventing the bread from tasting bland or flat. If you happen to use salted butter, remember to slightly reduce the amount of kosher salt to maintain the perfect balance.
- Raisins (or Currants): Traditional Irish Soda Bread often includes dried fruits like raisins or currants. Currants are smaller and offer a slightly tarter flavor. Feel free to choose your preference or even omit them if you prefer a plain loaf. If your raisins have dried out over time, a quick soak in hot water for about ten minutes will plump them up beautifully. Just ensure they are thoroughly drained before adding them to the dough.

Consider a Dough Whisk for Easier Mixing
While not strictly essential, a sturdy, long-handled dough whisk can make a noticeable difference when working with sticky bread doughs and other stiff mixtures. Its unique design allows it to efficiently cut through and combine ingredients without the dough clinging excessively to the metal, which also makes cleanup a breeze. If you’re a regular baker, it’s a worthwhile addition to your kitchen arsenal.
Step-by-Step Guide: Crafting Your Perfect Irish Soda Bread
Baking this traditional Irish Soda Bread is a straightforward and rewarding process. Follow these simple steps to create a beautiful, crusty loaf:
1. Get Ready: Prepare Your Workspace and Oven
Begin by gathering all your ingredients and essential equipment: a large mixing bowl, dry measuring cups, a liquid measuring cup, and a baking sheet lined with parchment paper. This preparation, known as “mise en place,” ensures a smooth baking experience. Preheat your oven to 400ºF (200ºC) as you begin, allowing it to reach the correct temperature before the bread is ready for baking.
2. Mix the Dry Ingredients: Foundation of Flavor
Into your large mixing bowl, carefully measure the all-purpose flour. Precision here is key! You’ll need four cups for the main dough, plus an additional ¼ cup to use when you shape the loaf later. Add the sugar, kosher salt, and baking soda to the flour. Use a whisk to thoroughly combine these dry ingredients. This step ensures that the leavening agent (baking soda) and seasoning are evenly distributed throughout the flour mixture, leading to a consistent rise and flavor in your finished bread.
A Quick Tip for Measuring Flour Correctly
Always lightly spoon flour from its storage container into your dry measuring cup. Avoid using the measuring cup itself to scoop directly from the bag, as this can compact the flour, leading to an excess amount in your recipe. Similarly, do not shake the cup to level the flour, as this also causes compaction. Instead, use a straight edge, such as the back of a table knife, to level off the top of the flour. Adding too much flour is a common pitfall that can result in dense, dry, or hard baked goods.
3. Incorporate the Butter and Raisins: Adding Richness and Sweetness
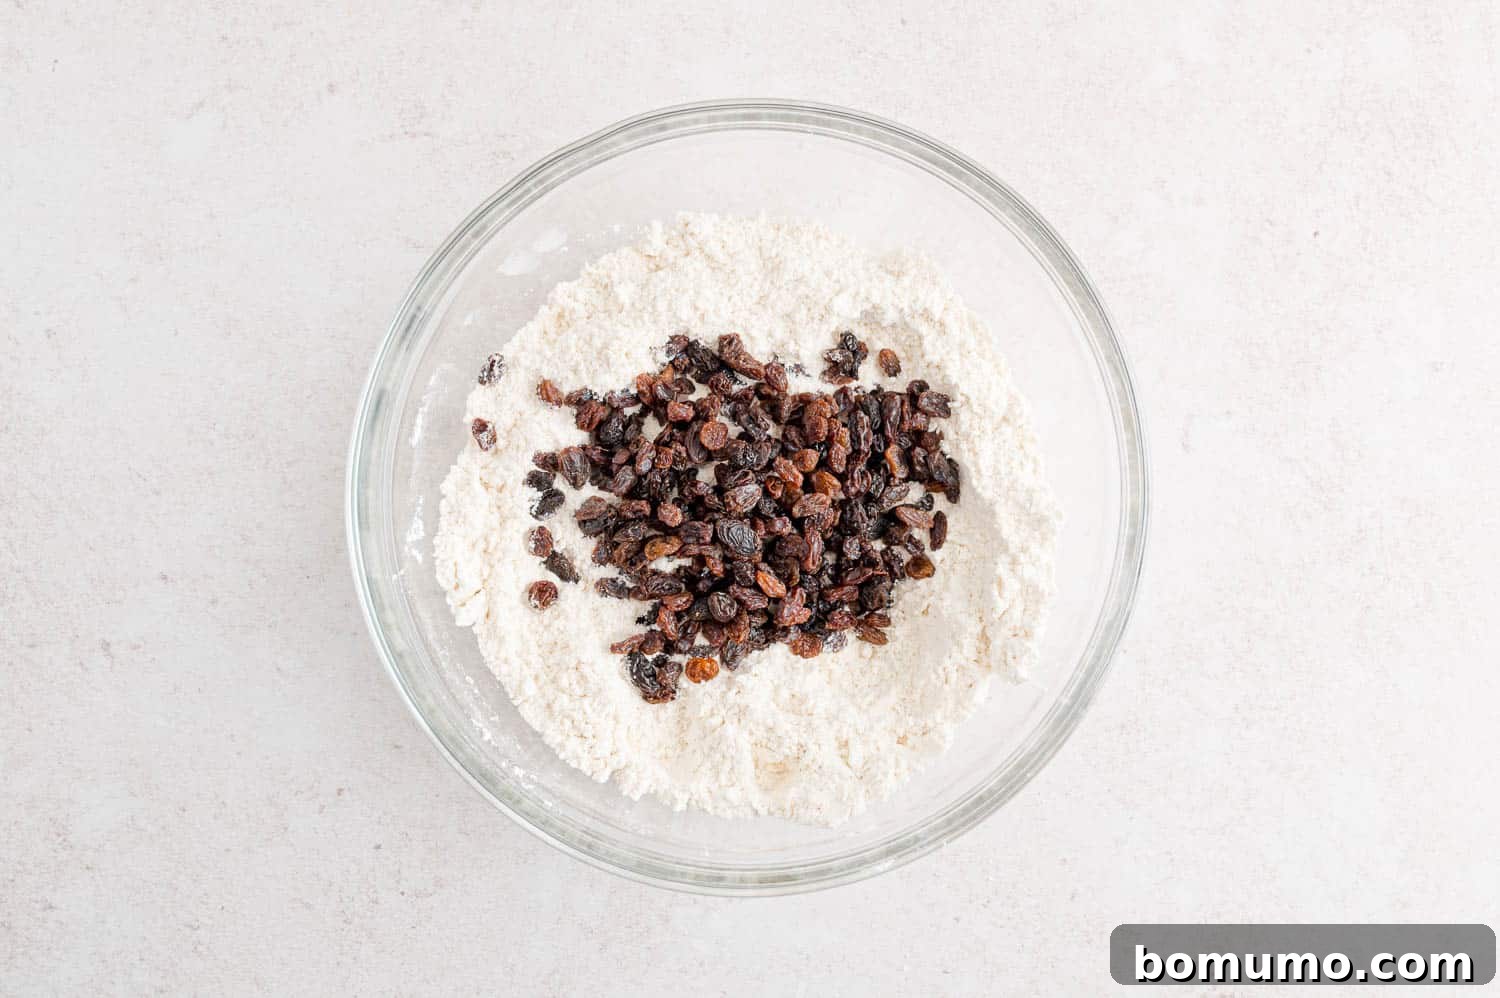
Next, it’s time to work the softened butter into your dry ingredients. The most effective method is to use your fingertips, gently rubbing the butter into the flour mixture until it resembles coarse crumbs. This technique ensures the butter is evenly dispersed and creates tender pockets in the bread. Alternatively, a pastry blender or a sturdy fork can also be used to “cut in” the butter. Continue until there are no large lumps of butter remaining. If you’re including raisins (or currants), stir them in now, ensuring they are well distributed throughout the mixture.
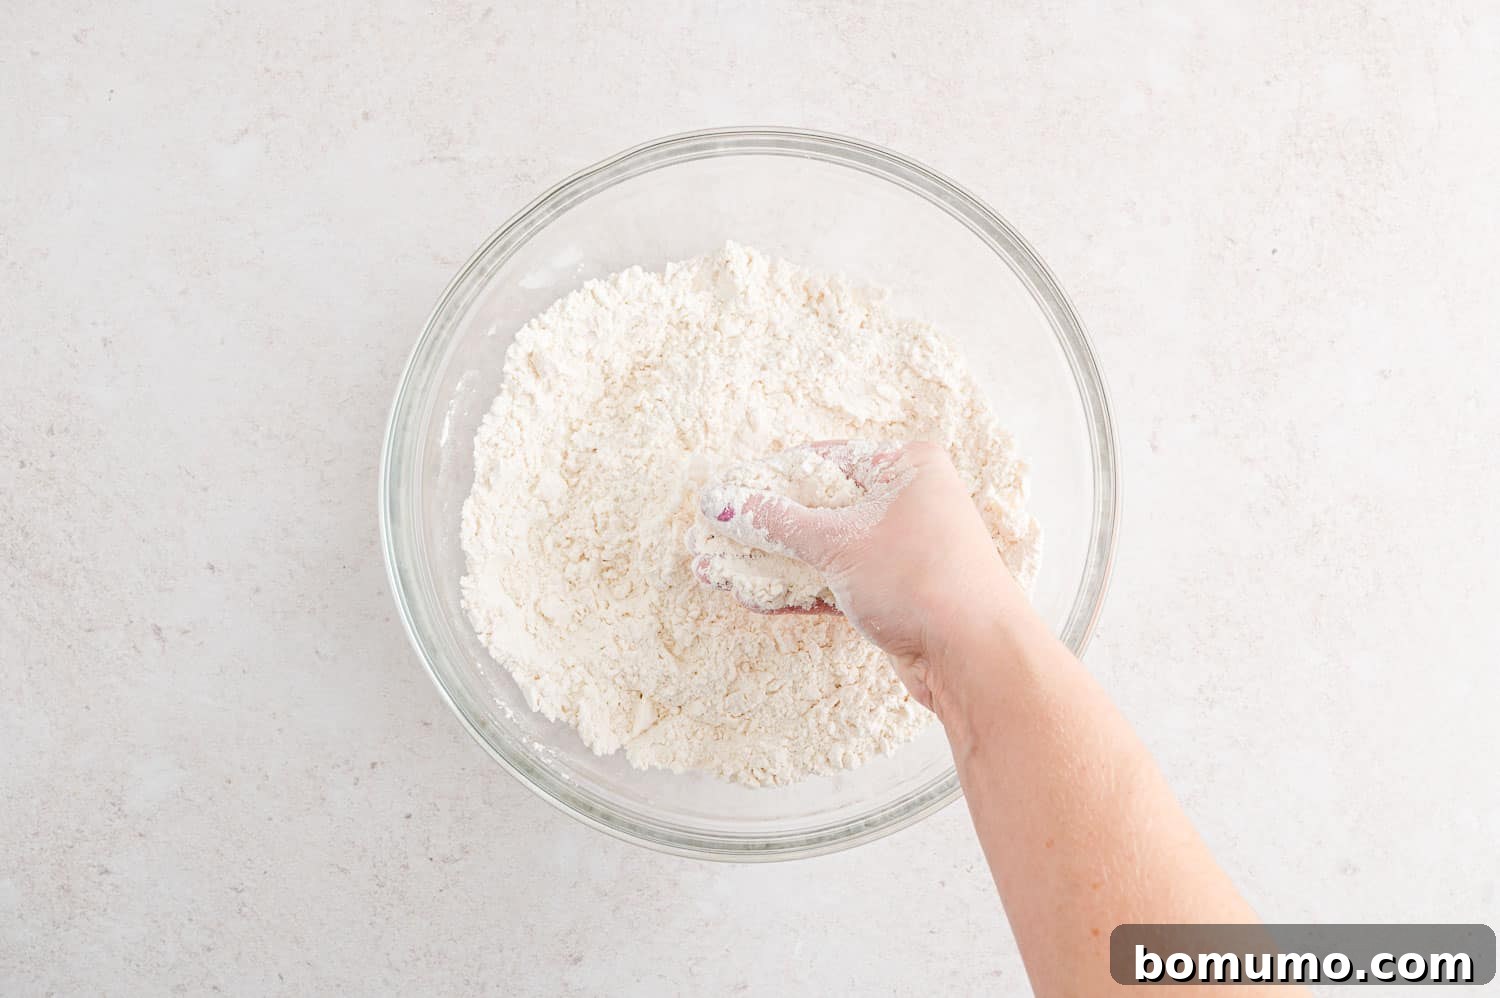
Ensure the butter is fully incorporated; the mixture should have a uniform, coarse crumb texture. Now, if you’re using raisins, gently fold them into the mixture until evenly distributed. This ensures every slice has a burst of sweet fruit.
4. Add Wet Ingredients: Bringing the Dough Together
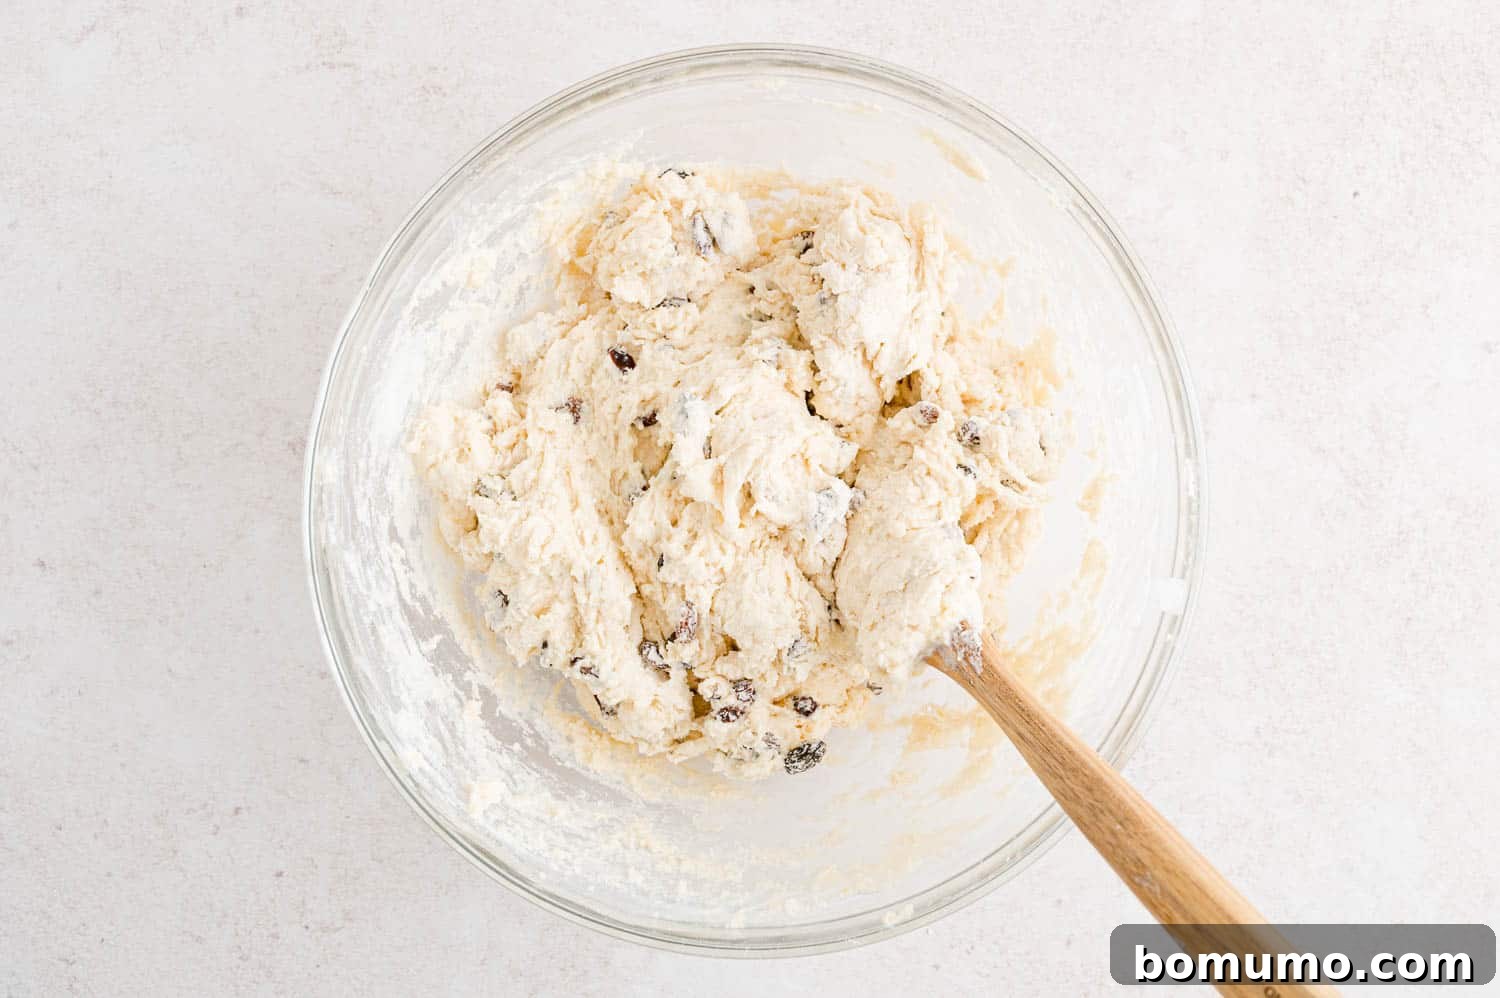
In a separate small bowl, lightly whisk your large egg until the yolk and white are just combined. Pour the beaten egg into the bowl with your dry ingredients, followed by the buttermilk. Using a heavy wooden spoon or a specialized dough whisk, begin to stir the mixture. The dough will quickly become very thick and shaggy.
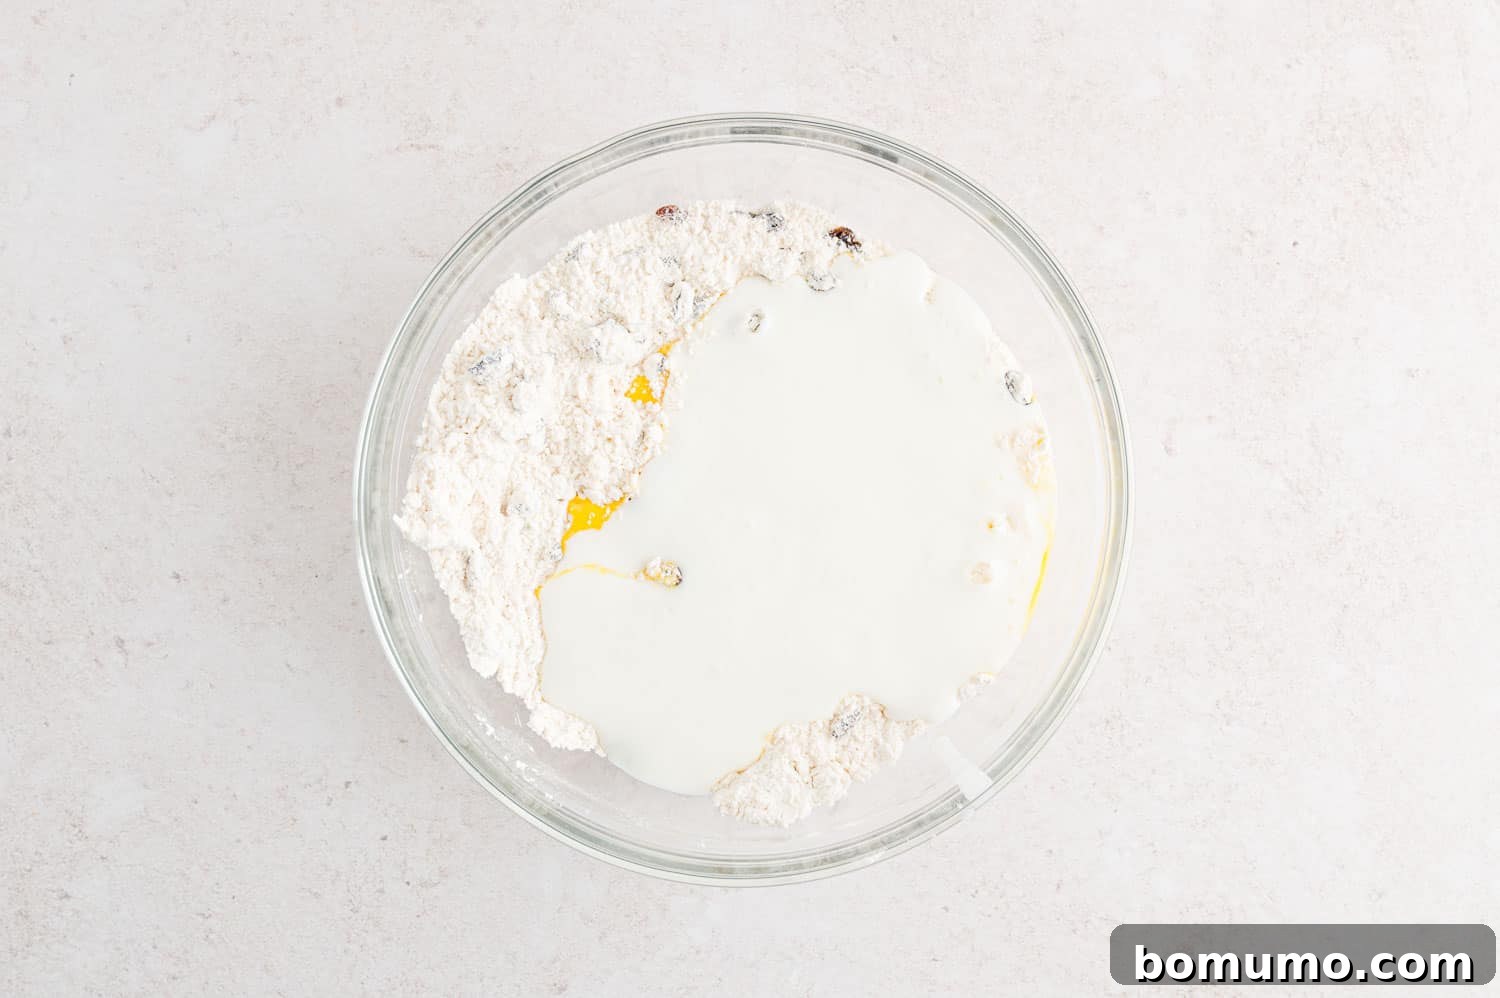
Continue stirring until a thick, somewhat shaggy dough forms.
5. Shape the Dough: A Gentle Touch is Key
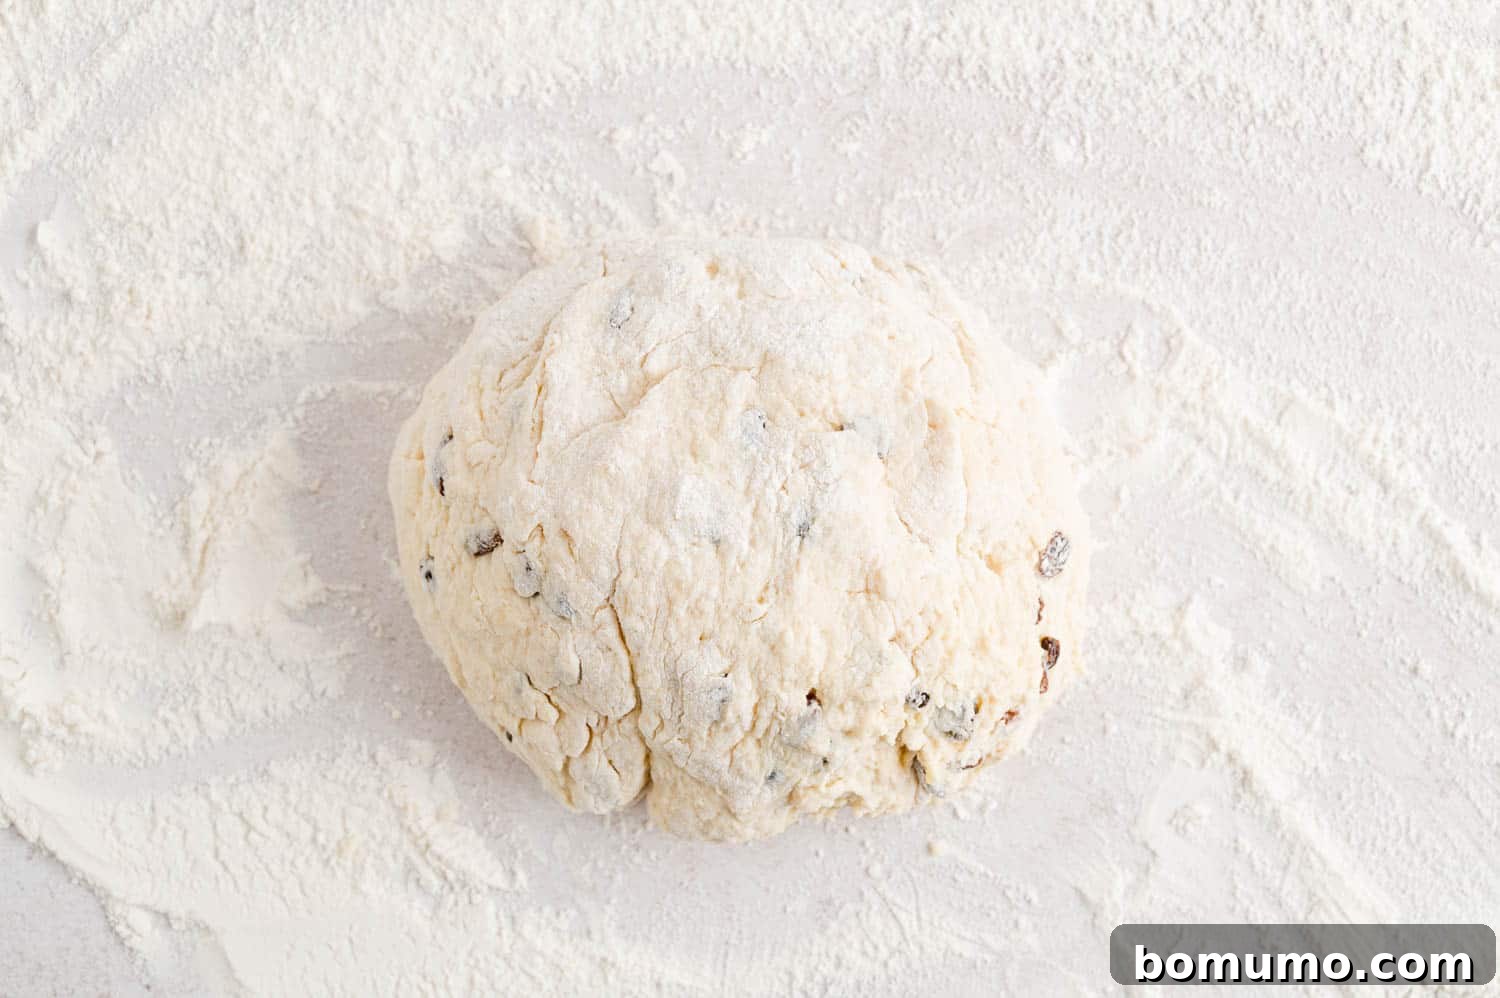
Once the dough becomes too difficult to stir with a spoon, scrape it out of the bowl onto a lightly floured surface. The dough will be noticeably thick, sticky, and shaggy – this is perfectly normal for soda bread! Sprinkle the top of the dough lightly with additional flour, making it easier to handle without sticking excessively to your hands.
Gently knead the dough just enough to bring all the ingredients together and form it into a cohesive ball. The key here is to avoid overworking the dough. Too much kneading can develop the gluten excessively, resulting in a tougher bread. Knead just until the dry bits are fully incorporated and you can shape it into a round loaf. It should still feel fairly sticky.
6. Score the Top: More Than Just Decoration
Carefully transfer your round loaf onto the prepared baking sheet. Now, dip the edge of a sharp knife in flour to prevent sticking, and make a deep cut across the top of the dough. Dip the knife in flour again and make another deep cut, forming a large “X” shape across the entire top surface of the loaf. These cuts should be about 5 inches long and roughly ½-inch deep.
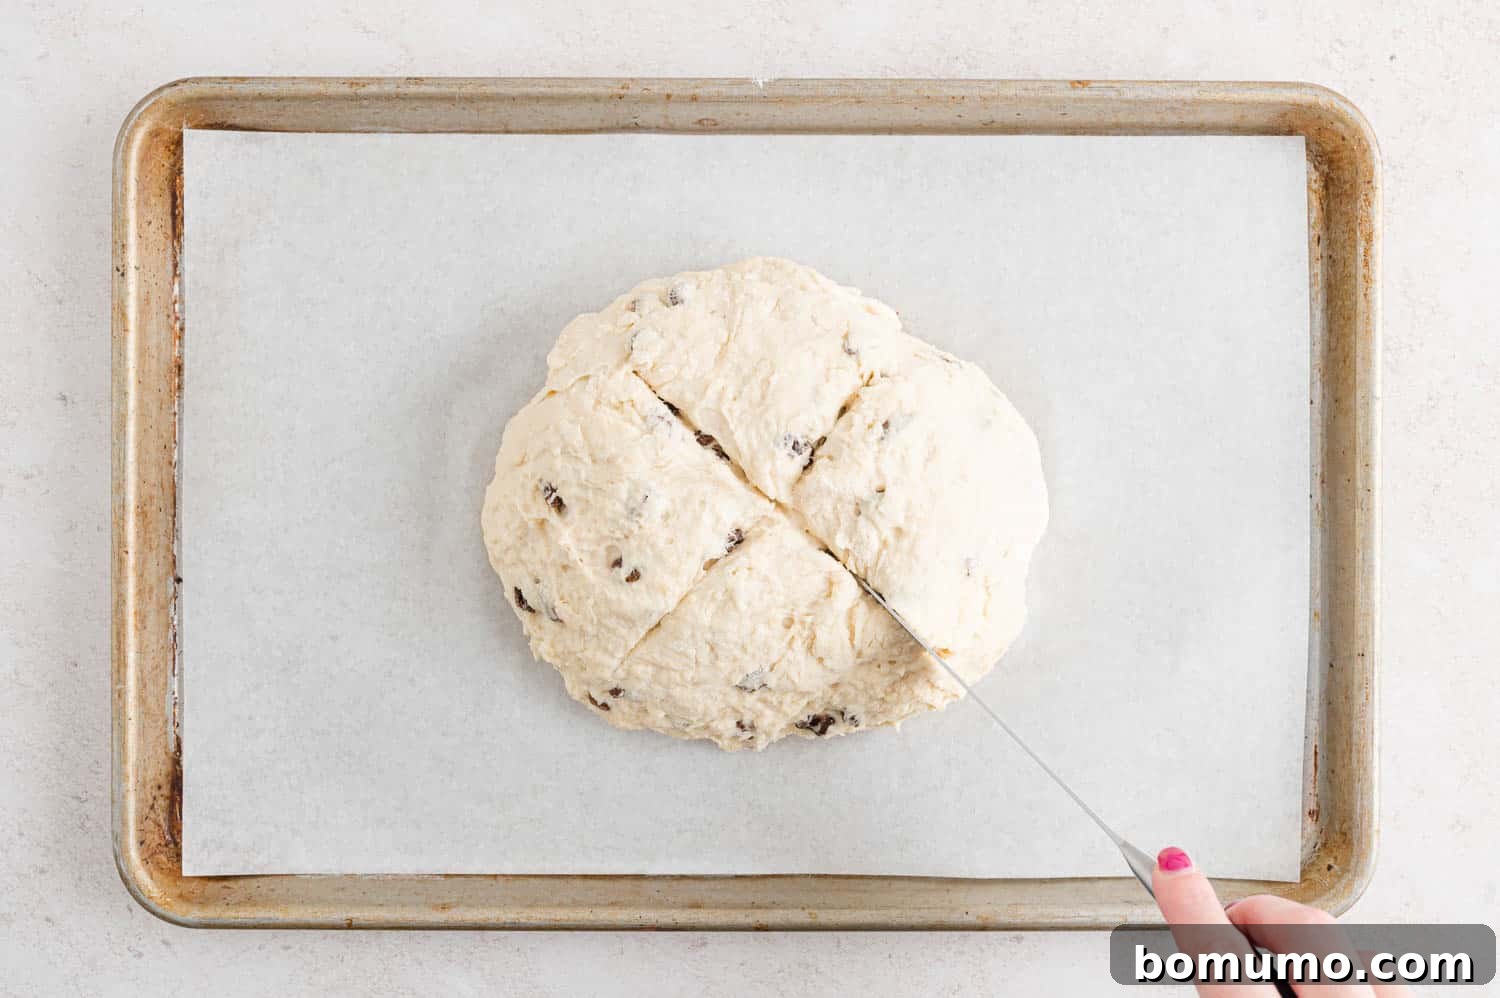
While folklore suggests the “X” is made to release mischievous fairies or the devil, there’s a practical scientific reason behind this tradition. As the baking soda reacts with the buttermilk in the oven, carbon dioxide gas is produced, causing the bread to rise. The deep cuts provide a natural expansion point, allowing the bread to bake evenly and achieve a beautifully rustic appearance. Without these scores, the top of the bread would likely crack and split in a less controlled, potentially less attractive manner.
7. Bake the Bread: Achieve Golden Perfection
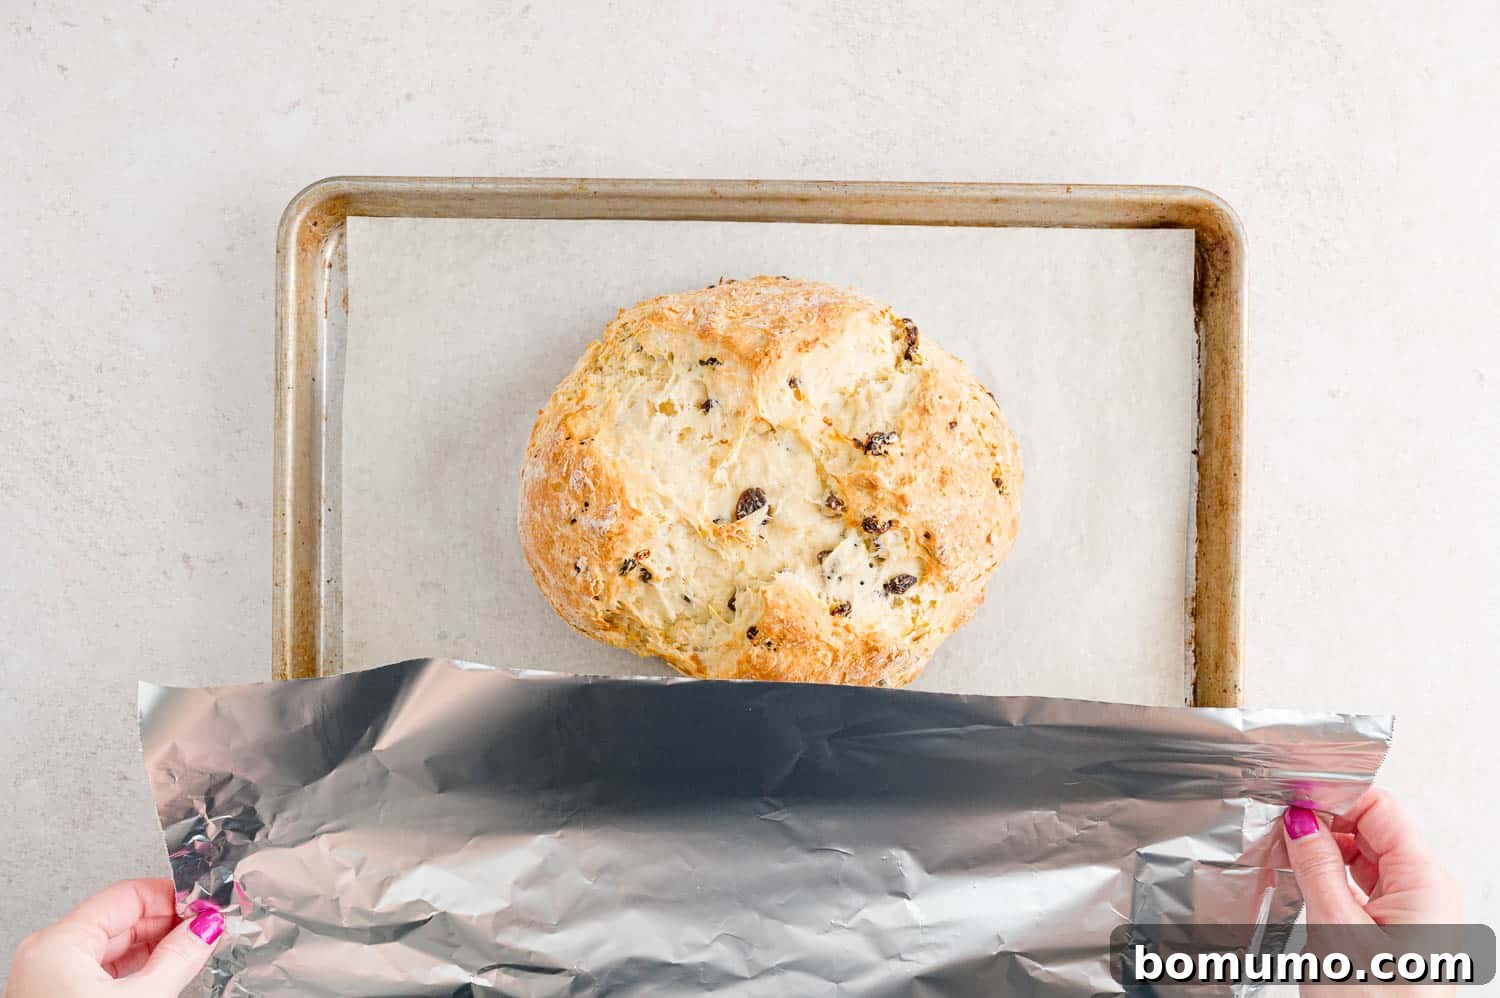
Place your scored loaf into the preheated oven and bake for 30 minutes. At this point, take a quick peek. If you notice the top is browning too quickly, loosely tent the loaf with a sheet of aluminum foil. This prevents excessive browning while allowing the inside to continue cooking. Continue baking for an additional 10 minutes, or until the crust is a rich golden brown. To confirm doneness, insert a toothpick into the very center of the bread. If it comes out clean or with only a few moist crumbs attached, your bread is ready. If it’s sticky and doughy, continue baking for a few more minutes until done.
8. Cool and Serve: The Reward for Your Efforts
Once baked, transfer the bread from the baking sheet to a wire rack to cool. While it’s best enjoyed warm, allow it to cool for at least 10 to 15 minutes before slicing. This brief cooling period helps the internal structure of the bread set, making it easier to slice cleanly and preventing it from becoming gummy.
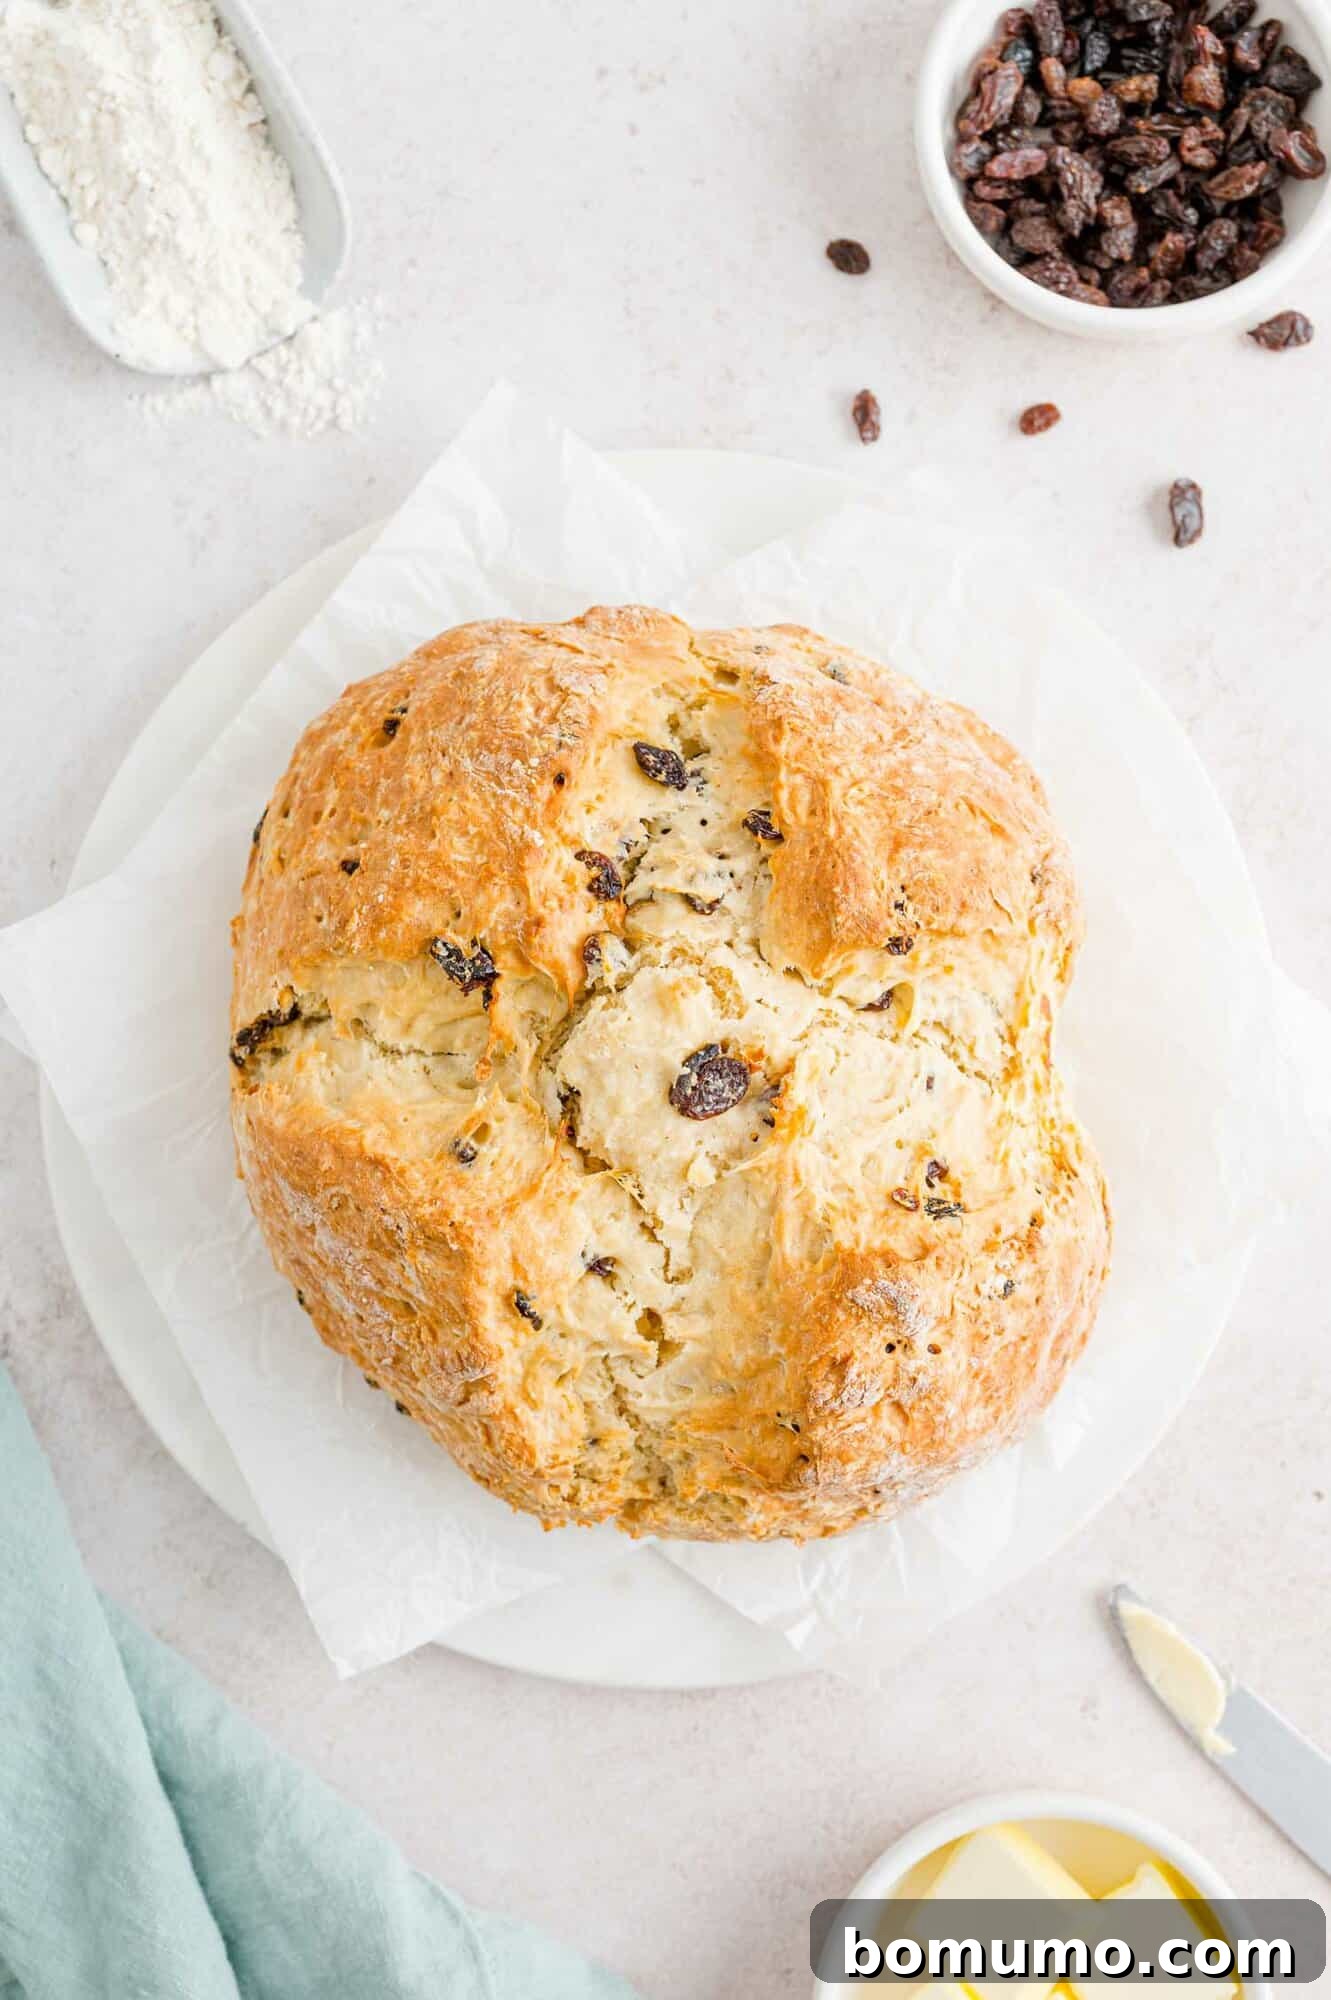
Serve your warm Irish Soda Bread with generous dollops of softened butter. For an extra touch of gourmet flair, consider preparing a compound butter by mixing softened butter with flavorings. Delicious options include a sweet Orange Honey Butter, a festive Cranberry Cinnamon Honey Butter, or a warming Gingerbread Butter. Each provides a unique flavor profile that beautifully complements the rustic charm of the bread.
Customize Your Irish Soda Bread: Creative Variations
One of the joys of baking is the ability to adapt recipes to your personal taste and dietary preferences. Irish Soda Bread is wonderfully versatile, offering several opportunities for customization:
- Whole Wheat Irish Soda Bread: For a heartier loaf with a deeper, nuttier flavor and increased fiber, substitute half of the all-purpose flour with whole wheat flour (2 cups all-purpose, 2 cups whole wheat). Keep in mind that whole wheat flour absorbs more liquid, so the dough might be slightly denser.
- Dried Fruit Options: While raisins are traditional, feel free to experiment with other dried fruits. Currants (specifically Zante currants), dried cranberries, or even dried cherries make excellent substitutions, each adding a different tartness or sweetness. If you prefer a plain loaf, you can simply omit the dried fruit altogether.
- Buttermilk Substitute: If you find yourself out of buttermilk, don’t despair! It’s incredibly easy to make a reliable substitute at home. Simply pour 2 tablespoons of white vinegar (or lemon juice) into a liquid measuring cup, then fill the rest of the cup with regular milk (dairy or non-dairy) to reach 1¾ cups. Stir it gently and let it sit for about 5 minutes until it thickens slightly and curdles. The acid in the vinegar will then react perfectly with the baking soda to leaven your bread. Note that dough made with a substitute might be slightly stickier, so you might need a touch more flour during the kneading stage.
Planning Ahead: Make-Ahead Considerations
While the convenience of preparing dough in advance can be appealing, Irish Soda Bread is generally not a good candidate for make-ahead preparation. The unique leavening process, which relies on the immediate chemical reaction between baking soda and buttermilk, begins as soon as these ingredients are combined. If the dough is made ahead and refrigerated overnight, this crucial reaction will have already occurred and diminished its effectiveness by the time it reaches the oven. This means your bread won’t achieve the light, airy texture and good rise that makes Irish Soda Bread so special.
The good news, however, is that Irish Soda Bread is inherently a “quick bread.” Its preparation time is so minimal – just a few minutes of mixing – that it’s perfectly suited for baking right before you plan to serve it. This ensures you enjoy the freshest, most flavorful loaf possible.
If you are specifically looking for a bread dough that can be prepared ahead of time and refrigerated, you might enjoy exploring recipes like my Parker House Rolls, which are designed for such flexibility.
Storage and Reheating Tips for Your Loaf
To ensure your Irish Soda Bread remains delicious and fresh, proper storage is key. Always allow the bread to cool completely on a wire rack before storing it. This prevents condensation from forming inside the storage container, which can make the crust soggy.
For short-term storage, place the cooled loaf in a plastic bag or an airtight container at room temperature. Because Irish Soda Bread is made without any preservatives, it typically stays fresh for a few days. The texture might firm up slightly, but a quick reheat can revive it.
For longer storage, both refrigeration and freezing are excellent options. If refrigerating, wrap the bread securely in plastic wrap to prevent it from drying out, then place it in an airtight container. It will keep well for about a week. To freeze, slice the bread first for convenience. Wrap individual slices or the whole loaf securely with plastic wrap, then add an additional layer of aluminum foil or freezer paper. Properly frozen Irish Soda Bread can maintain its quality for up to a few months. Thaw frozen bread at room temperature or gently warm slices in a toaster or oven.
Creative Ways to Enjoy Leftover Irish Soda Bread
Even if you have a few slices of Irish Soda Bread left over, don’t let them go to waste! Leftover soda bread is absolutely wonderful when toasted, transforming into a crispy, flavorful base for a variety of meals and snacks.
Consider making a gourmet Avocado Toast for breakfast or lunch the following day. Simply toast a slice of your leftover soda bread until golden and crisp. Then, spread a generous layer of mashed ripe avocado over the top, add a vibrant slice of ripe tomato, and crown it with a perfectly cooked over-easy fried egg. The savory flavors of the avocado and egg, combined with the subtle sweetness and firm texture of the toasted soda bread, create a truly satisfying and delicious meal.
More Homemade Bread Recipes to Explore
No-Knead Dutch Oven Bread
Cranberry Walnut Bread with Oats
Healthy Pumpkin Bread Recipe
Classic Parker House Rolls
Authentic Irish Soda Bread Recipe
Average Rating: 4.80 from 5 votes
Rachel Gurk
20 mins
40 mins
10 mins
1 hr 10 mins
10 servings
Print Recipe
Ingredients
- 4 cups all-purpose flour, plus ¼ cup more for kneading
- 2 tablespoons sugar
- 1 teaspoon kosher salt
- 1 teaspoon baking soda
- 4 tablespoons butter, softened
- 1 cup raisins (or currants), optional
- 1 large egg, beaten
- 1 ¾ cups buttermilk (see note for substitute)
Instructions
- Preheat oven to 400ºF (200ºC). Line a baking sheet with parchment paper.
- In a large bowl, mix together flour, sugar, salt, and baking soda.
- Using your hands, knead in the softened butter until it resembles coarse crumbs. If using, mix in raisins.
- Add the beaten egg and buttermilk; mix well with a sturdy wooden spoon or a dough whisk until a shaggy, sticky dough forms.
- When the dough becomes too difficult to stir, turn it out onto a lightly floured surface. Sprinkle the top of the dough lightly with flour. Knead lightly, just enough to bring the dough together into a ball so that you can shape it. The dough should still be fairly sticky.
- Form the dough into a round loaf, approximately 7 to 8 inches in diameter. Transfer it to the prepared baking sheet. Using a sharp knife dipped in flour, score the top of the dough deeply with an X shape (about 5 inches long and ½-inch deep).
- Bake for 30 minutes. Check the bread; if the top is browning too quickly, loosely tent it with aluminum foil. Continue baking for an additional 10 minutes, or until the crust is golden brown and a toothpick inserted into the center comes out clean or with only a few crumbs attached.
- Let the bread cool for 5 to 10 minutes on the baking sheet before transferring it to a wire rack to cool further. Slice into wedges or thick slices and serve warm, ideally with plenty of softened butter.
Notes
- Make a buttermilk substitute: To make 1¾ cups of buttermilk substitute, put 2 tablespoons of white vinegar (or lemon juice) into a liquid measuring cup. Fill the rest of the cup with milk. Stir well and let it sit for 5 minutes before using. Note that the dough might be slightly stickier with this substitute, so you may need a bit more flour for kneading.
- Whole wheat soda bread: For a heartier loaf, substitute 2 cups of the all-purpose flour with whole wheat flour.
- To store, ensure the bread is completely cool before placing it in a plastic bag or airtight container.
Recipe Video
(A video demonstrating the Irish Soda Bread recipe steps would typically be embedded here.)
Nutrition Information (Approximate)
, Calories: 308 kcal
, Carbohydrates: 54 g
, Protein: 8 g
, Fat: 7 g
, Saturated Fat: 4 g
, Polyunsaturated Fat: 1 g
, Monounsaturated Fat: 2 g
, Trans Fat: 0.2 g
, Cholesterol: 35 mg
, Sodium: 434 mg
, Potassium: 238 mg
, Fiber: 2 g
, Sugar: 5 g
, Vitamin A: 237 IU
, Vitamin C: 1 mg
, Calcium: 64 mg
, Iron: 3 mg
Nutrition information is automatically calculated and should be used only as an approximation.