
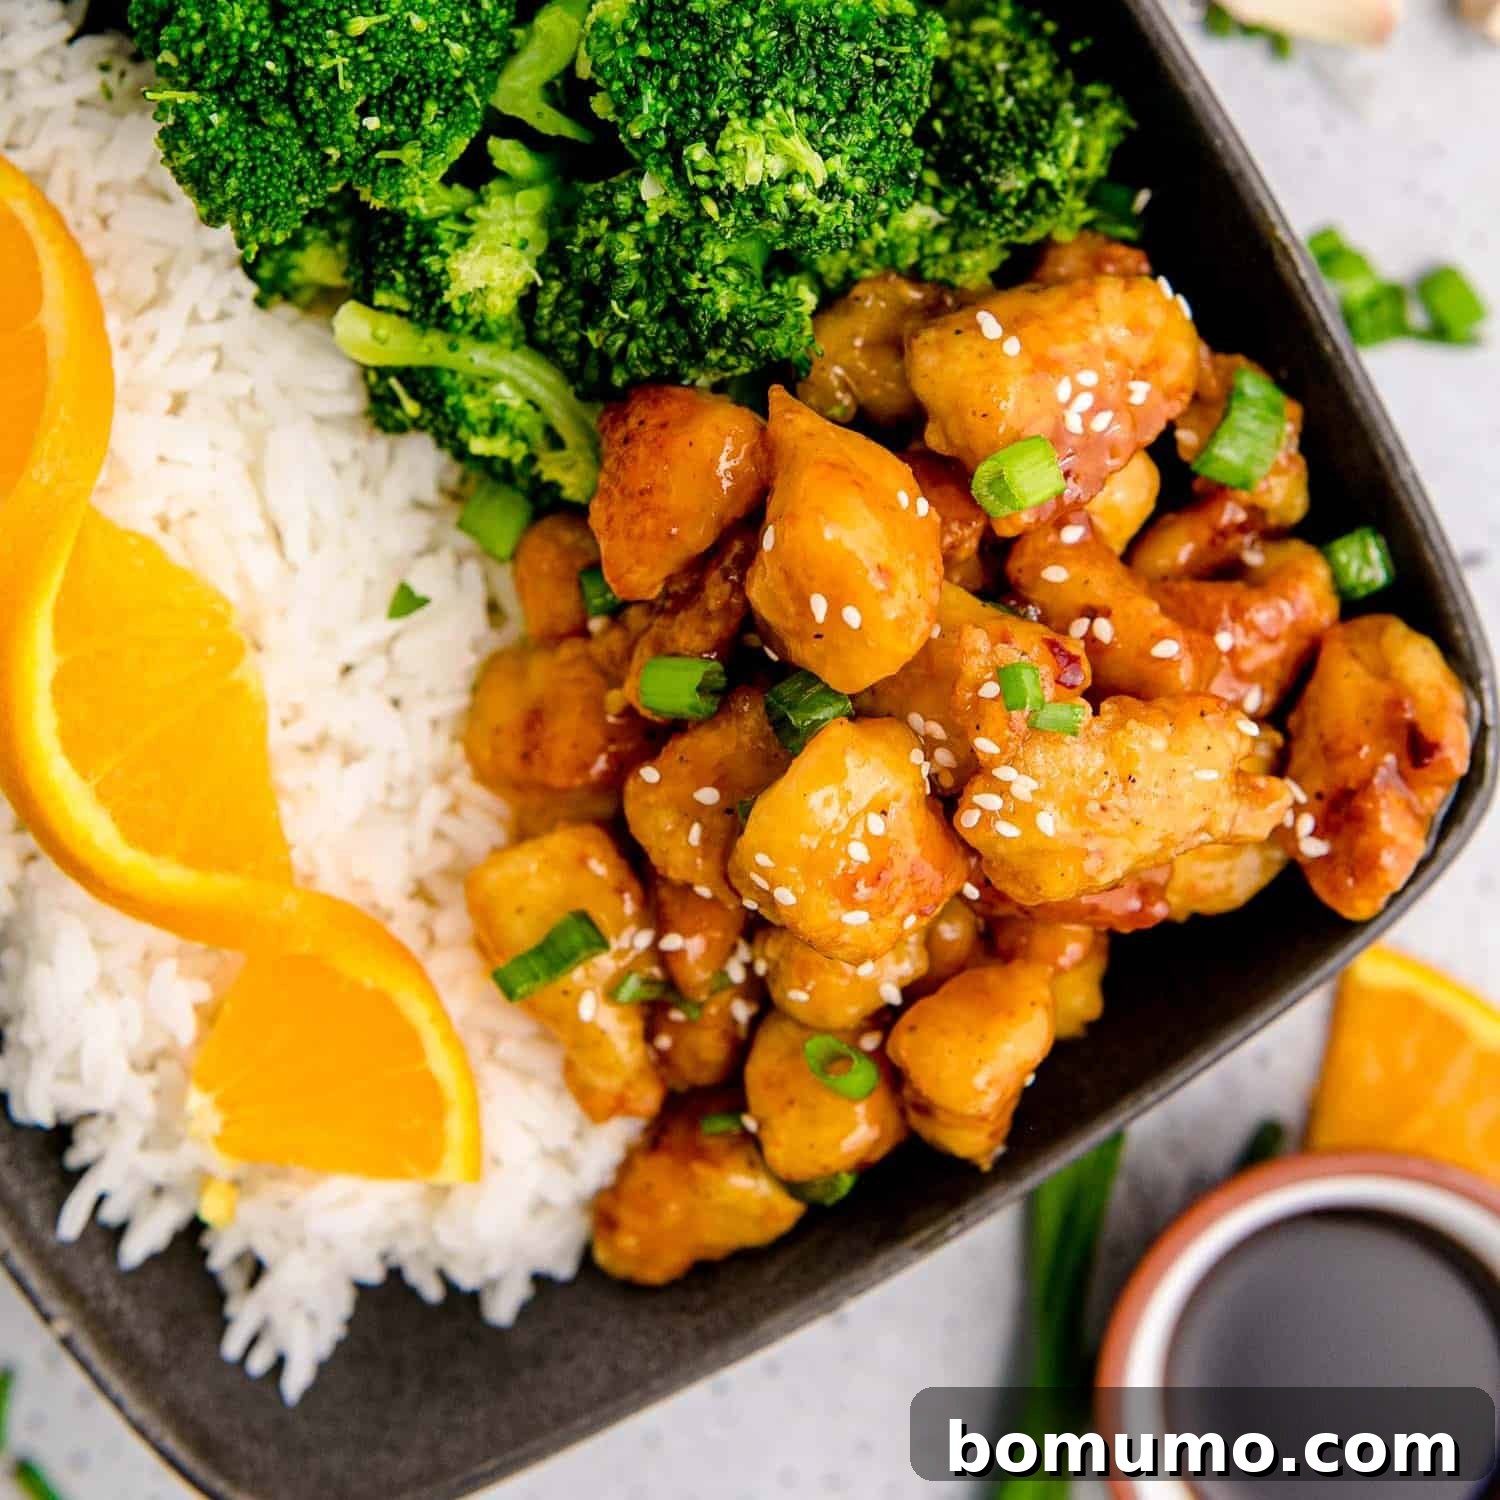
Recipe Overview: Your Path to Perfect Orange Chicken
Why you’ll love it: This isn’t just another orange chicken recipe; it’s *the* ultimate homemade orange chicken experience that outshines any takeout! You’ll revel in the irresistible combination of perfectly fried, succulent chicken bites enveloped in a vibrant, zesty orange sauce that boasts a delightful hint of heat. Crafted in your own kitchen, this dish guarantees freshness, quality, and a flavor profile that’s simply unparalleled.
How long it takes: Approximately 40 minutes from prep to plate, making it an ideal choice for a weeknight dinner or a special weekend treat.
Equipment you’ll need: A sturdy large skillet (or a Dutch oven for less splatter), kitchen tongs, paper towels for draining, and several mixing bowls for your ingredients.
Servings: This recipe is designed to generously serve 4 people, making it perfect for family dinners or entertaining friends.
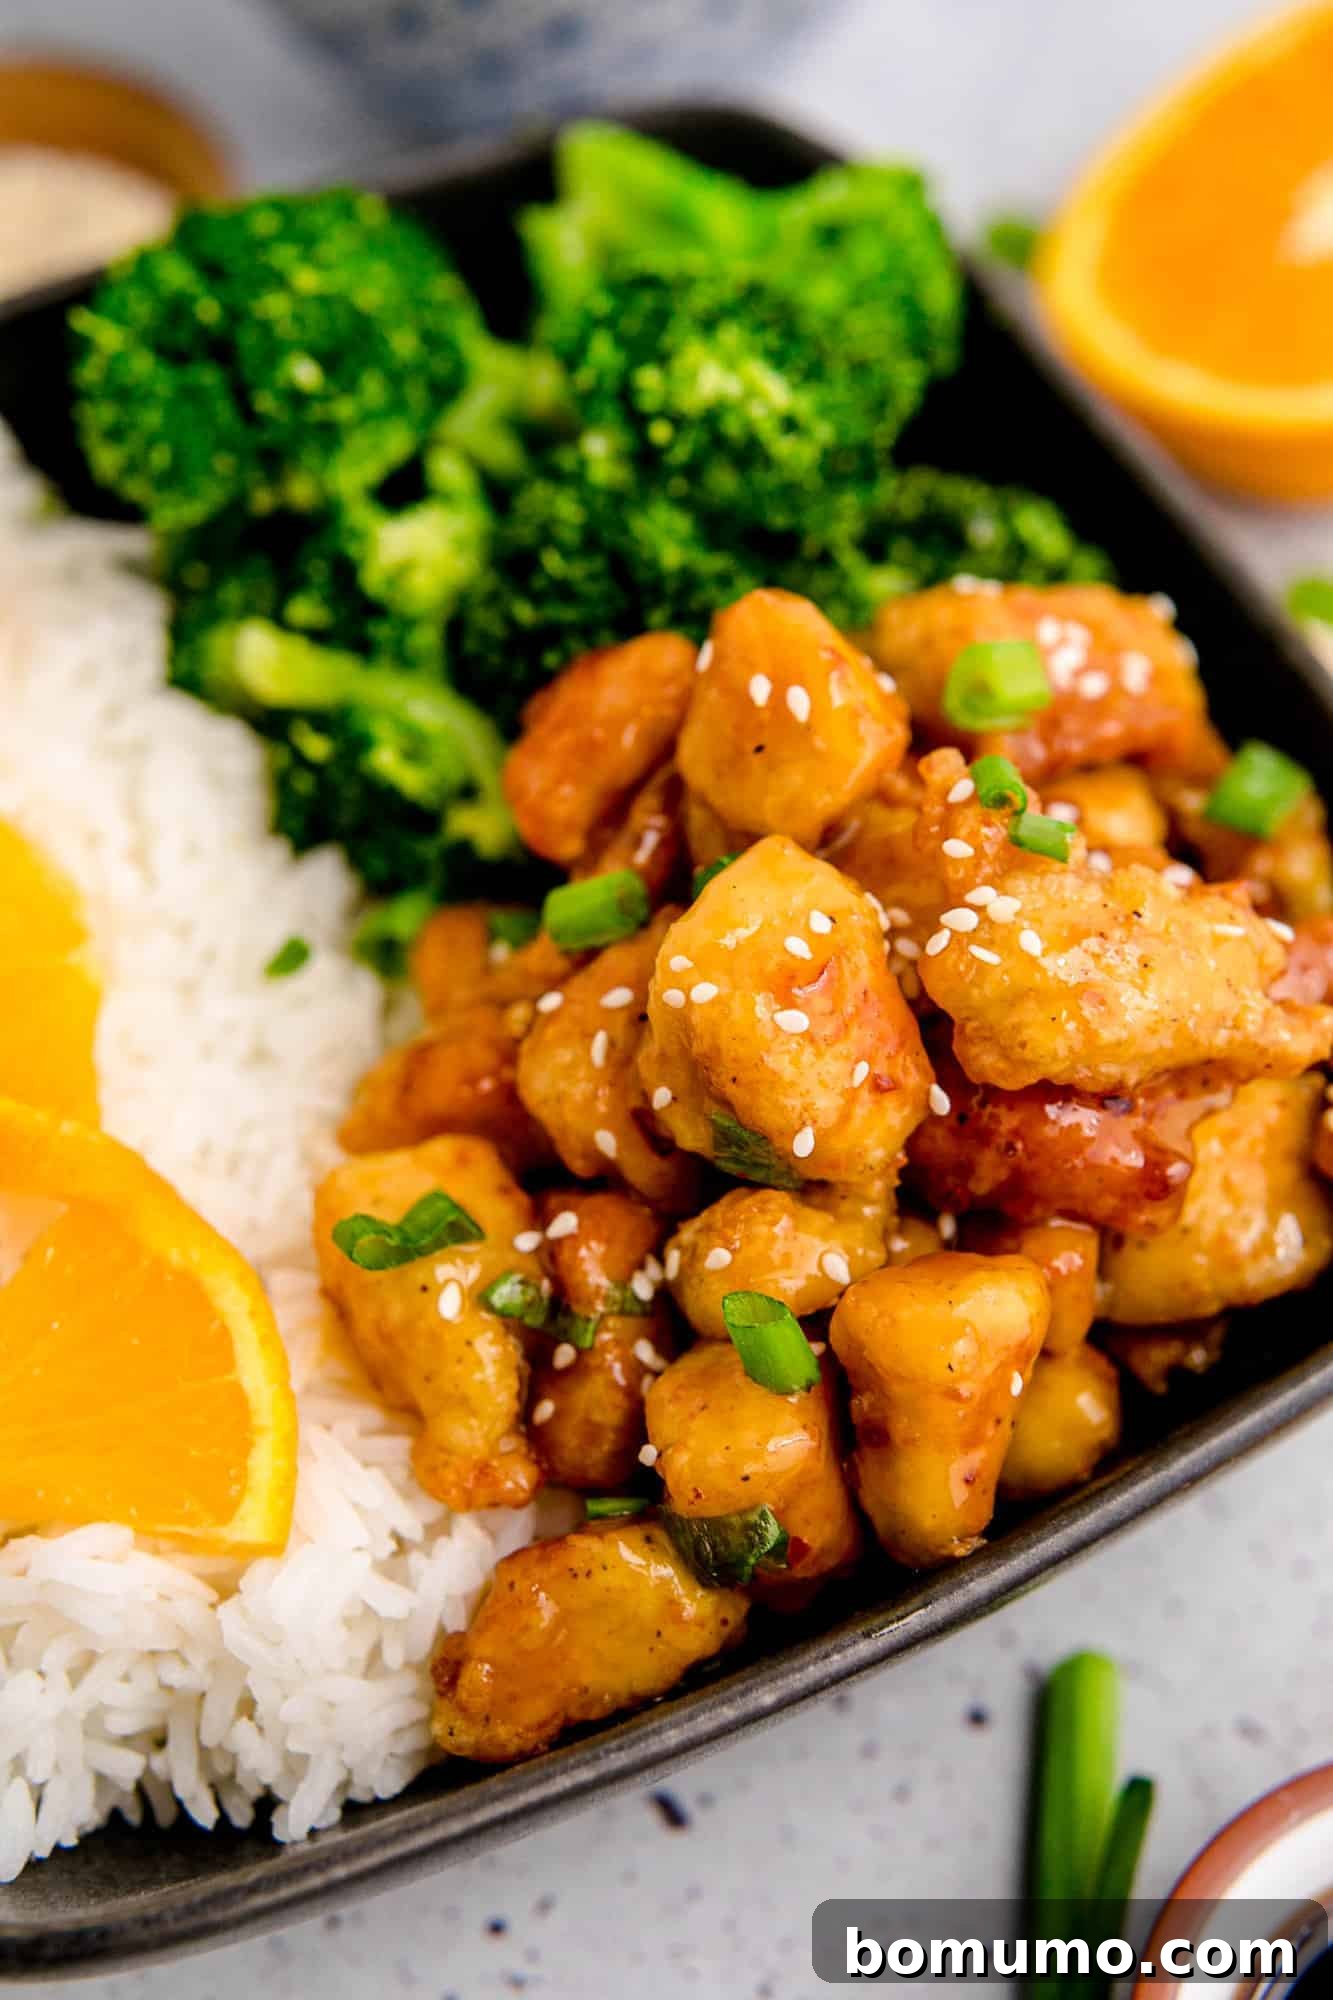
Mastering Homemade Orange Chicken: A Takeout Favorite Reimagined
Orange chicken holds a special place in the hearts of many, often serving as a beloved staple on Chinese American restaurant menus. The allure of tender, juicy chicken, perfectly crispy on the outside and moist within, generously coated in a bright, sweet, and tangy sauce, is hard to resist. It’s a culinary masterpiece that combines textures and flavors in a truly satisfying way. While restaurant versions are undoubtedly popular, nothing quite compares to the satisfaction and superior taste of creating this iconic dish in your own kitchen. (For another crowd-pleaser, be sure to explore our bang bang chicken recipe!)
Indeed, you can elevate your dining experience by preparing your very own homemade orange chicken. The advantages are numerous: you have complete control over the ingredients, ensuring high quality and healthier choices free from excessive additives often found in commercial preparations. This allows for customization to your exact preferences, whether you prefer it spicier, sweeter, or with an extra citrus kick. The knowledge that you’ve crafted such a delicious meal from scratch adds an immeasurable layer of enjoyment to every bite. We are confident that once you taste your homemade creation, you’ll be absolutely delighted!
Embarking on the journey of making orange chicken from scratch requires a modest investment of time and effort, but the rewards are truly worth it. As with many truly good things in life, a little dedication in the kitchen yields outstanding results. If you find yourself pressed for time on busy evenings, don’t worry, we’ve got you covered! Explore our curated list of 30-minute dinner recipes for quick fixes, or try other easy Asian-inspired dishes like this delightful bourbon chicken, the speedy Instant Pot honey sriracha chicken, or our comforting crockpot teriyaki chicken. For a lightning-fast option, our Kung Pao shrimp is ready in just 30 minutes, and it can easily be adapted with chicken if that’s your preference.
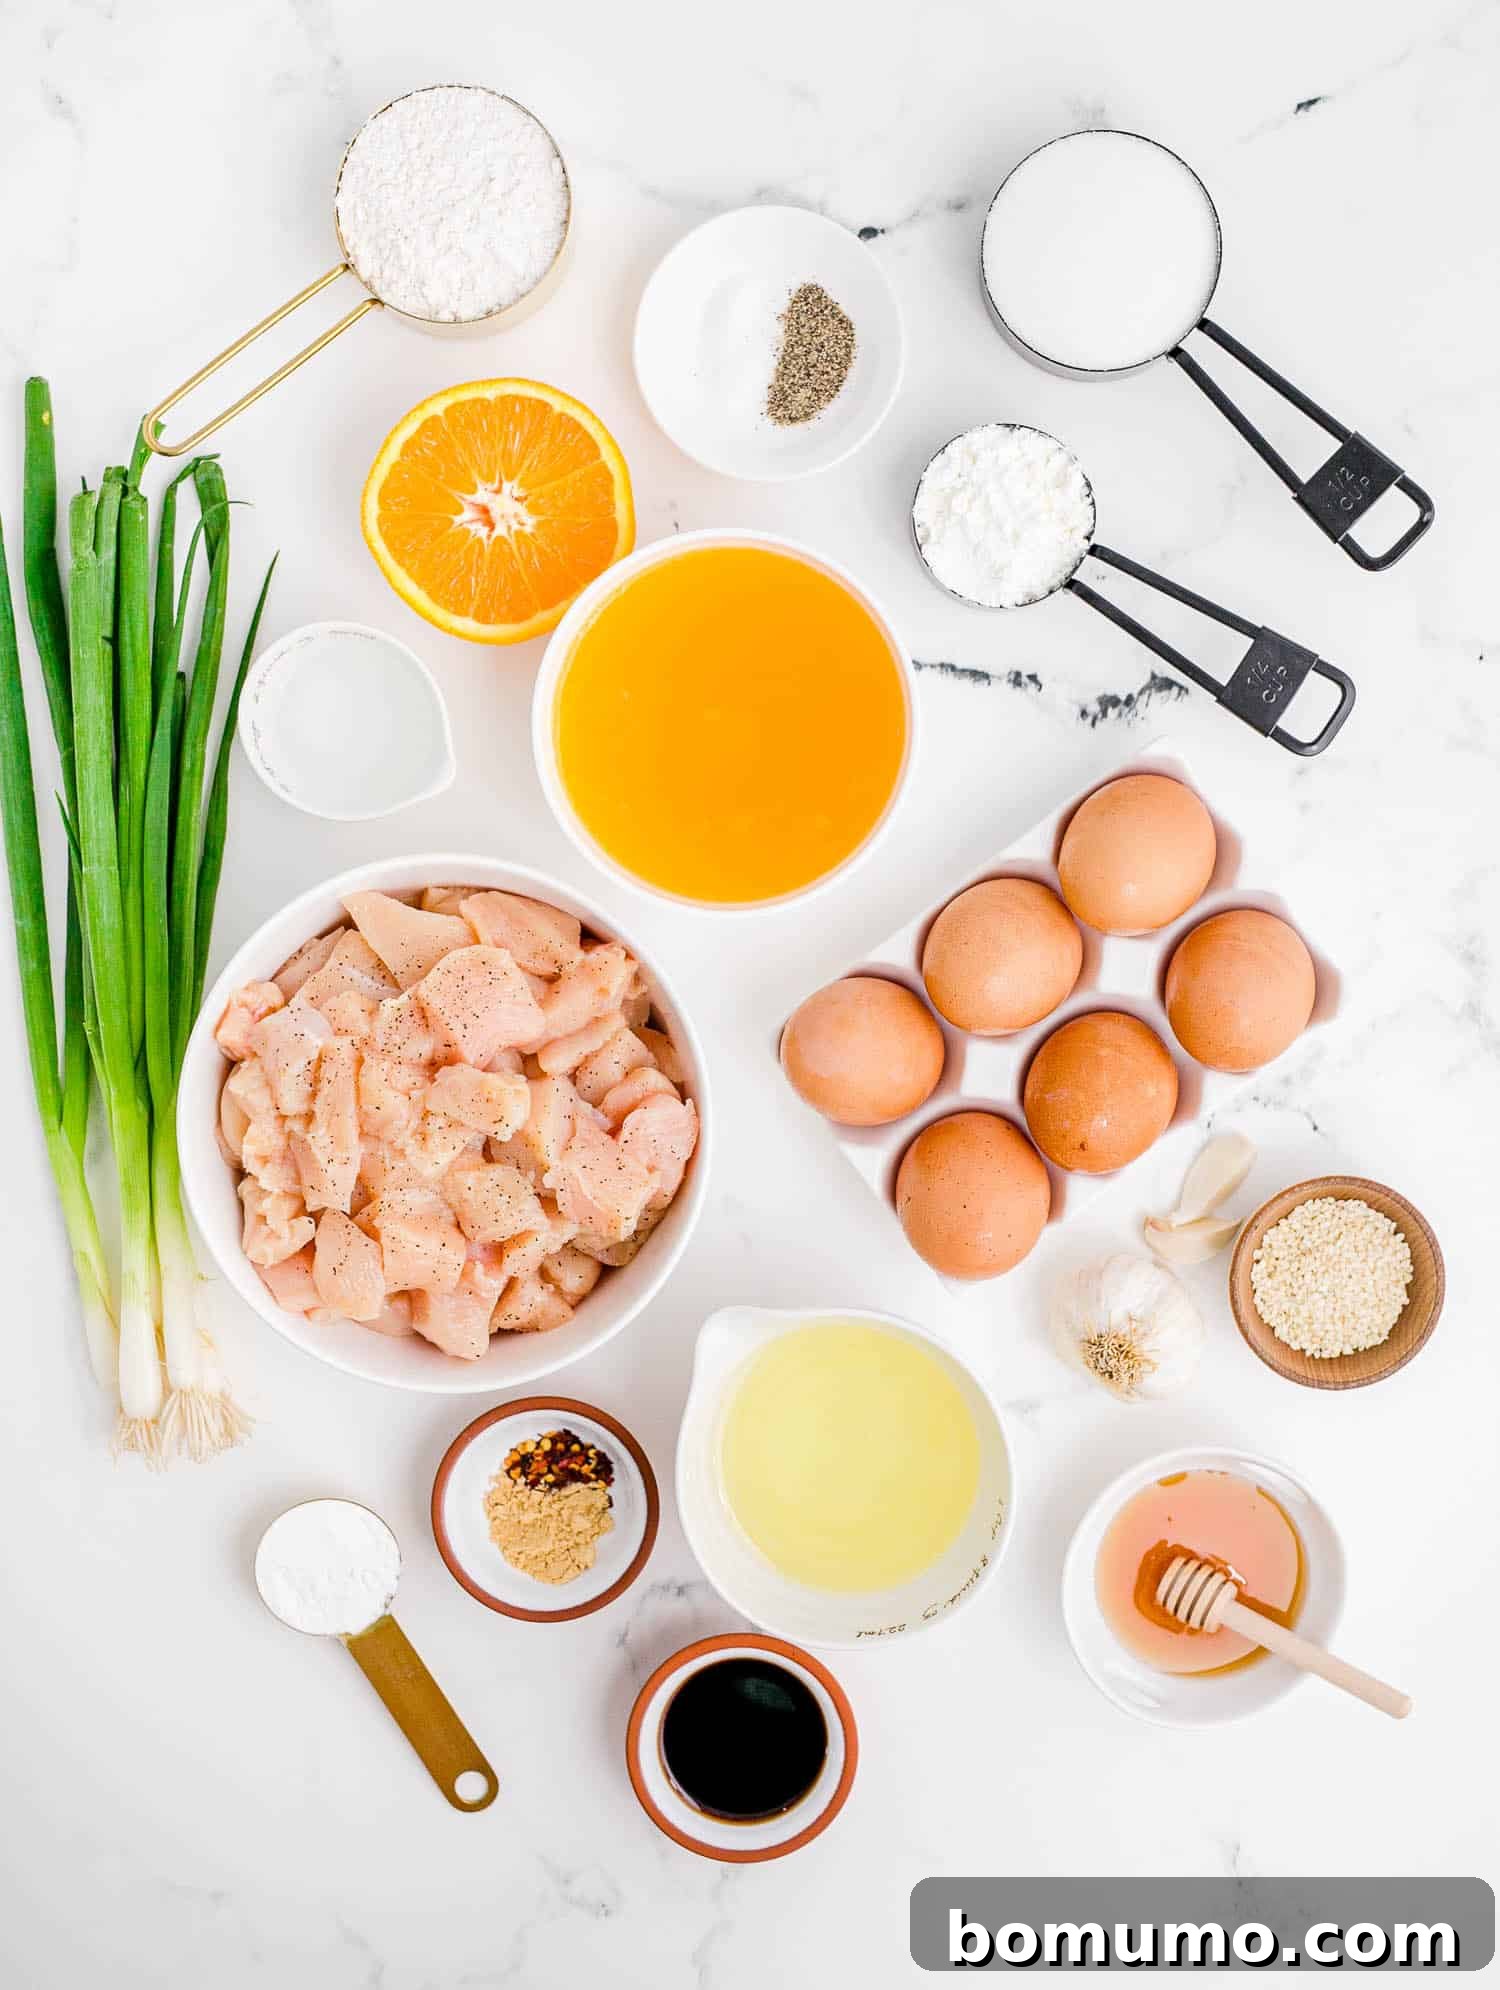
Key Ingredients for Unforgettable Orange Chicken
Crafting the perfect homemade orange chicken begins with understanding the role each ingredient plays. Here’s a closer look at what you’ll need and why it matters:
- Boneless Skinless Chicken Breasts: We recommend cutting the chicken into uniform bite-size pieces, about ½-inch, to ensure even cooking and optimal crispiness. While breasts are leaner, boneless skinless chicken thighs are an excellent alternative if you prefer a richer, more succulent dark meat that tends to stay juicier. Regardless of your choice, aim for consistent sizing.
- Breading: Achieving that signature crispy exterior involves a crucial two-step breading process. First, the chicken is coated in beaten eggs, which act as a binder. Then, it’s dredged in a seasoned mixture of all-purpose flour and cornstarch. The cornstarch is key here, providing a lighter, crispier coating that holds up beautifully during frying, much like what you’d find in restaurant versions. Ensure the flour is well seasoned to add flavor from the first bite.
- Orange Juice: The heart of your sauce! For the brightest, most authentic citrus flavor, freshly squeezed orange juice is highly recommended. It offers a natural tang and sweetness that refrigerated juice, while convenient, simply can’t replicate. If using store-bought, opt for a high-quality, pulp-free variety. Consider adding a touch of orange zest to the sauce for an intensified aroma and flavor.
- Cornstarch (for the Sauce): This versatile ingredient is your secret weapon for achieving the perfect sauce consistency. It thickens the orange sauce, giving it that glossy, rich texture without overpowering the delicate flavors. When mixing, it’s crucial to first create a “slurry” by dissolving cornstarch in a small amount of cold liquid (like orange juice) to prevent lumps before adding it to the hot sauce.
- White Vinegar, White Granulated Sugar, and Honey: This triumvirate creates the essential tangy-sweet balance that defines a great orange sauce. White vinegar provides a sharp, clean acidity, while granulated sugar and honey contribute sweetness and a lovely glaze. Honey also adds a subtle floral note and helps with the sauce’s body. You can experiment with brown sugar for a deeper, more molasses-like sweetness if preferred.
- Soy Sauce: A foundational ingredient that brings umami depth and savory complexity to the sauce. We highly recommend using a low sodium soy sauce to better control the overall saltiness of your dish, allowing the other flavors to shine without being overwhelmed. Tamari is a great gluten-free alternative.
- Ginger, Garlic, Red Pepper Flakes: These aromatics and spices are vital for building a robust and layered flavor profile. Freshly minced ginger and garlic offer unparalleled pungency and warmth. Red pepper flakes introduce a pleasant “tinge of heat” that perfectly complements the sweet and tangy notes. Feel free to adjust the amount of garlic and red pepper flakes to your liking – add more for an extra zesty and spicy kick!
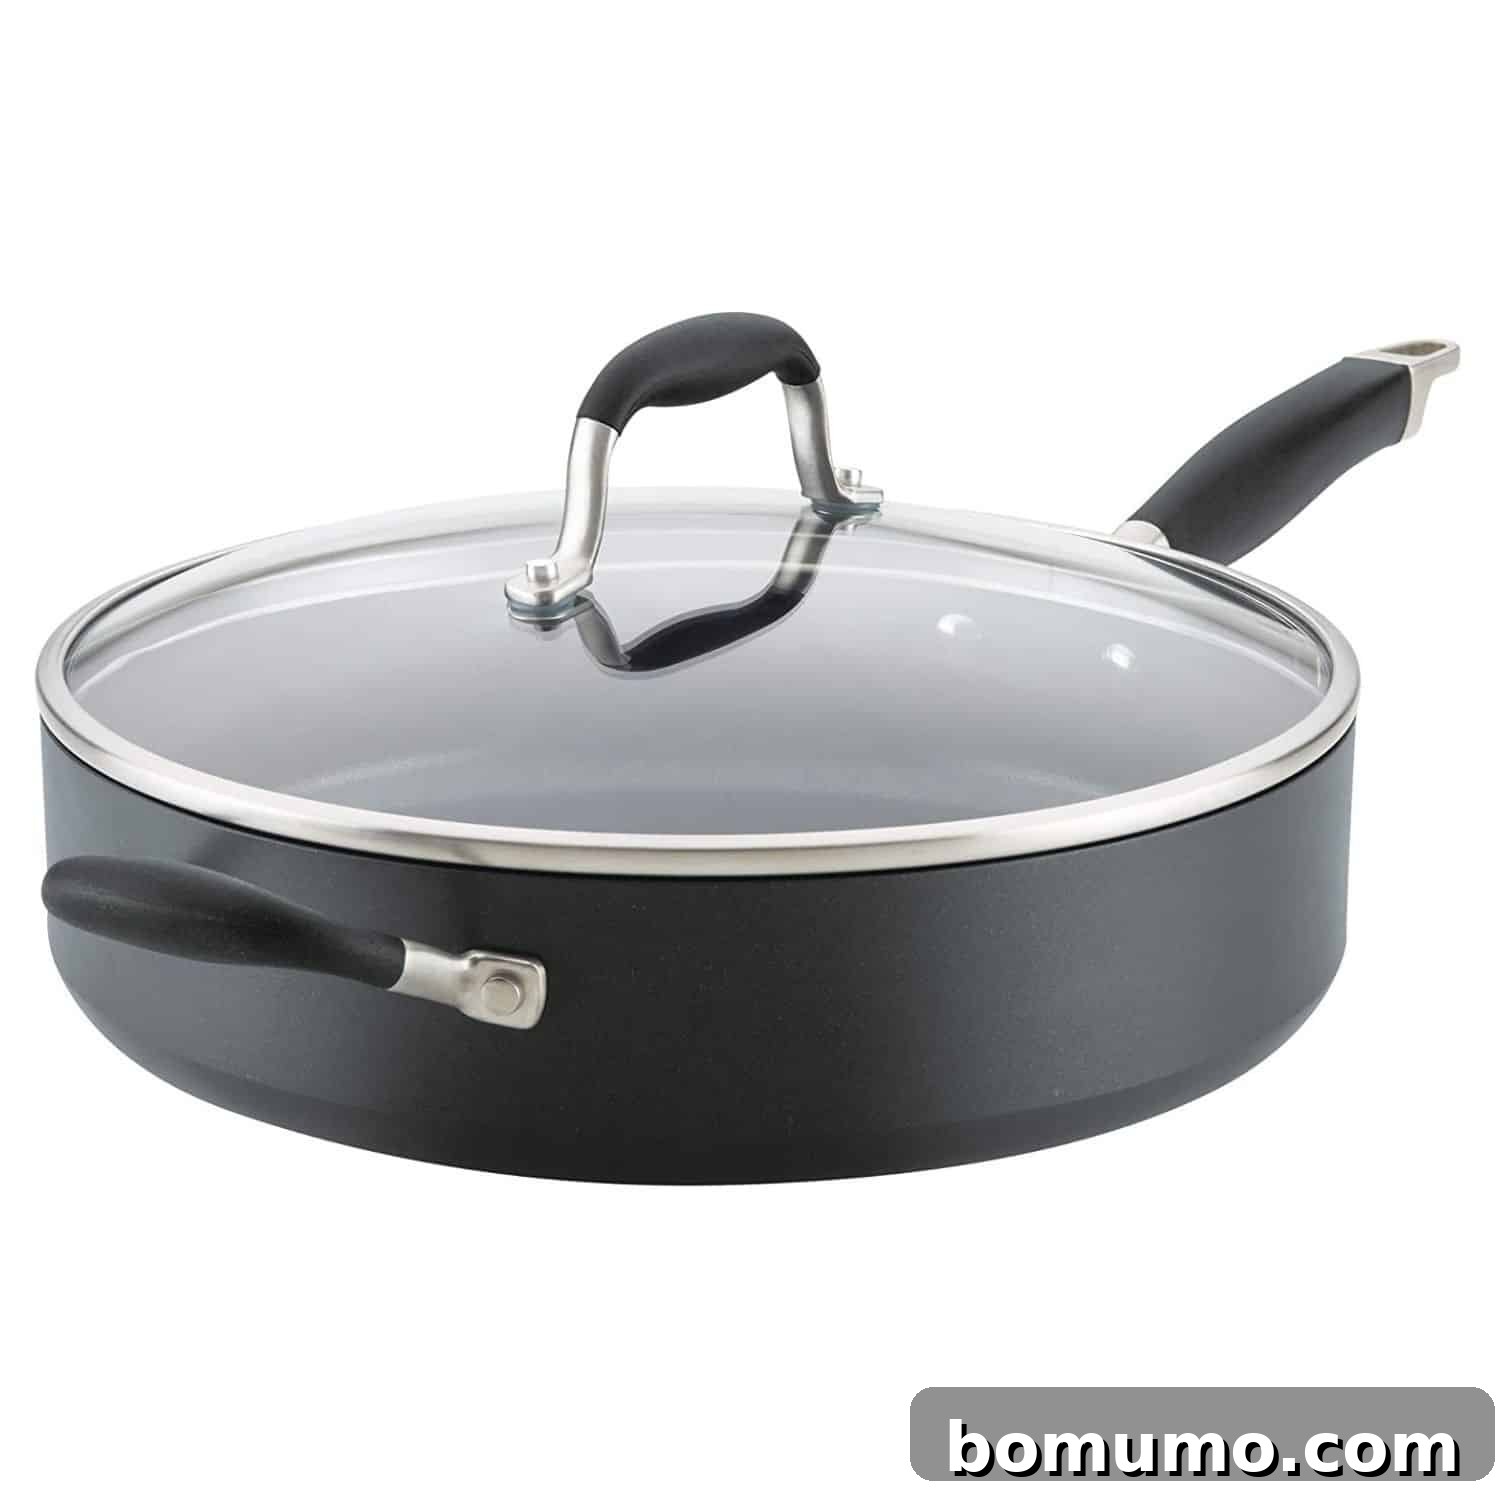
Essential Equipment: The Straight-Sided Skillet
A high-quality, straight-sided skillet, often referred to as a sauté pan, is an indispensable tool for preparing this orange chicken. Its deep walls are ideal for frying, effectively containing splatters and making cleanup easier. This type of pan also excels in preparing one-pan pasta dishes and many other culinary creations, proving itself to be a versatile workhorse in any kitchen. You’ll find yourself reaching for this reliable pan time and time again!
Step-by-Step Guide: How to Make Irresistible Homemade Orange Chicken
Creating this delightful dish is a rewarding process that comes together smoothly with a bit of organization. Here’s a detailed guide to ensure your orange chicken is a resounding success:
1. Master Your Mise en Place (Do the Prep Work): Before you even turn on the stove, having all your ingredients prepped and organized, a technique known as “mise en place,” is crucial for a stress-free cooking experience. Start by getting your rice steaming; consider making rice in your Instant Pot for an effortless side. Decide on your accompanying vegetables and get them prepped or started. Read through the entire recipe carefully to familiarize yourself with each step. Cut the chicken into uniform bite-size pieces, ensuring they’ll cook evenly. Freshly squeeze the oranges for maximum flavor. Set out all your bowls, measuring spoons, and other necessary equipment. Now, you’re ready to begin!
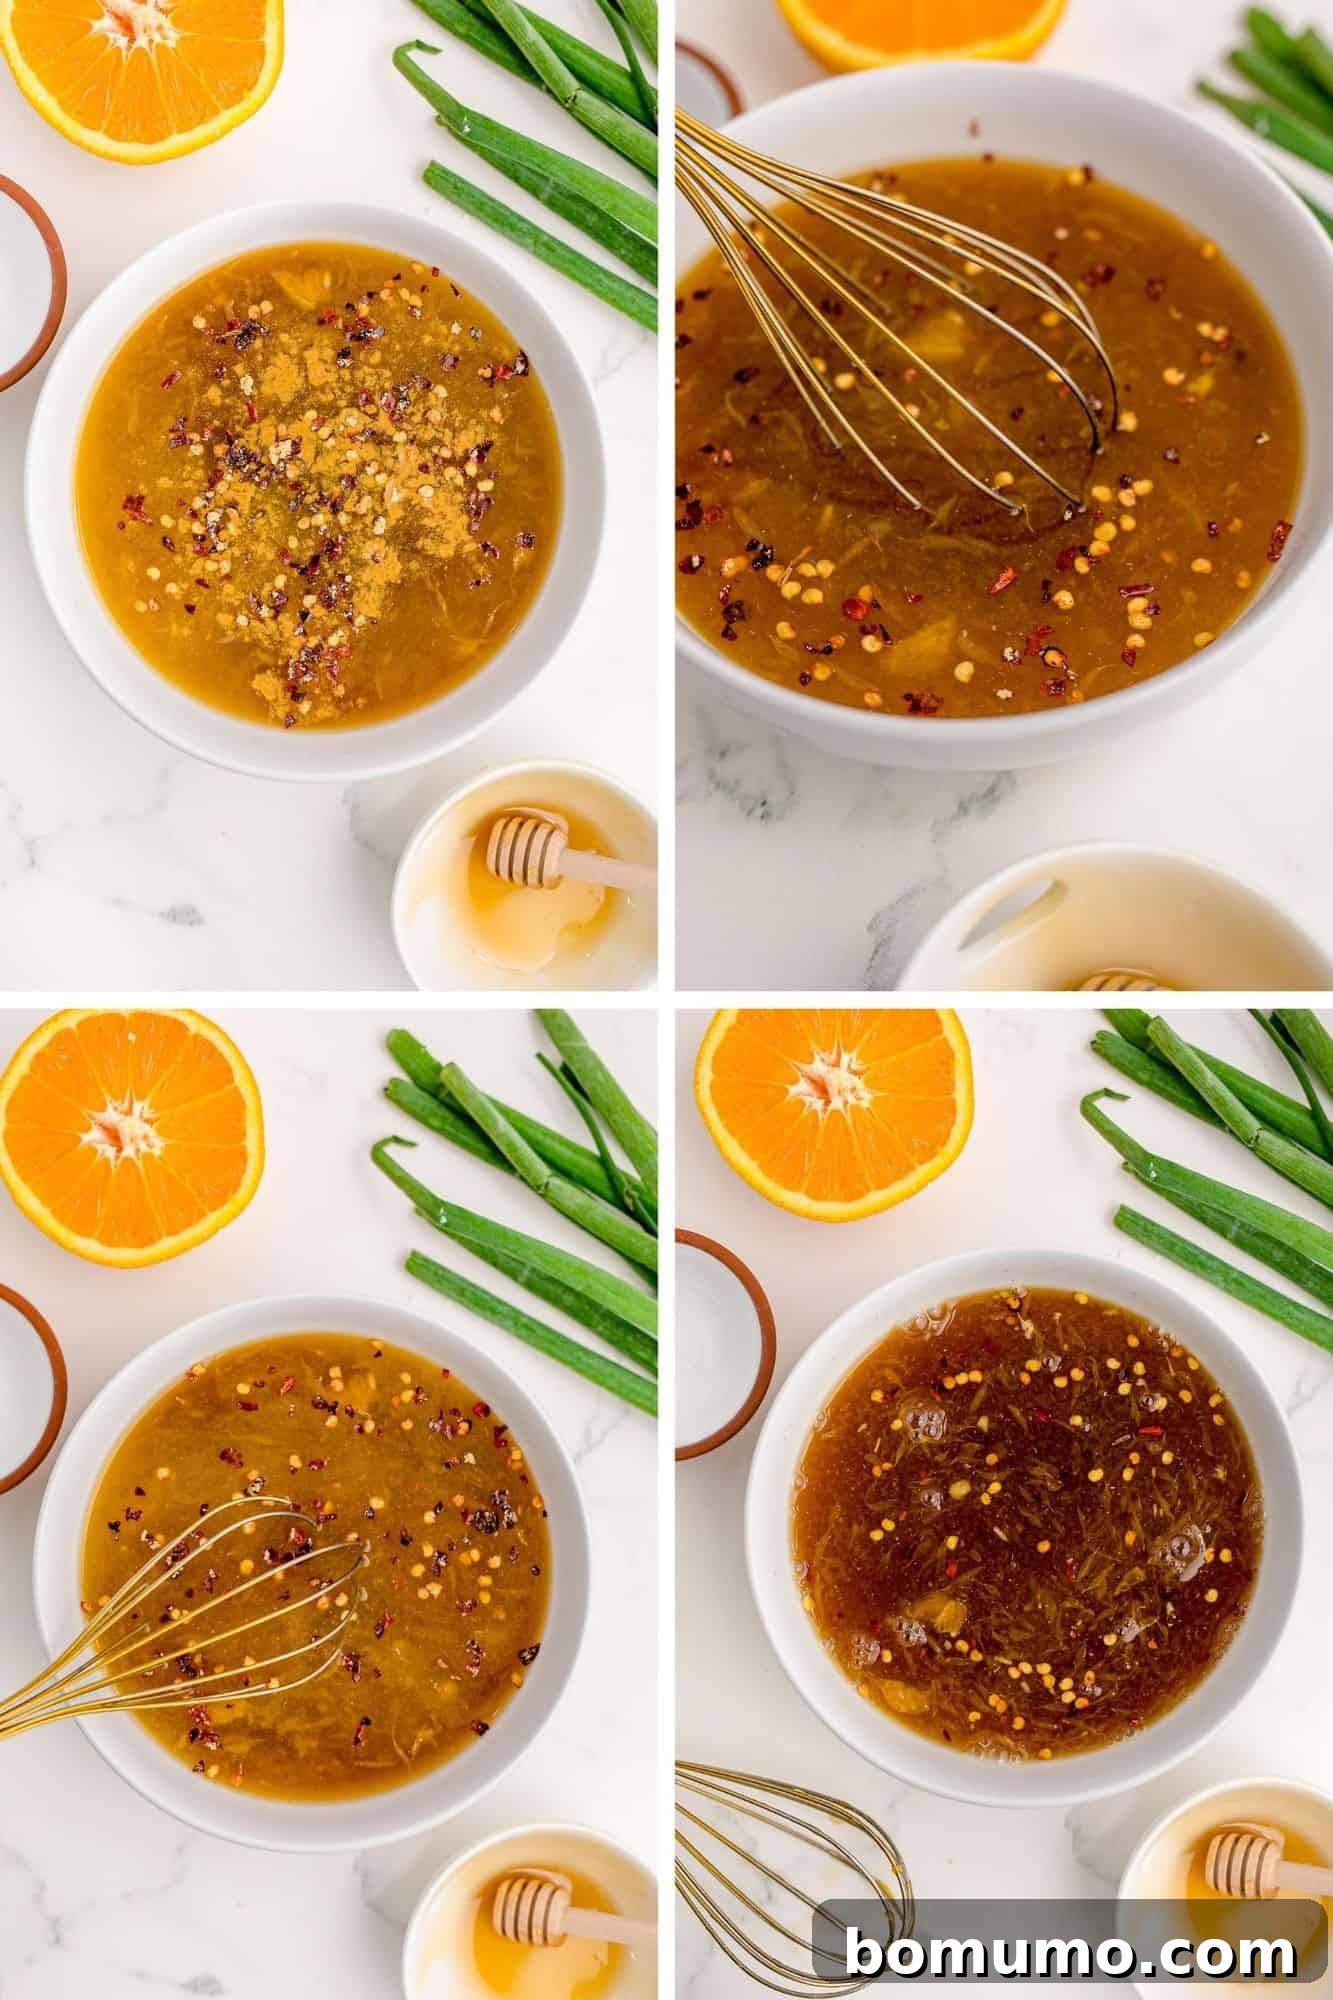
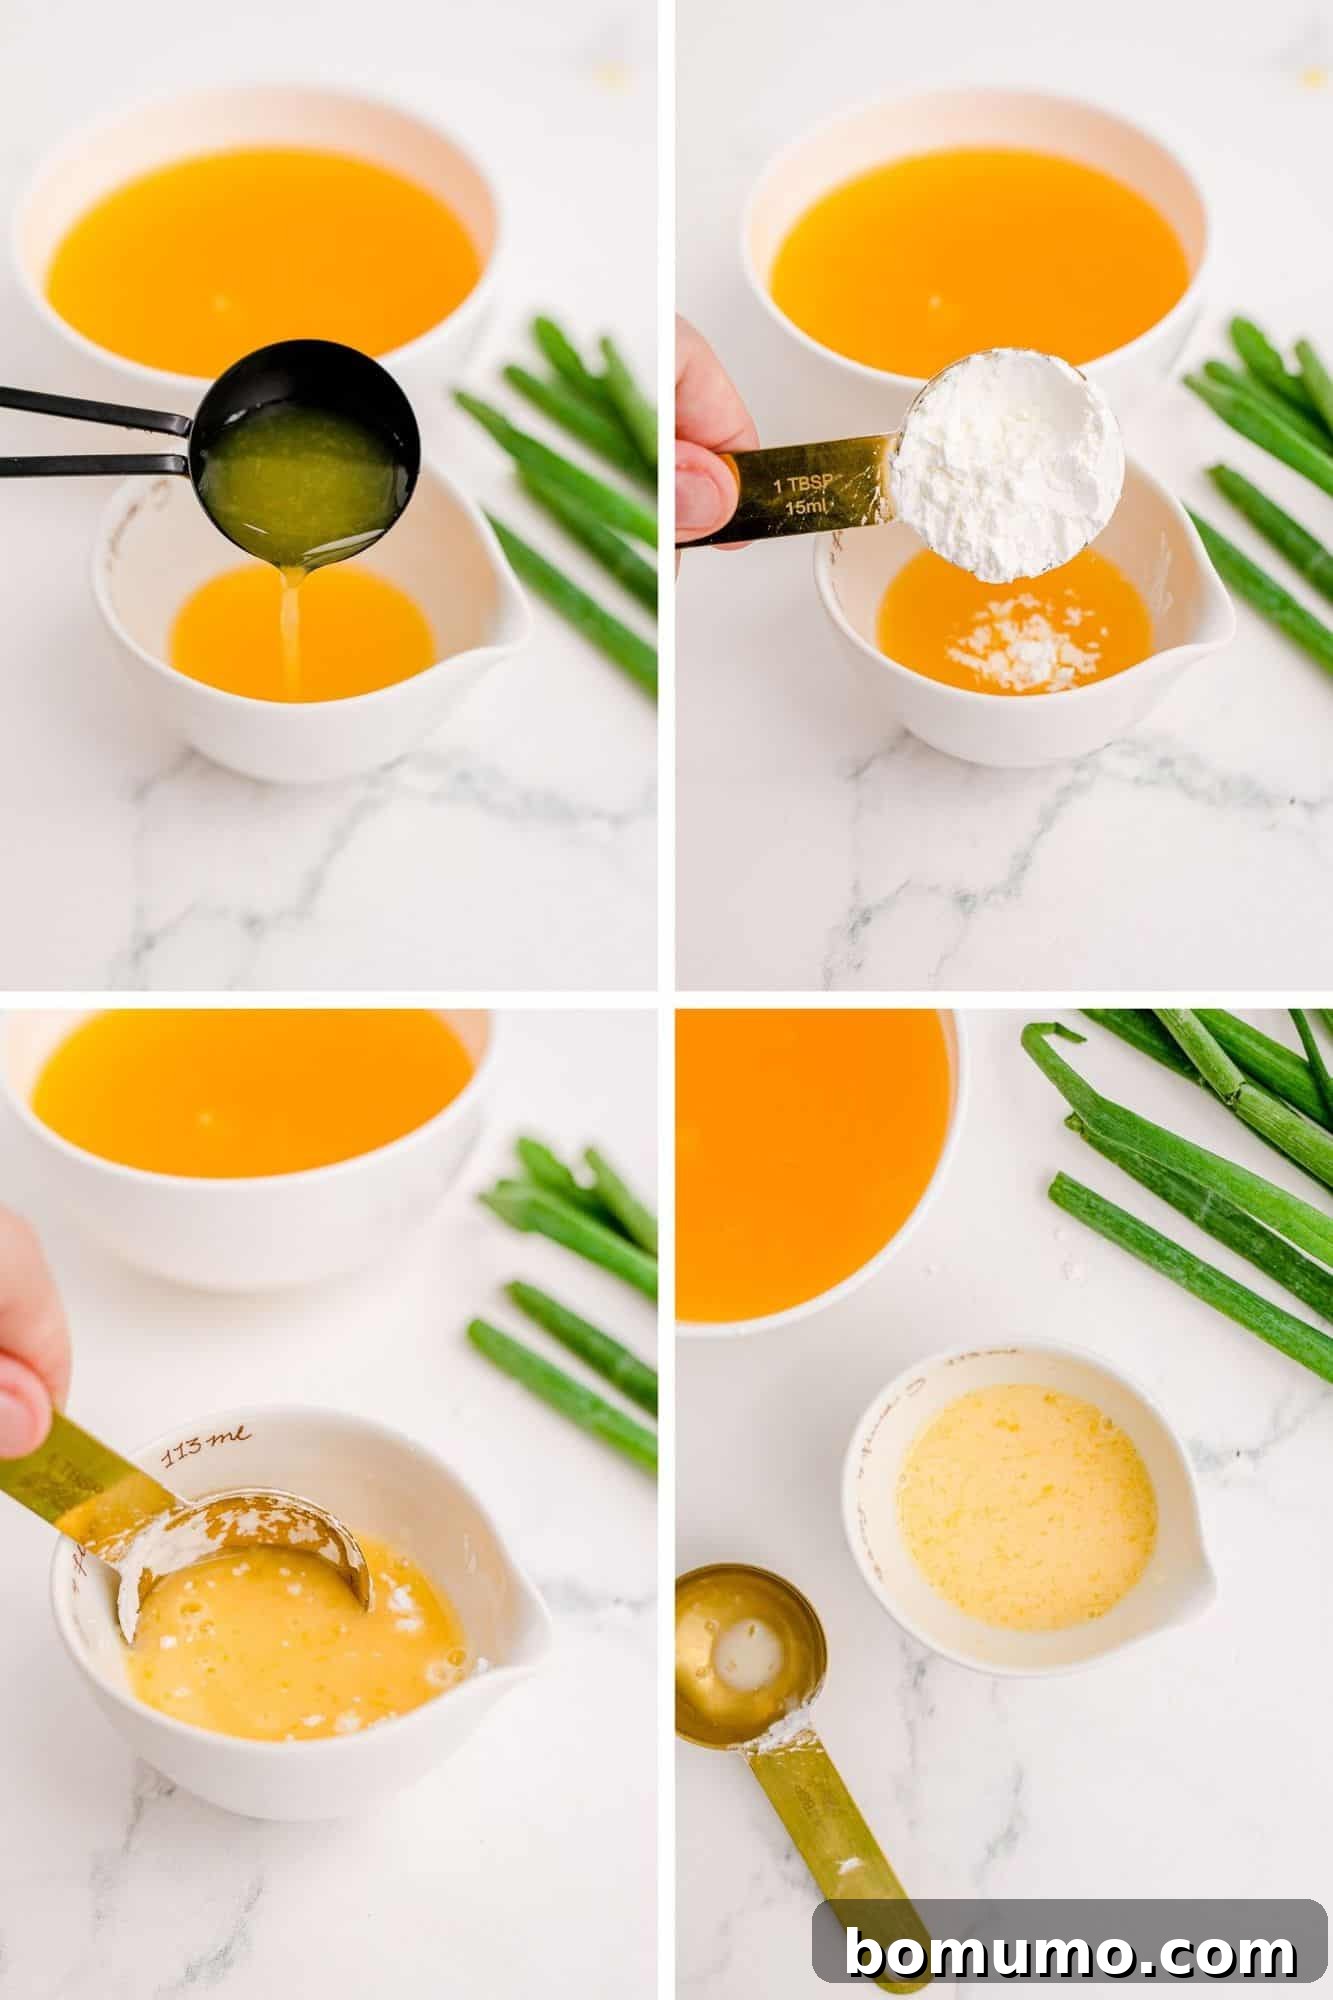
2. Craft the Flavorful Sauce: In a medium-sized bowl, whisk together the main components of your sauce: the larger portion of orange juice, white granulated sugar, white vinegar, soy sauce, honey, ground ginger, minced garlic, and red pepper flakes. Give it a good stir until the sugar dissolves. In a separate, smaller bowl, create a cornstarch slurry by whisking a couple of tablespoons of orange juice with the cornstarch until smooth. This slurry will be added later to thicken the sauce without creating lumps.
The cornstarch slurry is critical for achieving that glossy, thick sauce without lumps. It’s essential to mix it with cold liquid first before introducing it to the hot pan.
3. Prepare the Frying Station and Oil: Choose a large, heavy-bottomed sauté pan or a Dutch oven if you prefer to minimize splatters. Pour in your chosen high smoke point oil (such as avocado, grapeseed, canola, peanut, or sunflower oil) and heat it over medium-high heat until it reaches approximately 350°F (175°C). You can test the oil’s readiness by dropping a tiny pinch of flour into it; if it sizzles gently, it’s ready. If it smokes, it’s too hot and needs to cool slightly.
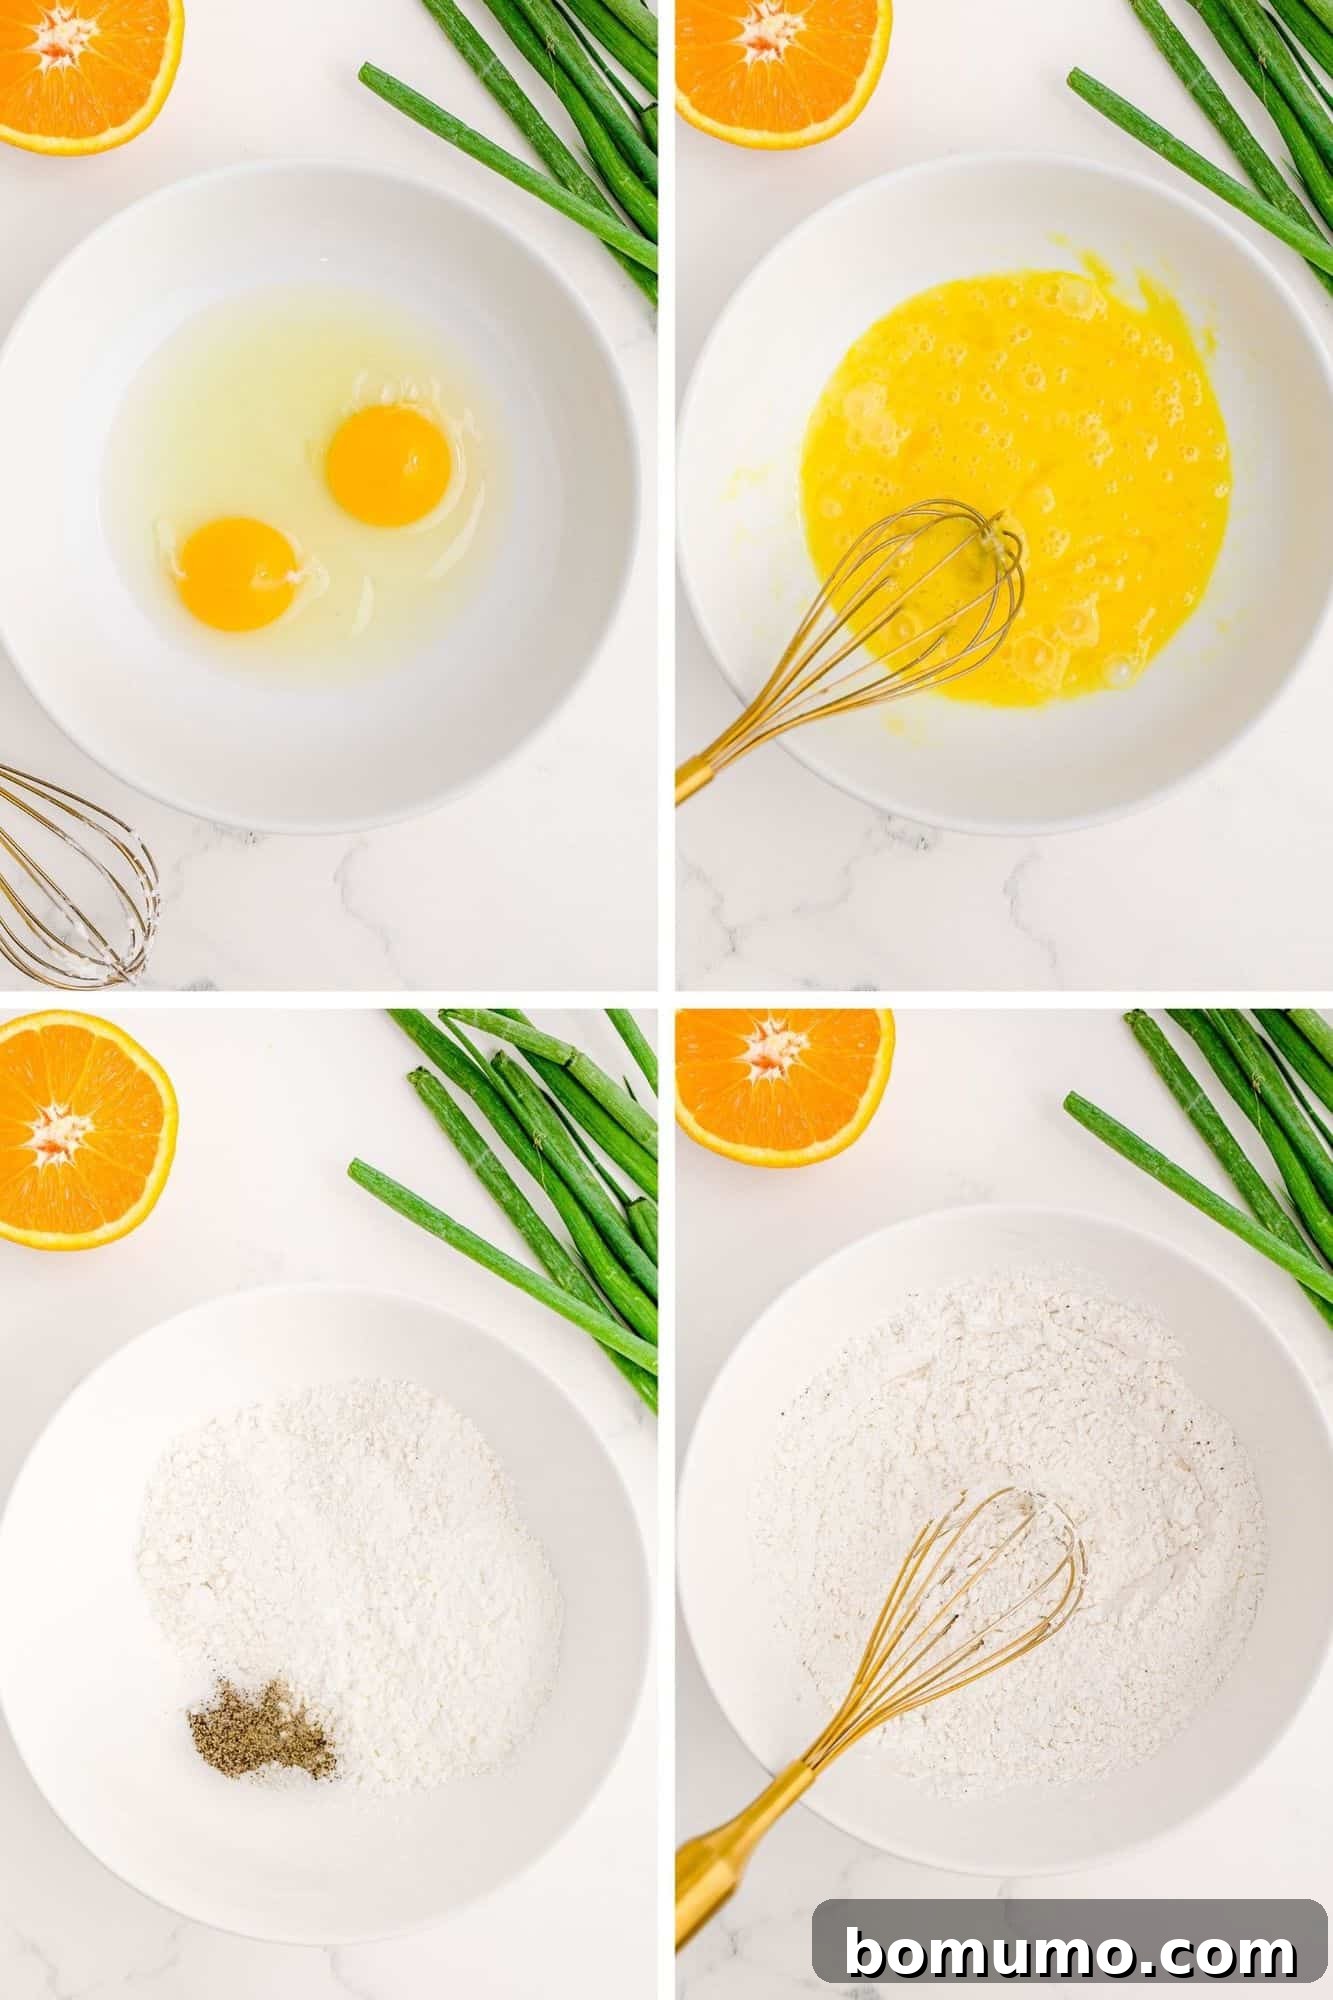
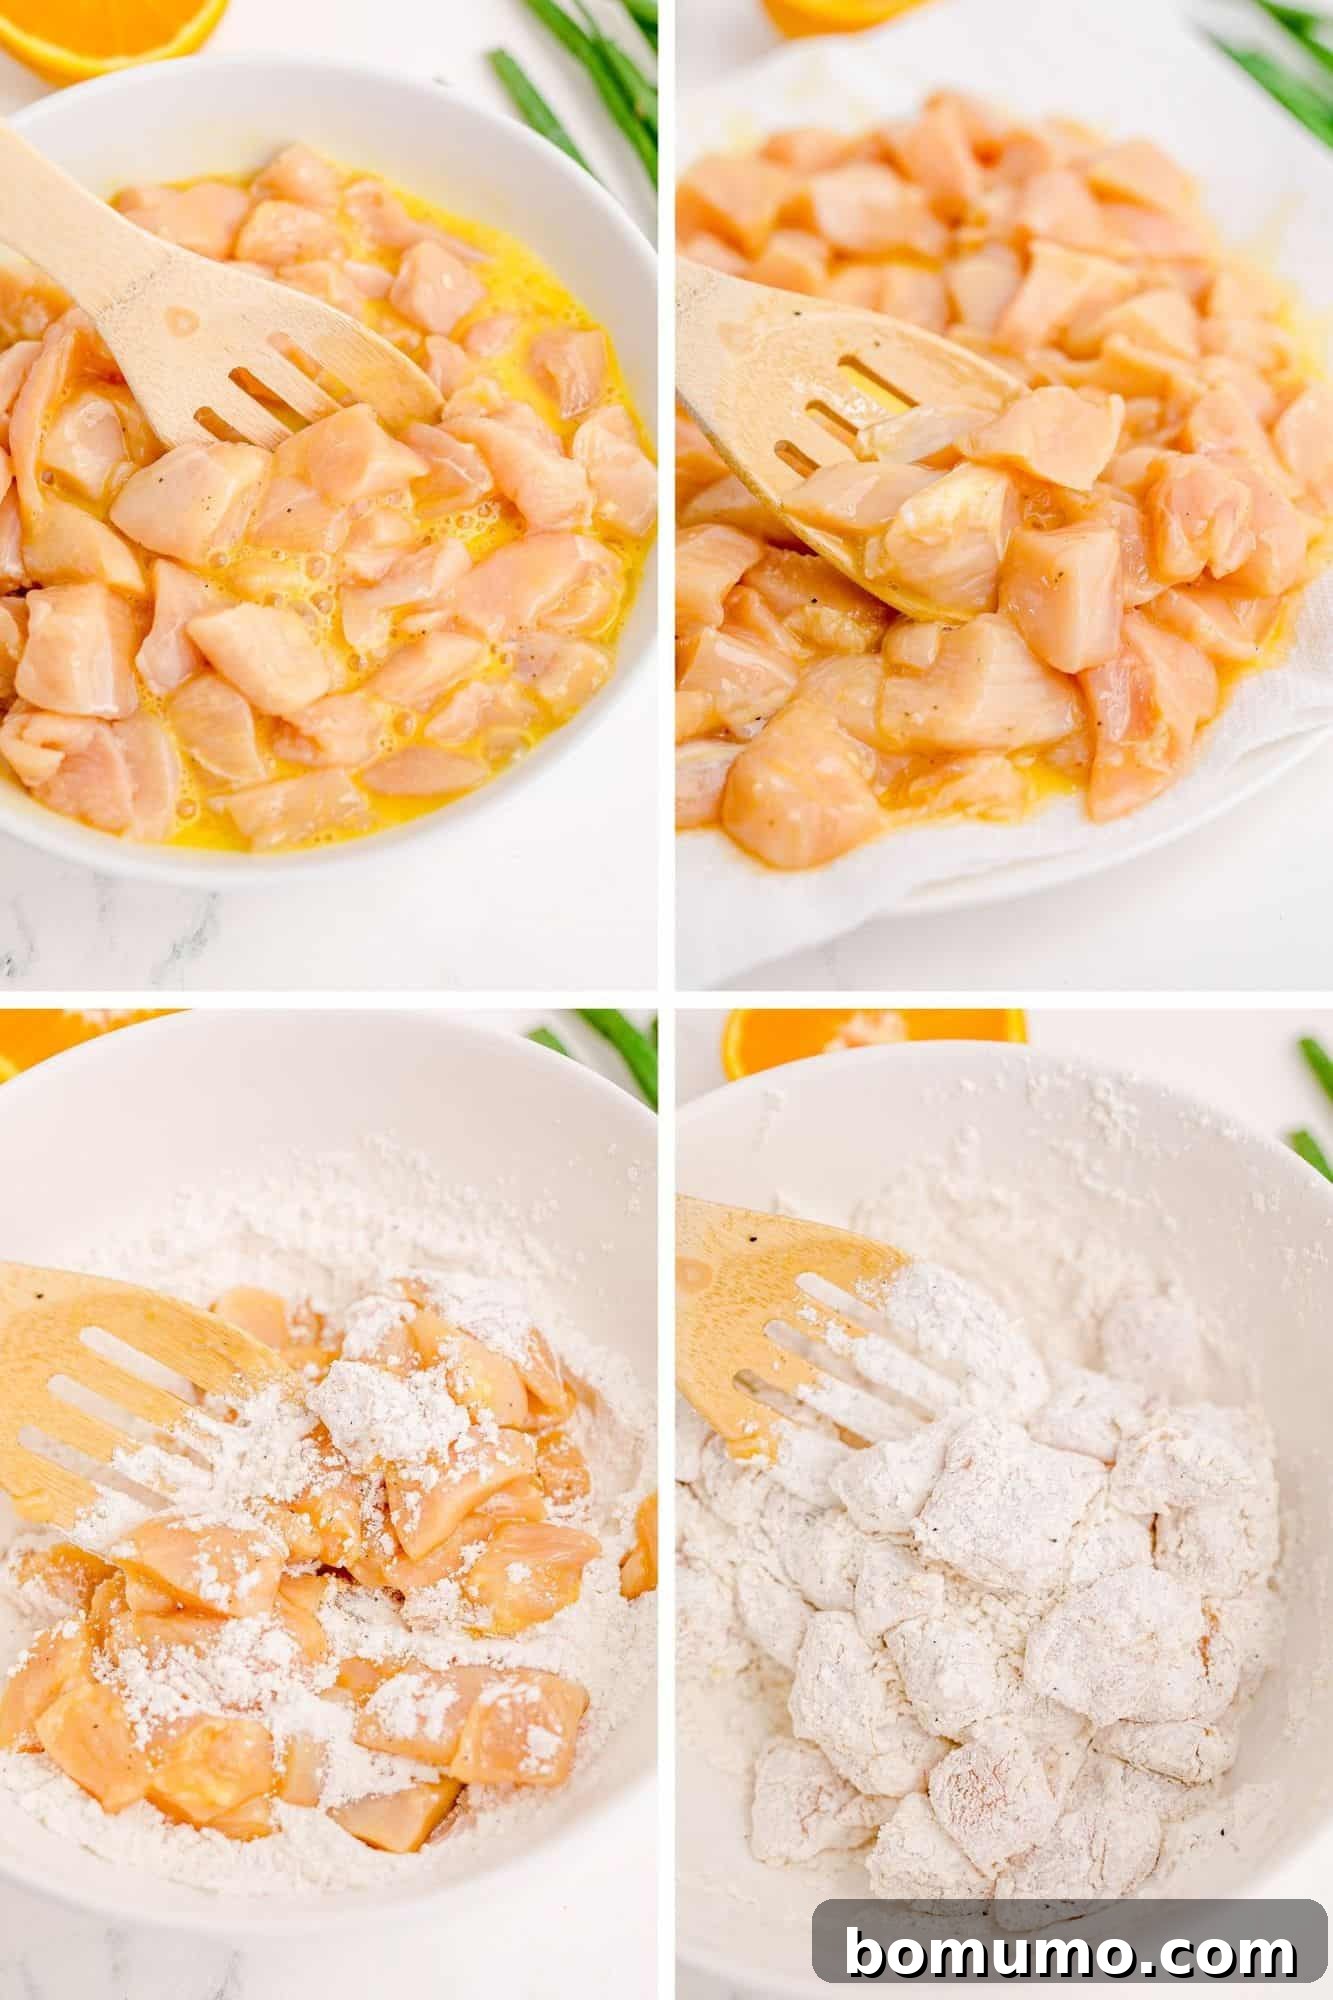
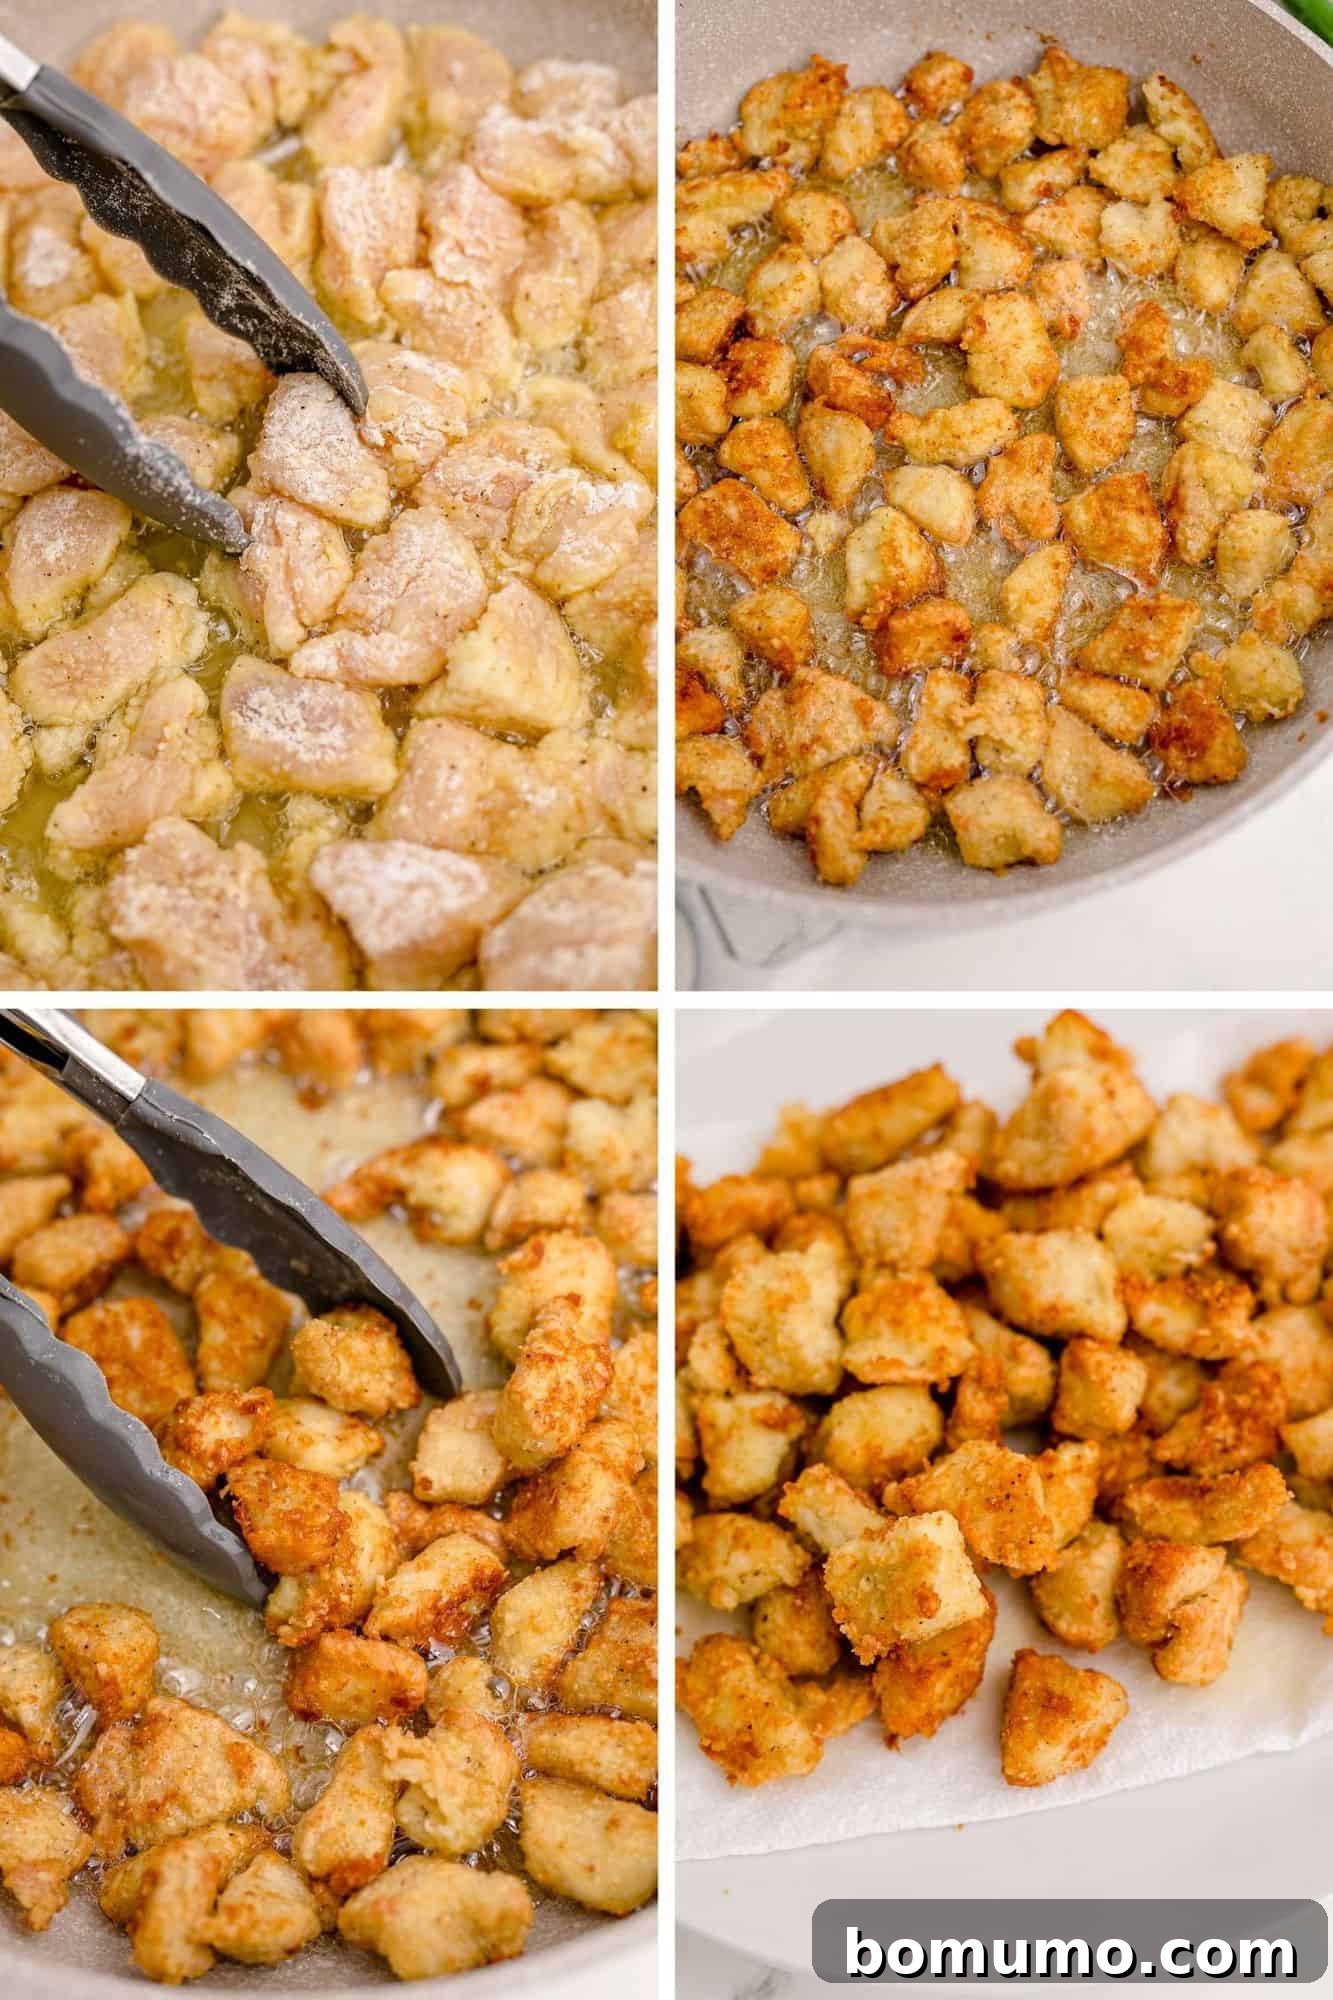
4. Perfectly Bread the Chicken: While your oil is heating, prepare your breading station. In a shallow bowl, lightly beat two large eggs with a fork. In another shallow dish, combine the all-purpose flour, cornstarch, salt, and black pepper, whisking well to ensure even seasoning. Line a plate with several layers of paper towels; this will be for draining excess egg from the chicken. Dip the chicken pieces into the beaten egg, allowing any excess to drip off. Then, transfer them to the prepared plate to drain further. Next, dredge the chicken pieces thoroughly in the flour mixture, ensuring each piece is fully coated. It’s now perfectly prepped and ready for frying!
The sequence of breading—egg wash followed by seasoned flour and cornstarch—is crucial for a crisp, adhering coating. Ensure all surfaces of the chicken pieces are covered for a uniform golden-brown finish.
5. Achieve Golden Perfection (Fry the Chicken): Carefully and quickly place the breaded chicken pieces into the hot oil, ensuring not to overcrowd the pan. Fry the chicken undisturbed for about 5 minutes, allowing a beautiful golden, crispy crust to form on the bottom. Using kitchen tongs, swiftly flip each piece over and cook the other side until it’s also golden brown and the chicken is cooked through, reaching an internal temperature of 165°F (74°C) with no pink in the center. Once done, transfer all the chicken and oil from the skillet onto another plate generously lined with paper towels to absorb excess grease, ensuring your chicken remains delightfully crisp.
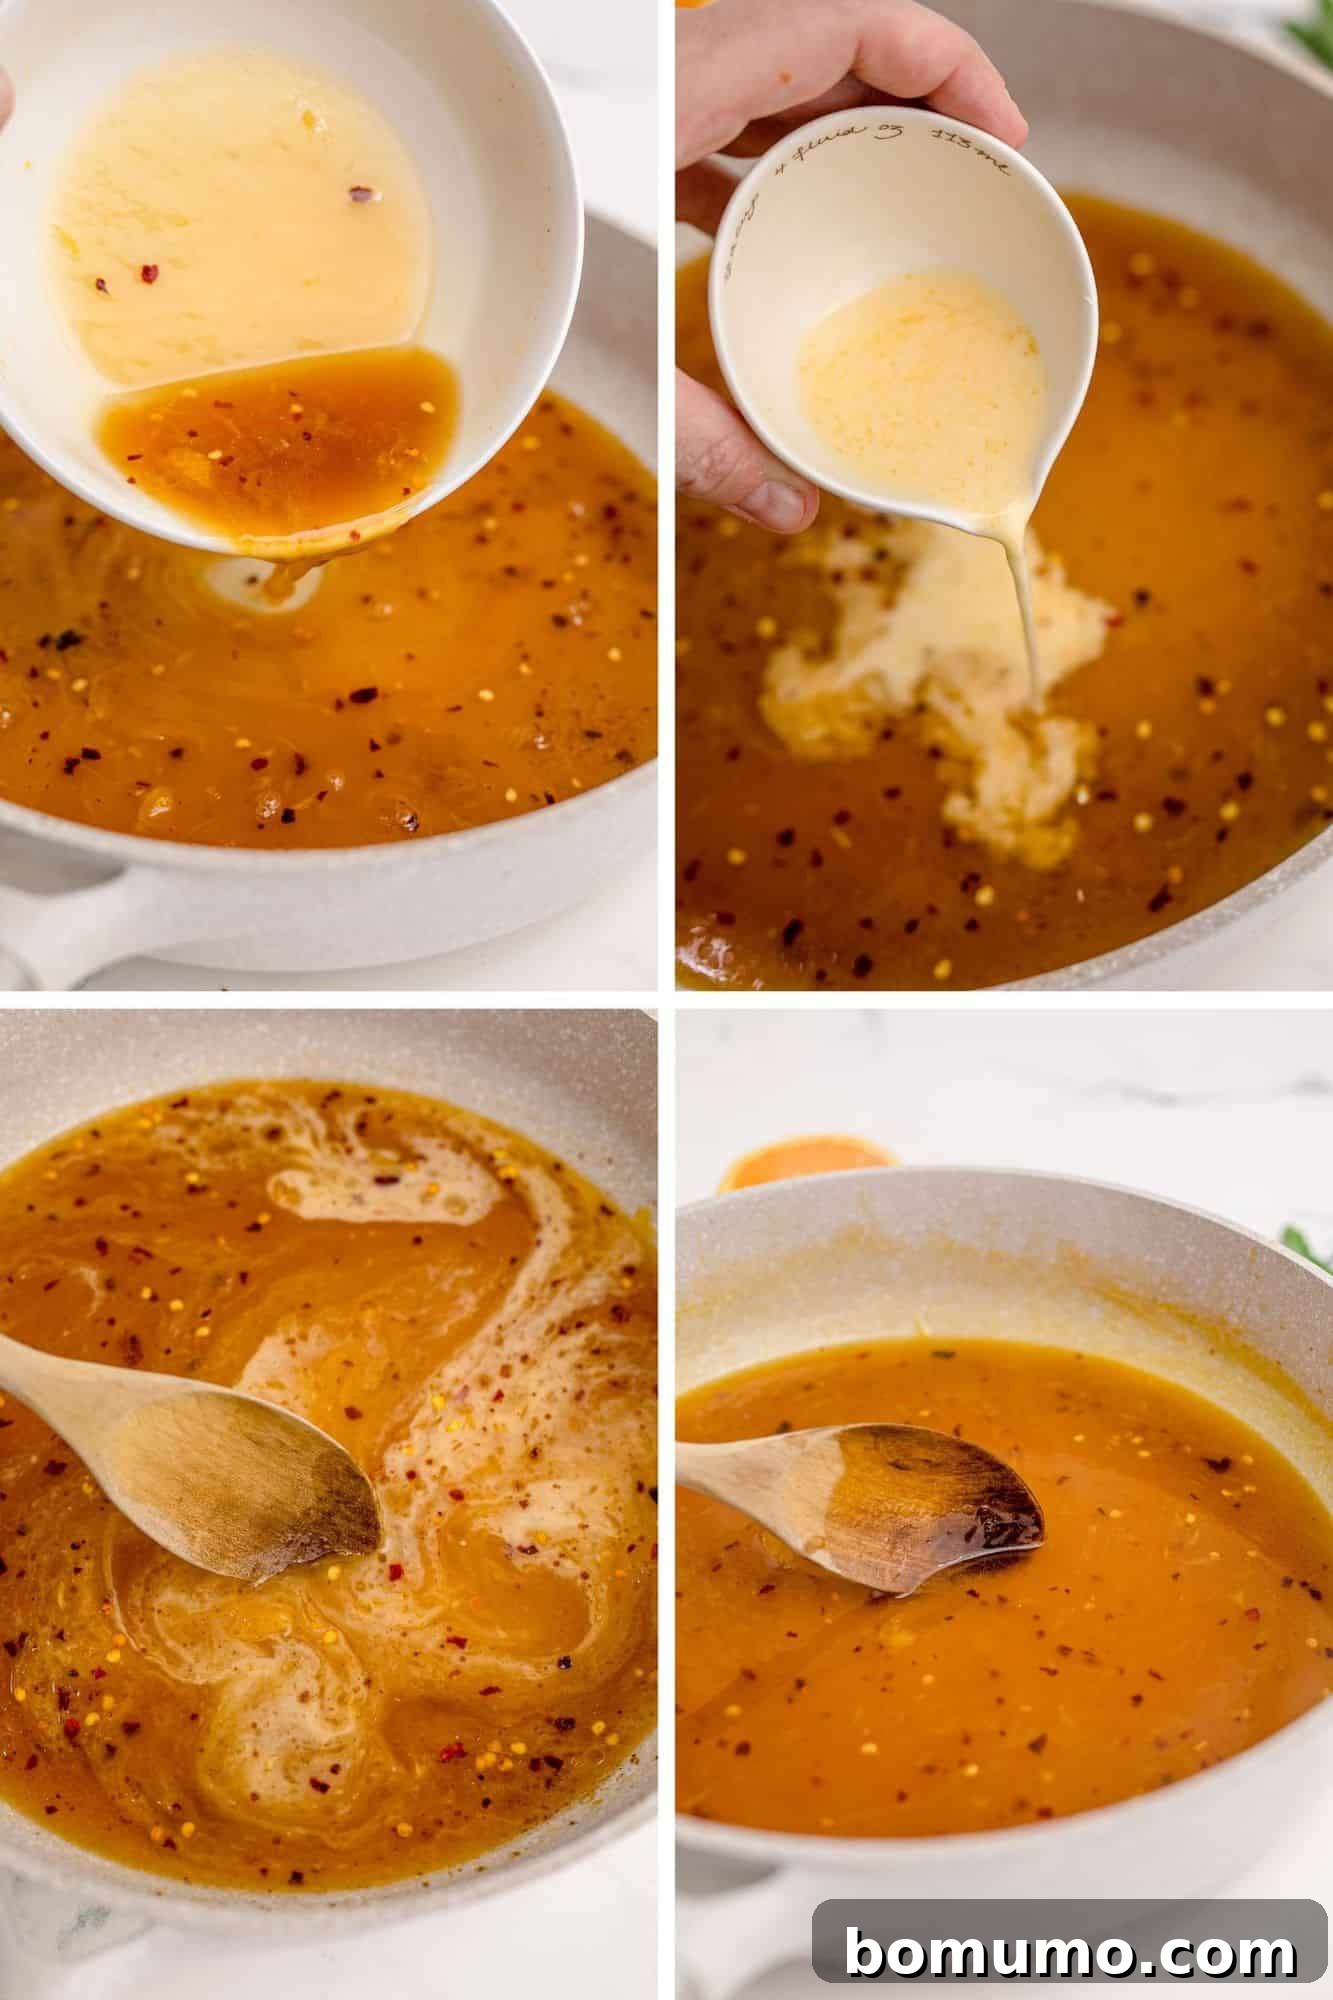
6. Simmer the Silky Sauce: Using the same skillet (after carefully pouring off the oil and quickly wiping any major debris, or using a fresh pan if preferred), pour in the prepared orange juice mixture (without the cornstarch slurry yet). Bring it to a gentle simmer over medium heat, stirring consistently. Gradually whisk in the reserved orange juice and cornstarch slurry. Continue to cook and stir, allowing the sauce to thicken to your desired consistency and become beautifully clear and glossy, typically within 5 to 10 minutes. The scraping motion helps to incorporate any flavorful browned bits from the pan. Remove the pan from the heat once thickened.
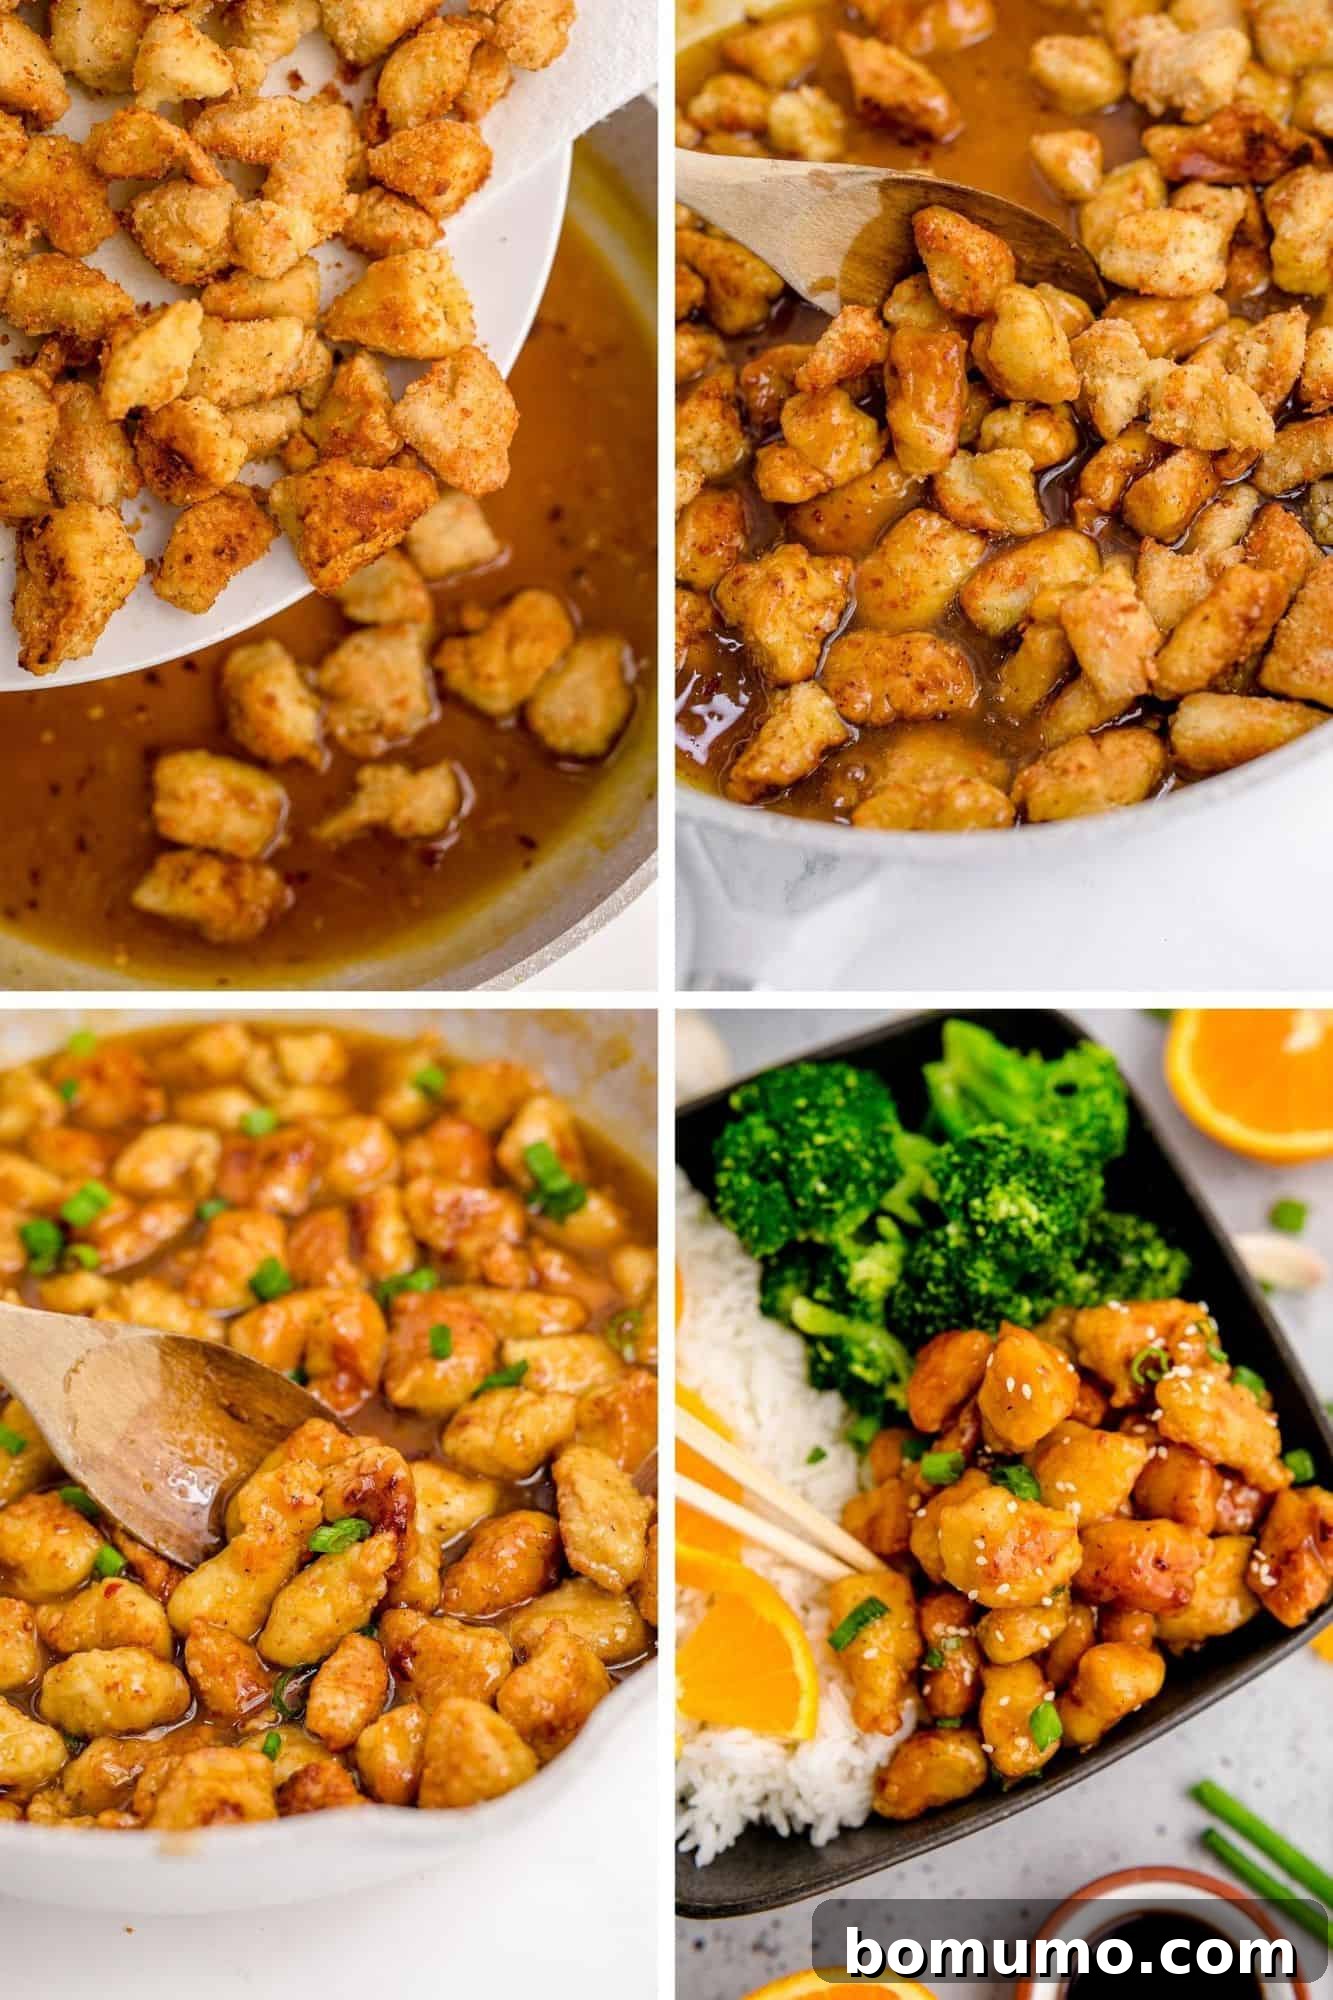
7. Unite Chicken and Sauce (Combine): Return the crispy fried chicken pieces to the skillet with the thickened orange sauce. Gently toss and stir the chicken until each piece is thoroughly coated in the luscious, aromatic sauce. That’s it! Your homemade orange chicken is now perfectly prepared and ready to be enjoyed.
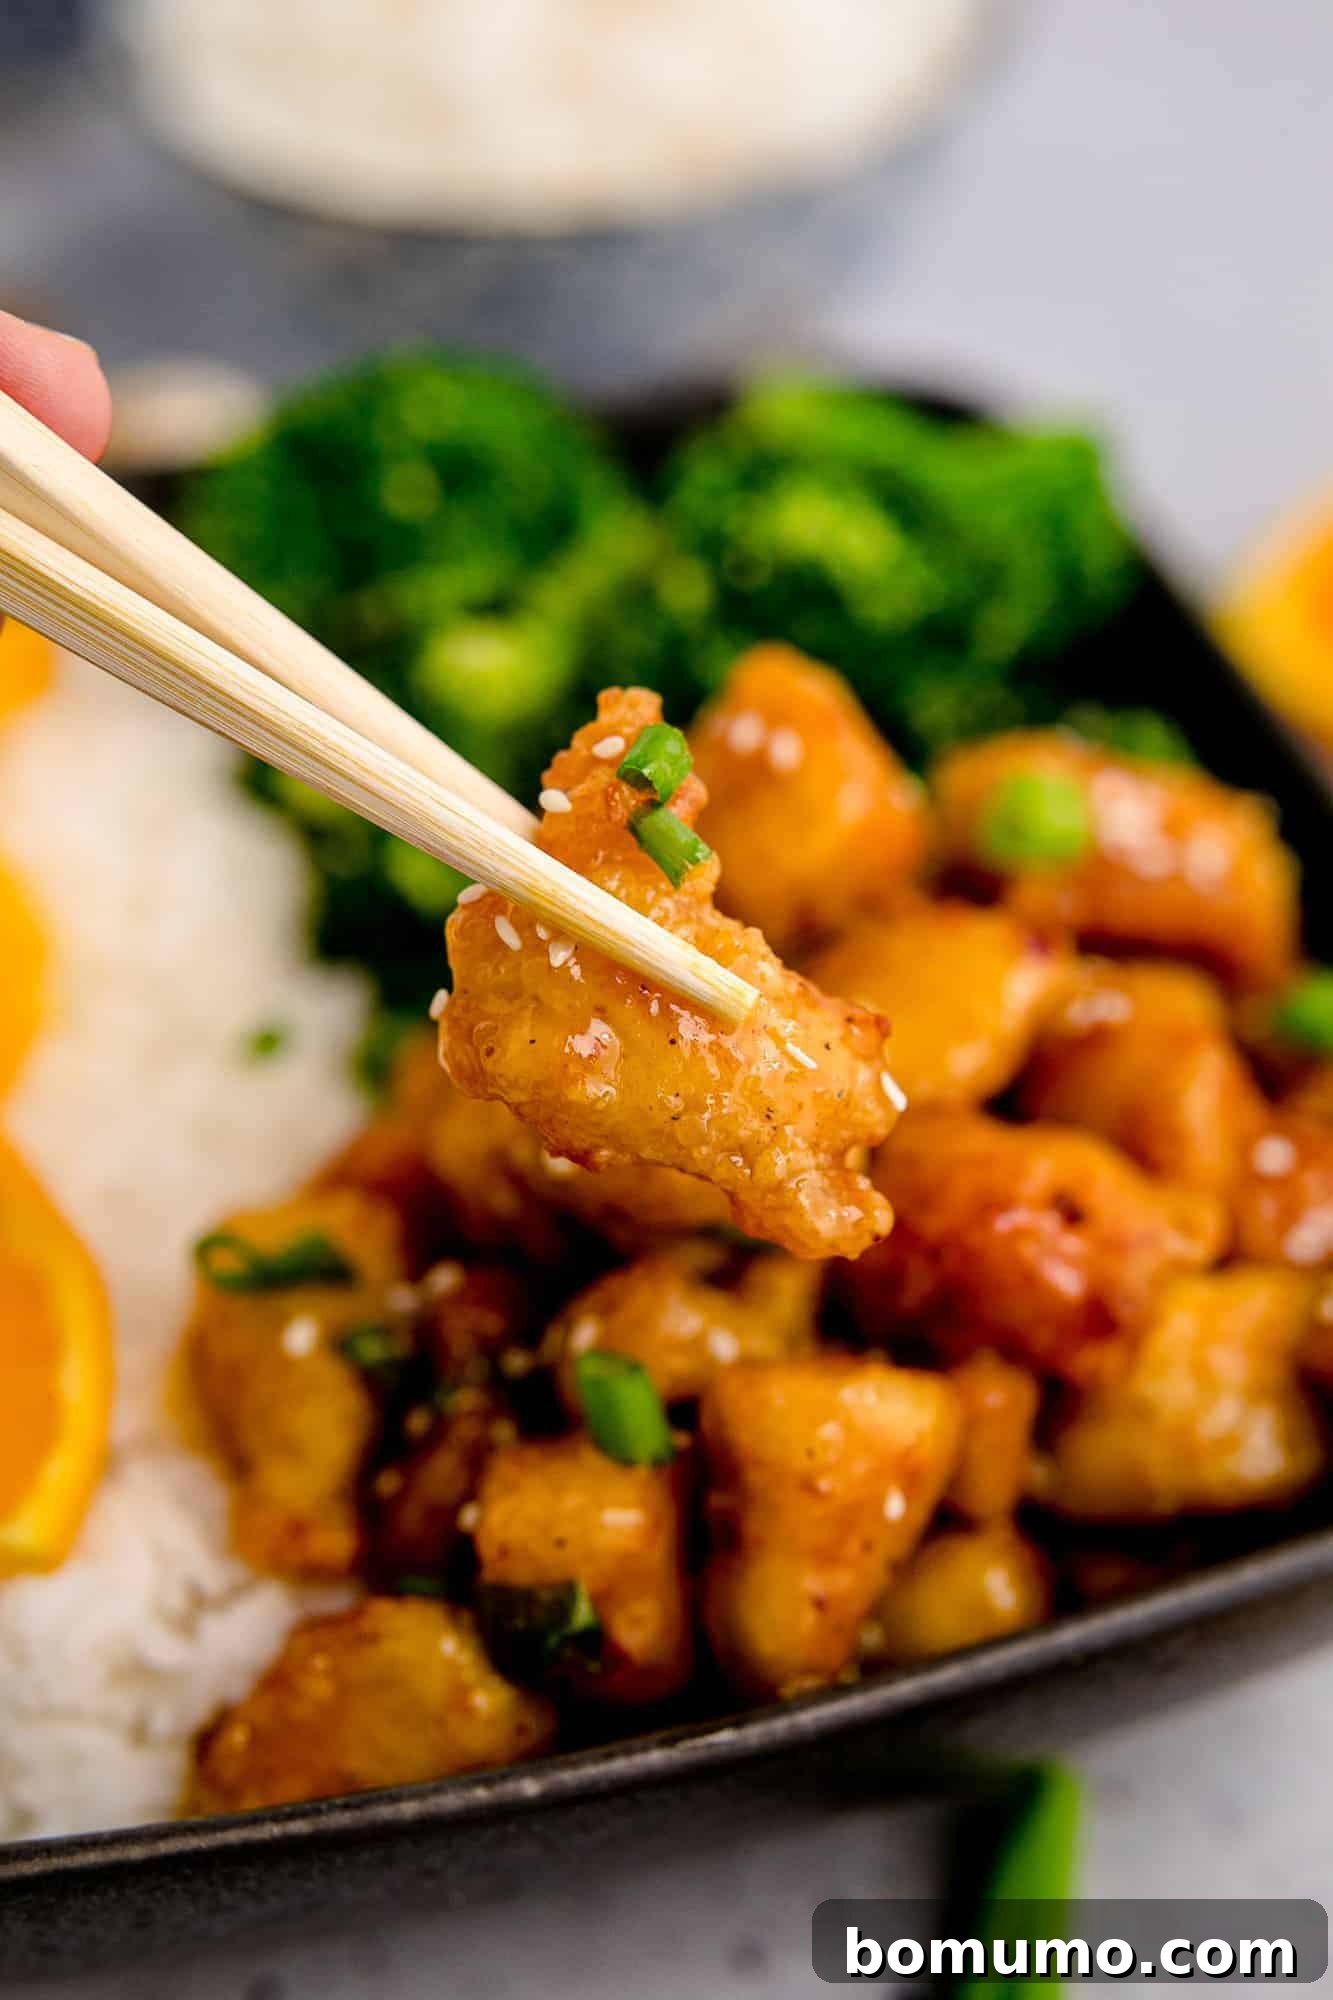
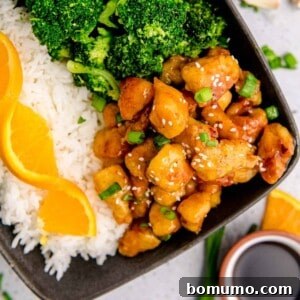
8. Present and Savor (Serve): Serve your glorious homemade orange chicken immediately for the best texture and flavor. It pairs exquisitely with fluffy steamed jasmine rice, a side of crisp-tender broccoli or green beans, and perhaps a refreshing jasmine tea. Don’t forget the classic fortune cookie – we predict your fortune will simply say, “Life is delicious!” To round out your authentic Asian-inspired feast, consider adding homemade air fryer egg rolls, delectable air fryer crab rangoon, or a vibrant mandarin orange salad.
Pro Cooking Tips for Ultimate Crispiness
Achieving that coveted restaurant-style crispiness in your homemade orange chicken is simpler than you might think, and it largely hinges on a few key techniques:
- The Power of Cornstarch in Breading: The addition of cornstarch to your flour mixture is paramount. It helps break down the flour’s protein, creating a lighter, airier, and significantly crispier coating than flour alone. This ensures your chicken stays crunchy even after being tossed in the sauce.
- Optimal Oil Temperature: Always ensure your frying oil is at the correct temperature, ideally around 350°F (175°C). Oil that isn’t hot enough will result in greasy, soggy chicken, as the coating absorbs too much oil. If the oil is too hot, the exterior will burn before the chicken cooks through. Use a kitchen thermometer for precision, or test with a small piece of breading.
- Avoid Overcrowding the Pan: This is a golden rule for frying. Placing too much chicken into the skillet at once will drastically drop the oil’s temperature. This prevents the chicken from crisping properly and can lead to uneven cooking. Fry in batches, leaving ample space between each piece, to maintain consistent oil temperature and achieve maximum crispiness.
- Fry Undisturbed: Resist the urge to constantly move or flip the chicken. Allow each side to fry undisturbed until it develops a deep golden-brown color and a visibly crispy texture before turning. This allows the crust to set properly.
- Drain Properly: After frying, immediately transfer the chicken to a plate lined with multiple layers of paper towels. This helps to wick away excess oil, preventing the chicken from becoming greasy and keeping it crisp.
Scaling Up: Tips for Making a Double Batch
If you’re hosting a larger gathering or simply want extra for leftovers, doubling this orange chicken recipe is entirely feasible. However, a few considerations will ensure the quality remains consistent:
- Breading in Batches: To maintain the integrity of the coating and prevent the chicken from clumping, we recommend breading only two cut-up chicken breasts (or an equivalent amount of thighs) in the egg and flour mixture at a time. This allows for better control and ensures each piece is perfectly coated.
- Skillet Size and Crowding: When frying, it’s critical to use a skillet large enough to accommodate the chicken without overcrowding. If your skillet isn’t spacious enough for a double batch, it’s best to cook the chicken in multiple batches. Frying too many pieces at once lowers the oil temperature, leading to less crispy chicken.
- Oil Quantity: While you’re doubling the chicken, it may not be necessary to double the oil. Ensure you have enough oil to generously cover the bottom of your skillet by at least a ½-inch, as this is sufficient for frying in batches. You might need to add a little more oil between batches if it gets depleted.
- Sauce Adjustment: Double all sauce ingredients accordingly. When thickening the sauce, be mindful of consistency, as larger batches might take slightly longer to reach the desired thickness.
A Lighter Twist: Baked Orange Chicken
For those seeking a slightly lighter alternative without sacrificing flavor, this homemade orange chicken recipe adapts beautifully to oven baking. While it won’t have the exact same deep-fried crispness, it offers a healthier profile that is still incredibly delicious. Here’s how to prepare it:
Begin by preparing the chicken exactly as instructed for the breading process (egg wash and seasoned flour/cornstarch mixture). Instead of frying, spread the breaded chicken pieces in a single layer on a large, greased baking sheet. For extra crispiness and even cooking, consider using a wire rack placed over the baking sheet. Bake the chicken in a preheated oven at 375°F (190°C) for approximately 10 minutes, or until the chicken is cooked through and reaches an internal temperature of 165°F (74°C). To achieve a lovely browned and slightly crispy exterior, finish by broiling the chicken for an additional 2 to 3 minutes, watching it very carefully to prevent burning. While the chicken bakes, prepare the orange sauce in a skillet on the stovetop as directed. Once the baked chicken is ready, add it to the skillet with the sauce and toss gently to coat every piece evenly. Serve immediately and enjoy a delicious, healthier version of your favorite!
Make-Ahead Solutions for Convenient Meals
Make-Ahead Solutions for Convenient Meals
Planning ahead can be a lifesaver on busy days. While fresh is always best, you can prepare certain components of this orange chicken recipe in advance to streamline your cooking process:
- Pre-fry the Chicken: You can fry the chicken bites completely ahead of time. Once cooked, spread them in a single layer on a cooling rack to cool thoroughly. Once cooled, store them in an airtight container in the refrigerator for up to 2 days. When ready to serve, prepare the orange sauce in a skillet and add the pre-fried chicken, simmering gently until heated through.
- Prepare the Sauce: The orange sauce can also be made in advance. Whisk all the sauce ingredients together (excluding the cornstarch slurry initially), then store in an airtight container in the fridge for up to 3-4 days. When ready to use, bring it to a simmer, then whisk in the cornstarch slurry to thicken.
- Re-crisping Pre-fried Chicken: A warning: pre-fried and refrigerated chicken, when simply reheated in sauce, will lose some of its crispiness. If you desire to bring back some of that satisfying crunch, reheat the chicken on a wire rack in a preheated oven at 375°F (190°C) for 5-8 minutes, or briefly in an air fryer until crisp, before adding it to the warm sauce.
Storage & Reheating Strategies
Storage & Reheating Strategies
Maximizing the lifespan and enjoyment of your homemade orange chicken is easy with these storage and reheating tips:
- Refrigerate: Leftover orange chicken, once completely cooled, should be stored in an airtight container in the refrigerator. It will maintain its quality and flavor for up to 5 days.
- Freeze: For longer storage, orange chicken freezes beautifully. Place cooled chicken and sauce in a freezer-safe airtight container or heavy-duty freezer bag. It can be frozen for up to 6 months. Thaw overnight in the refrigerator before reheating.
- Reheat for Best Texture: To preserve the best texture and avoid sogginess, reheat your orange chicken in a skillet on the stovetop over medium heat, stirring occasionally until warmed through. Alternatively, an air fryer works wonders for restoring some crispiness to the chicken, especially if reheated separately from the sauce.
- Avoid Microwaving: While convenient, microwaving is generally not recommended for reheating orange chicken, as it tends to make the chicken soft and the coating soggy, compromising the overall texture.
- Reheating Frozen with Sauce: If you froze the orange chicken with the sauce already mixed in, the most effective way to reheat it is in the oven. Transfer the thawed chicken and sauce to an oven-safe dish, cover loosely with foil, and bake at 325°F (160°C) until heated through, stirring once or twice.
Creative Ideas for Leftover Orange Chicken
Creative Ideas for Leftover Orange Chicken
Don’t let any delicious leftover orange chicken go to waste! Transform it into an exciting new meal with these creative ideas:
Orange Chicken Lettuce Wraps: This is a fantastic way to enjoy your leftovers. Start with sturdy lettuce leaves such as Bibb, romaine, butter, or iceberg, which make perfect edible cups. In a skillet, lightly stir-fry a package of coleslaw mix (or thinly sliced cabbage and carrots) with a teaspoon of oil. For an authentic touch, toasted sesame oil adds incredible flavor. Enhance the mixture with ingredients like water chestnuts for crunch, thinly sliced celery, a dash of soy sauce, or a drizzle of sriracha if you like extra spice. Once the vegetables are tender-crisp, mix in your leftover orange chicken and its sauce, stirring gently until everything is heated through. Pile the savory mixture onto the fresh lettuce leaves and garnish with chopped peanuts for texture, crispy wonton strips, or toasted sesame seeds for a final flourish. It’s a quick, fresh, and incredibly yummy meal!
Orange Chicken Fried Rice: Chop the leftover chicken into smaller pieces. Prepare your favorite fried rice recipe, and once the rice and vegetables are cooked, stir in the chopped orange chicken and a little extra sauce. Cook until heated through, infusing the rice with that irresistible orange flavor.
Orange Chicken Noodle Stir-fry: Add your leftover orange chicken and sauce to a quick vegetable stir-fry with ramen noodles or lo mein. It’s a flavorful and satisfying one-pan meal that comes together in minutes.
More Takeout Copycat Recipes
Honey Walnut Shrimp
Easy Fried Rice Recipe – 30 minutes!
Sesame Beef and Vegetables
Chicken Lettuce Wraps
Homemade Orange Chicken Recipe
Rachel Gurk
20
20
40
4
Ingredients
Chicken:
- 1 ½ pounds boneless skinless chicken breasts (or boneless skinless chicken thighs, cut into ½-inch pieces)
- ½ cup all-purpose flour
- ¼ cup cornstarch
- ¼ teaspoon salt
- ¼ teaspoon ground black pepper
- 2 large eggs
- ½ cup oil (use a high smoke point oil such as avocado, grapeseed, canola, peanut, or sunflower)
Sauce:
- 1 cup orange juice, divided
- 1 tablespoon cornstarch
- ½ cup granulated sugar (or brown sugar, if you prefer)
- 1 tablespoon white vinegar
- 2 tablespoons soy sauce
- 1 tablespoon honey
- ¼ teaspoon ground ginger
- 2 cloves garlic, minced (or ¼ teaspoon garlic powder)
- ¼ teaspoon red pepper flakes, or to taste
- optional garnishes: chopped green onions, toasted sesame seeds
Instructions
-
Cut the chicken breasts (or thighs) into uniform bite-size pieces, approximately ½-inch. This ensures even cooking and optimal crispiness.1 ½ pounds boneless skinless chicken breasts
-
Prepare the orange sauce. Measure out 1 cup of orange juice. Reserve 2 tablespoons of this orange juice in a small bowl and whisk it with 1 tablespoon of cornstarch to create a smooth slurry; set aside. In a separate, larger bowl, whisk together the remaining orange juice, granulated sugar, white vinegar, soy sauce, honey, ground ginger, minced garlic, and red pepper flakes until well combined.1 cup orange juice, divided, 1 tablespoon cornstarch, ½ cup granulated sugar, 1 tablespoon white vinegar, 2 tablespoons soy sauce, 1 tablespoon honey, ¼ teaspoon ground ginger, 2 cloves garlic, minced, ¼ teaspoon red pepper flakes, or to taste
-
Pour ½ cup of oil into a heavy skillet (a sauté pan or Dutch oven works best) and heat over medium-high heat until it reaches approximately 350°F (175°C).½ cup oil
-
While the oil is heating, prepare the breading station. In a medium-size shallow bowl, mix together ½ cup all-purpose flour, ¼ cup cornstarch, ¼ teaspoon salt, and ¼ teaspoon ground black pepper. Set this mixture aside. Lightly beat 2 large eggs in another shallow dish. Line a plate with several paper towels; this will be used to drain excess egg from the chicken.½ cup all-purpose flour, ¼ cup cornstarch, ¼ teaspoon salt, ¼ teaspoon ground black pepper, 2 large eggs
-
Add the chicken pieces to the beaten eggs, ensuring they are fully coated. Use a slotted spoon to remove the chicken pieces, allowing excess egg to drain off, and place them on the paper-towel-lined plate. Next, transfer the chicken pieces into the bowl containing the flour mixture. Stir or toss well to ensure each piece is evenly coated in the seasoned flour.
-
Carefully place the coated chicken pieces into the hot oil, ensuring not to overcrowd the pan (cook in batches if necessary). Fry the first side undisturbed for about 5 minutes until golden brown and crispy. Using tongs, quickly flip each piece over and cook the other side until it’s also golden and the chicken is fully cooked (internal temperature 165°F / 74°C). Once cooked, carefully pour the chicken and oil onto a plate generously lined with paper towels to absorb excess grease.
-
Using the same skillet (after carefully draining off the oil and wiping clean), pour the whisked orange juice mixture (without the cornstarch slurry) into the skillet. Place over medium heat. Gradually whisk in the reserved orange juice/cornstarch slurry. Bring the sauce to a boil, stirring constantly and scraping up any browned bits from the bottom of the pan. Cook for about 5 to 10 minutes, or until the sauce thickens to your desired consistency and becomes glossy. Remove from heat.
-
Add the crispy fried chicken back to the pan with the thickened sauce. Stir well to coat every piece of chicken evenly in the luscious orange sauce. Garnish with chopped green onions and toasted sesame seeds if desired. Serve immediately with steamed rice, broccoli, or green beans for a complete and satisfying meal.
Notes
- Nutrition note: The provided nutrition information is calculated with the assumption that all the oil used for frying is consumed. However, a significant portion of the oil is discarded after frying the chicken, meaning the actual consumed fat and calorie content per serving may be lower. This information should be used as an approximation.
- Oven instructions for a lighter option: To prepare this recipe in the oven, spread the fully breaded chicken pieces on a large, lightly greased baking sheet (or on a wire rack placed over a baking sheet for better air circulation and crispiness). Bake in a preheated oven at 375°F (190°C) for 10 minutes, or until the chicken is thoroughly cooked (internal temperature 165°F / 74°C). For a golden-brown finish and a touch of crispness, briefly broil the chicken for 2 to 3 minutes, carefully monitoring to prevent burning. While the chicken bakes, prepare the orange sauce in a skillet on the stovetop. Once baked, add the chicken to the sauce and toss to coat.
- Tips for doubling the recipe: If you plan to double this recipe, we recommend coating only 2 cut-up chicken breasts (or equivalent chicken thighs) in the beaten egg and flour mixture at a time to ensure proper coverage. Additionally, use a sufficiently large skillet to prevent overcrowding, which is essential for crispy chicken. You may need to cook the chicken in multiple batches. While the chicken quantity doubles, it might not be necessary to double the oil; just ensure you have enough to generously cover the bottom of your skillet for each batch.
- Storage and reheating: Leftover orange chicken can be stored in an airtight container in the refrigerator for up to 5 days. For optimal texture, it is best reheated in a skillet on the stovetop or in an air fryer. Microwaving is not recommended as it can make the chicken soggy. Orange chicken can also be frozen for up to 6 months. If freezing the chicken with the sauce already added, the best reheating method is in the oven to help maintain some quality.
Video Tutorial
Nutrition Information
, Carbohydrates: 58g
, Protein: 42g
, Fat: 35g
, Saturated Fat: 4g
, Polyunsaturated Fat: 9g
, Monounsaturated Fat: 20g
, Trans Fat: 1g
, Cholesterol: 191mg
, Sodium: 645mg
, Potassium: 830mg
, Fiber: 1g
, Sugar: 35g
, Vitamin A: 332IU
, Vitamin C: 34mg
, Calcium: 36mg
, Iron: 2mg
Nutrition information is automatically calculated and should only be used as an approximation. Actual values may vary based on specific ingredients and preparation methods.
Did You Make This?
We’d love to hear your thoughts! Share a comment and rating below!