
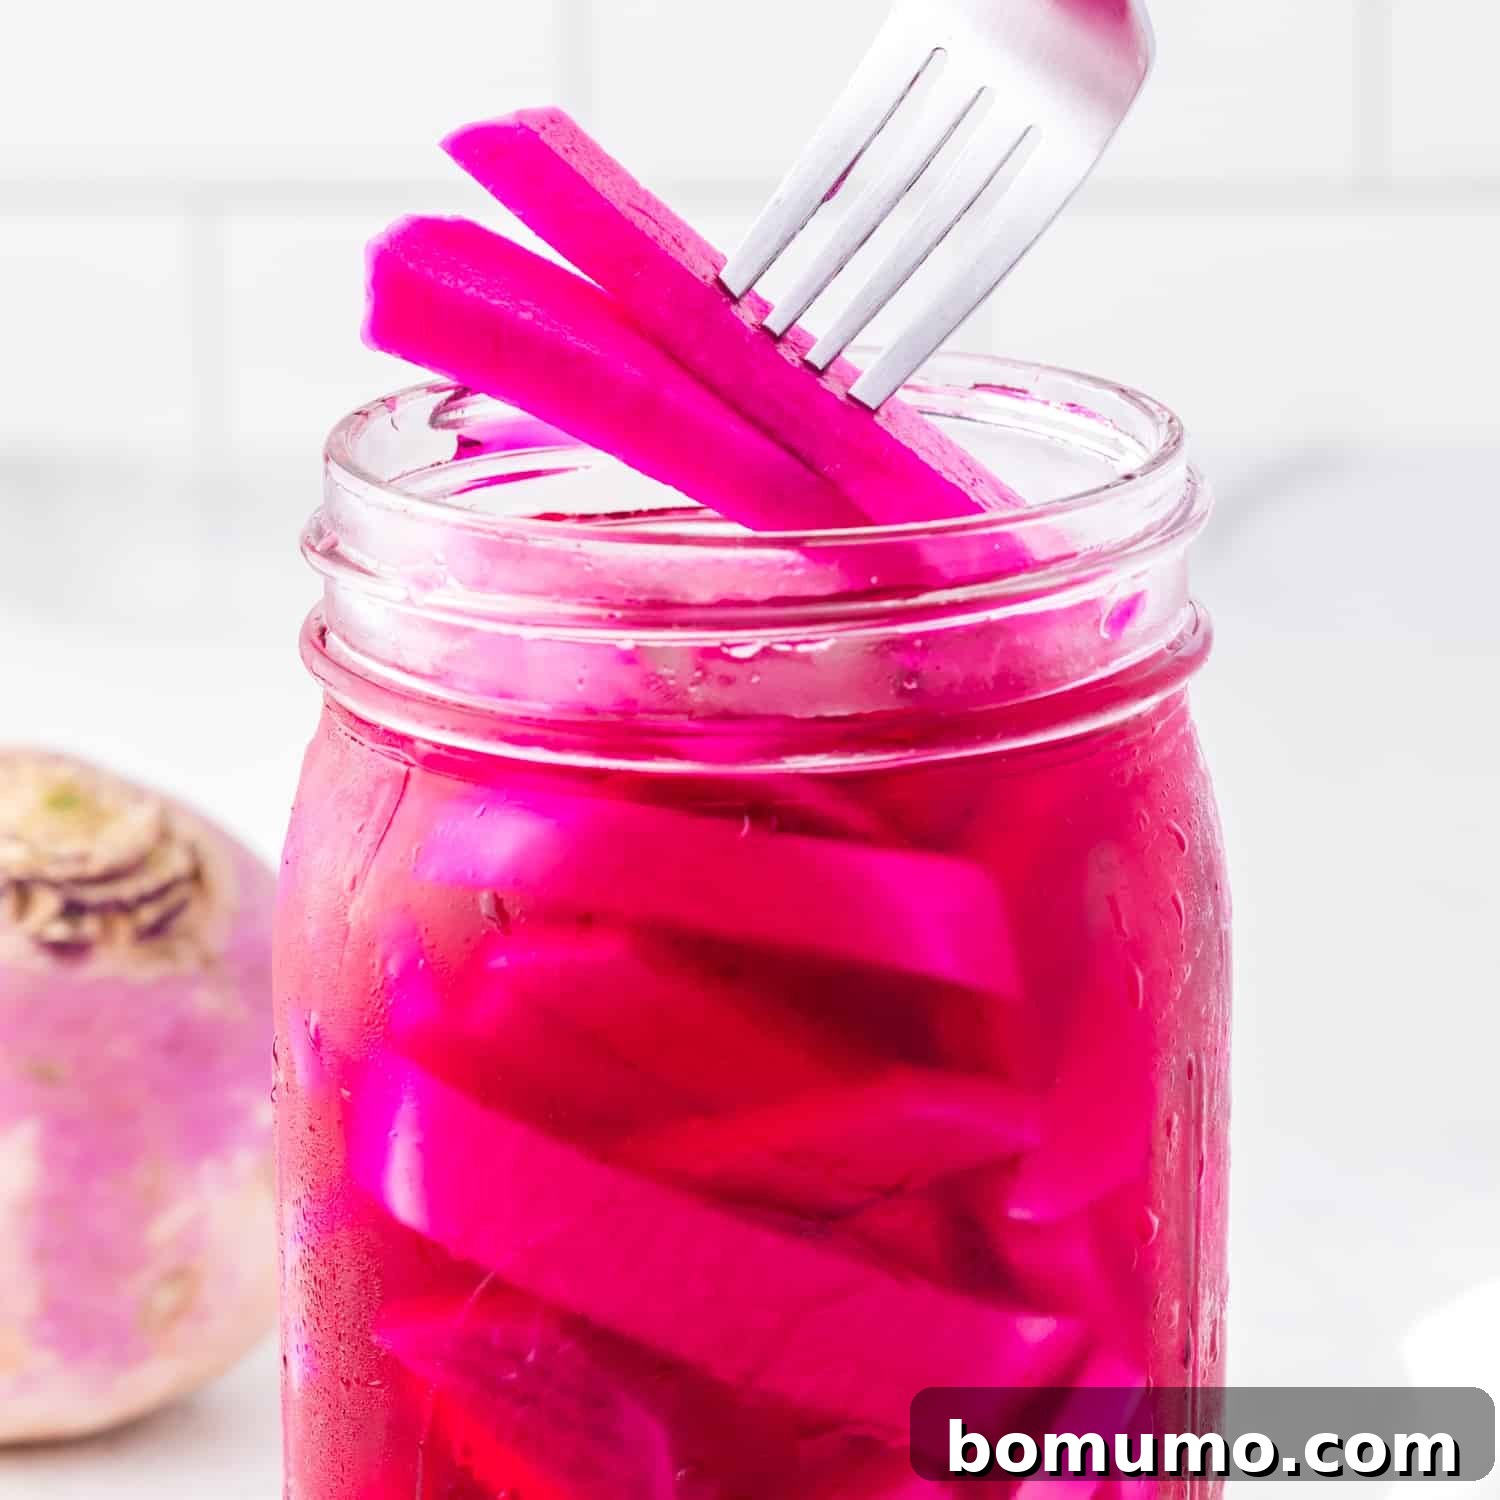
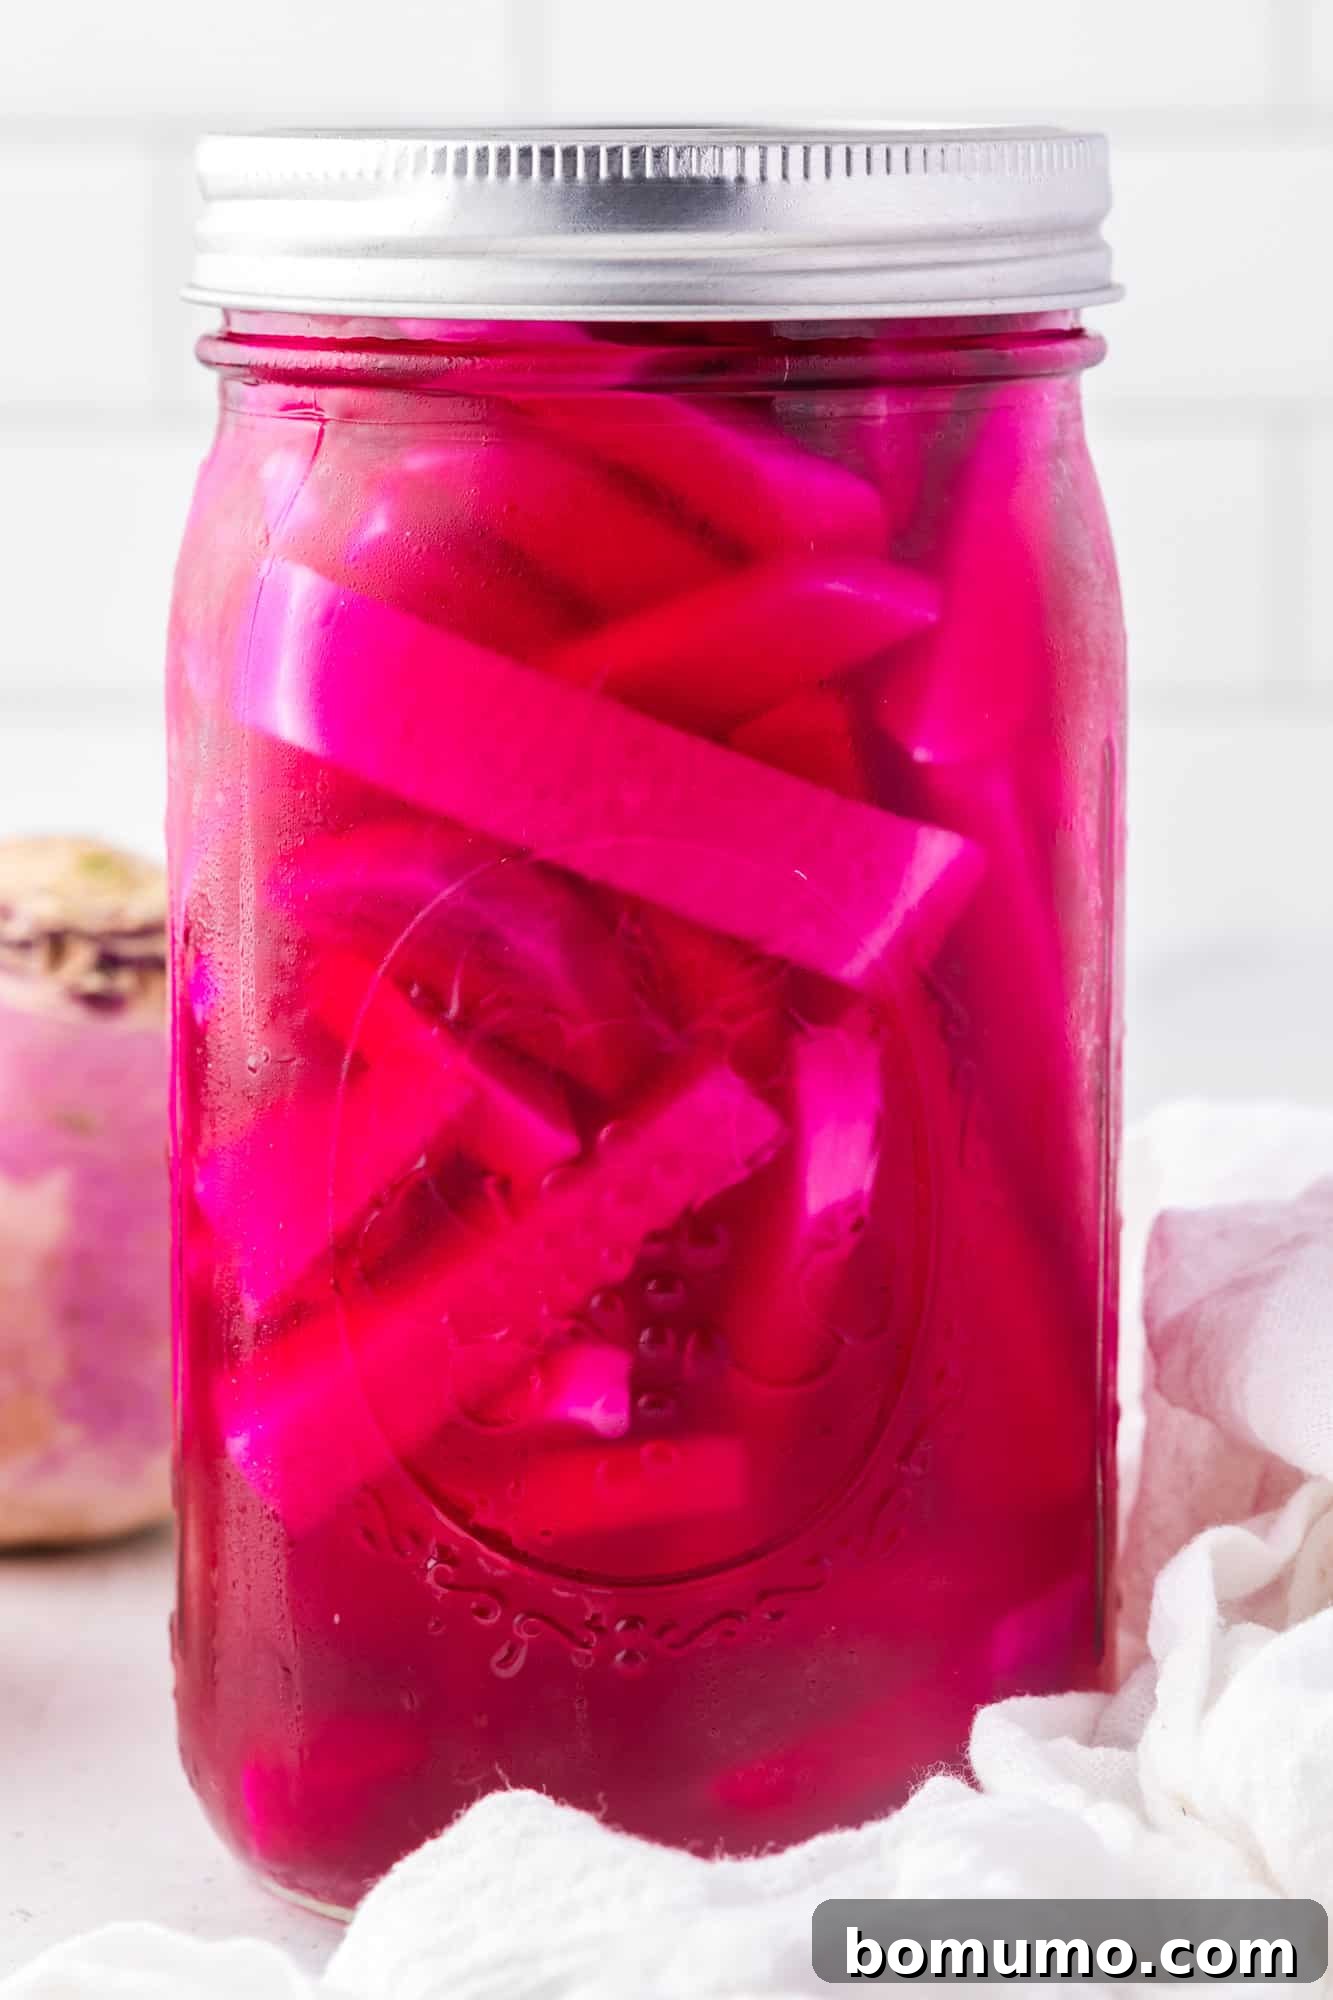
Crunchy, tangy, and a touch sweet, Middle Eastern style pickled turnips are a vibrant condiment that’s surprisingly simple to make at home. These delightful pink pickles are the perfect accompaniment to an array of dishes, from classic falafel pitas and savory shawarma wraps to fresh salads and impressive appetizer boards. Get ready to elevate your meals with this distinctive and flavorful addition!
Recipe Overview
Why you’ll love it: This homemade pickled turnip recipe is incredibly easy to follow, adding a refreshing pep and zing to a wide variety of dishes.
How long it takes: Approximately 20 minutes of active preparation and cooking time, plus essential chilling time for flavors to develop.
Equipment you’ll need: A basic saucepan for the brine and a quart-sized jar for pickling.
Servings: Makes about 8 servings of delicious pickled turnips.
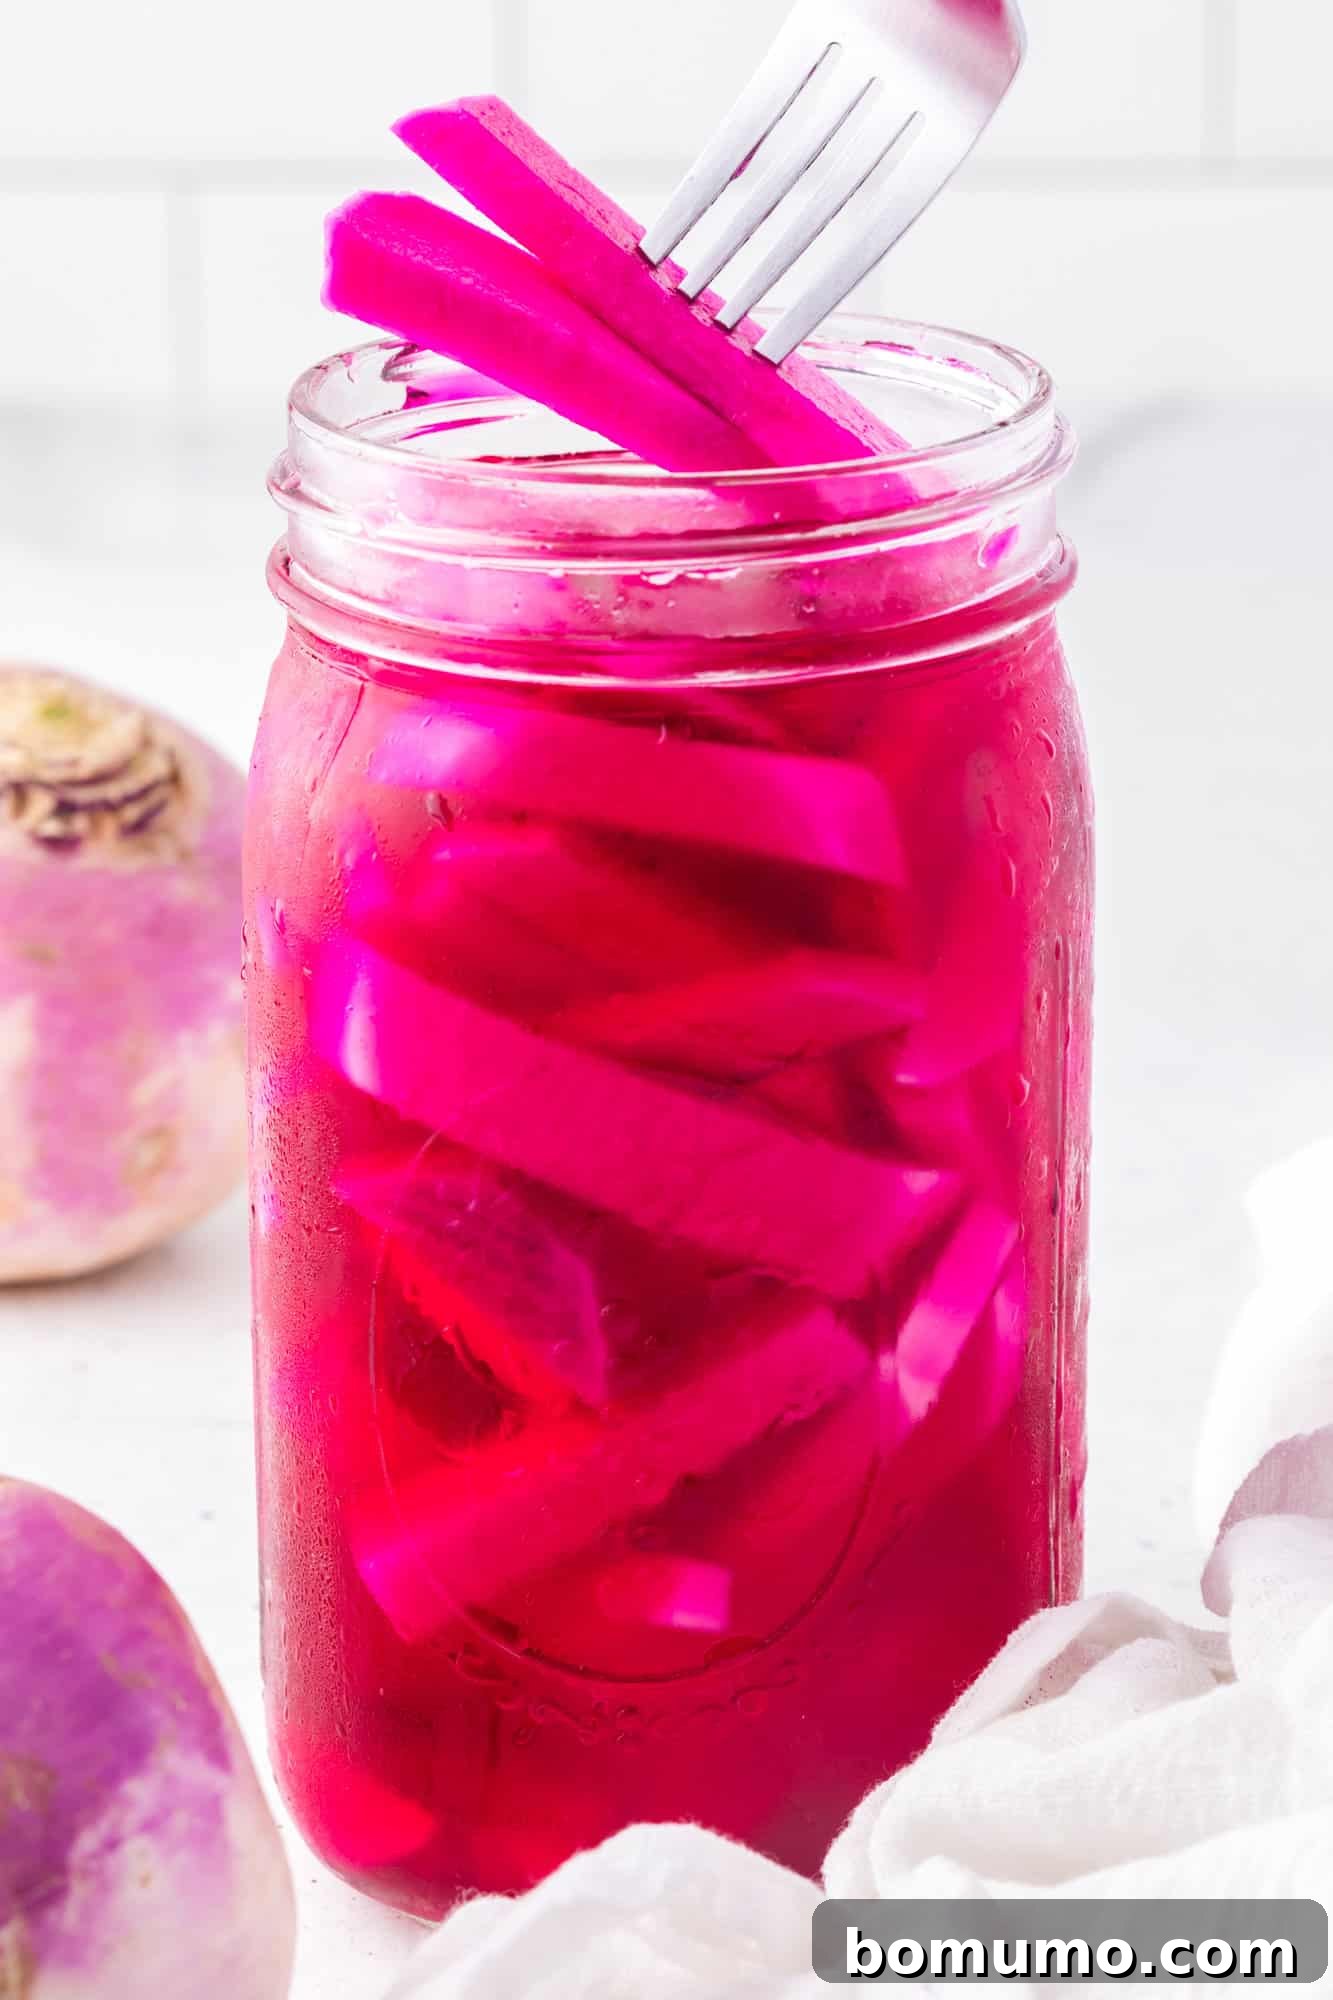
If you’ve ever enjoyed a delicious falafel pita from your favorite Middle Eastern restaurant, you’ve likely encountered those delightful pinkish-red pickles nestled amongst the crisp lettuce and creamy tahini sauce. These intriguing morsels are none other than pickled turnips, a staple condiment in Middle Eastern cuisine that adds a burst of flavor and a satisfying crunch.
Their signature vibrant pink hue often sparks curiosity. How do humble white-fleshed turnips transform into such a captivating shade? The secret lies in a simple, natural ingredient you might not expect to find in a pickle jar! Keep reading to discover the magic behind these beautiful “pink pickles” when you delve into our ingredient list.
Also affectionately known as “pink pickles,” these tangy turnips serve as a versatile condiment, perfect for enjoying on their own, or integrating into salads and sandwiches. They offer a distinct tart-and-tangy profile, where the inherent mild bitterness of turnips is wonderfully mellowed and transformed through the pickling process. The result is a crisp, refreshing bite that brightens any dish.
While pickles can be customized to be spicy, sweet, or intensely garlicky, the recipe we’re sharing today captures the authentic taste found in many Middle Eastern eateries. This particular balance of flavors is a family favorite and promises to deliver that classic pickled turnip experience you crave.
(For another delicious way to enjoy turnips, try roasting them to add an earthy depth to my warm kale salad with roasted root vegetables!)
Why You’ll Love This Homemade Pickled Turnips Recipe
Crafting your own batch of Middle Eastern pickled turnips at home is not only rewarding but also incredibly straightforward. This recipe stands out for several compelling reasons:
- Effortless Refrigerator Pickling: Forget the intimidating process of traditional canning. This is a simple refrigerator pickle recipe, requiring no special equipment beyond a clean Mason jar or any airtight container. It’s a beginner-friendly approach to homemade pickles that ensures freshness and flavor without the fuss.
- Quick Preparation, Worthwhile Wait: The active preparation time for these pickles is remarkably brief, just about 15 minutes, with an additional 5 minutes for cooking the brine. The most challenging part is the anticipation, as the pickles require a minimum chilling time of 24 hours (and ideally 3 to 5 days) for the flavors to fully meld and the turnips to achieve their peak pickled perfection.
- Incredibly Versatile Culinary Companion: Once ready, these vibrant pickles become an indispensable ingredient in your kitchen. Beyond their traditional role in falafel and shawarma, they are fantastic on various sandwiches, add a bright counterpoint to tacos, complement burgers, and provide a tangy crunch atop hot dogs. Their zesty flavor elevates almost any meal.
- A Symphony of Flavor and Texture: Prepare your taste buds for an exciting combination! These pickled turnips boast a delightful crunch, a vibrant tanginess from the vinegar, and a subtle sweetness that balances the acidity. The natural peppery notes of the turnips are beautifully enhanced by the pickling brine, which also introduces a savory kick from garlic and a hint of herbal depth from bay leaves. It’s a truly complex and satisfying flavor profile that keeps you coming back for more.
Turnips 101: A Guide to the Star Ingredient
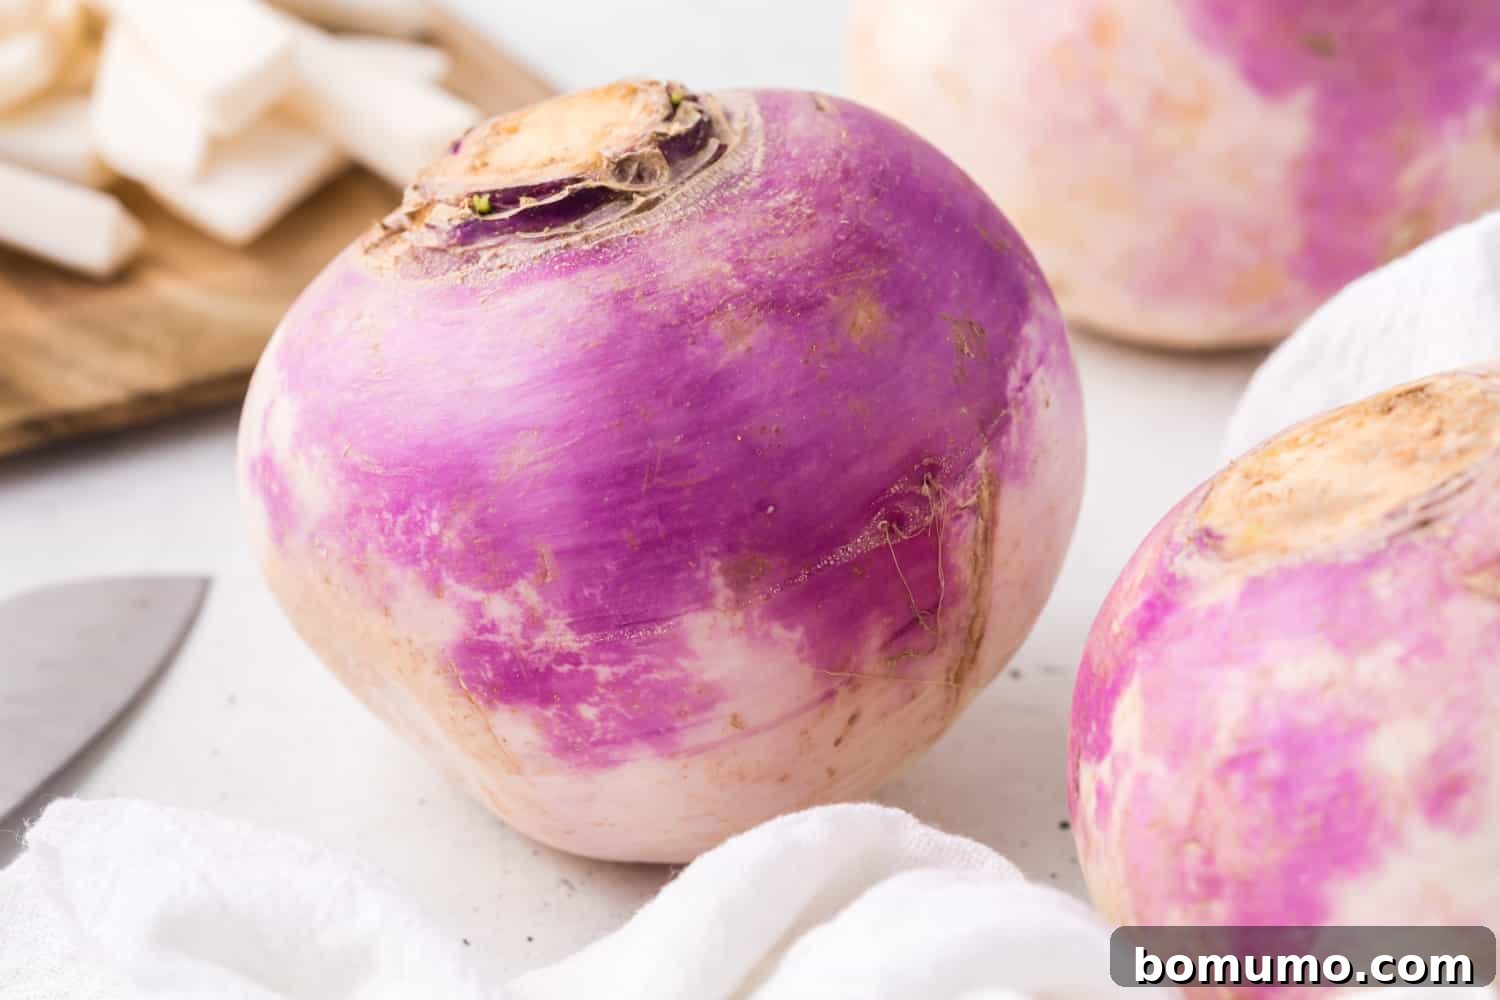
Turnips are humble yet nutritious root vegetables belonging to the cruciferous family, alongside cabbage, broccoli, and kale. While the distinct pinkish-white bulbs grow predominantly above ground, both their leaves (turnip greens) and roots are edible and packed with health benefits. Turnips are renowned for being low in calories while offering a good source of fiber, vitamins, and minerals.
How to Choose the Best Turnips: For optimal pickling, selecting the right turnips is key. Look for small to medium-sized turnips, as larger ones tend to develop a more bitter taste or a woody texture. The turnips should feel firm to the touch, indicating freshness, and their skins should be smooth and unblemished. Avoid any with soft spots, cracks, or signs of wilting. If the greens are still attached, they should appear vibrant and crisp, another indicator of a fresh turnip.
How to Store Turnips for Freshness: Proper storage helps maintain their crispness and flavor before pickling. Unpeeled turnips should be stored in the refrigerator, where they can remain fresh for up to two weeks. Unlike some vegetables, there’s no need to place them in a plastic bag; simply keep them dry to prevent premature spoilage. Raw turnips do not fare well when frozen, as their texture can become mushy upon thawing, making them unsuitable for pickling.
Essential Ingredients for Perfect Pink Pickles
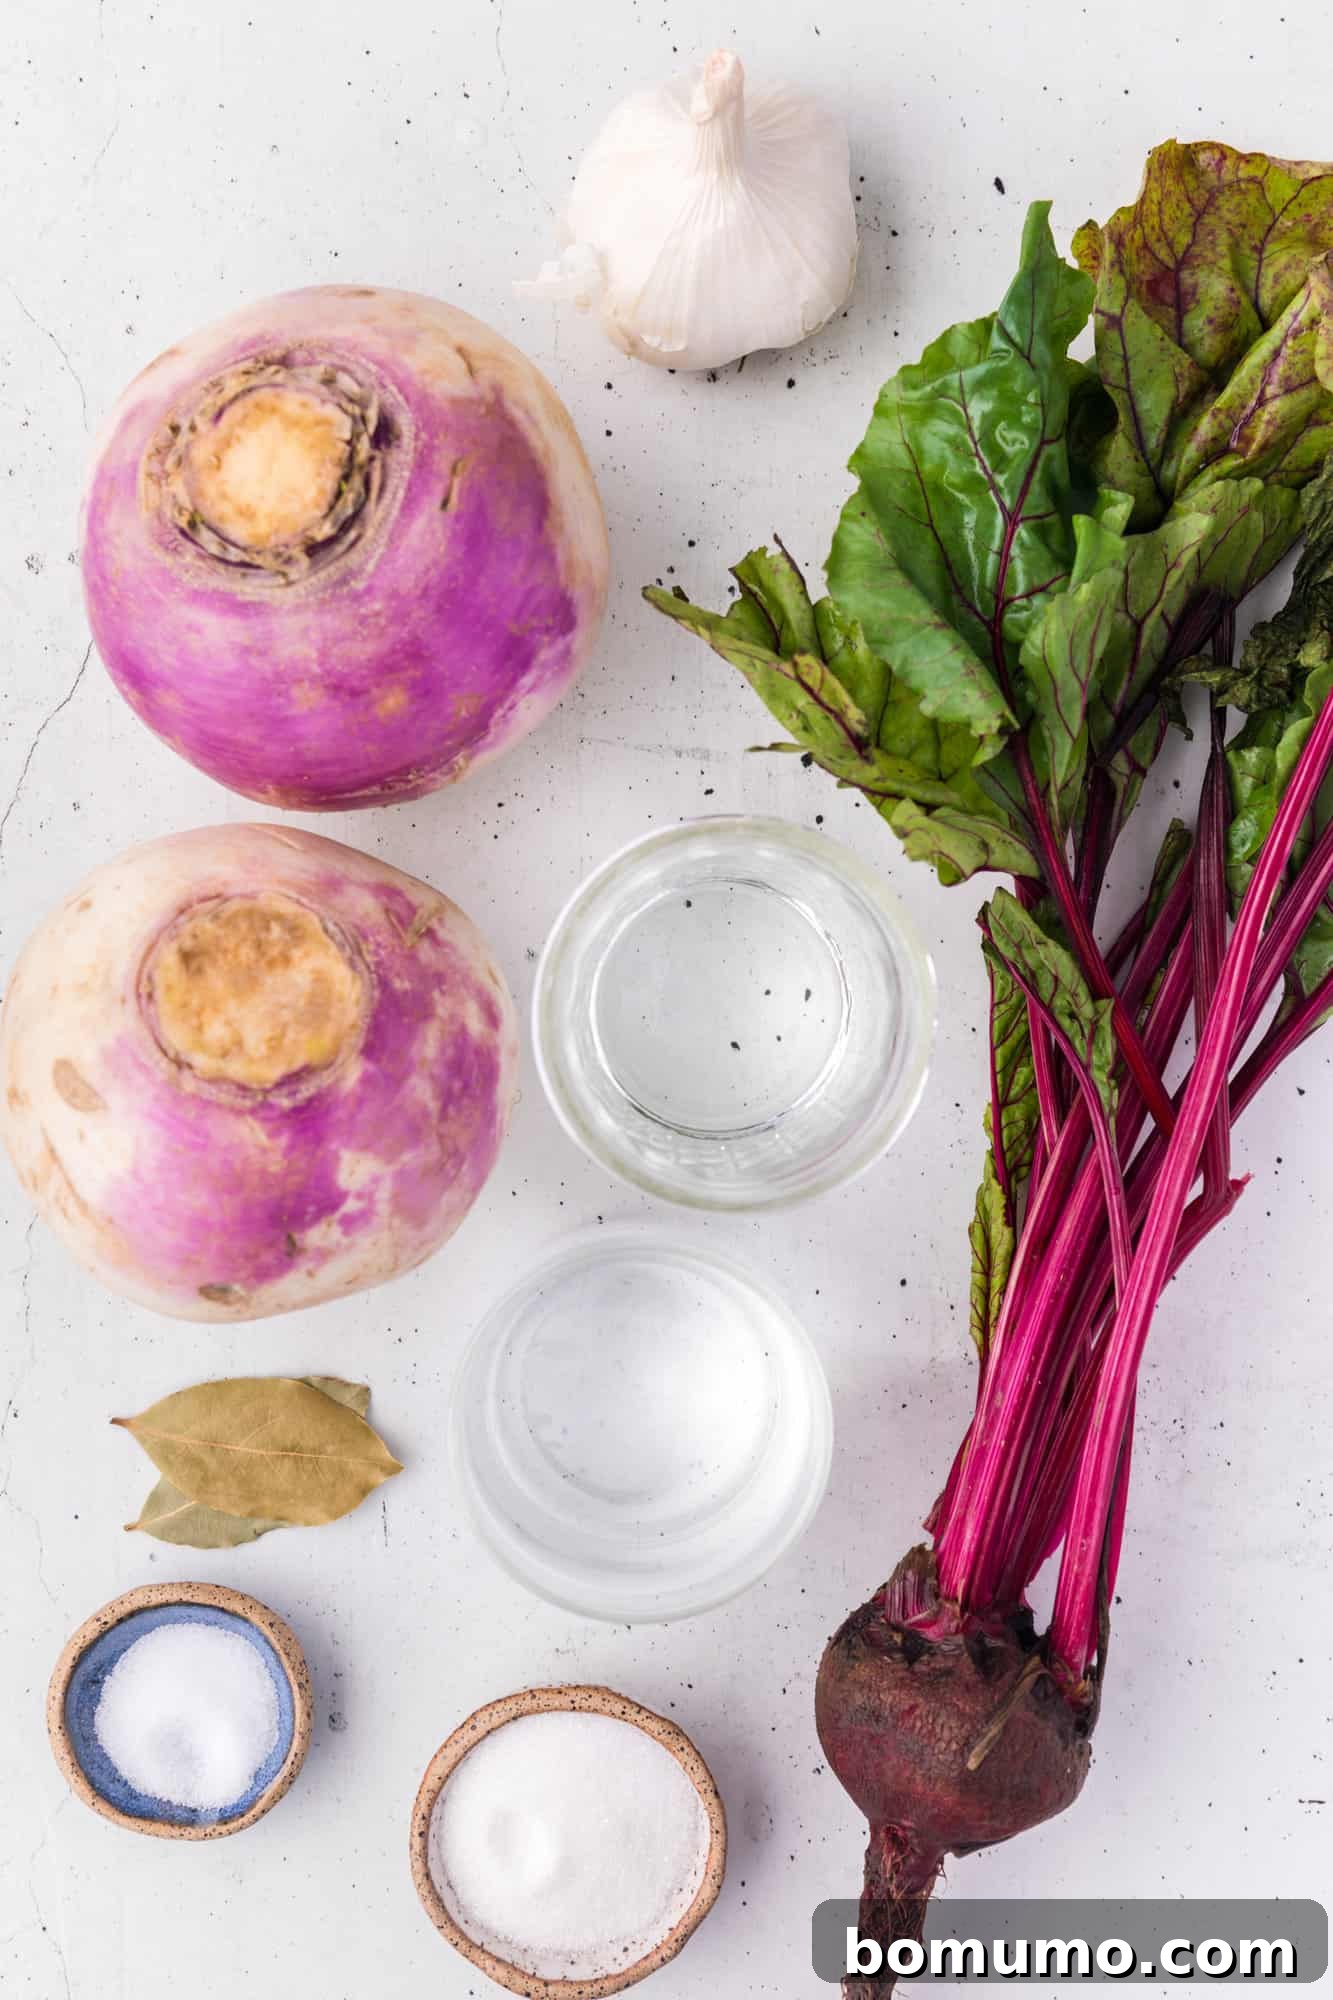
Creating these delightful pickled turnips requires a simple list of ingredients, each playing a crucial role in developing their signature flavor and vibrant color. Here’s what you’ll need:
- Turnips: The star of our recipe! Ensure you choose firm, fresh turnips. You’ll need two large turnips, which typically weigh around 14 ounces in total. Their crisp texture is vital for a satisfying pickle.
- Beet: This is the secret behind the beautiful, natural pink color of these Middle Eastern pickles! A small beet is added directly to the jar, which gradually tints both the pickling brine and the turnip strips. Beyond its coloring power, the beet also contributes a subtle, earthy sweetness that beautifully complements the other flavors.
- Garlic: A few cloves of garlic infuse the pickles with a wonderfully aromatic and savory depth. Whether you choose to smash them lightly to release their oils or slice them thinly so they can be enjoyed alongside the turnips, garlic is a key flavor enhancer.
- White Vinegar: The primary pickling agent, white vinegar provides the essential acidity that gives these turnips their characteristic tang and acts as a natural preservative. While other vinegars can be used for pickling, inexpensive all-purpose white vinegar delivers that authentic, classic pickled turnip flavor you expect.
- Granulated Sugar: Sugar is crucial for balancing the sharp acidity of the vinegar. It rounds out the flavor profile of our pickled turnips, adding a hint of sweetness that makes them utterly addictive without being overly sugary.
- Water: Used to dilute the vinegar and dissolve the salt and sugar for the brine. For the purest flavor and best results, always use filtered water, as tap water can sometimes contain minerals or off-flavors that might affect the final taste of your pickles.
- Kosher Salt: An absolute necessity for any pickling recipe! Salt not only contributes to the flavor but also plays a vital role in the preservation process and helps maintain the turnips’ crisp texture. While specialized pickling salt exists, kosher salt is an excellent, readily available alternative that works perfectly. Avoid iodized table salt, as it can sometimes make the brine cloudy or impart an off-flavor.
- Bay Leaves: Often underestimated, bay leaves add a subtle yet significant layer of aromatic complexity to the pickling liquid. Their herbaceous notes contribute to the overall depth of flavor, making the pickles more nuanced and enjoyable.
Step-by-Step Guide: Crafting Your Own Pickled Turnips
Making Middle Eastern pickled turnips is a straightforward process that yields delicious results. Follow these simple steps:
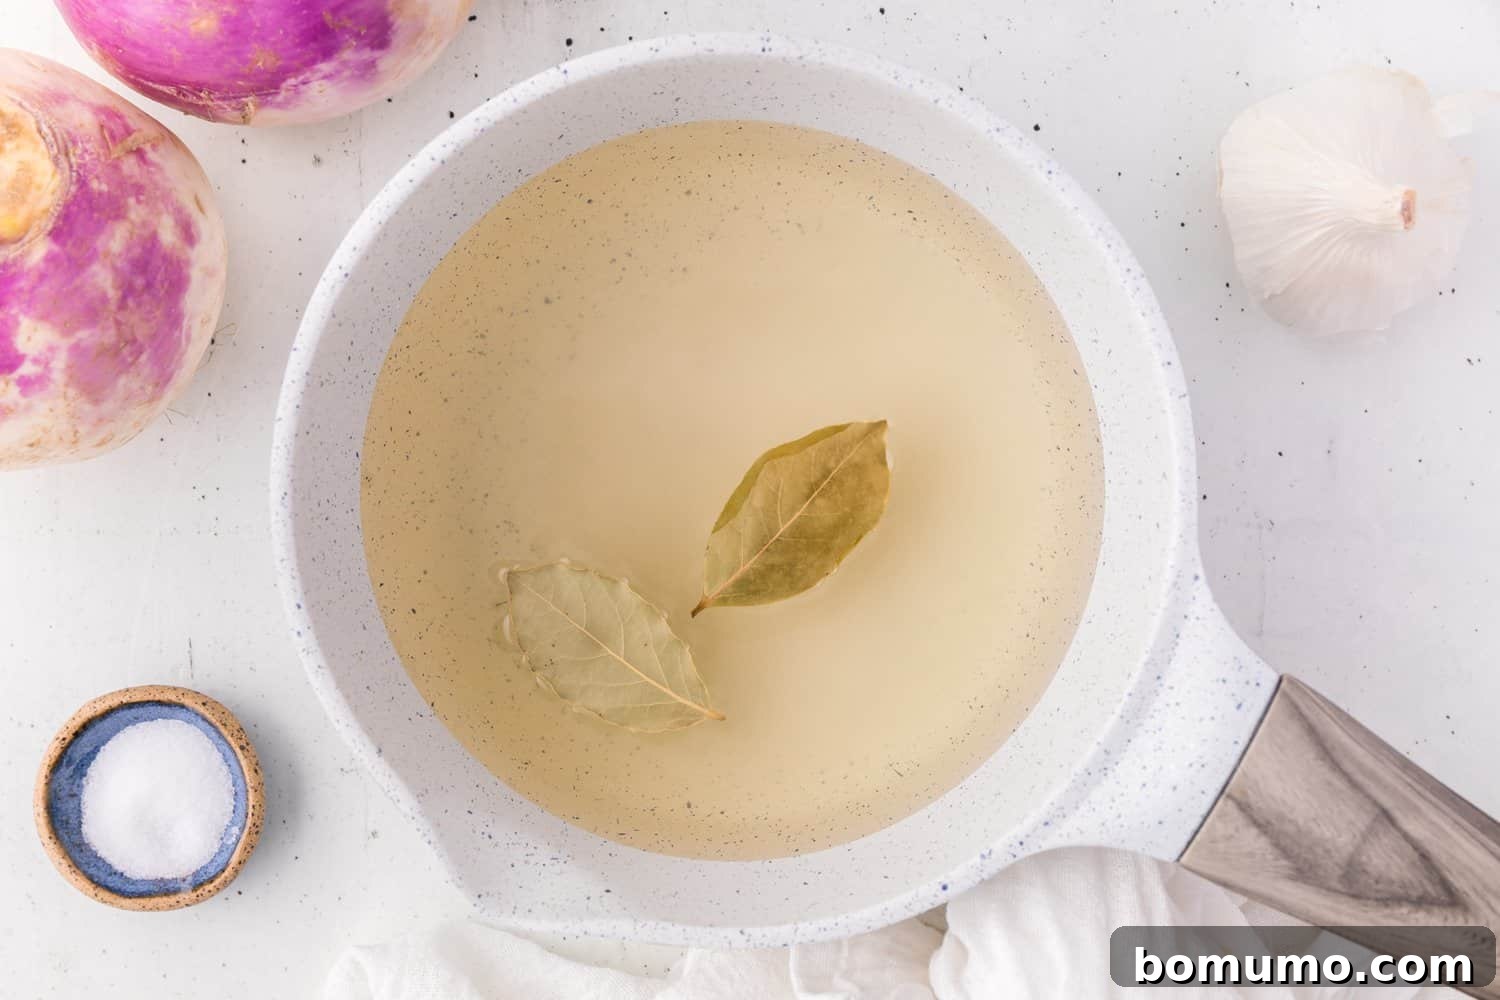
- Prepare the Brine: In a medium saucepan, combine the measured water, white vinegar, kosher salt, granulated sugar, and bay leaves. Place the saucepan over medium heat and bring the mixture to a gentle boil, stirring occasionally. Continue stirring until both the sugar and salt are completely dissolved. Once dissolved, remove the saucepan from the heat and set it aside to cool completely to room temperature. This cooling step is crucial to prevent the turnips from softening prematurely.
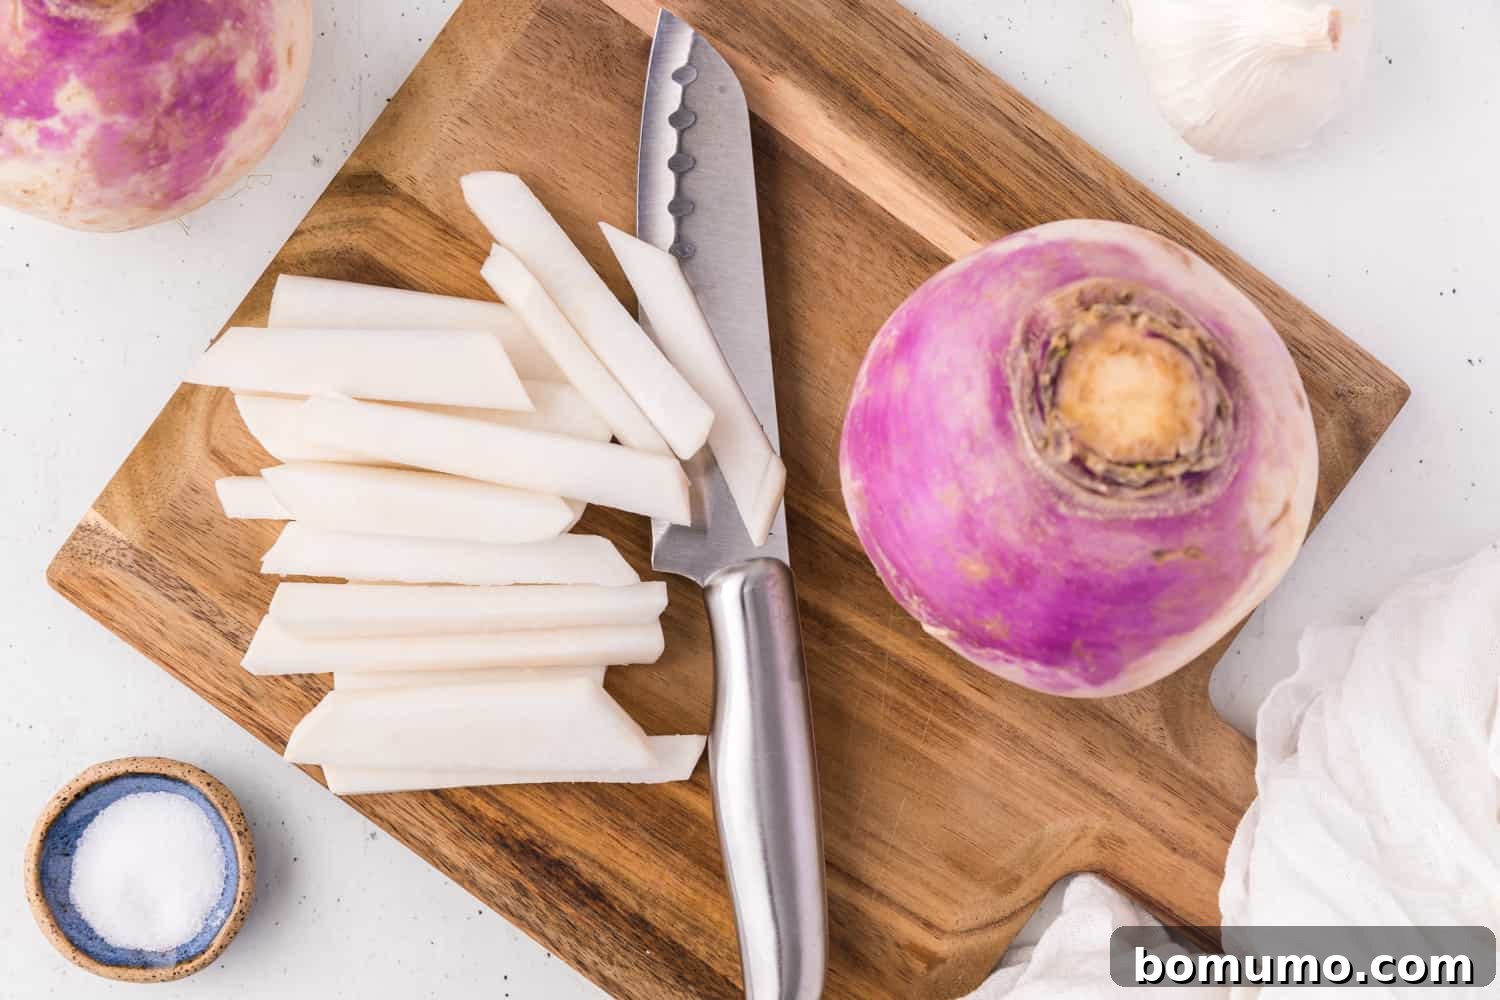
- Prepare the Vegetables: While the pickling brine cools, scrub the turnips thoroughly under running water, then peel them using a vegetable peeler. For consistent pickling and an appealing presentation, cut the peeled turnips into evenly-sized thin strips, approximately ½ inch thick and about 2-3 inches long. Repeat this process with the small beet, peeling it and slicing it into similar-sized strips. The uniform thickness ensures that all the vegetables pickle at the same rate.
- Prepare the Garlic (Optional): Peel the garlic cloves. You can either smash them lightly with the flat side of a knife blade to release their flavor or slice them thinly if you prefer to eat them with the pickles. If you’re not a fan of garlic, feel free to omit it entirely.
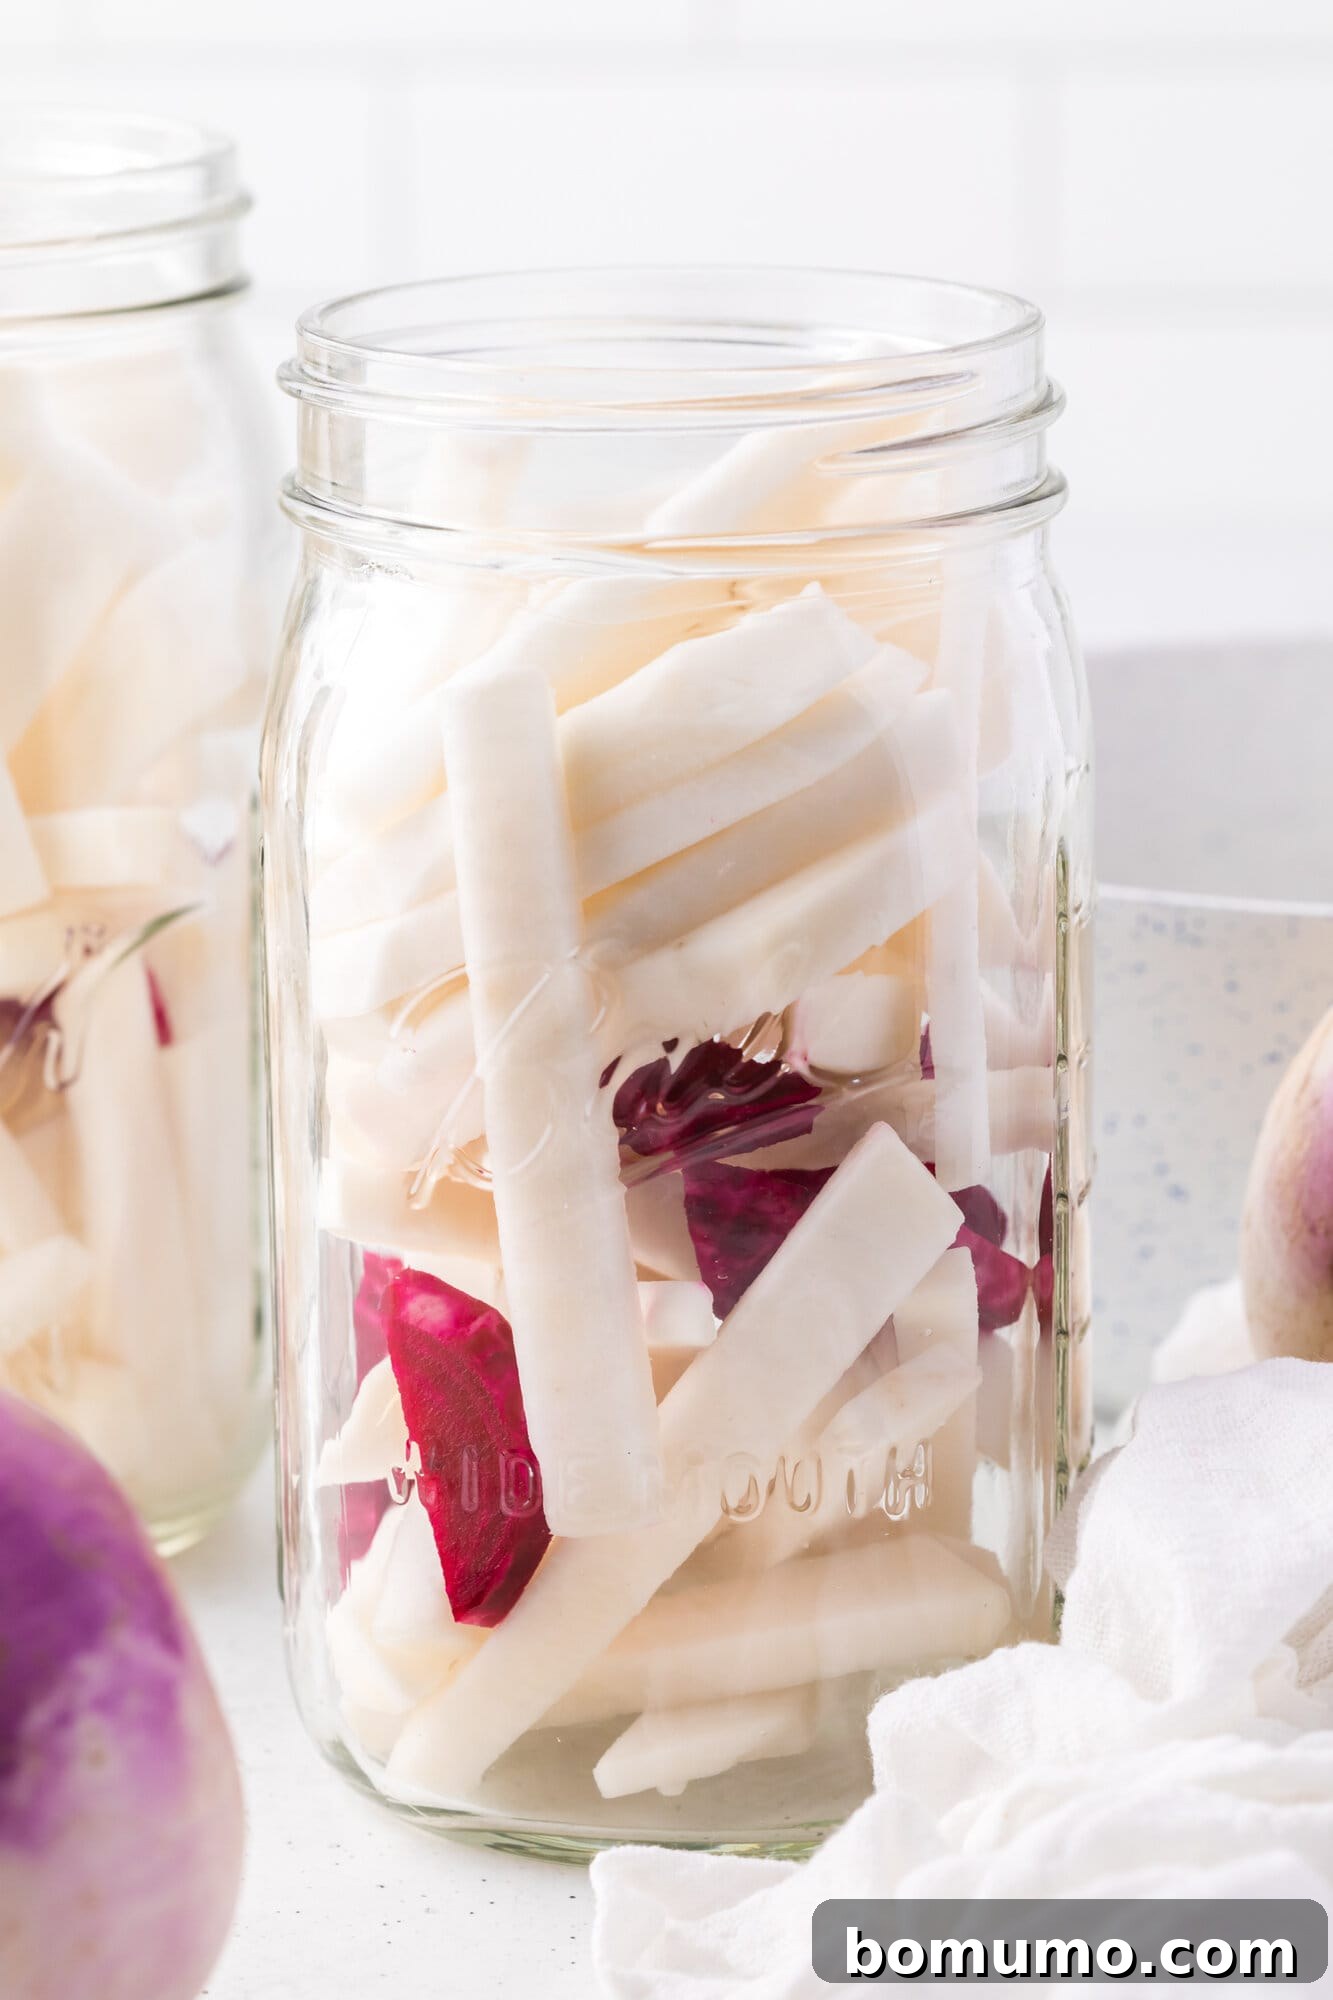
- Assemble the Jar: Carefully place the prepared turnip strips, beet strips, and garlic cloves (if using) into a clean, sterile quart-sized glass jar. Pack the vegetables relatively snugly, but avoid overly compacting them, leaving a small amount of headspace at the top of the jar.
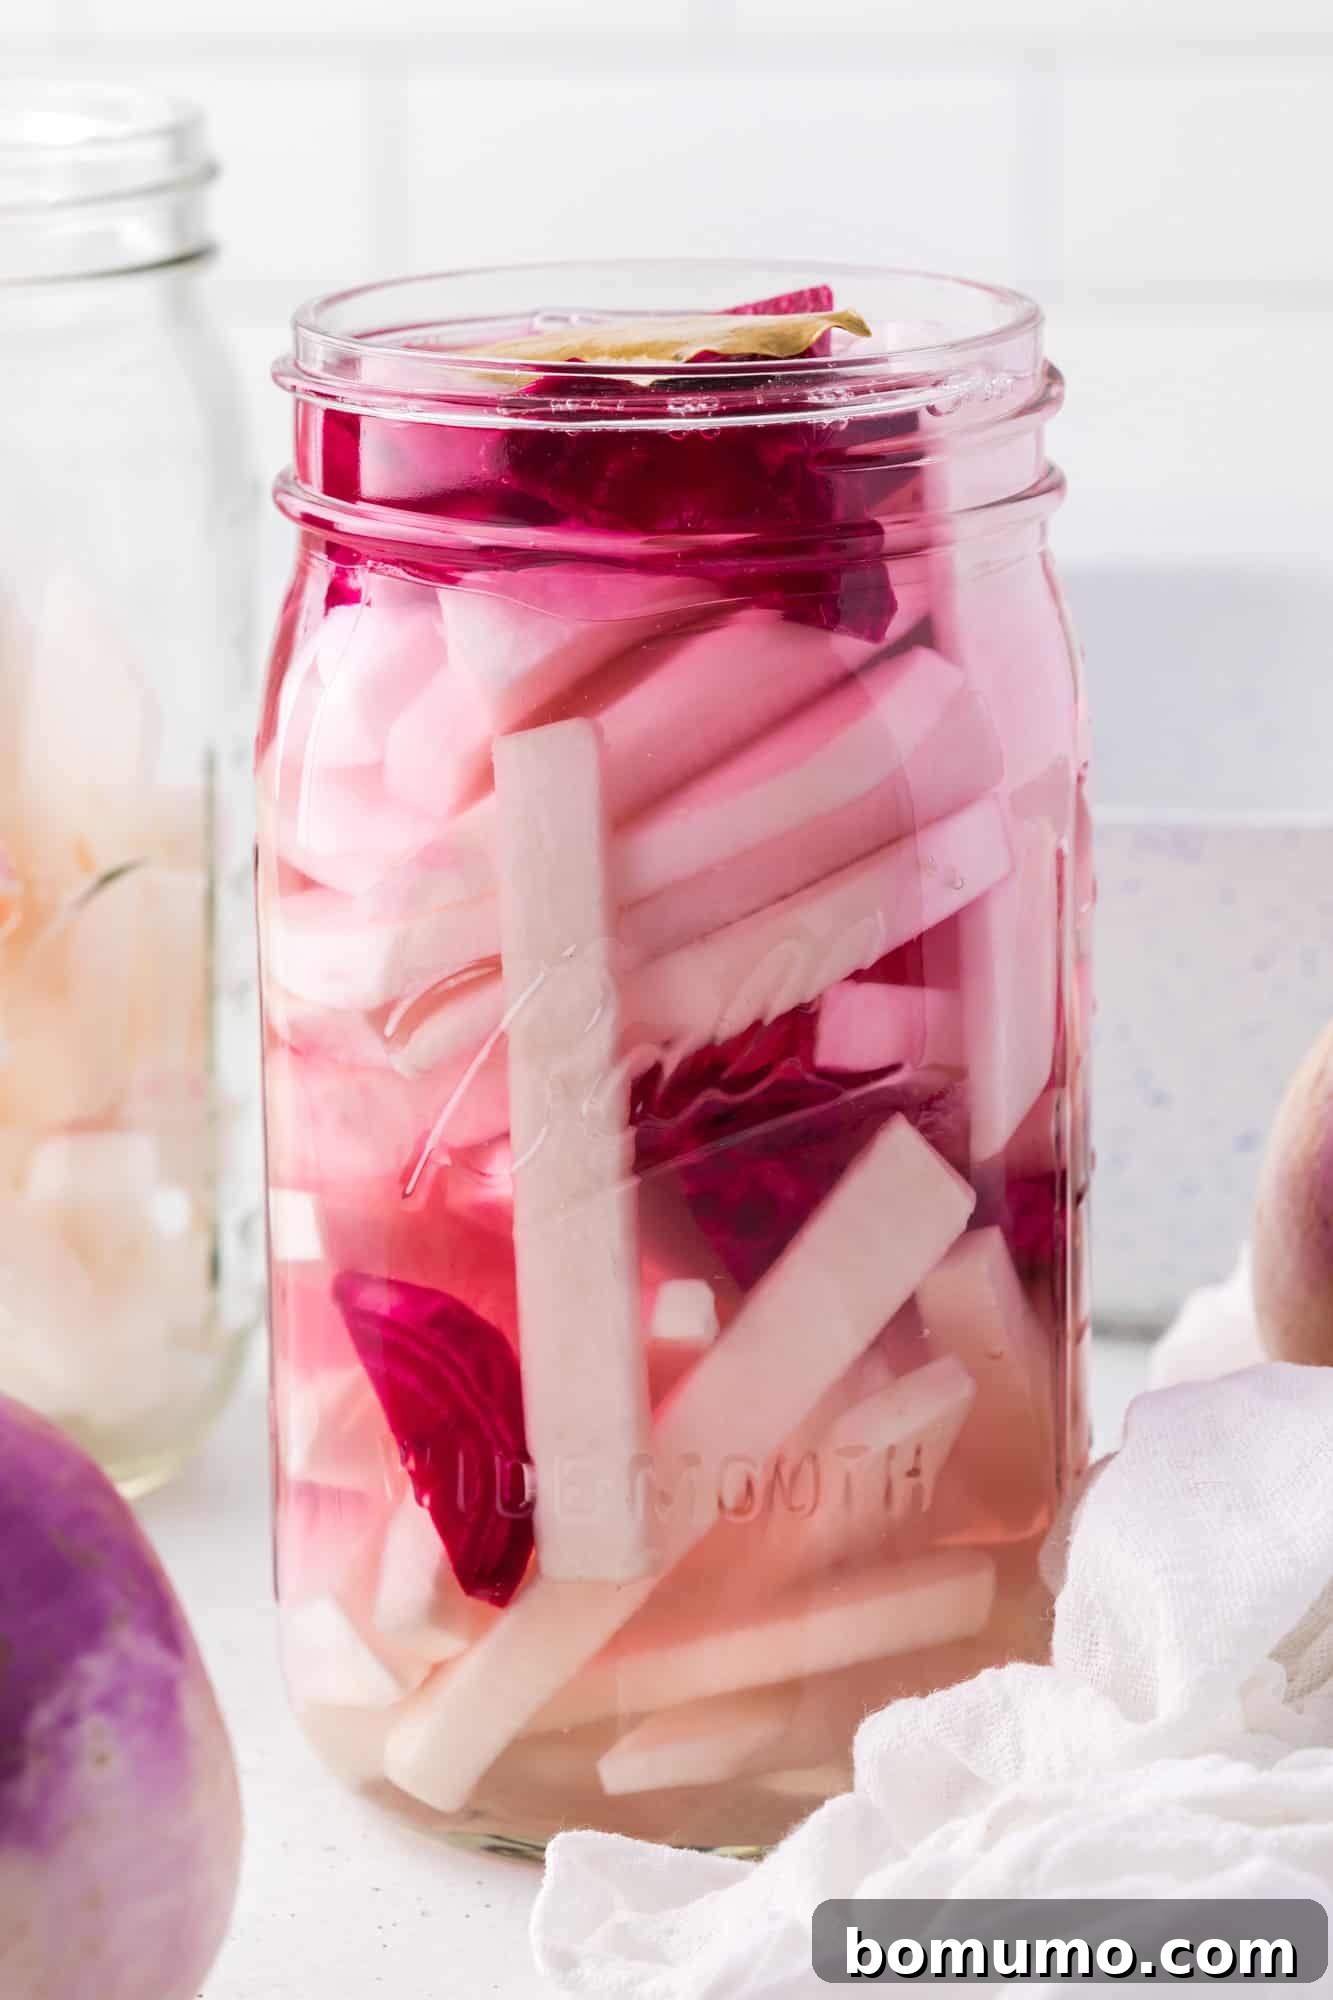
- Pour the Brine: Once the brine has completely cooled to room temperature, carefully pour it over the vegetables in the jar. Ensure that all the turnip and beet strips are fully submerged in the liquid. You might not need all the brine; discard any leftover liquid.
- Chill and Marinate: Seal the jar tightly with its lid and transfer it to the refrigerator. Allow the pickles to chill and marinate for at least 24 hours before serving. For the absolute best flavor and texture, patiently wait 3 to 5 days, as this extended pickling time in the fridge allows the flavors to deepen and mature beautifully.
Frequently Asked Questions (FAQs)
Turnips, both raw and pickled, are highly nutritious. They are an excellent source of dietary fiber, which aids digestion, and are rich in Vitamin C, a powerful antioxidant that supports immune health. They also contain various minerals and phytonutrients that offer anti-inflammatory benefits. While pickling adds salt, consuming pickled turnips in moderation can be a tasty way to incorporate these beneficial vegetables into your diet (Healthline).
The vibrant pink color in these pickles comes from the beet added to the jar. If your turnips didn’t turn pink, it’s likely due to one of a few reasons: the beet might have been too small or old, or it wasn’t sliced thinly enough to release its pigment effectively. Ensure you use a fresh, small beet and slice it thin. Also, remember that the color develops over time, so give them at least 3-5 days in the refrigerator for the best hue.
For extra crunchy pickled turnips, start with very fresh, firm turnips. Avoid older, softer ones. You can also try adding a pinch of pickling crisping agents, such as calcium chloride (often found where canning supplies are sold), to the jar before adding the brine. Ensuring your brine is completely cool before pouring it over the vegetables also helps maintain their crispness, as hot brine can soften them.
Customize Your Pickled Turnips: Exciting Variations
While this recipe delivers a classic Middle Eastern flavor, pickled turnips are incredibly adaptable. Feel free to experiment with these variations to tailor them to your personal taste:
- Infuse with Herbal Notes: To add an aromatic twist, tuck fresh herb sprigs into the jar along with the vegetables. Try dill for a classic pickle flavor, thyme for an earthy undertone, or oregano for a Mediterranean flair. These herbs will subtly infuse the brine, adding another layer of complexity to your pickles.
- Turn Up the Heat: If you enjoy a spicy kick, it’s easy to add heat to your turnip pickles. Incorporate a few black peppercorns, a whole dried chili pepper, or a generous pinch of red pepper flakes directly into the brine mixture when you’re preparing it. For a fresher, more immediate spice, you can also add a thinly sliced jalapeño pepper to the jar with the turnips and beets.
- Achieve Pink Without the Beet: If you prefer to omit the beet (perhaps due to taste preference or availability), you can certainly make the rest of the recipe as instructed. Your pickles will retain their delicious flavor but will naturally be white in color. If you still desire that signature pink hue without the beet, a few drops of natural red food coloring can be added to the cooled brine before pouring it into the jar.
Serving Suggestions: The Perfect Accompaniment to Any Meal
These crunchy, tangy pickled turnips are a versatile condiment that can enhance a wide array of dishes. Their bright flavor and vibrant color make them a fantastic addition to almost any meal. Here are some ideas to get you started:
- Snacking & Appetizers: Enjoy them straight from the jar as a refreshing snack, or arrange them on a cheese or charcuterie board for an eye-catching pop of color and a zesty counterpoint to rich cheeses and cured meats.
- Salads & Sandwiches: They are a natural fit for salads, adding crunch and tang. Try them finely diced in my chopped Greek salad, or incorporate them into your favorite sandwiches, wraps, and pita bread for an extra layer of flavor.
- Burgers & Tacos: Elevate your backyard barbecue by topping burgers and hot dogs with these flavorful pickles. Their acidity cuts through richness beautifully. They also make an excellent addition to mushroom tacos or slow cooker pork tacos, providing a much-needed crunch and zing.
- Egg & Chicken Salads: Finely dice the pickled turnips and fold them into your homemade egg salad or curried chicken salad for an unexpected burst of flavor and texture.
- Healthy Lunch Ideas: For a nutritious and satisfying lunch, serve pickled turnips alongside a warm grain salad or use them as a vibrant garnish for a Buddha bowl or any meal bowl.
- Middle Eastern Pairings: Naturally, they pair perfectly with other Middle Eastern staples. Serve them with grilled chicken shawarma drumsticks, fattoush salad, or as a traditional garnish for creamy hummus, where their bright pink color creates a stunning contrast.
Storage Tips: Keeping Your Pickles Fresh
Proper storage is essential to ensure the longevity and safety of your homemade pickled turnips.
- Always Refrigerate: It’s crucial to remember that these are quick refrigerator pickles and are not shelf-stable. They must always be stored in the refrigerator to prevent spoilage and maintain food safety.
- Airtight Container: Transfer the pickled turnips to a tightly covered glass jar or an airtight container before refrigerating. This helps keep them fresh and prevents them from absorbing other odors in the fridge.
- Shelf Life: When stored correctly in the refrigerator, these pickled turnips will last for several weeks, typically up to 1-2 months. While their texture may soften slightly over time, they should remain flavorful.
- Signs of Spoilage: Always inspect your pickles before consuming them. If the brine appears cloudy (beyond the initial beet-induced tint) or develops an unusual or bad smell, or if there’s any sign of mold, discard the entire batch immediately. Safety first!
Explore More Quick Pickle Recipes
Easy Pickled Red Onions Recipe
Pickled Cauliflower (quick pickles)
Refrigerator Dill Pickles – Quick and Easy
Easy Korean Pickles
Pickled Asparagus Recipe – 10 minutes hands-on!
Pickled Vegetables – spicy or not!
The Easiest Pickled Green Beans
Quick Pickled Radish Recipe – How to Pickle Radishes
Recipe
Middle Eastern Pickled Turnips Recipe
Rachel Gurk
Print Recipe
Prep Time: 15 mins
Cook Time: 5 mins
Chilling Time: 1 day (minimum, ideally 3-5 days)
Total Time: 20 mins (active) + chilling
Yield: 8 servings
Making Middle Eastern style pickled turnips is easier than you think! They’re crunchy, tangy, and a little bit sweet—and the perfect addition to salads, shawarma, and appetizer boards.
Ingredients
- 1 ½ cups water
- 1 cup white vinegar
- 2 tablespoons kosher salt (recommended brand)
- 1 tablespoon granulated sugar
- 2 bay leaves
- 2 large turnips, about 14 oz. total
- 1 small beet, about 3 oz. (for natural pink color)
- 2 cloves garlic, peeled and smashed or sliced (optional)
Instructions
- In a small saucepan, combine the water, white vinegar, salt, granulated sugar, and bay leaves. Bring the mixture to a boil over medium heat, stirring occasionally until the sugar and salt dissolve completely. Remove the saucepan from heat and let the brine cool completely to room temperature.
- Meanwhile, peel the turnips with a vegetable peeler. Cut them into thin, uniform strips (about ½-inch thick).
- Peel the beet and cut it into similar-sized strips. Place the cut turnips, beets, and garlic (if using) into a clean, sterile glass quart jar. Ensure the jar has enough space to hold all ingredients comfortably.
- Once the brine has cooled, pour it into the jar, making sure all the turnip and beet strips are fully submerged. Discard any leftover brine.
- Cover the jar tightly with a lid and place it in the refrigerator.
- Allow the pickled turnips to marinate in the refrigerator for at least 24 hours to develop initial flavors. For optimal taste and texture, let them pickle for 3 to 5 days.
Notes
- Storage: Quick pickles must always be refrigerated. Properly stored, pickled turnips will keep in the refrigerator for a few months. Discard immediately if the brine turns cloudy or develops an off-smell.
- Spicy Variation: For a hotter pickle, add a sliced jalapeño pepper, a few peppercorns, a dried red chile pepper, or a pinch of red pepper flakes to the brine.
- No Beet Option: If you choose not to add a beet, the pickles will naturally remain white in color. For pink pickles without the beet, you can add a few drops of red food coloring to the cooled brine.
Nutrition Facts (per serving)
Calories: 30kcal, Carbohydrates: 6g, Protein: 1g, Fat: 0.1g, Saturated Fat: 0.01g, Polyunsaturated Fat: 0.03g, Monounsaturated Fat: 0.01g, Sodium: 1785mg, Potassium: 122mg, Fiber: 1g, Sugar: 4g, Vitamin A: 5IU, Vitamin C: 10mg, Calcium: 21mg, Iron: 0.3mg
Nutrition information is automatically calculated and should only be used as an approximation.
Did You Make This?
Share a comment and rating below! I love hearing what you think!