
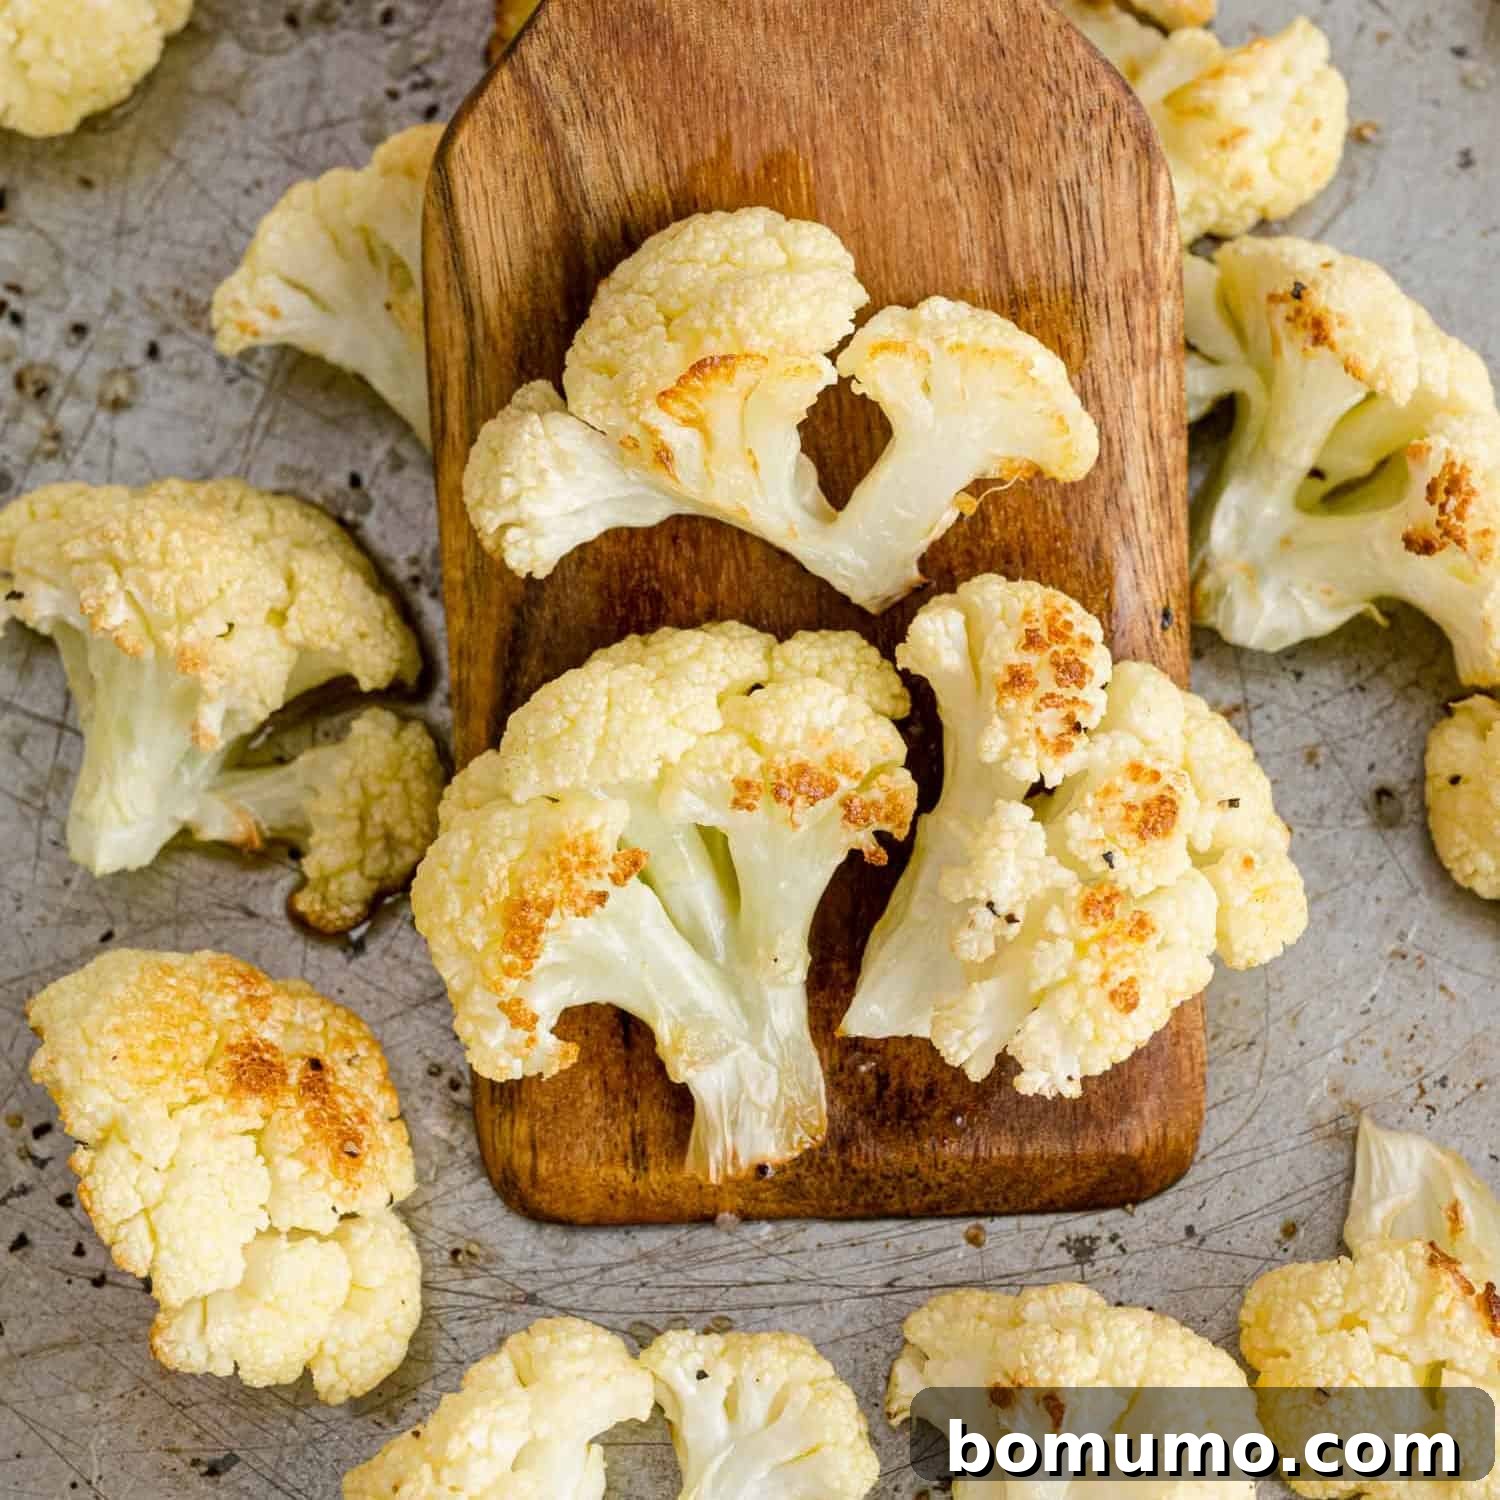
Recipe Overview: The Ultimate Guide to Roasted Cauliflower
Why You’ll Love This Recipe: Unlock the incredible potential of cauliflower with roasting! This method intensifies its natural sweetness, creating a deeply flavorful, slightly nutty, and delightfully crispy vegetable. It’s not just delicious; it’s also incredibly healthy, easy to prepare, and a fantastic addition to any meal. This comprehensive guide will show you exactly how to roast cauliflower to perfection, transforming a humble vegetable into a culinary star.
Preparation & Cook Time: Approximately 25 minutes total (5 minutes prep, 20 minutes cook time)
Essential Equipment: A sharp chef’s knife, a large rimmed baking sheet (also known as a sheet pan), and a reliable oven.
Yields: 4 generous servings
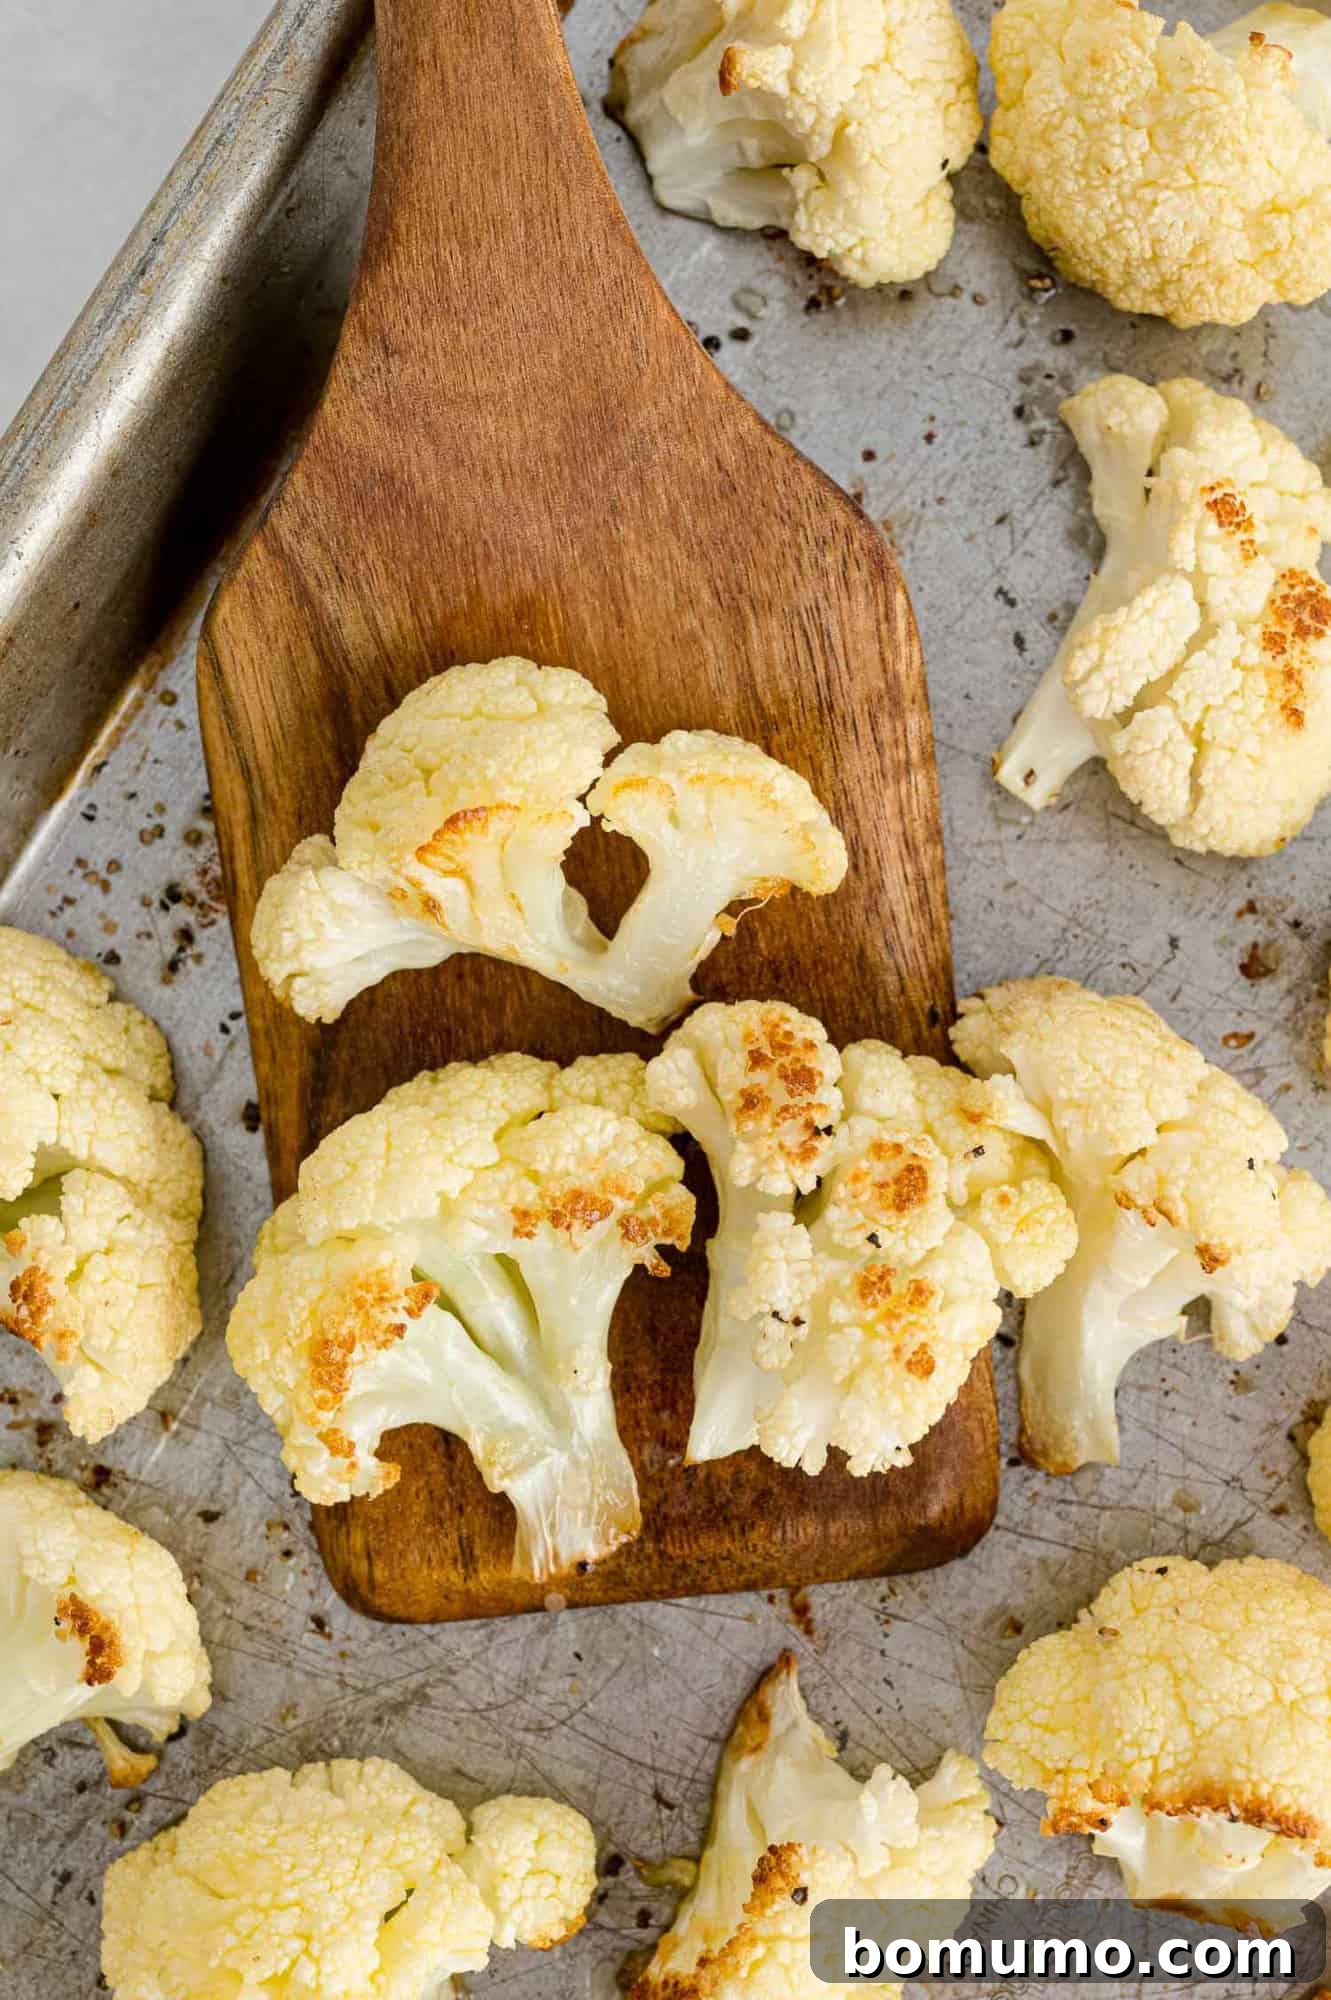
For years, roasting has been my go-to method for preparing vegetables, and for good reason! It’s a technique that truly elevates their natural flavors and textures, making them irresistible even to the most skeptical eaters. From tender roasted broccoli to sweet roasted carrots, earthy mushrooms, and the comforting sweetness of any winter squash, the oven consistently delivers exceptional results. This cooking method brings out a depth of flavor and a pleasing caramelization that simply can’t be achieved by steaming or boiling. Plus, it’s an inherently healthy way to prepare produce, requiring minimal oil and yielding maximum taste. Once you experience the magic of roasted vegetables, you’ll understand why they’re a staple in my kitchen.
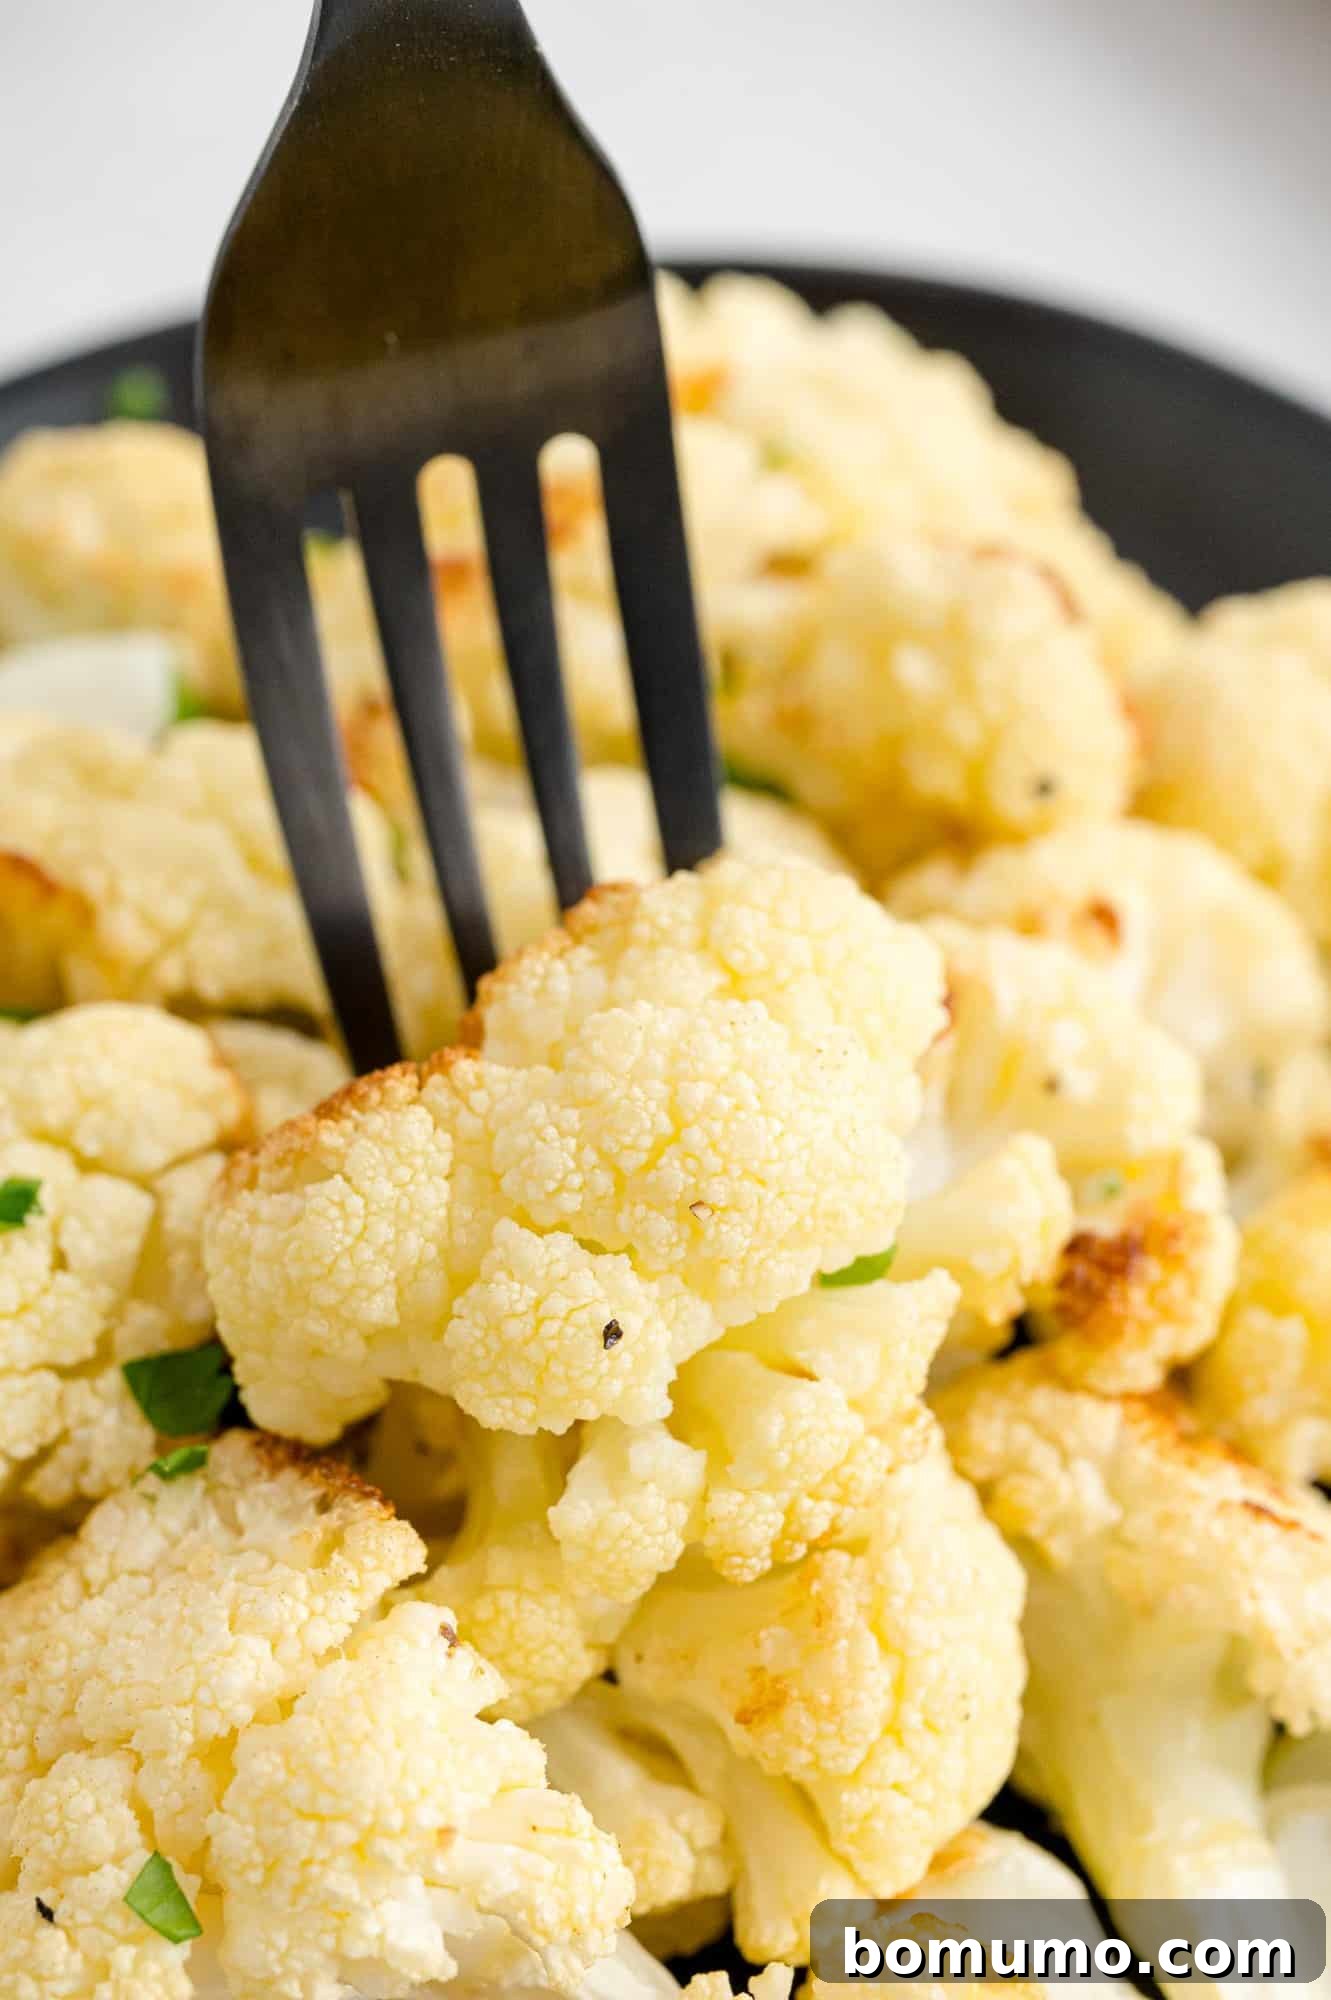
Cauliflower, in particular, undergoes a magnificent transformation when roasted. Forget bland, watery florets; roasting turns cauliflower into a delightful culinary experience. Its mild flavor becomes richer, its texture tender on the inside with beautifully crispy, browned edges. Best of all, achieving this level of deliciousness is surprisingly simple and requires very little effort, making it perfect for weeknight dinners or a quick healthy snack.
The Health Benefits of Cauliflower: A Nutritional Powerhouse
Beyond its culinary versatility, cauliflower is a nutritional champion. Often overshadowed by its greener cousins, this cruciferous vegetable is packed with essential vitamins, minerals, and antioxidants, while being remarkably low in calories. It’s an excellent source of dietary fiber, promoting digestive health and satiety, which can aid in weight management. According to Healthline, cauliflower is rich in Vitamin C, crucial for immune function and skin health, and Vitamin K, vital for blood clotting and bone health. It also provides a significant amount of choline, an essential nutrient important for brain development and memory. Furthermore, cauliflower contains a diverse array of antioxidants, including glucosinolates and isothiocyanates, which are known for their anti-inflammatory and cancer-fighting properties. Incorporating roasted cauliflower into your diet is a simple yet effective way to boost your nutrient intake and support overall well-being.
For those who fall in love with roasted cauliflower, the culinary journey doesn’t end here! You can explore even more delightful ways to enjoy this versatile vegetable. Try preparing a stunning whole roasted cauliflower, perfect as a centerpiece for any meal, or spice things up with my personal favorite burrito bowl topping: savory roasted cauliflower with chili powder. And don’t forget to pair it with vibrant, tangy pickled red onions for an extra burst of flavor!
About Perfectly Roasted Cauliflower: A Culinary Revelation
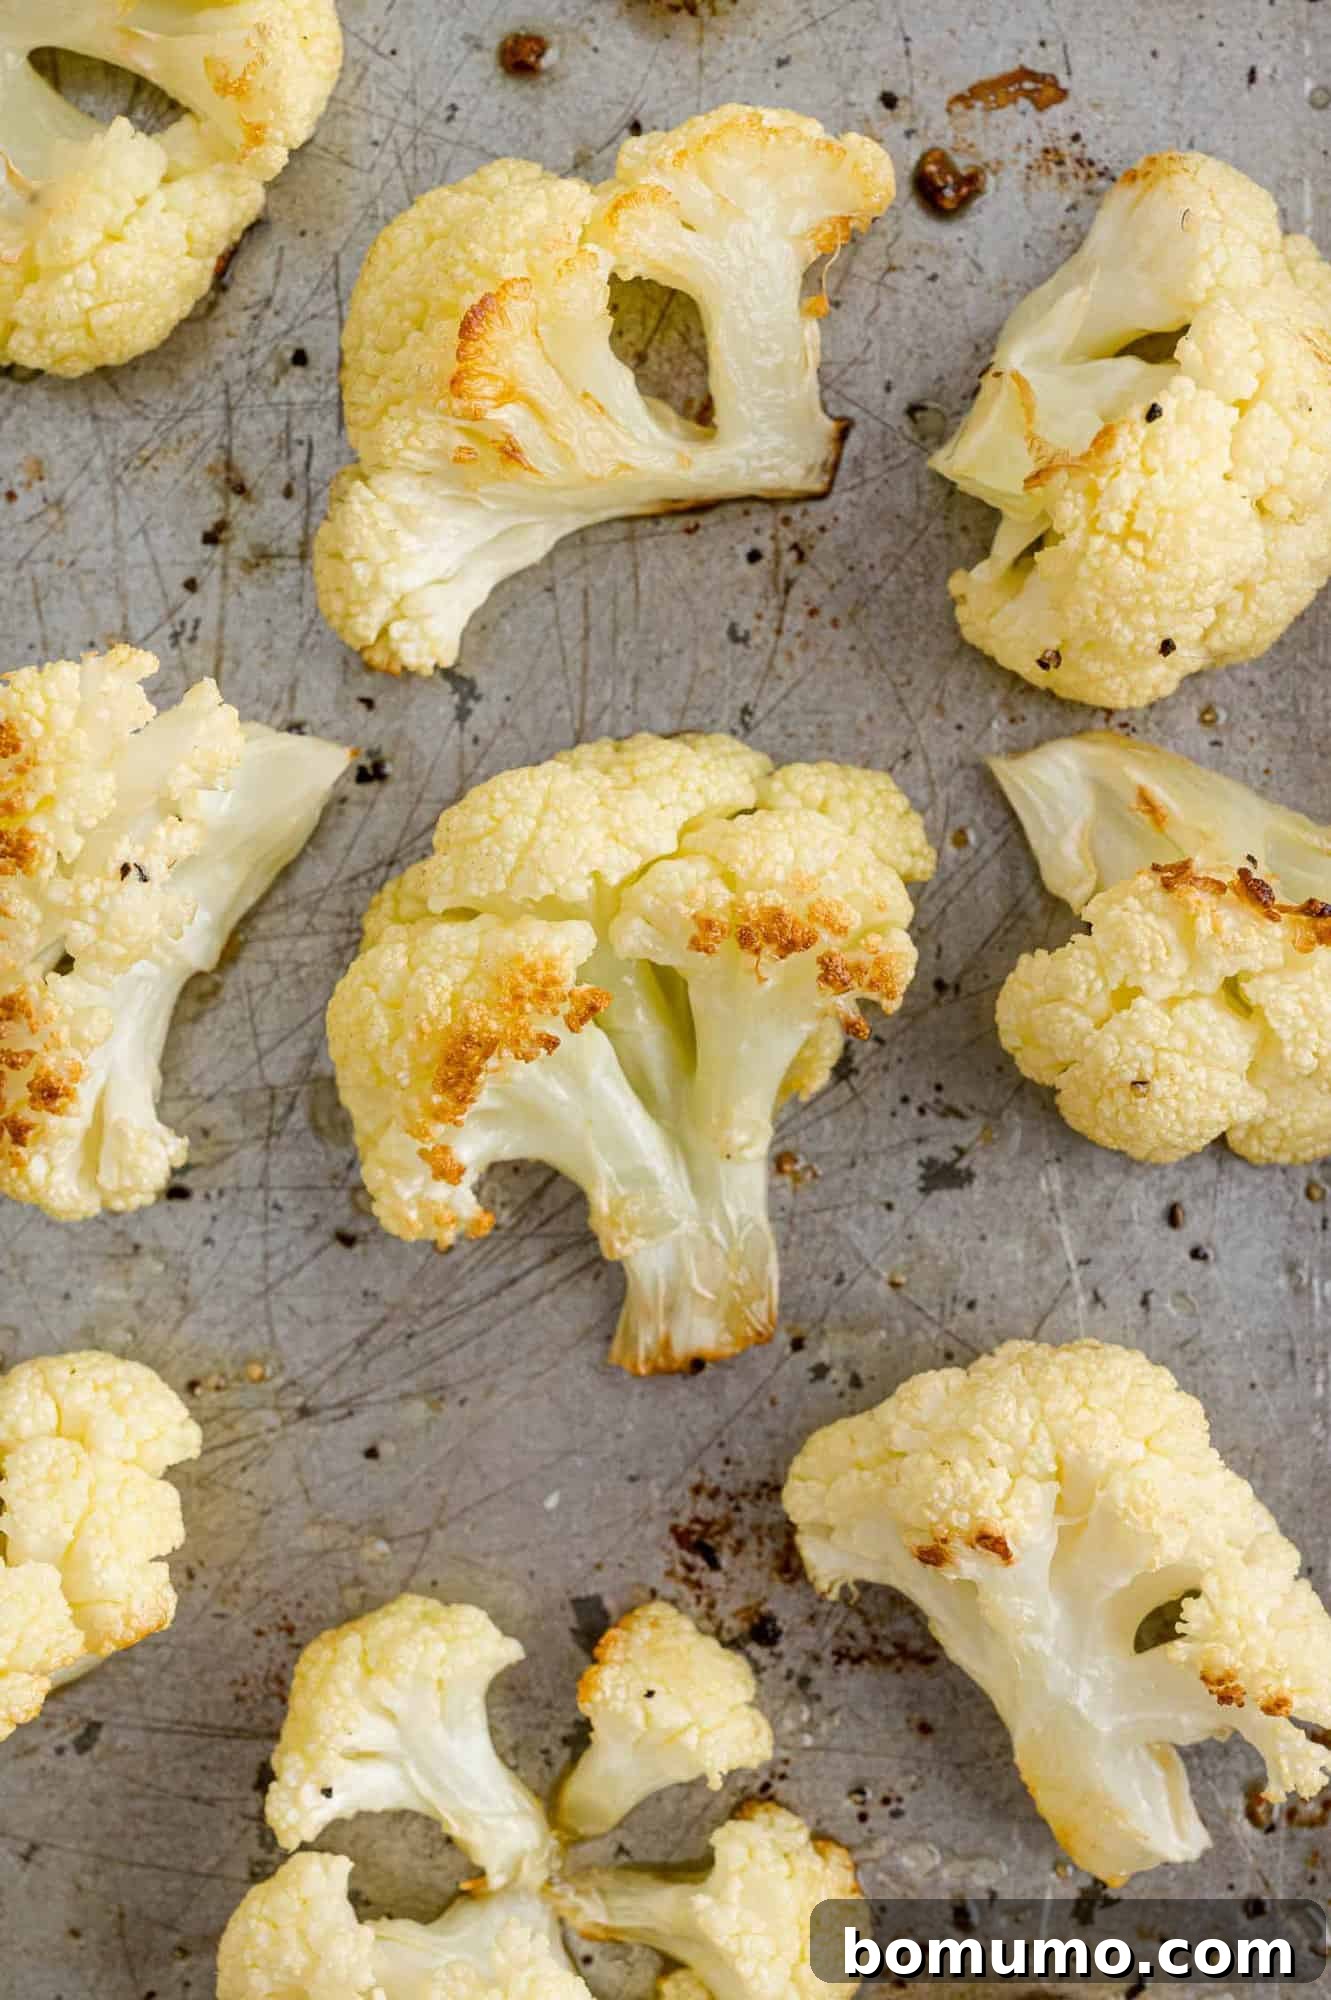
When it comes to preparing cauliflower, roasting stands out as the absolute best method for maximizing its flavor and texture. If your only experience with cauliflower involves it being boiled until mushy and bland, then it’s no wonder you might think you dislike it! Traditional boiling methods often lead to a soggy, watery, and sometimes strong-smelling vegetable that lacks appeal. It’s precisely why boiled cauliflower is often smothered in heavy cheese sauce to make it palatable. Roasting, however, completely changes the game. The dry heat of the oven caramelizes the natural sugars in the cauliflower, creating a rich, nutty flavor profile and a delightful tender-crisp texture with beautifully browned, slightly charred edges. This process doesn’t just improve the taste; it transforms the entire eating experience. Give roasted cauliflower a try today, and after just one bite, it’s highly likely to become your new favorite way to enjoy this incredible vegetable.
Beyond its unparalleled flavor, roasting cauliflower is incredibly easy to master. Once you understand the fundamental principles of how to roast cauliflower, you’ll find yourself effortlessly incorporating it into your meal rotation. The process of roasting virtually any vegetable is straightforward, typically requiring only a few basic ingredients and minimal hands-on time. In this guide, we’ll walk you through these essential steps, providing extra tips and tricks to ensure your roasted cauliflower is always perfect.
Ingredient Notes: What You’ll Need for the Best Roasted Cauliflower
- Cauliflower: The star of our show! When selecting a head of cauliflower, look for one that is firm and dense, with a creamy white color. The leaves surrounding the stem should be fresh, vibrant green, and crisp. Avoid any cauliflower with brown spots, soft areas, or a dull appearance, as these indicate it’s past its prime. For optimal freshness, raw cauliflower can be stored unwrapped in the refrigerator for up to a week, or in a plastic or paper bag to help retain moisture.
- Olive Oil: A good quality olive oil is essential for both flavor and achieving that coveted crispiness. It helps the cauliflower caramelize beautifully in the oven. While extra virgin olive oil is excellent, you can also substitute other mild-tasting oils such as avocado oil, grapeseed oil, or even sunflower oil, depending on your preference and what you have on hand. The key is an oil with a high smoke point that won’t overpower the cauliflower’s delicate flavor.
- Salt and Pepper: Simple yet critical. I highly recommend using coarse ground sea salt or Kosher salt and freshly cracked black pepper. The larger crystals of salt adhere better and provide bursts of savory flavor, while fresh pepper adds a pungent, aromatic kick that pre-ground pepper often lacks. These seasonings are the foundation, enhancing the natural taste of the cauliflower without masking it.
How to Cut and Prep Cauliflower: Two Effective Methods
Properly preparing your cauliflower is the first step to achieving perfectly roasted cauliflower. The goal is to create florets that are roughly uniform in size, ensuring even cooking. Here are two methods to get your cauliflower ready:
First Method: The “Slam and Break” Technique (Quick & Fun!)
For a surprisingly quick and somewhat cathartic way to break down a head of cauliflower, try the “slam” method. While still wrapped in its plastic, firmly slam the stem end of the cauliflower onto a sturdy counter. This impact helps to loosen the florets from the core, making them easy to pull apart. This method is incredibly fast and fun, especially if your cauliflower comes wrapped. However, it can result in florets of varying sizes. Personally, I don’t mind this for roasting; the smaller, crispier pieces are a delicious bonus! But if you’re aiming for perfectly uniform florets, the next method is more suitable.
Second Method: Precision Cutting with a Knife
For a more controlled and refined approach, using a sharp chef’s knife will yield beautiful, evenly sized florets, which can lead to more consistent roasting results. Here’s how to do it:
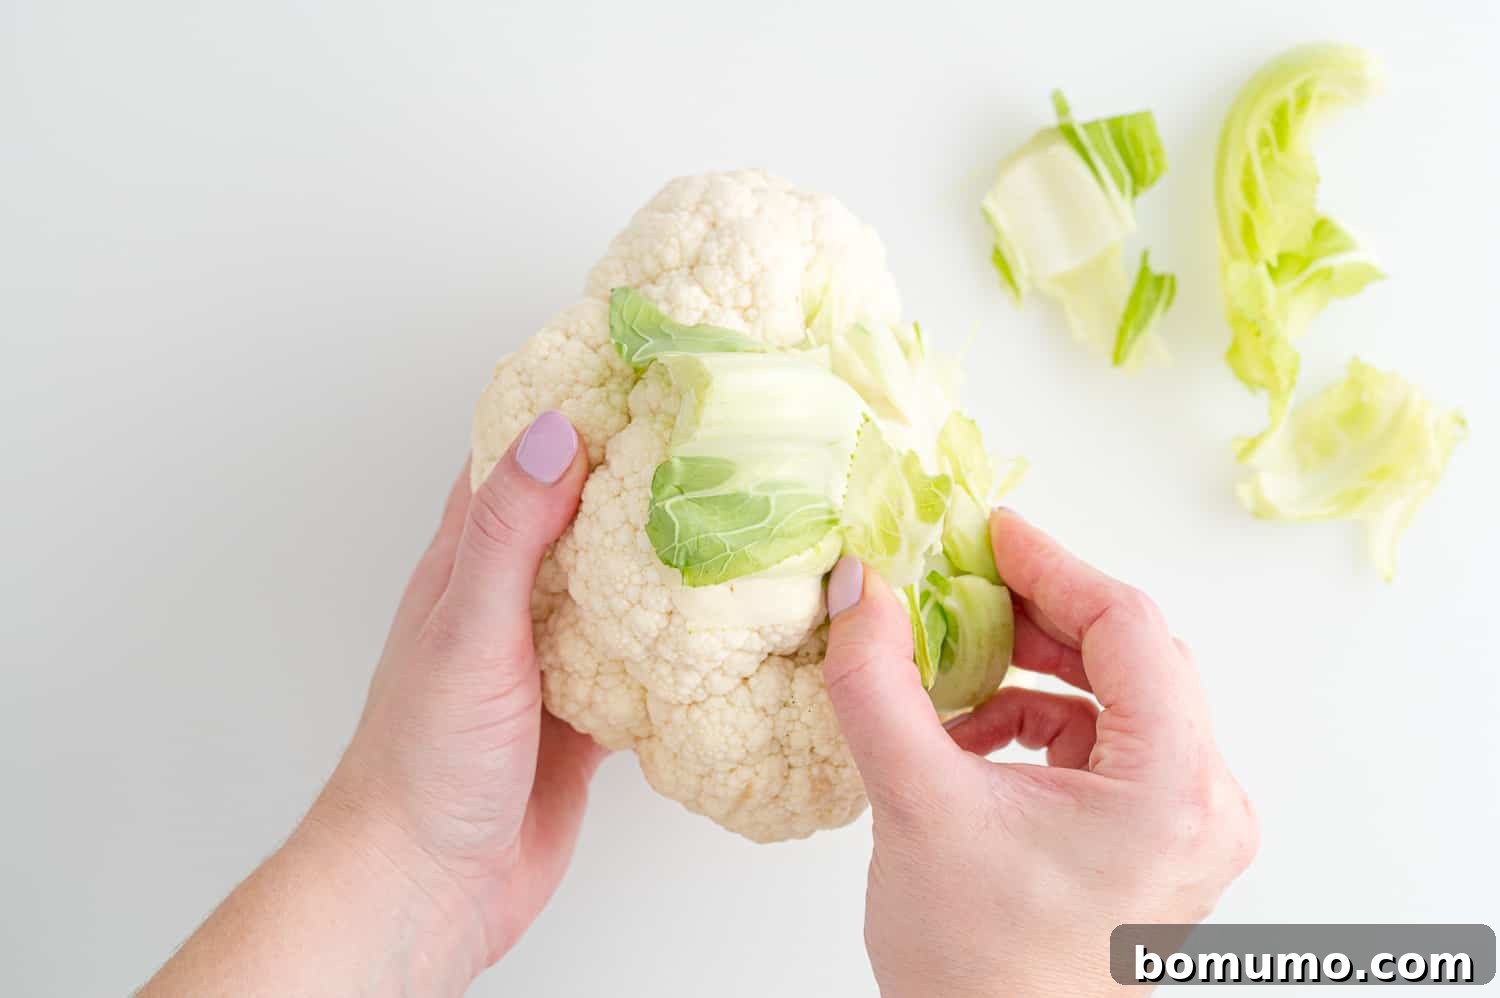
Start by removing any tough outer leaves from the base of the cauliflower head. These are typically bitter and fibrous, so discard them.
Next, carefully cut the cauliflower into quarters from the top down through the stem. This will give you four manageable sections to work with.
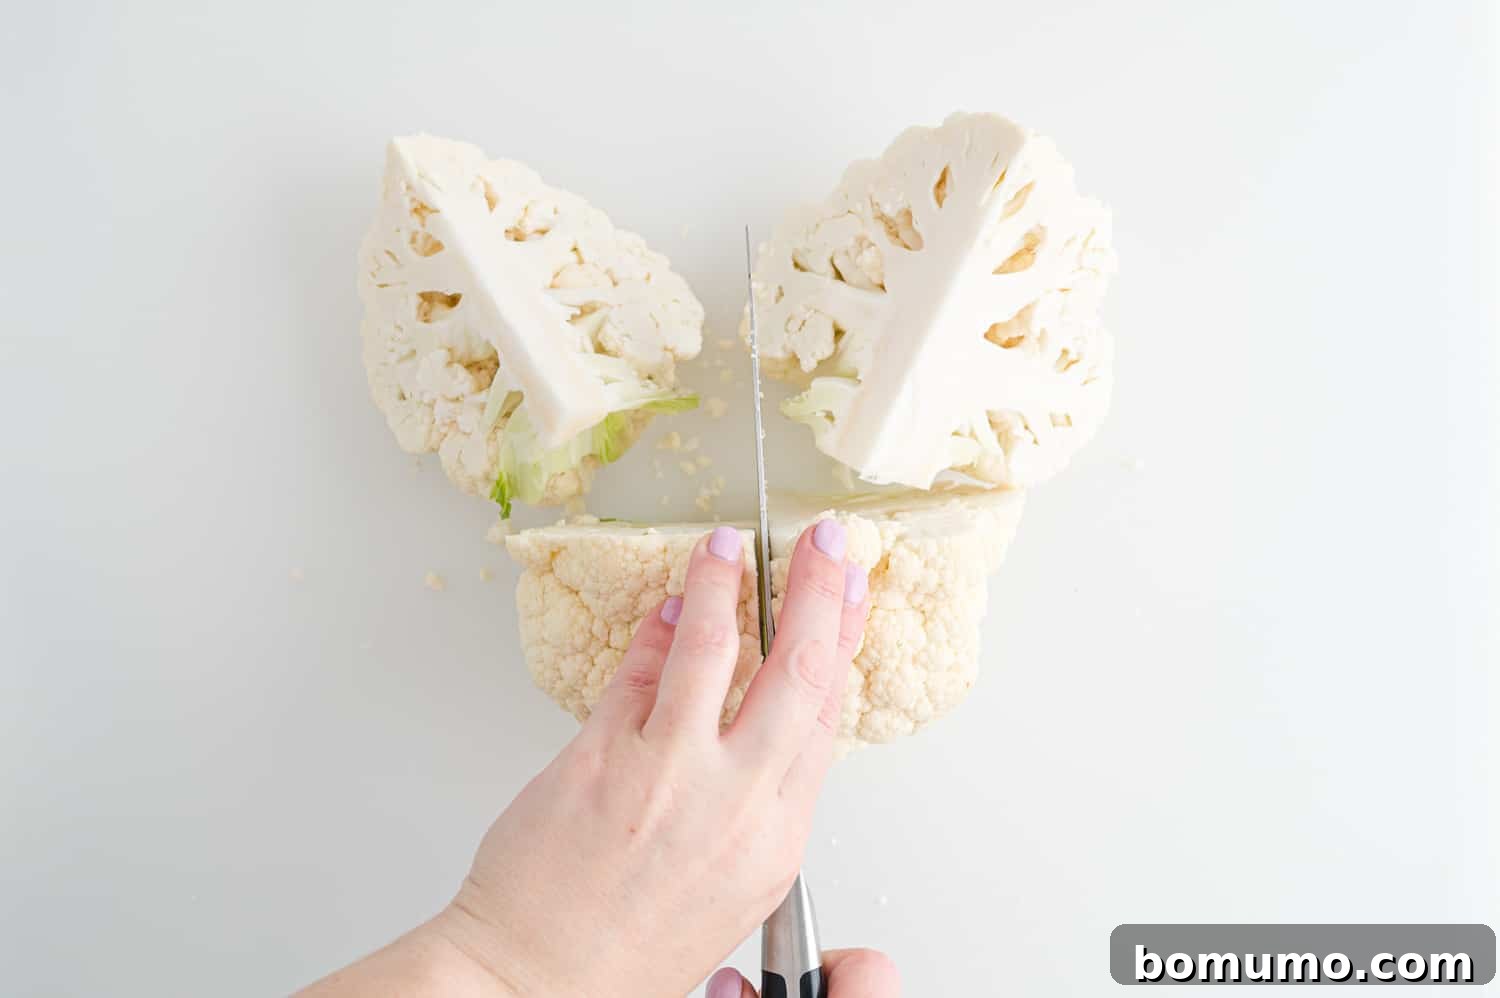
With each quarter, make a diagonal cut to remove the tough, inedible core. This allows the florets to separate more easily.
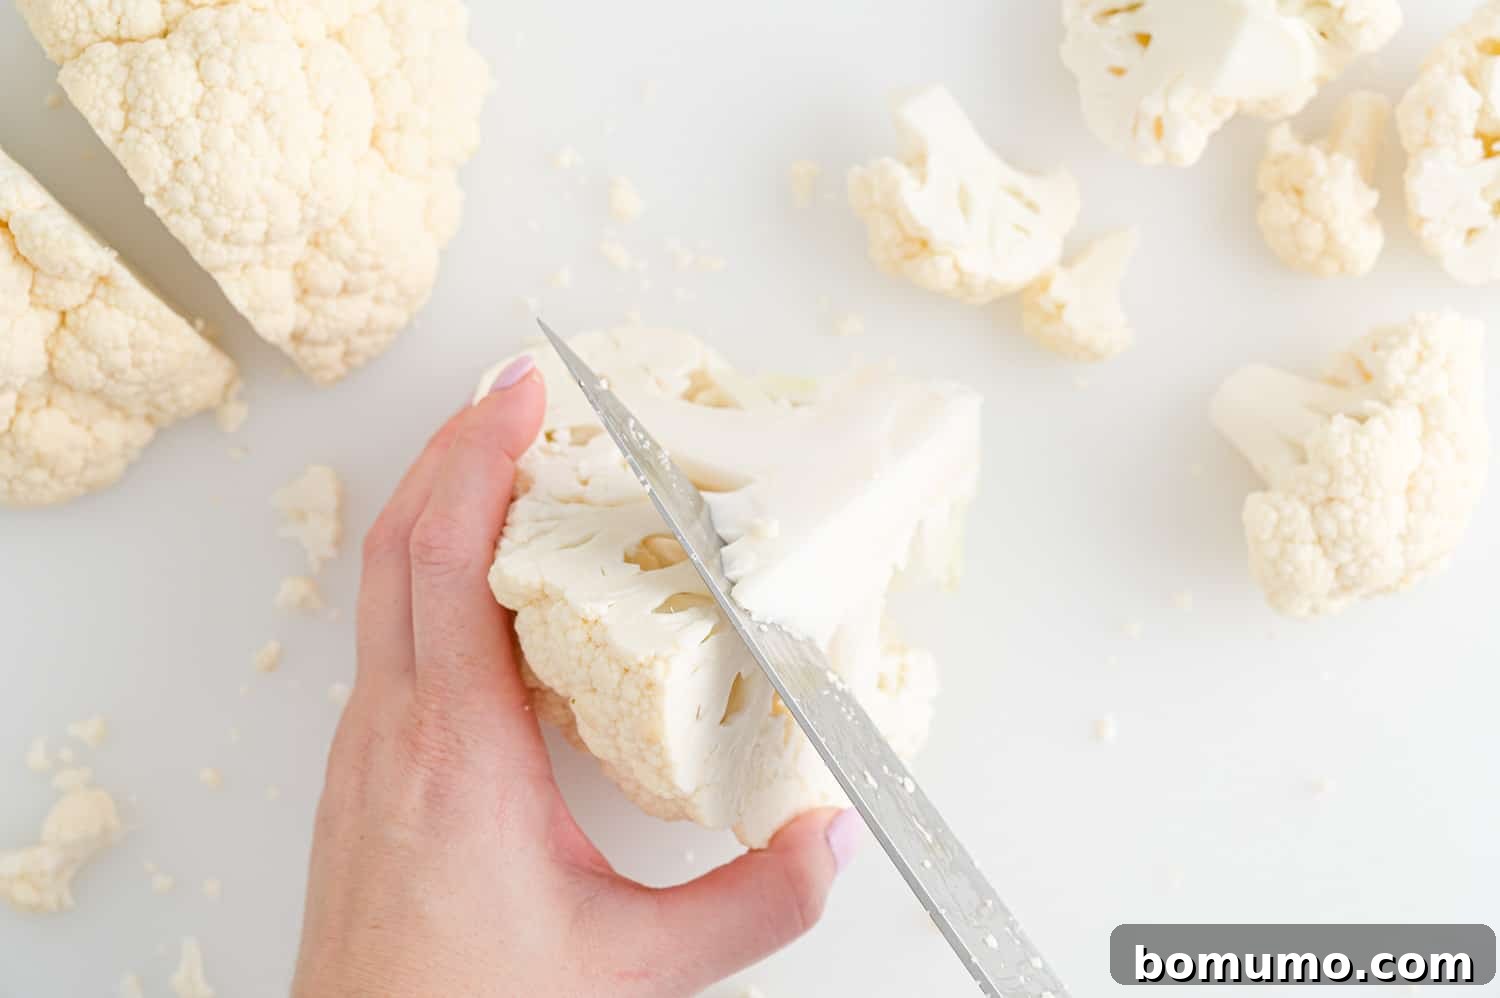
Finally, break or cut the large quarters into bite-sized florets. Aim for pieces that are roughly the same size, about 1 to 1.5 inches, to ensure they cook evenly. Smaller florets will cook faster and get crispier, while larger ones will be softer inside.
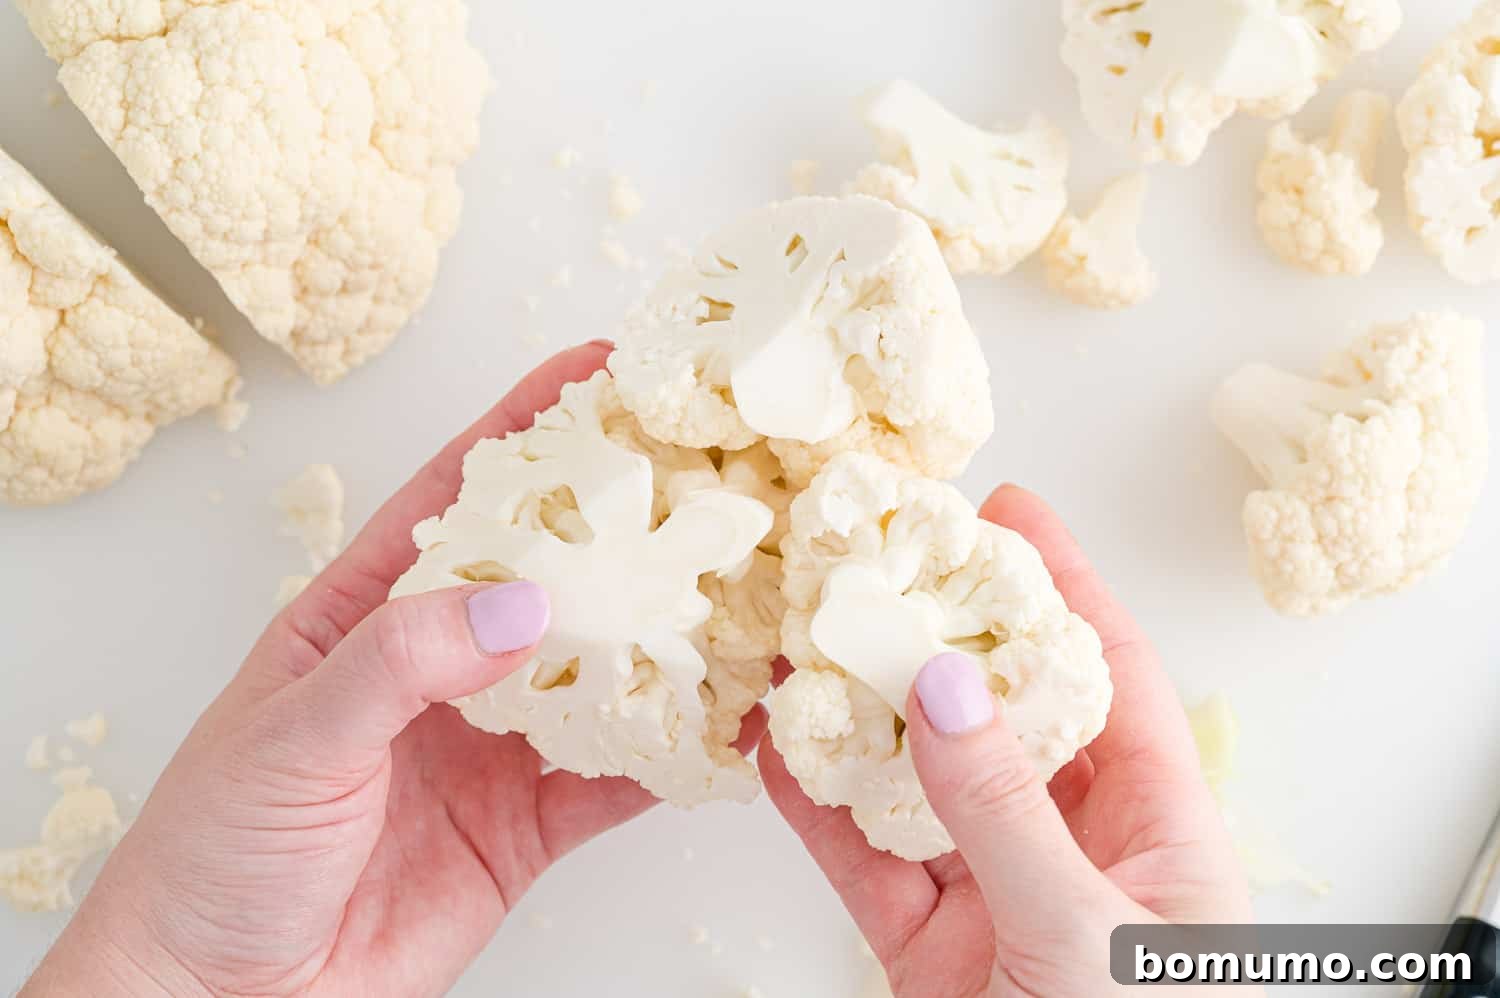
Both methods are completely acceptable for this roasted cauliflower recipe. Choose the one that best suits your preference and available tools!
How To Roast Cauliflower In 3 Simple Steps: A Foolproof Method
Achieving perfectly crispy roasted cauliflower is simpler than you might think. Regardless of the vegetable, the fundamentals of roasting remain consistent: you need a large rimmed baking sheet, uniformly cut vegetables, a touch of oil and seasonings, and a hot oven. Follow these steps for consistently delicious results every time.
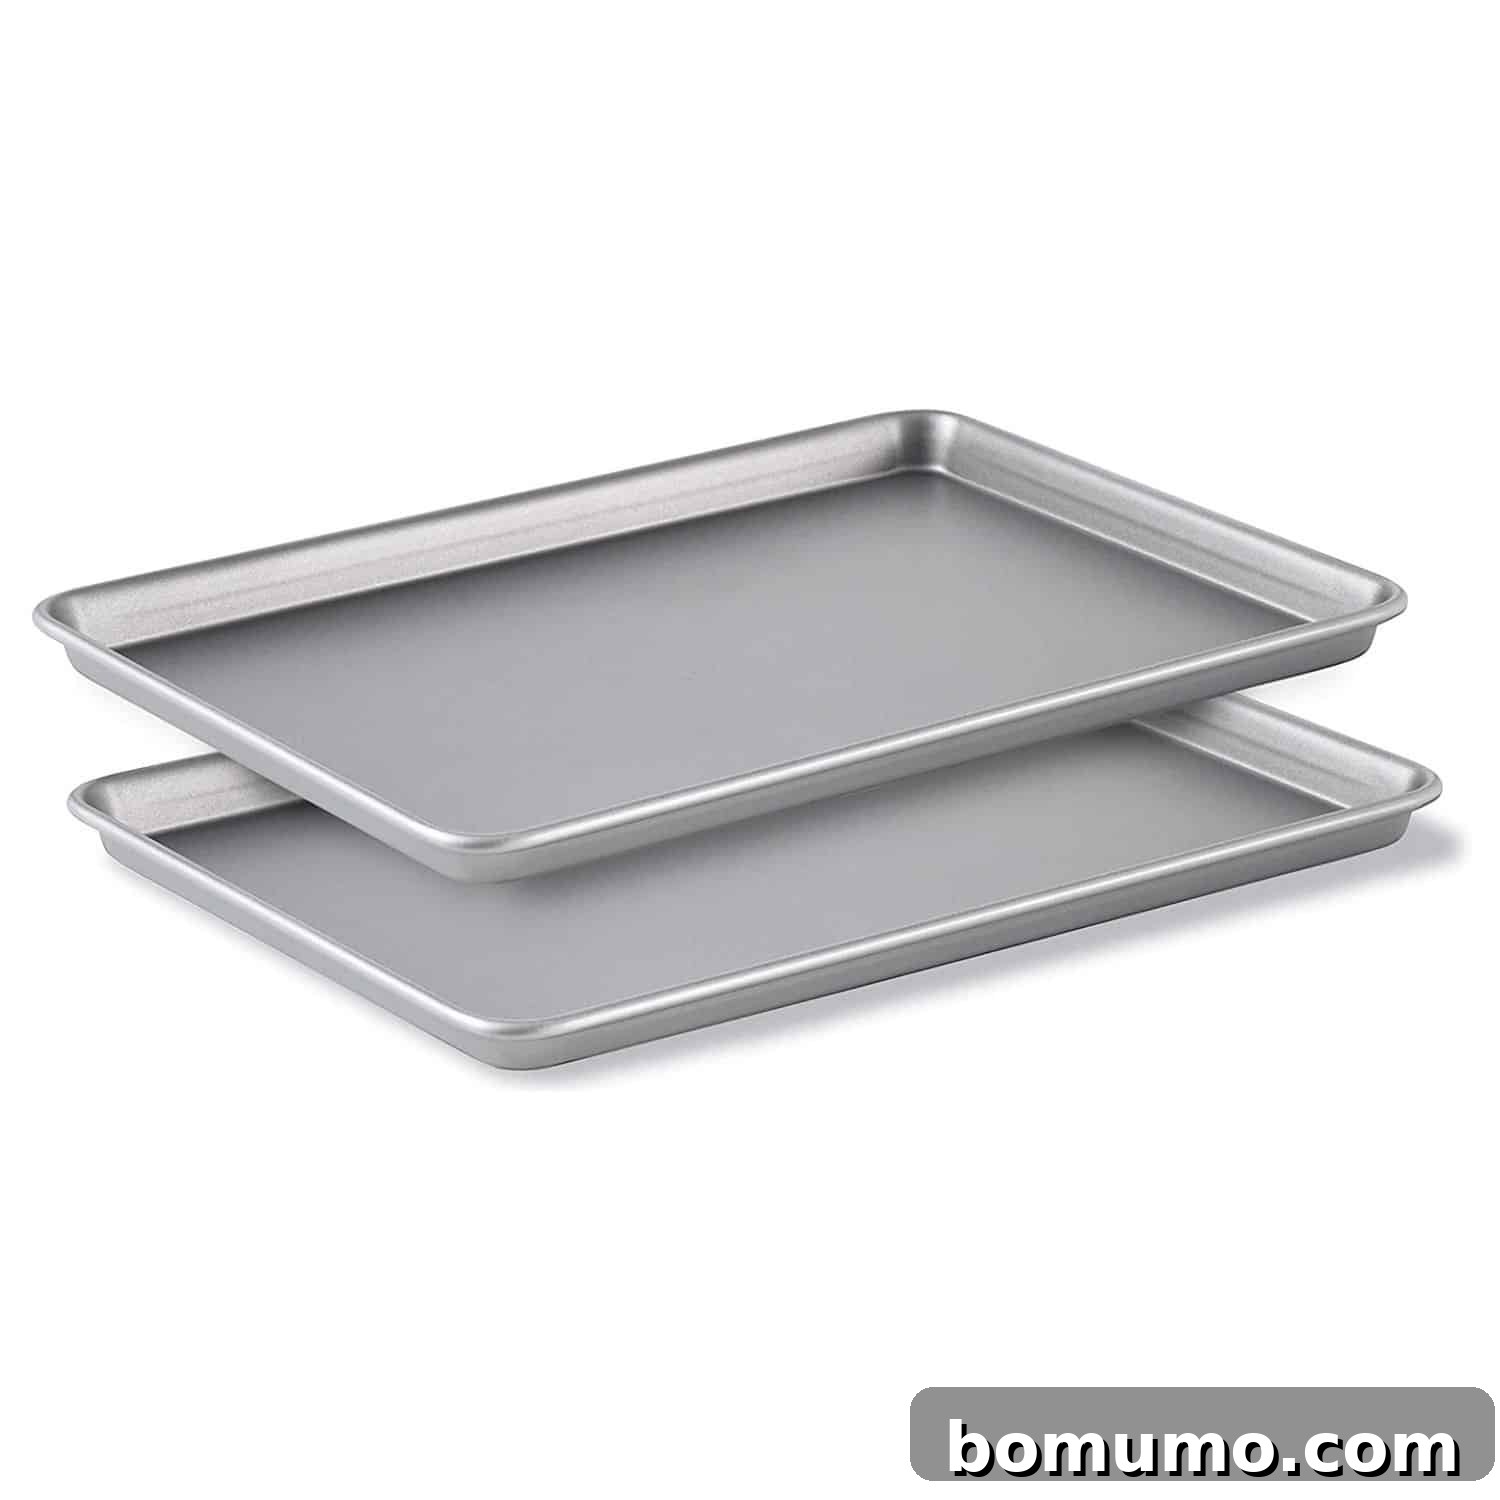
Understanding the Essential Sheet Pan
A half sheet pan, typically measuring 18 x 13 inches with a 1-inch rim, is an invaluable tool in any kitchen, especially for roasting. Its generous surface area is crucial for allowing vegetables to spread out in a single layer, preventing steaming and promoting optimal browning and crispiness. Without enough space, your cauliflower would steam instead of roast, leading to a soggy texture.
Beyond its primary role in roasting vegetables, this versatile pan is essential for a multitude of cooking tasks. From creating complete sheet pan dinners with minimal cleanup to perfectly crispy baked bacon, its utility makes it a true workhorse. Investing in one or two good quality sheet pans will significantly enhance your cooking experience.
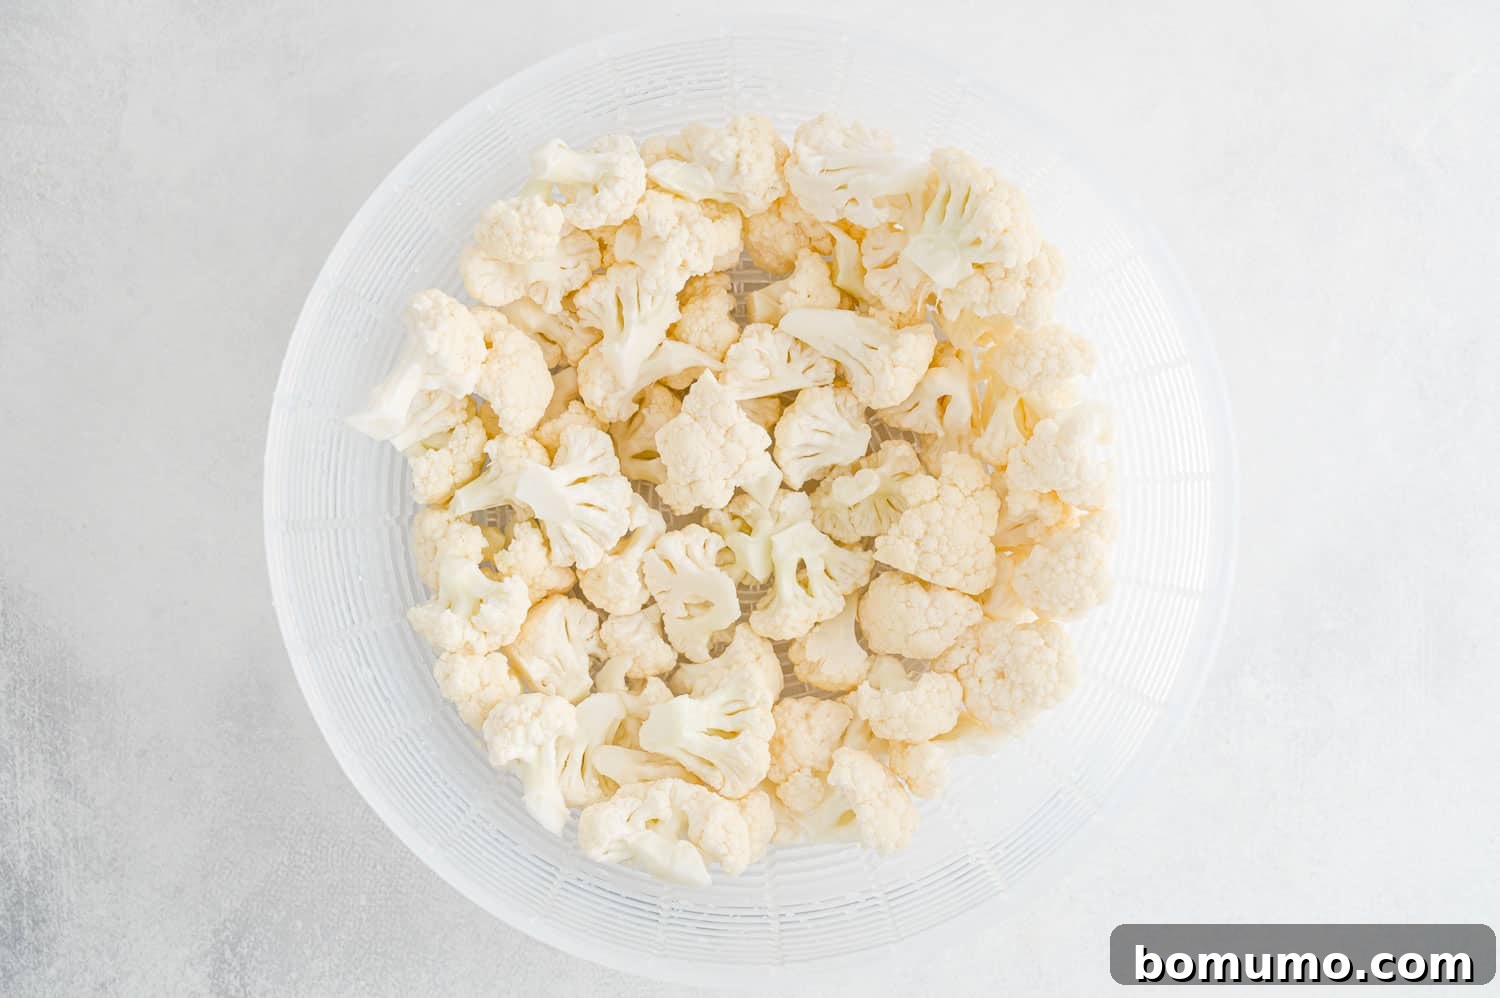
1. Wash and Thoroughly Dry the Cauliflower: Begin by rinsing your cauliflower florets under cold water. After washing, the most crucial step for achieving crispy oven roasted cauliflower is to dry them as thoroughly as possible. Excess moisture will steam the cauliflower instead of allowing it to roast and brown, resulting in a less desirable, softer texture. I highly recommend using a salad spinner to remove most of the water. For an even drier result, spread the florets on a clean kitchen towel for 10-15 minutes, patting them gently. Remember: the drier your florets are, the crispier and more delicious your roasted cauliflower will be, and the faster it will cook.
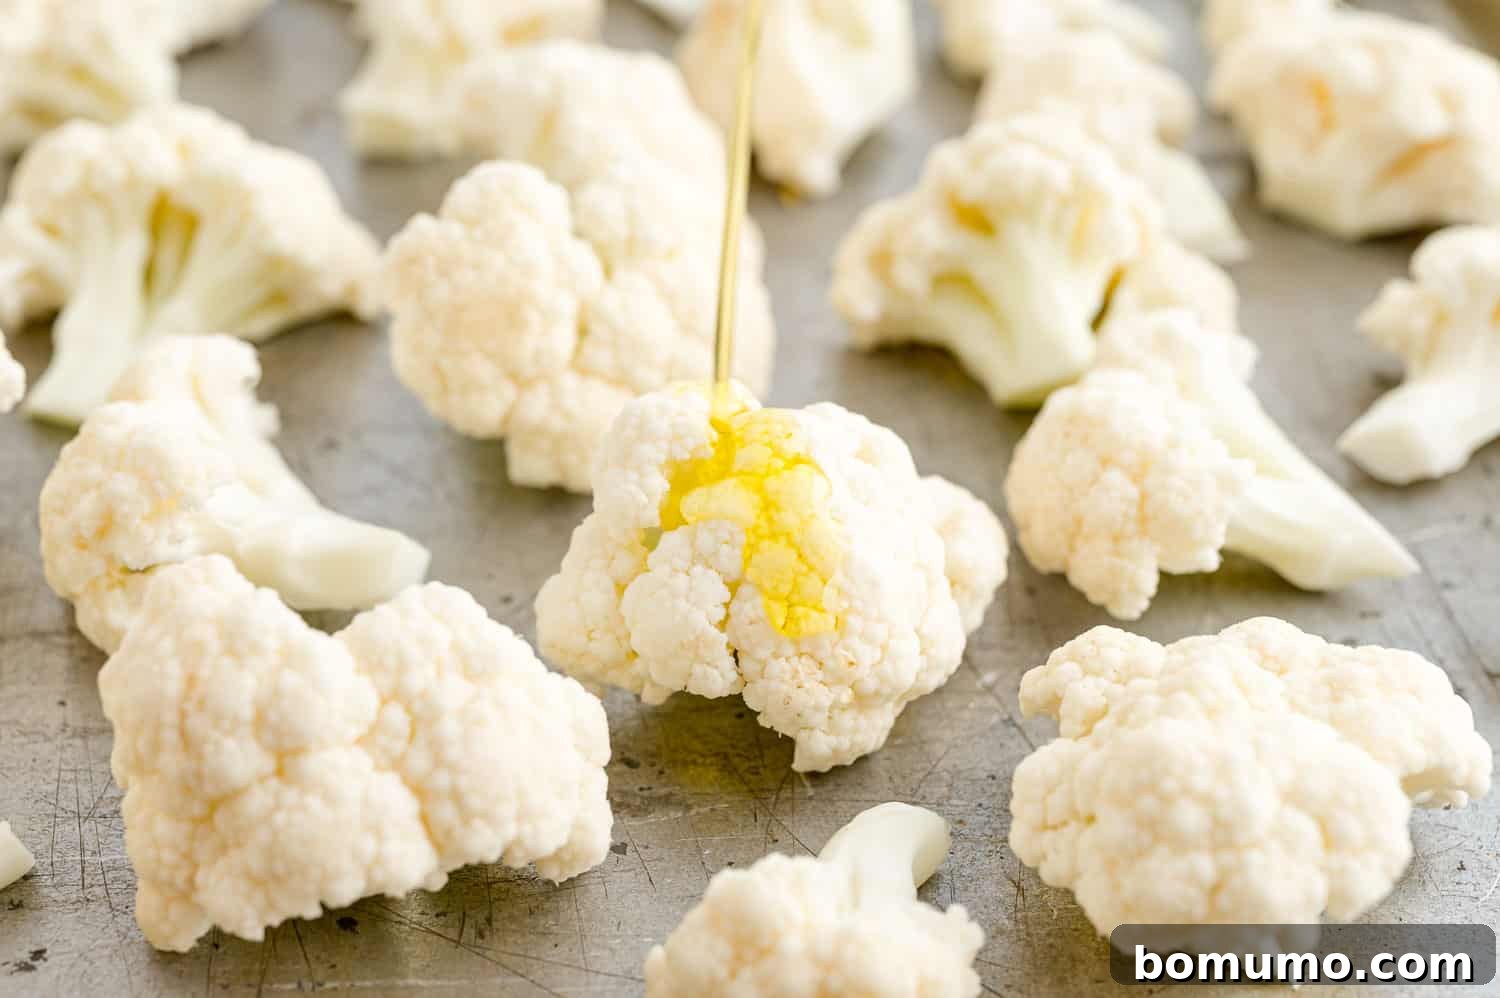
2. Season and Toss with Oil: Once dry, transfer your cauliflower florets to a large bowl. Drizzle them generously with olive oil, then sprinkle with salt and freshly ground black pepper. Use your hands to toss everything together, ensuring each floret is lightly and evenly coated with oil and seasoning. This thin layer of oil is key; it helps conduct heat, promoting browning and crisping. Alternatively, you can do this step directly on your sheet pan, which saves on cleanup.
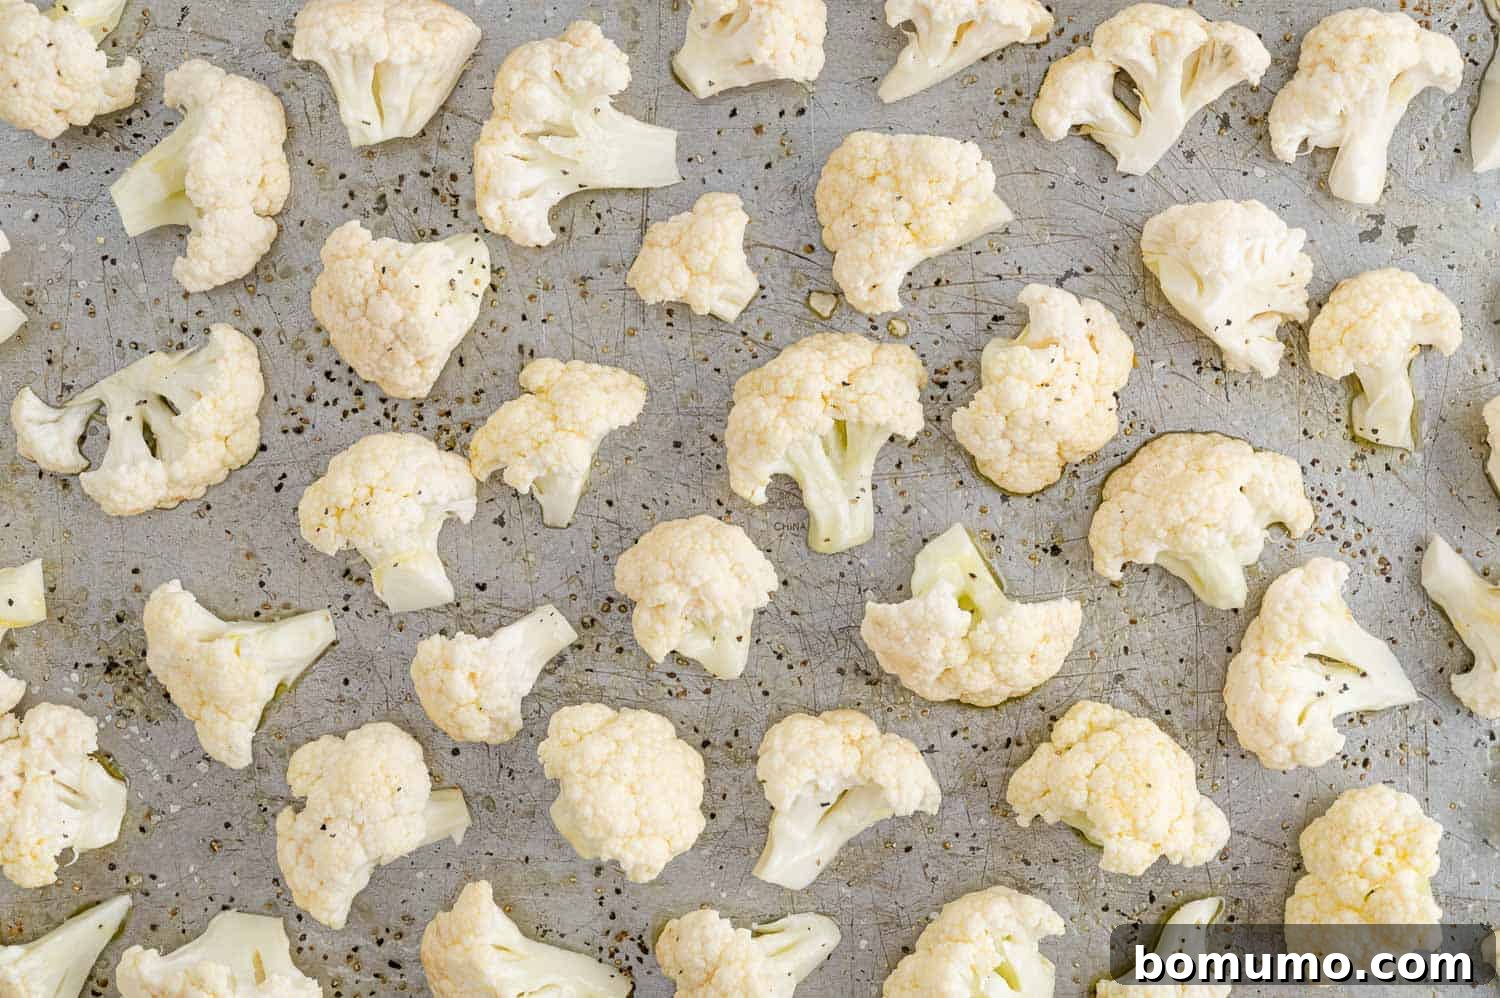
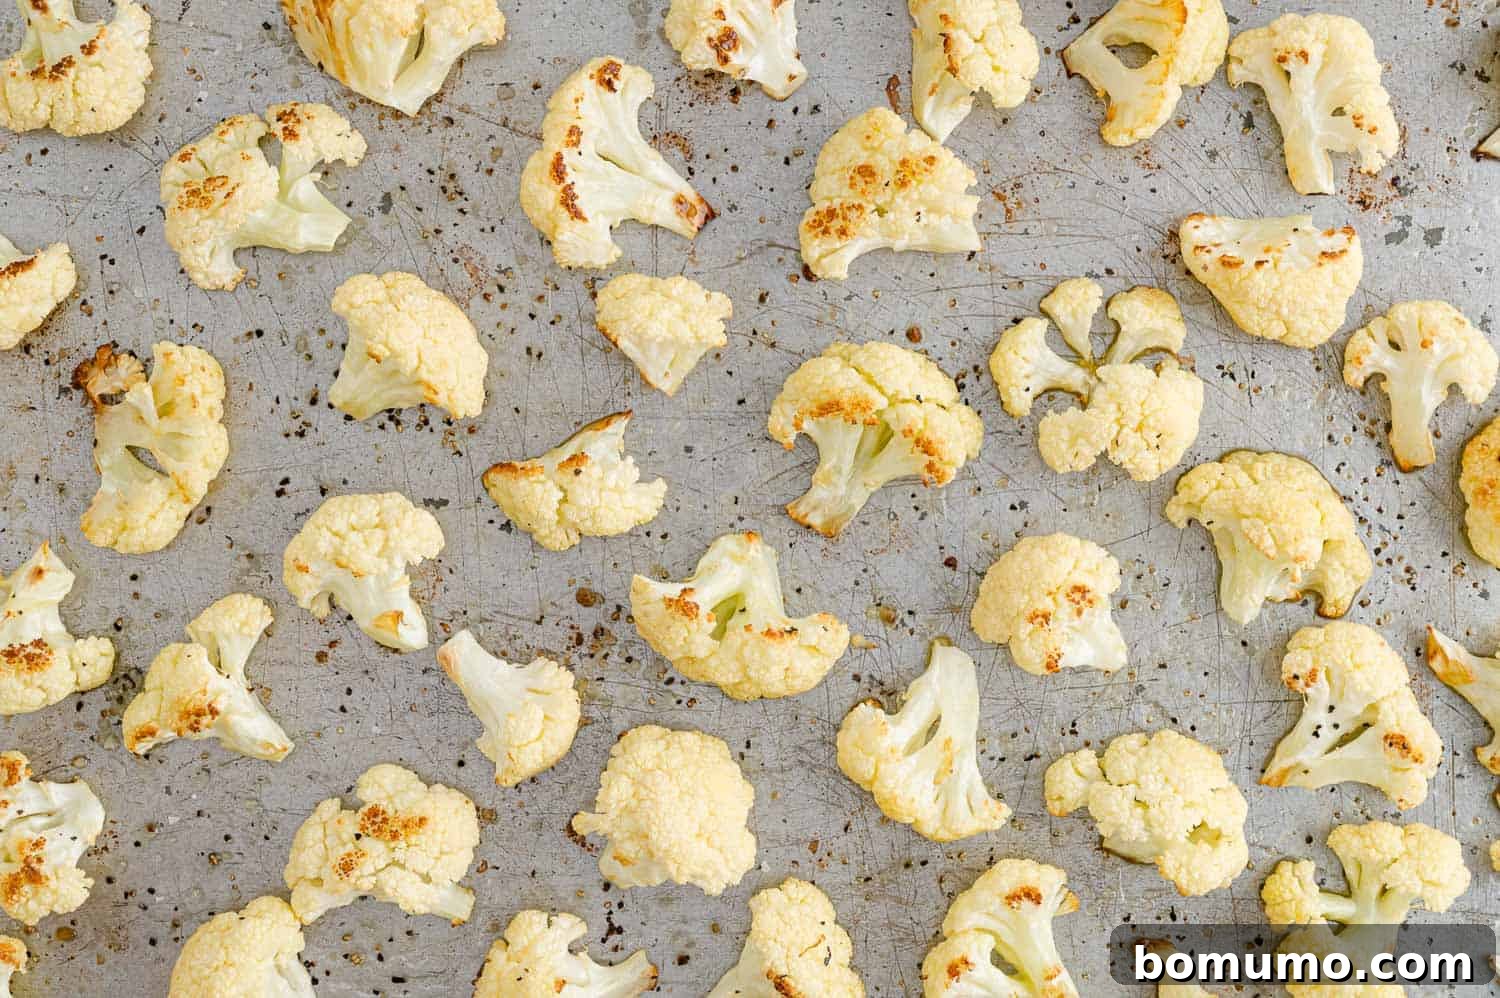
3. Spread Evenly and Roast: Arrange the seasoned cauliflower florets in a single layer on your large rimmed baking sheet. It’s absolutely essential to avoid crowding the pan. Each piece needs ample space to allow hot air to circulate freely around it. If the florets are too close together, they will release moisture and steam rather than roast, leading to a soft, soggy result. If necessary, use two sheet pans to ensure proper spacing. Place the sheet pan into your preheated oven and roast at 425°F (220°C) until the cauliflower is tender, golden brown, and delightfully crispy around the edges. This typically takes about 20-25 minutes, with a flip halfway through for even cooking.
Flexible Oven Temperatures for Roasting
While this roasted cauliflower recipe is optimized for 425°F (220°C) to achieve maximum crispiness in minimal time, don’t worry if your oven is already occupied with another dish requiring a different temperature. Cauliflower is quite forgiving! You can still roast it beautifully at lower temperatures, typically between 350°F and 400°F (175°C – 200°C). Keep in mind that at these lower temperatures, it will take a bit longer to cook through and may not develop quite the same level of deep browning and crispiness. However, it will still emerge tender and delicious. Just be sure to adjust your cooking time accordingly and keep an eye on it to prevent burning.
Roasted cauliflower is incredibly versatile. Enjoy it as a simple, flavorful side dish to almost any main course, or incorporate it into other recipes for an added layer of complexity. For instance, my roasted cauliflower soup boasts an unbelievably rich, savory depth of flavor that belies its healthy profile. Even when blended with other ingredients, the initial roasting step prior to making the soup dramatically enhances the taste. Everyone will want to know your secret to such a flavorful dish, and it all starts with mastering how to roast cauliflower!
Essential Tips for Success: Achieving Perfectly Crispy Roasted Cauliflower
Transforming ordinary cauliflower into an extraordinary dish is all about a few key techniques. Follow these crucial tips to ensure your roasted cauliflower is consistently golden brown, tender, and irresistibly crispy:
- Ensure it’s Bone Dry: This is arguably the most critical step for achieving crispy results. Any residual moisture on the cauliflower florets will turn into steam in the hot oven, effectively boiling your cauliflower instead of roasting it. After washing, spin the florets in a salad spinner to remove as much water as possible. Then, spread them out in a single layer on a clean kitchen towel on your counter for at least 15-30 minutes to air dry, patting them gently if needed. A dry surface is essential for proper caramelization and crisping.
- Generously Coat with Oil: A thin, even layer of oil serves multiple purposes. It acts as a conductor of heat, helping the cauliflower to brown and crisp up beautifully, much like the effect of shallow frying but in a healthier way. The oil also contributes to the rich flavor profile. Use about 2 tablespoons for a medium head of cauliflower, tossing thoroughly to ensure every floret is lightly coated. If you prefer, a spritz of olive oil cooking spray can help achieve an even coating with less oil.
- Promote Ample Air Flow: Crowding the baking sheet is a common mistake that leads to steamed, soggy vegetables. For successful roasting, the cauliflower florets must be spread out in a single layer, with a little space between each piece. This allows hot air to circulate freely around every surface, encouraging moisture to evaporate and promoting browning and crispiness. If you have a large head of cauliflower, or if you’re doubling the recipe, use two separate baking sheets to avoid overcrowding.
- Preheat Your Oven (and Pan!): Always make sure your oven is fully preheated to the specified temperature (425°F / 220°C for this recipe) before you put the cauliflower in. A good hot oven is vital for jumpstarting the roasting process and creating those desirable browned edges. For an extra boost of crispiness and to truly “kickstart” the roasting process, you can even place your empty sheet pan in the oven while it preheats. This ensures the cauliflower hits a hot surface as soon as it enters the oven, creating an instant sear.
Exciting Recipe Variations: Customize Your Roasted Cauliflower
Roasted cauliflower is a fantastic blank canvas, ready to absorb and complement a wide array of flavors. Don’t hesitate to get creative and customize your batch to suit your taste preferences!
- Amp Up the Seasoning: While salt and pepper are fundamental, a world of flavor awaits with additional seasonings. Make it spicy with a sprinkle of chili powder, a dash of cayenne pepper, or a fragrant curry powder. For a Tex-Mex twist, try a generous helping of taco seasoning. Everyday favorites like seasoned salt or garlic powder (or granulated garlic) are also excellent choices. Fresh or dried herbs such as thyme, rosemary, oregano, or parsley add a wonderful aromatic quality. We’re particularly fond of our versatile all-purpose seasoning blend on roasted cauliflower.
- Elegant Drizzles and Dressings: After roasting, a simple drizzle can transform the entire dish. Cauliflower’s mildness makes it an ideal vehicle for vibrant sauces. Drench your warm florets in beautifully green, garlicky chimichurri for a burst of fresh flavor. Homemade pesto or zesty salsa verde are equally delicious choices, adding brightness and complexity.
- Indulge with Cheese: Everything is better with cheese, right? For a classic cheesy rendition, try my dedicated Parmesan roasted cauliflower recipe, where the cheese crisps up beautifully in the oven. Alternatively, for a creamy, decadent finish, top the freshly roasted cauliflower with a warm, dreamy cheese sauce. If you’re looking for a hearty side dish perfect for holidays, our comforting cauliflower and potato casserole, complete with a cheese sauce and crispy breadcrumb topping, is a must-try.
- Air Fryer Convenience: When you want to enjoy crispy cauliflower without heating up your entire kitchen, your air fryer is a fantastic alternative. Simply follow the preparation steps, then cook your air fryer cauliflower in batches until tender-crisp. Don’t forget to try the incredibly addictive air fryer buffalo cauliflower bites for a spicy, crowd-pleasing snack or appetizer!
Make Ahead Ideas: Save Time on Busy Weeknights
Make Ahead Ideas: Save Time on Busy Weeknights
While this roasted cauliflower recipe is remarkably quick to prepare, you can still get a head start to make dinner even easier. The raw cauliflower florets can be washed, cut, and thoroughly dried up to four days in advance. Store them in an airtight plastic bag or a covered bowl in the refrigerator. This simple step can significantly reduce your active cooking time on busy evenings, making this healthy side dish even more convenient.
Storage & Reheating Tips for Leftover Roasted Cauliflower
Storage & Reheating Tips for Leftover Roasted Cauliflower
While freshly roasted cauliflower is always best, leftovers can be delicious too, especially when reheated properly.
Refrigerate: Any leftover roasted cauliflower should be stored in an airtight container in the refrigerator for up to five days. This helps maintain its freshness and prevents it from drying out.
Freeze: For longer storage, you can freeze roasted cauliflower for up to one month. Spread the cooled florets in a single layer on a baking sheet and freeze until solid, then transfer to a freezer-safe bag or container. This prevents them from clumping together. Thaw overnight in the refrigerator before reheating.
Reheat: To best regain the desired crispiness, avoid the microwave, which tends to make it soft. For optimal results, reheat your leftover roasted cauliflower in a preheated oven (or toaster oven) at around 375°F (190°C) for 5-10 minutes, or until warmed through and re-crisped. Alternatively, a few minutes in an air fryer will also do the trick, bringing back that lovely texture without much effort.
Creative Ways to Enjoy Leftover Roasted Cauliflower
Creative Ways to Enjoy Leftover Roasted Cauliflower
Don’t let any of your delicious roasted cauliflower go to waste! Leftovers can be ingeniously repurposed into new and exciting meals.
Toss leftover florets into your favorite burrito bowl for added texture and nutrition. They also make an incredible base for cauliflower nachos, where their crispiness holds up beautifully under melted cheese and toppings. For a healthy and flavorful meal, turn them into cauliflower tacos, pairing them with fresh salsa, avocado, and a squeeze of lime. You’ll be amazed at how tasty and satisfying these inventive dishes can be!
More Delightful Cauliflower Recipes to Explore
Cauliflower Steaks Recipe
Quick Pickled Cauliflower
Instant Pot Cauliflower Potato Soup
Vegetarian Curry with Cauliflower & Chickpeas
Roasted Cauliflower – Your Simple Guide to Deliciousness
Cook Time: 20 mins
Total Time: 25 mins
Servings: 4 servings
This easy roasted cauliflower recipe transforms a simple vegetable into a flavorful, healthy, and incredibly delicious side dish. Learn the secrets to crispy, golden florets here!
Ingredients
- 1 head cauliflower (yielding about 4 cups of florets)
- 2 tablespoons olive oil (or other mild-tasting oil like avocado or grapeseed)
- Salt and freshly ground black pepper, to taste
Instructions
- Preheat Oven: Preheat your oven to 425°F (220°C). For extra crispiness, you can place your empty baking sheet in the oven as it preheats.
- Prepare Cauliflower: Wash the head of cauliflower thoroughly under cold water. Cut it into medium-sized, bite-sized florets, aiming for consistent size for even cooking. The most critical step: dry the florets very thoroughly. Use a salad spinner if available, then spread them on a clean, lint-free towel and pat dry. The drier the cauliflower, the crispier it will become!
- Season: In a large bowl (or directly on the baking sheet), add the dried cauliflower florets. Drizzle with olive oil, then sprinkle generously with salt and pepper. Toss well with your hands to ensure every floret is evenly coated.
- Roast: Spread the seasoned cauliflower florets in a single layer on your prepared baking sheet. Ensure there is ample space between each piece to prevent steaming. Bake for 10 minutes, then carefully flip each piece over using tongs or a spatula. Continue baking for another 10-15 minutes, or until the cauliflower is tender, beautifully golden brown, and crispy on the edges.
- Serve: Remove from the oven and serve immediately as a delicious side dish.
Notes
- Handling Extra Cauliflower: If you find you have more cauliflower than the recipe calls for, simply add a bit of extra olive oil and ensure there’s enough room on the sheet pan to spread the florets without crowding. It’s often best to use two sheet pans if necessary to achieve the best crispy texture.
- Flavorful Add-ins: Experiment with different seasonings! Before roasting, consider adding ½ teaspoon to 1 teaspoon of seasoned salt, garlic powder, taco seasoning, chili powder, or curry powder. After roasting, elevate the dish with drizzles of flavorful sauces like salsa verde, fresh chimichurri, or a dollop of vibrant pesto.
- Make Ahead Tip: To save time, you can wash, cut, and thoroughly dry the raw cauliflower florets up to four days in advance. Store them in a resealable bag or an airtight container in the refrigerator until ready to bake.
- Air Fryer Instructions: For a quick alternative, prepare the cauliflower as directed and preheat your air fryer to 390°F (200°C). Arrange the cauliflower in a single layer in the air fryer basket (you may need to work in batches). Cook for 12 to 15 minutes, shaking the basket halfway through, until the cauliflower is tender and beautifully browned.
Video Guide: How to Roast Cauliflower
Nutrition Information (per serving)
Calories: 98kcal | Carbohydrates: 7g | Protein: 3g | Fat: 7g | Saturated Fat: 1g | Polyunsaturated Fat: 1g | Monounsaturated Fat: 5g | Sodium: 43mg | Potassium: 430mg | Fiber: 3g | Sugar: 3g | Vitamin C: 69mg | Calcium: 32mg | Iron: 1mg
Nutrition information is automatically calculated and should be considered an approximation. Individual results may vary.
Did You Make This Roasted Cauliflower?
I’d love to hear your thoughts! Share a comment and rating below to let me know how it turned out!
There you have it – your comprehensive guide to making the most delicious, perfectly crispy roasted cauliflower every single time. This simple yet effective method is guaranteed to transform this humble vegetable into a crowd-pleasing side dish or a versatile ingredient for countless other recipes. Don’t be shy; give it a try tonight and discover your new favorite way to eat cauliflower!