
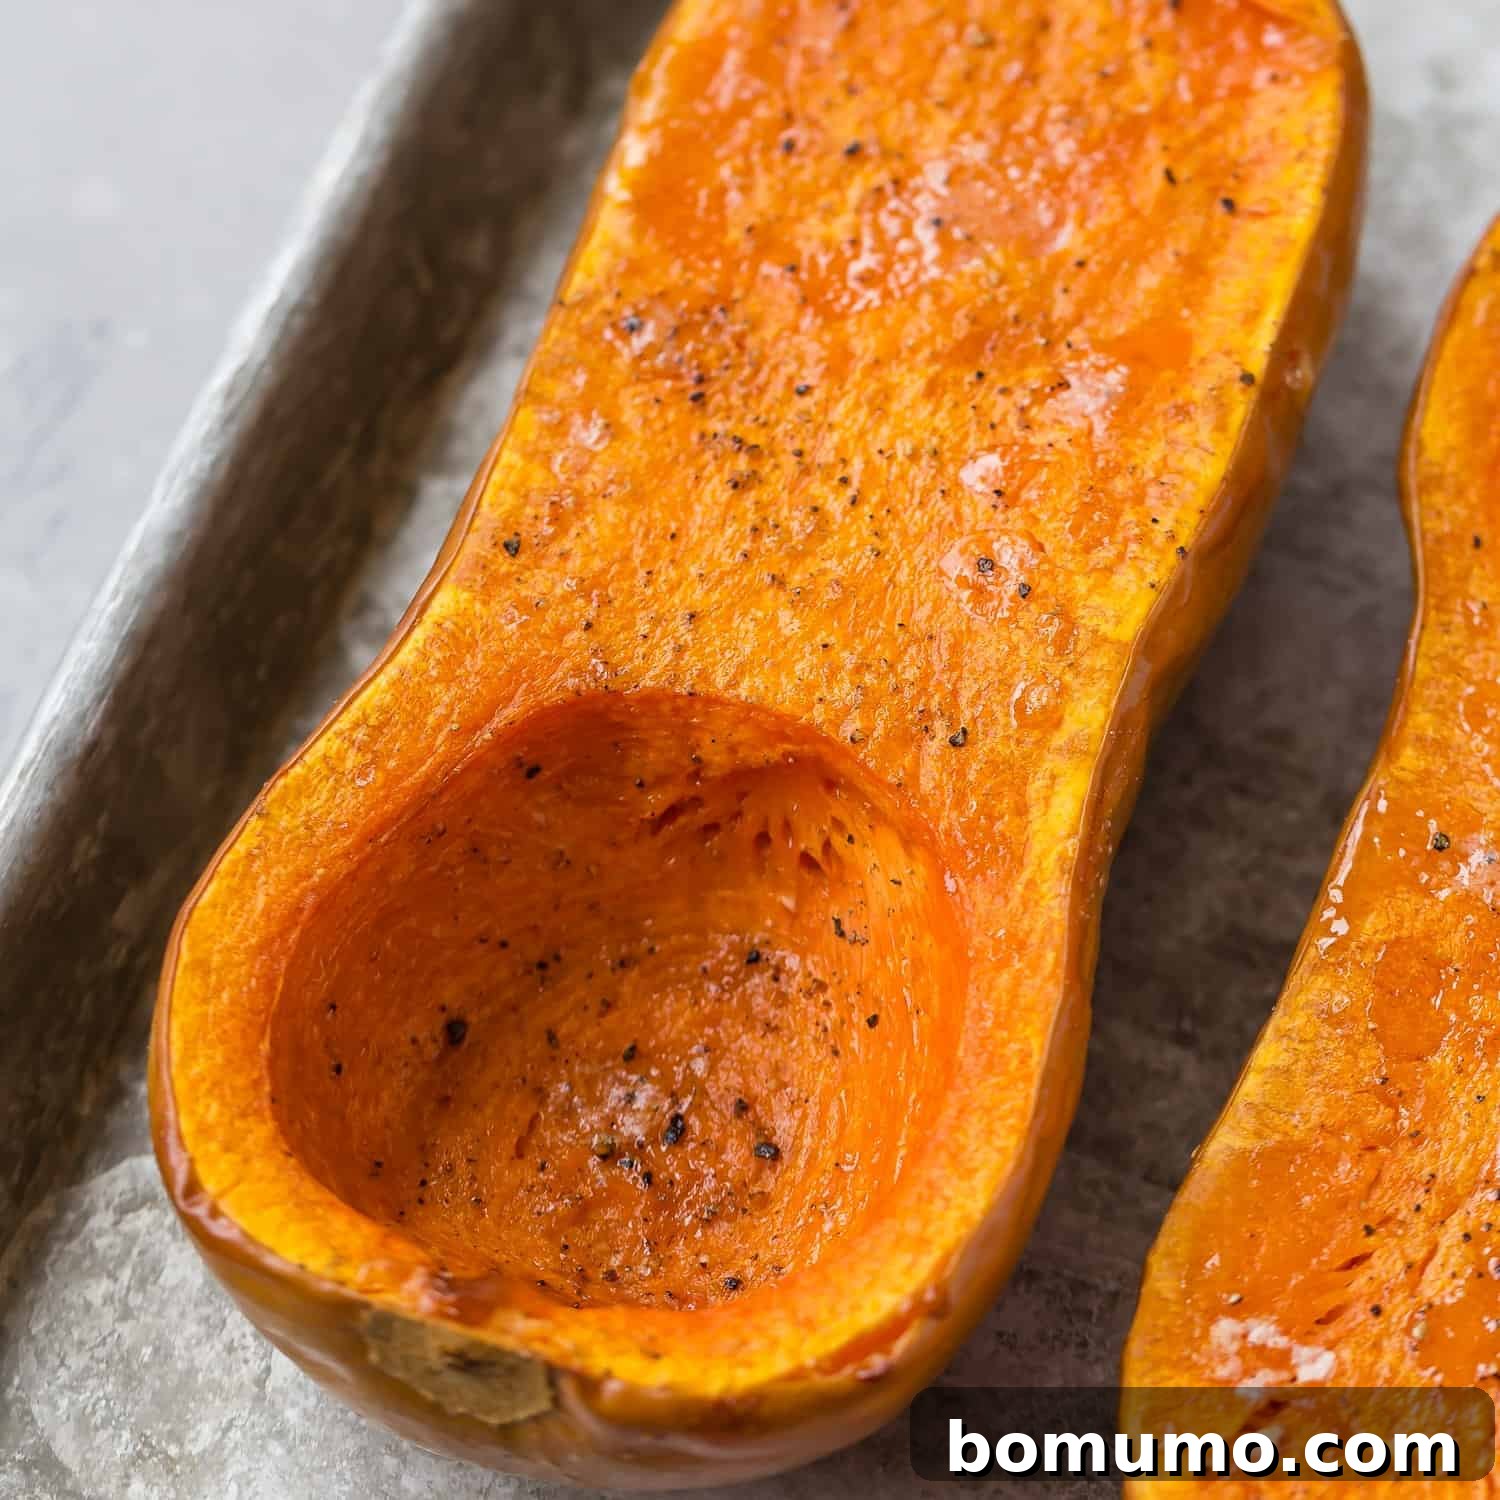
Unlock the full potential of butternut squash with this comprehensive guide! Discover over four fantastic ways to cook this versatile winter squash, including slow cooker, Instant Pot, perfectly roasted cubes, and tender roasted halves.
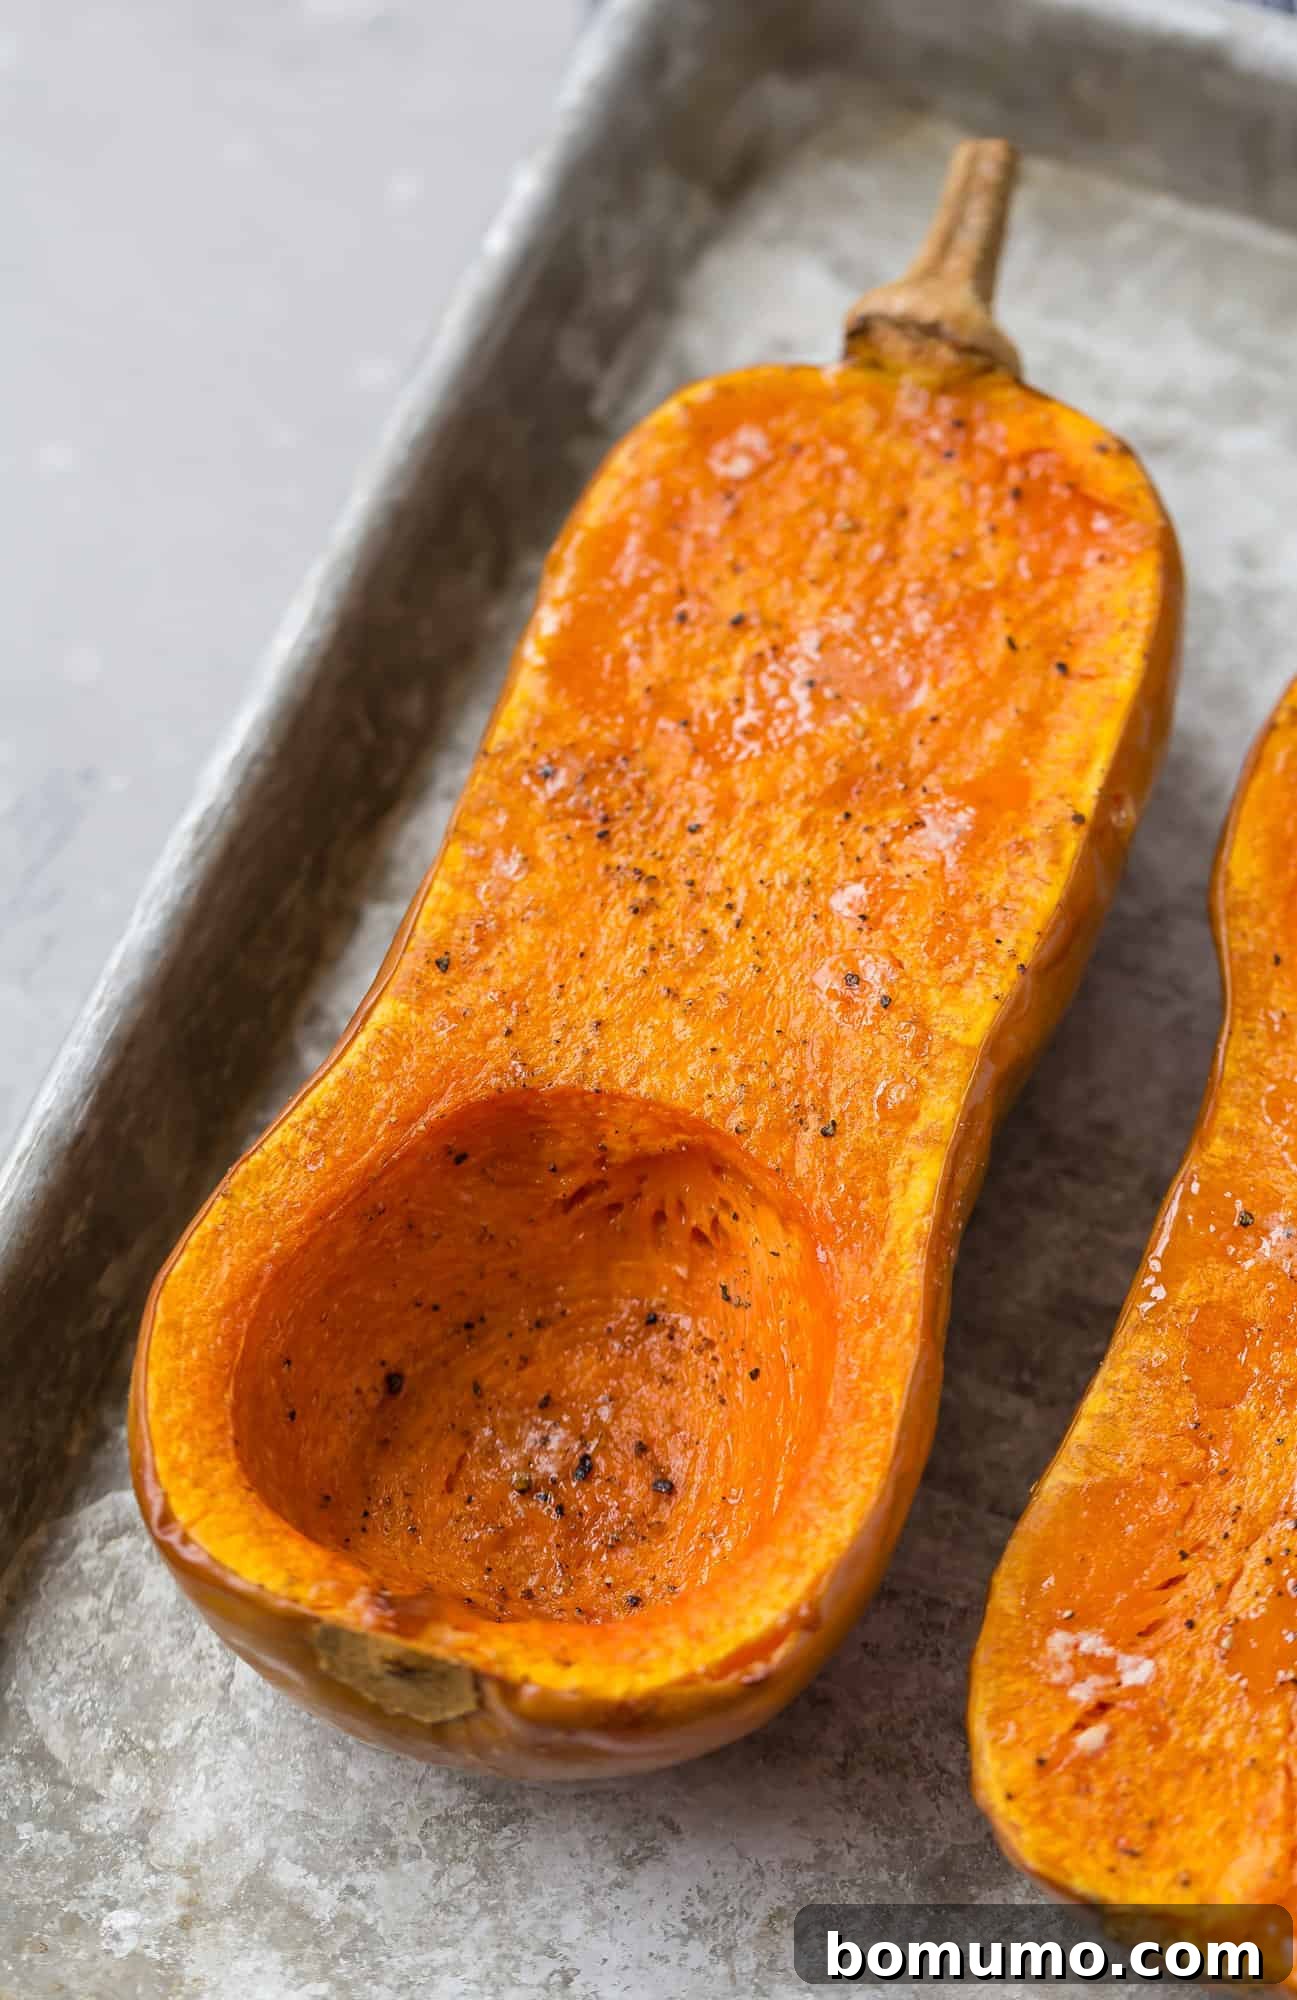
As the leaves change and the air turns crisp, squash season arrives, bringing with it a bounty of culinary delights. Among them, butternut squash stands out as a true superstar – beloved for its sweet, nutty flavor, vibrant orange flesh, and incredible versatility. Whether you’re a seasoned chef or a kitchen novice, learning to prepare this delicious vegetable is a rewarding experience that opens up a world of healthy and comforting recipes.
My kitchen has seen countless butternut squash transformations, from creamy, heartwarming soups (yes, perhaps a few too many!) to vibrant salads, smooth mashes, and even healthy queso dip. You’ve also shown immense love for our detailed guides on acorn squash, delicata squash, spaghetti squash, and most recently, kabocha squash. Now, it’s high time for butternut squash, arguably the most popular and adaptable variety, to take center stage.
This comprehensive guide will equip you with all the knowledge you need to cook butternut squash to perfection, using various popular methods. From effortless roasting to convenient pressure cooking and slow simmering, you’ll discover techniques that fit your schedule and culinary preferences. Each method brings out unique textures and flavors, making butternut squash a fantastic ingredient for an endless array of dishes.
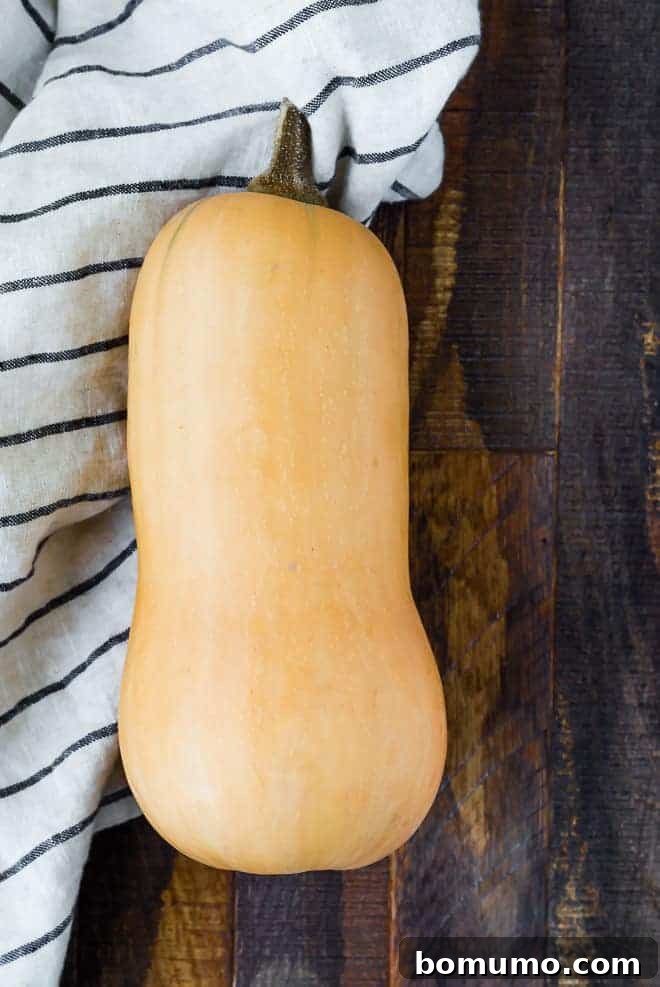
What You’ll Discover in This Guide
Embark on your butternut squash cooking journey with confidence. In this detailed post, you will learn:
- The essential techniques for safely peeling and cutting a butternut squash into cubes.
- How to achieve perfectly caramelized and tender roasted butternut squash cubes.
- The simple method for roasting butternut squash halves, ideal for mashing or stuffing.
- Step-by-step instructions for cooking butternut squash quickly in an Instant Pot.
- How to use your slow cooker to prepare butternut squash with minimal effort.
- Valuable tips on storing and freezing cooked butternut squash for future meals.
How to Peel and Cube a Butternut Squash Safely and Efficiently
Butternut squash has a notoriously tough skin, making the peeling and cutting process a potential challenge. However, with the right tools and a careful approach, it becomes much easier and safer. Your most important allies here are a sturdy, large cutting board that won’t slip, a high-quality vegetable peeler, and a sharp, large chef’s knife. Always prioritize safety when handling sharp tools and firm vegetables.
This step-by-step guide will walk you through preparing cubed butternut squash, which is perfect for roasting, adding to stir-fries, or incorporating into various recipes where a consistent texture is desired.
Step 1: Clean and Peel the Squash
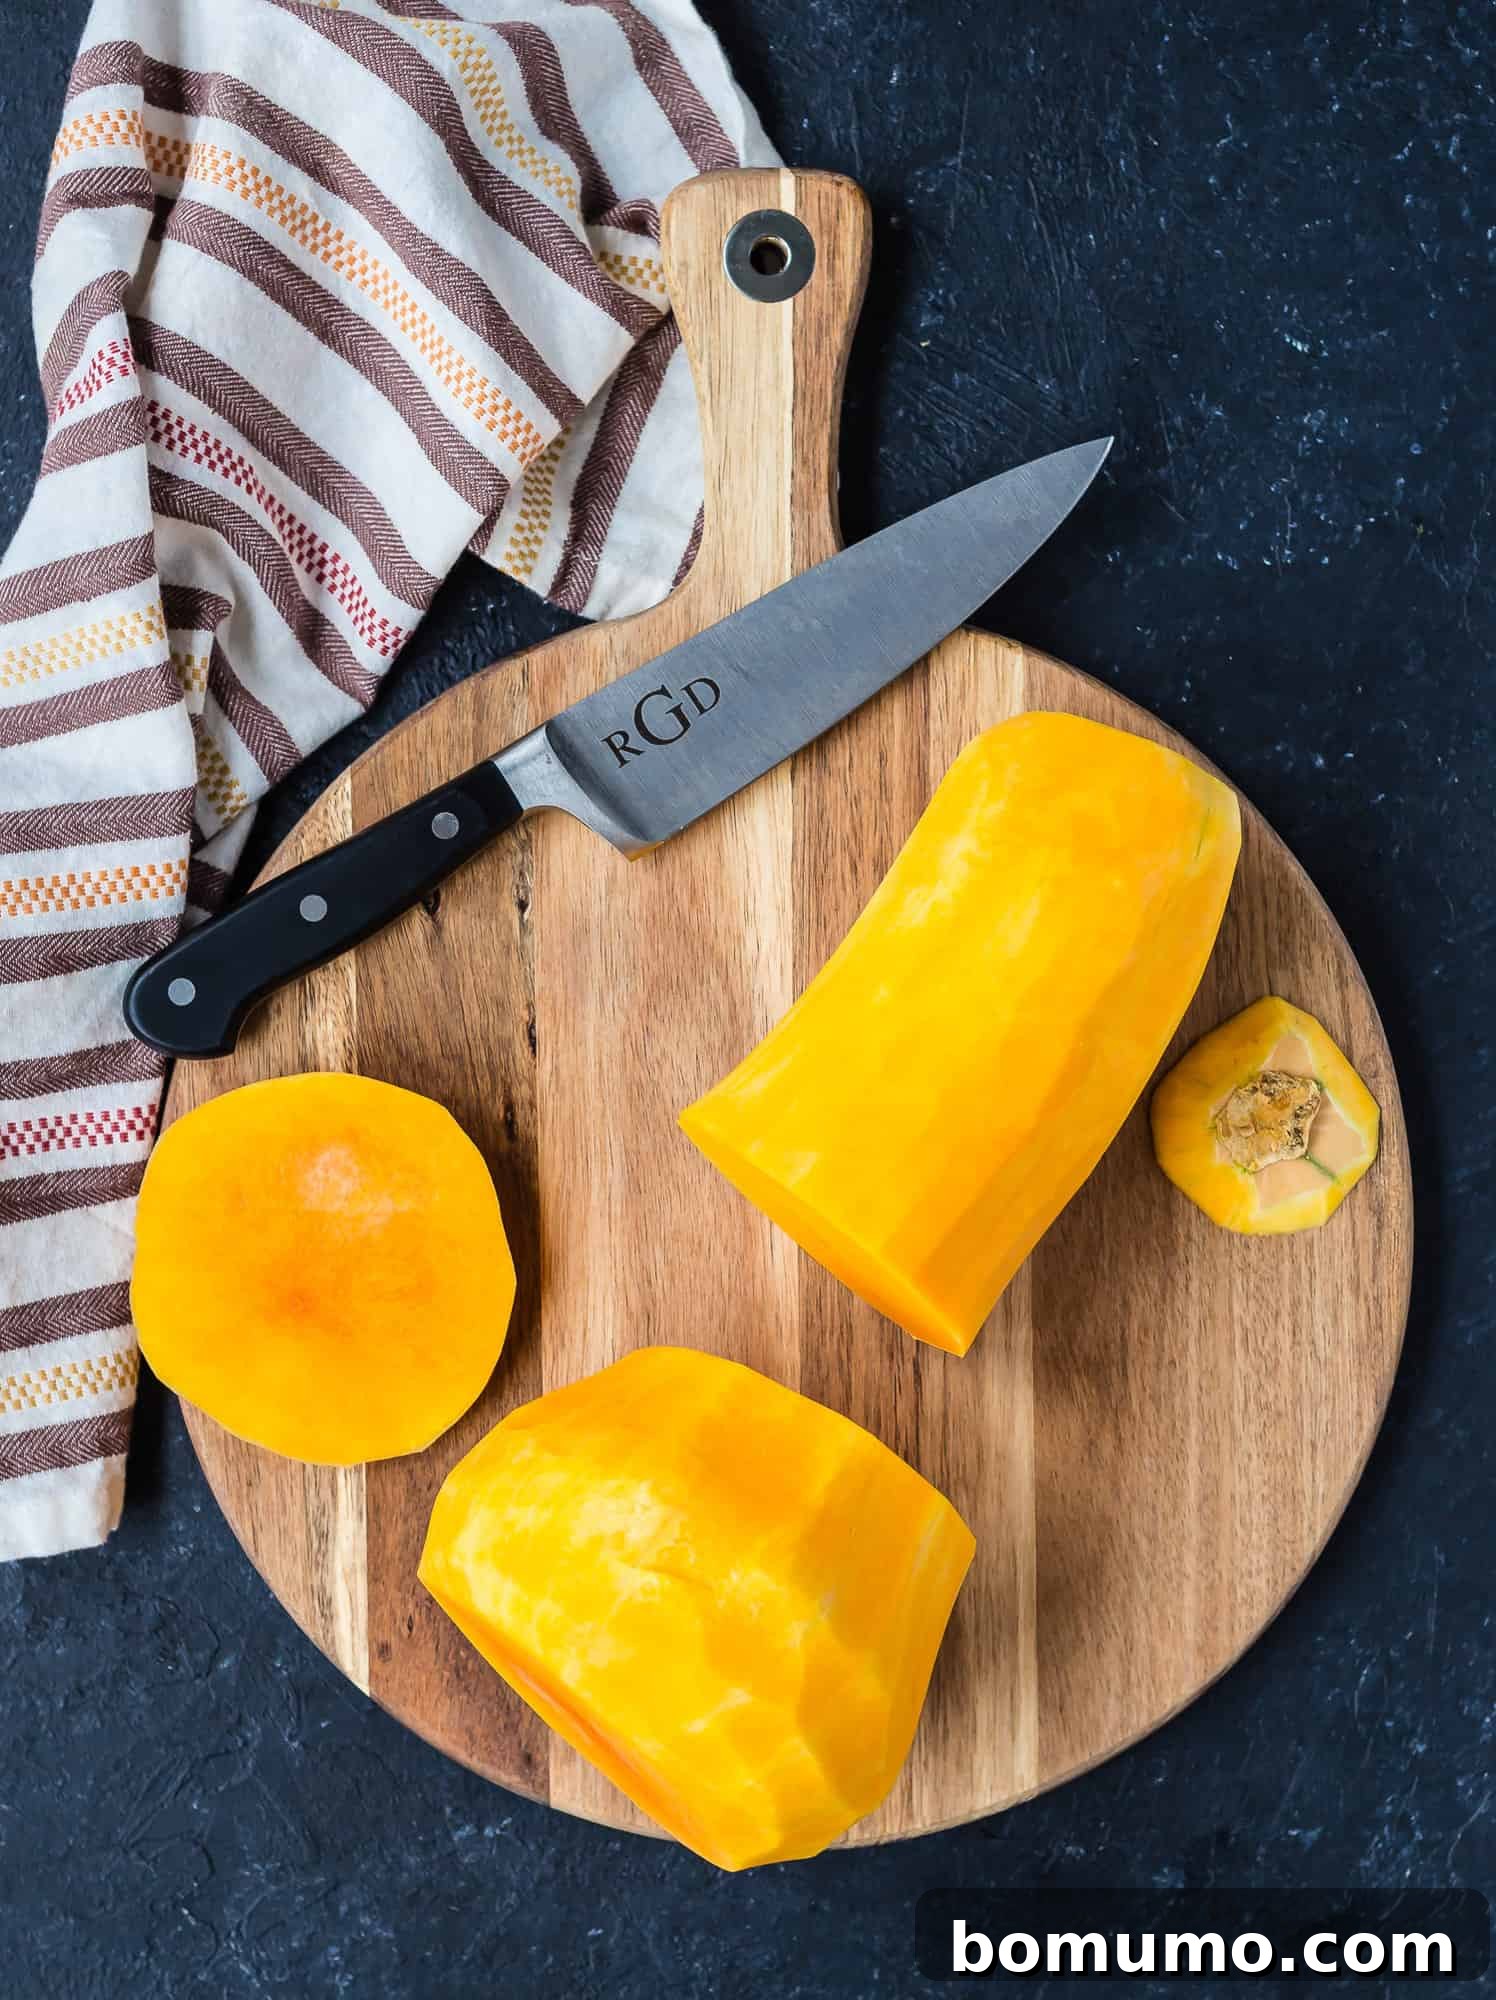
Begin by thoroughly washing your butternut squash using a vegetable brush under running water. Even though you’ll be peeling it, starting with a clean surface prevents dirt from transferring to your hands and then to the edible flesh. Once clean, use a good quality vegetable peeler to remove the tough outer skin. Peel downwards in strips, ensuring you go past any faint green lines you might see just beneath the surface for the best texture. The goal is to reveal the vibrant orange flesh completely.
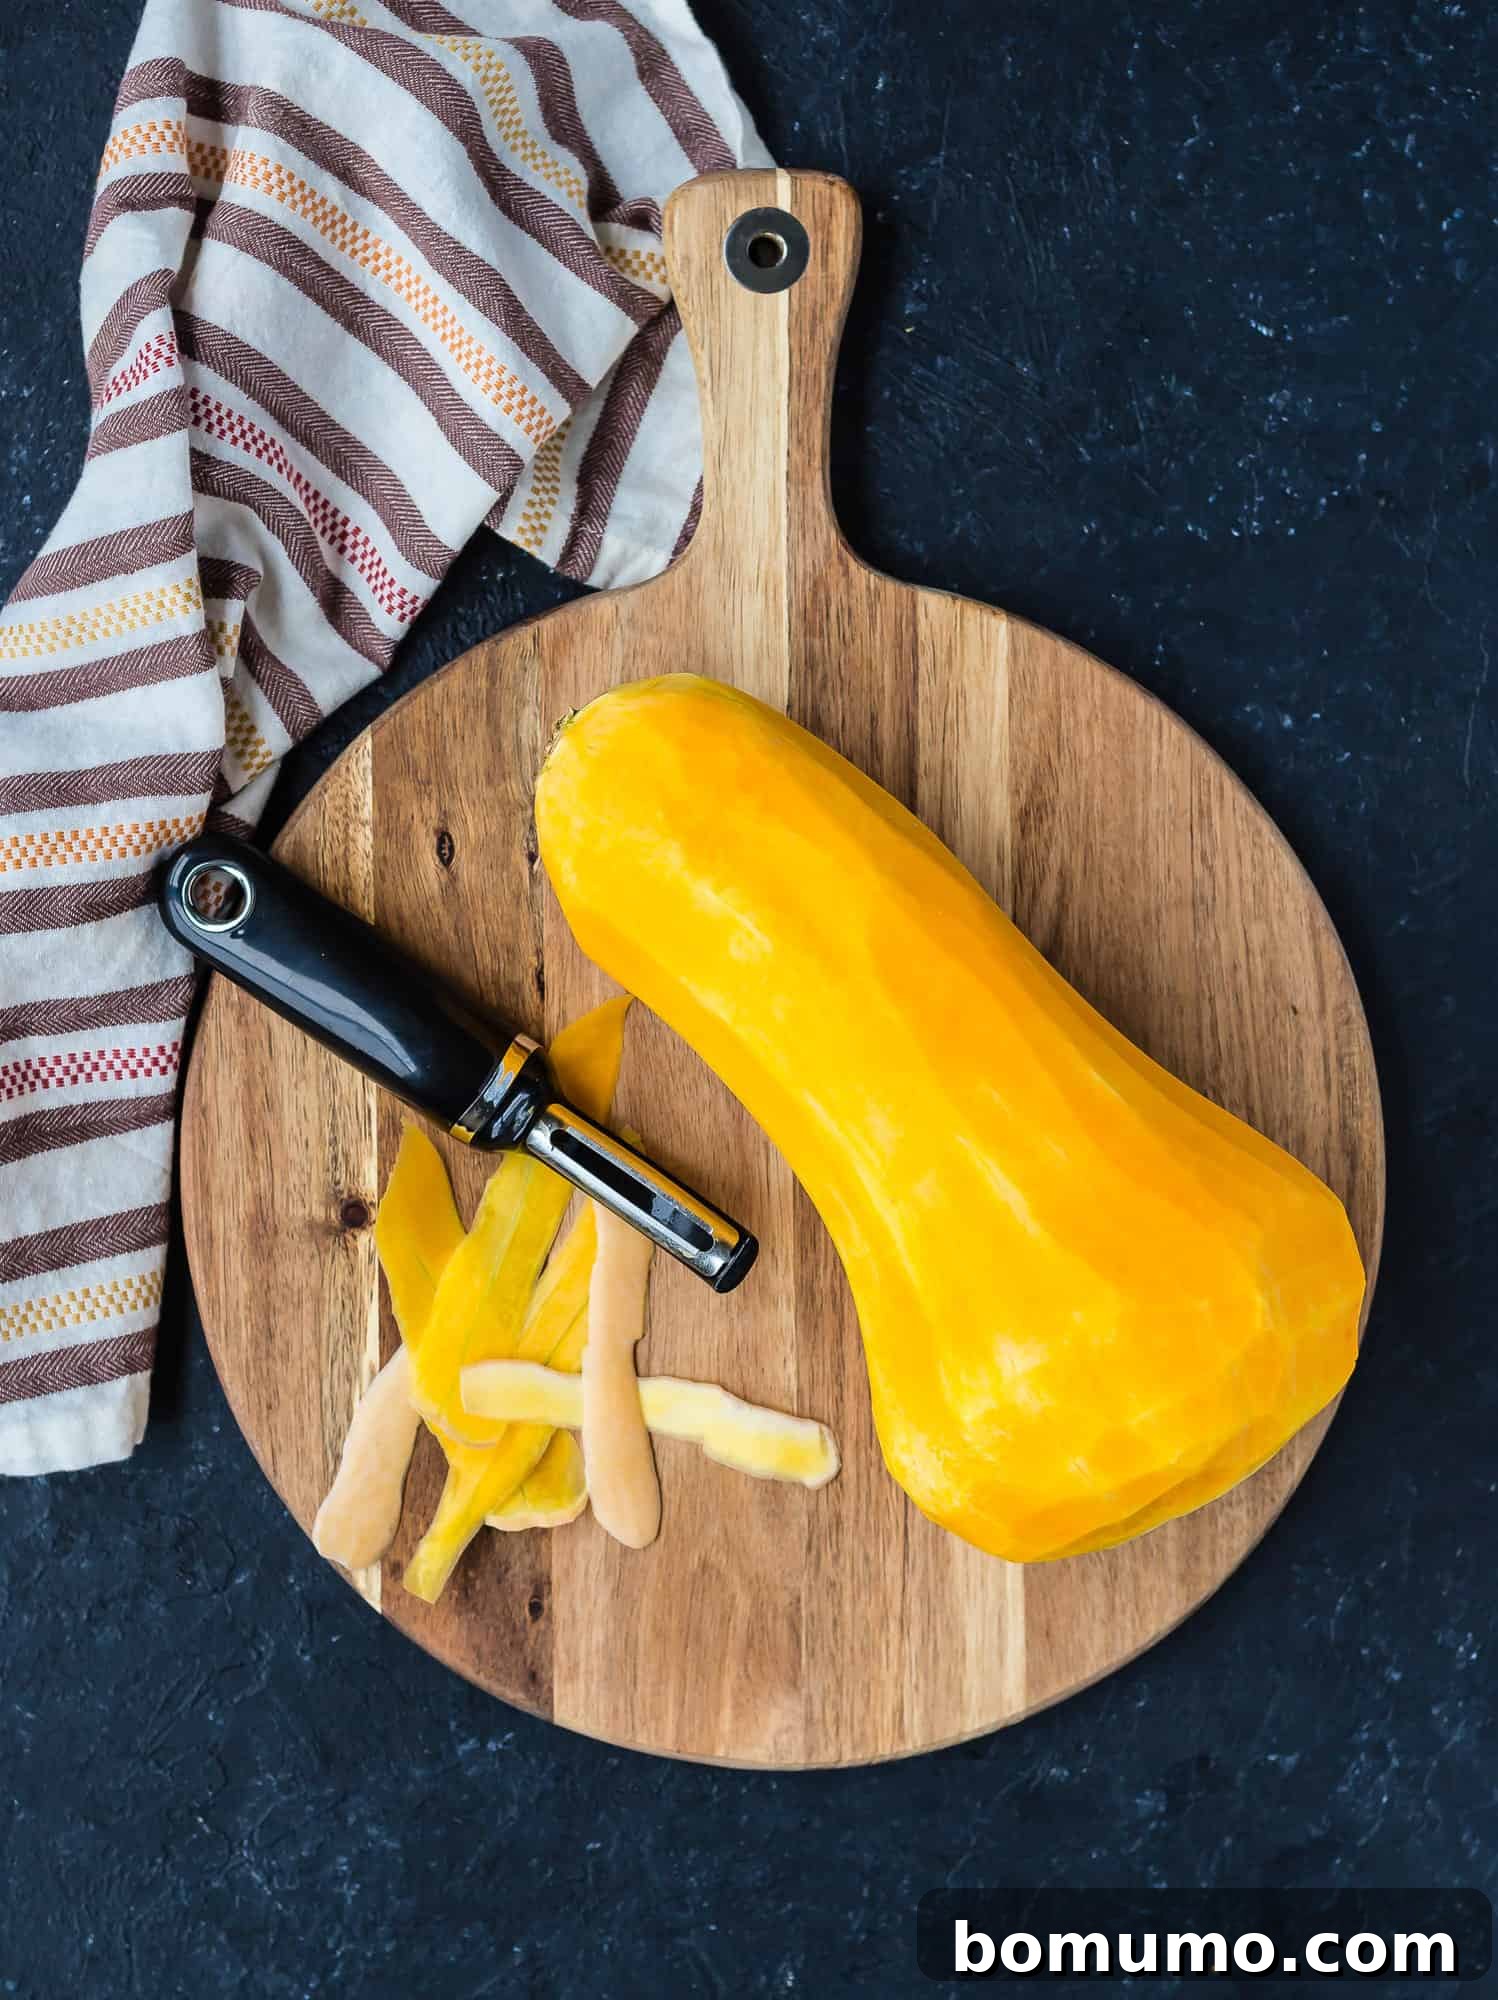
Step 2: Trim Ends and Divide the Squash
Carefully trim off both ends of the squash to create flat, stable surfaces. Next, locate the natural curve where the slender neck meets the bulbous seed cavity. Using your sharp knife, cut the squash in half at this point. This separates the solid top portion from the bottom portion which contains all the seeds, making the deseeding process much simpler.
Step 3: Quarter the Halves for Stability
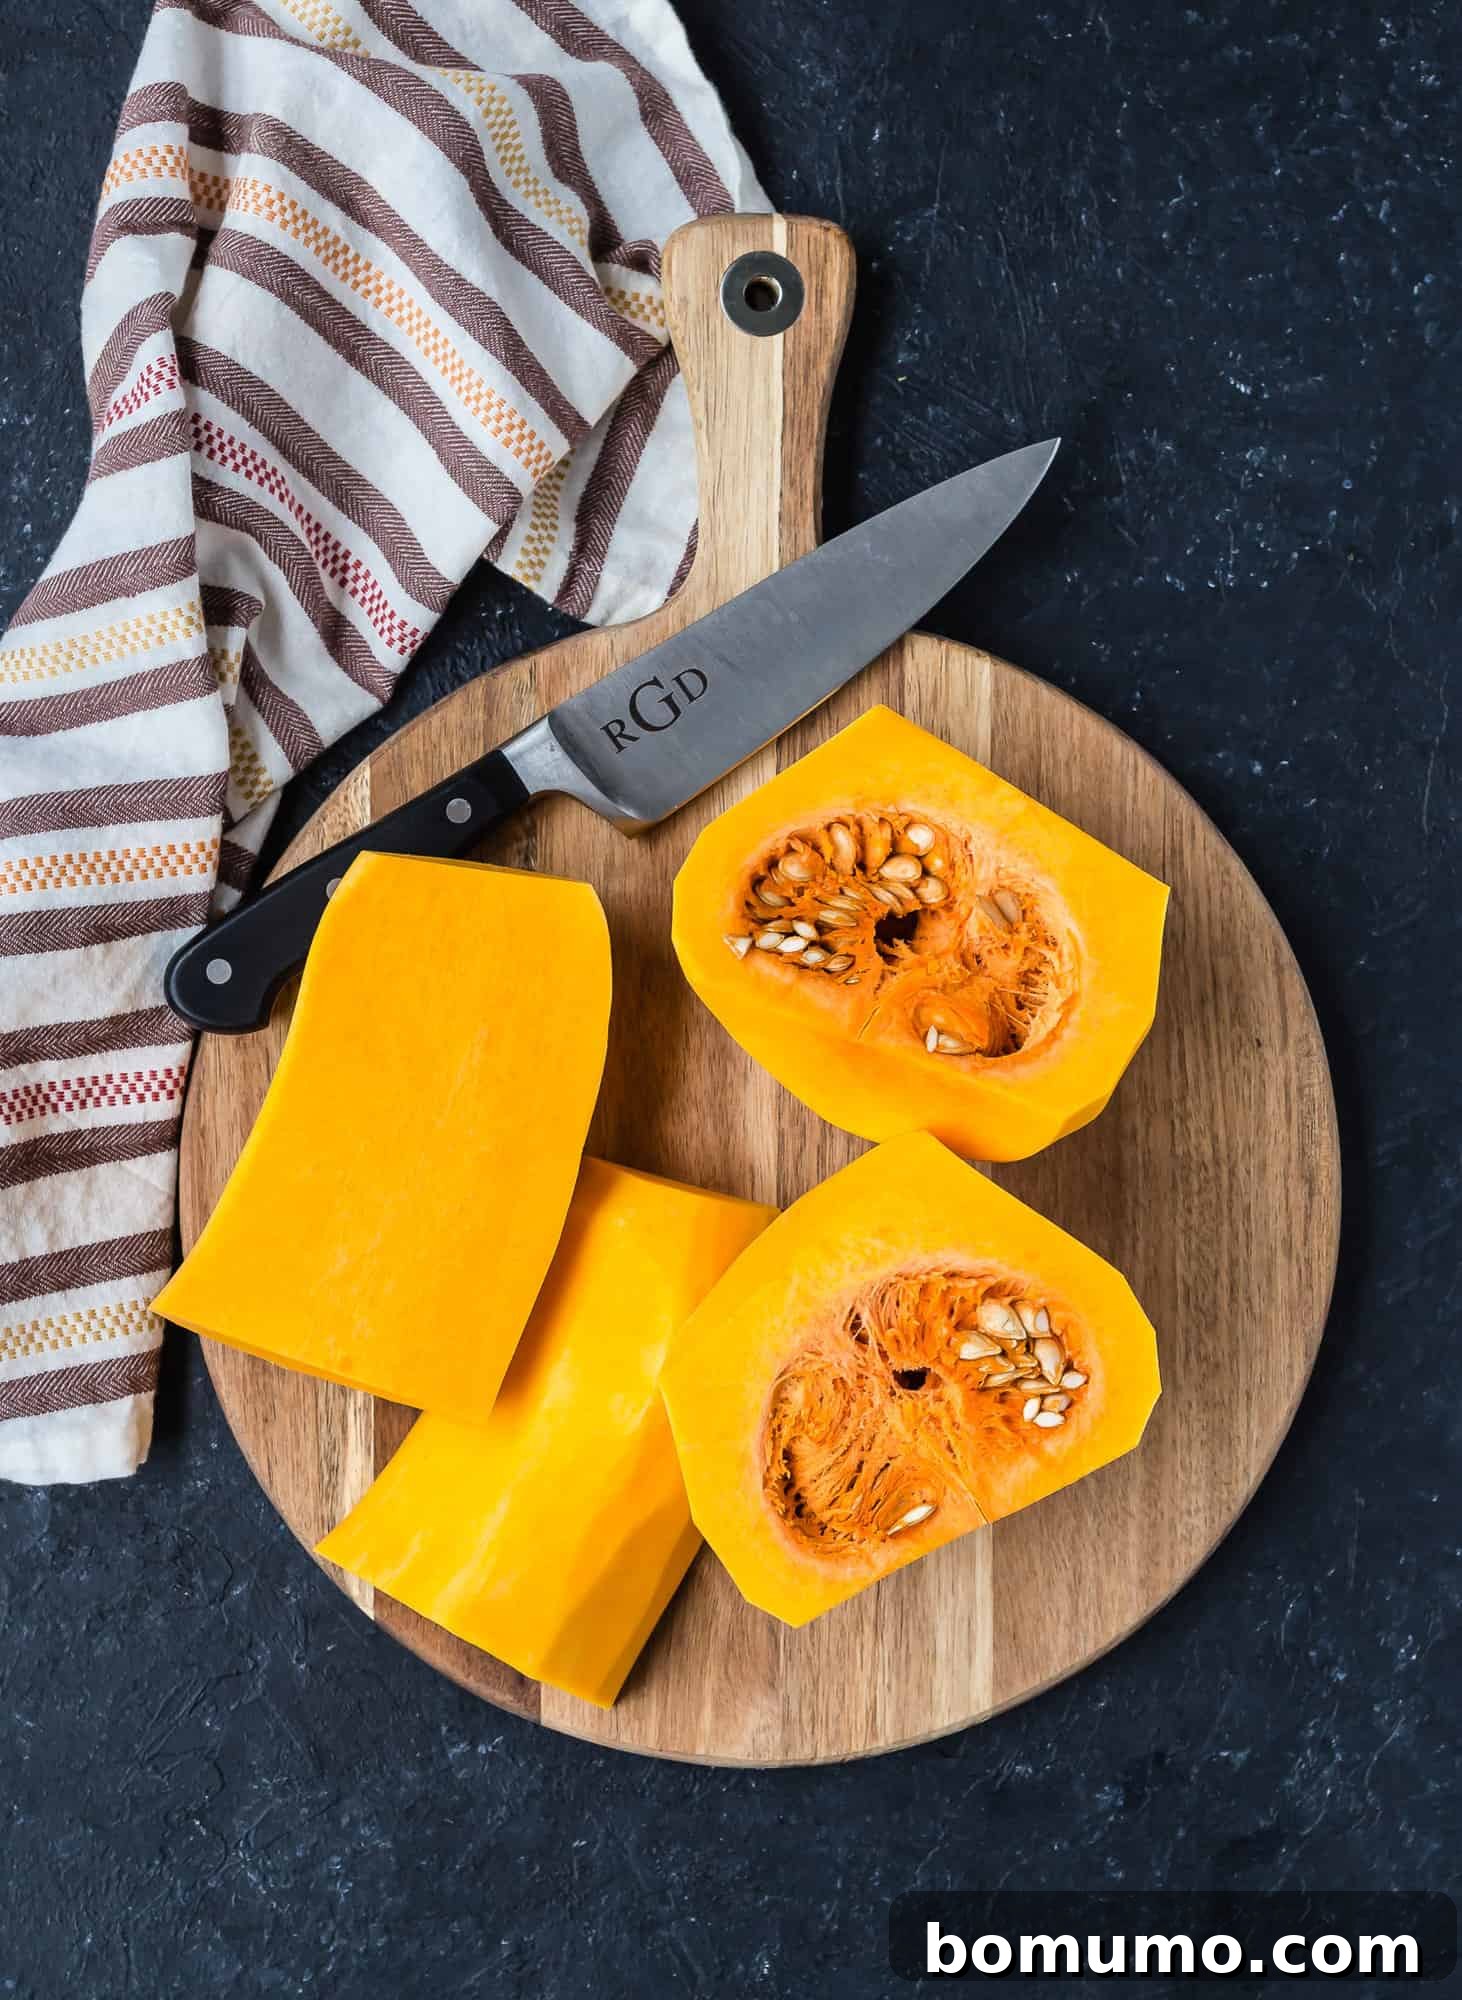
Take each of the two halves you just created and cut them in half again, this time lengthwise from top to bottom. For stability, stand each piece upright on your cutting board before making the cut. This will result in four more manageable, crescent-shaped pieces, making the next step of deseeding and cubing significantly easier and safer.
Step 4: Remove the Seeds
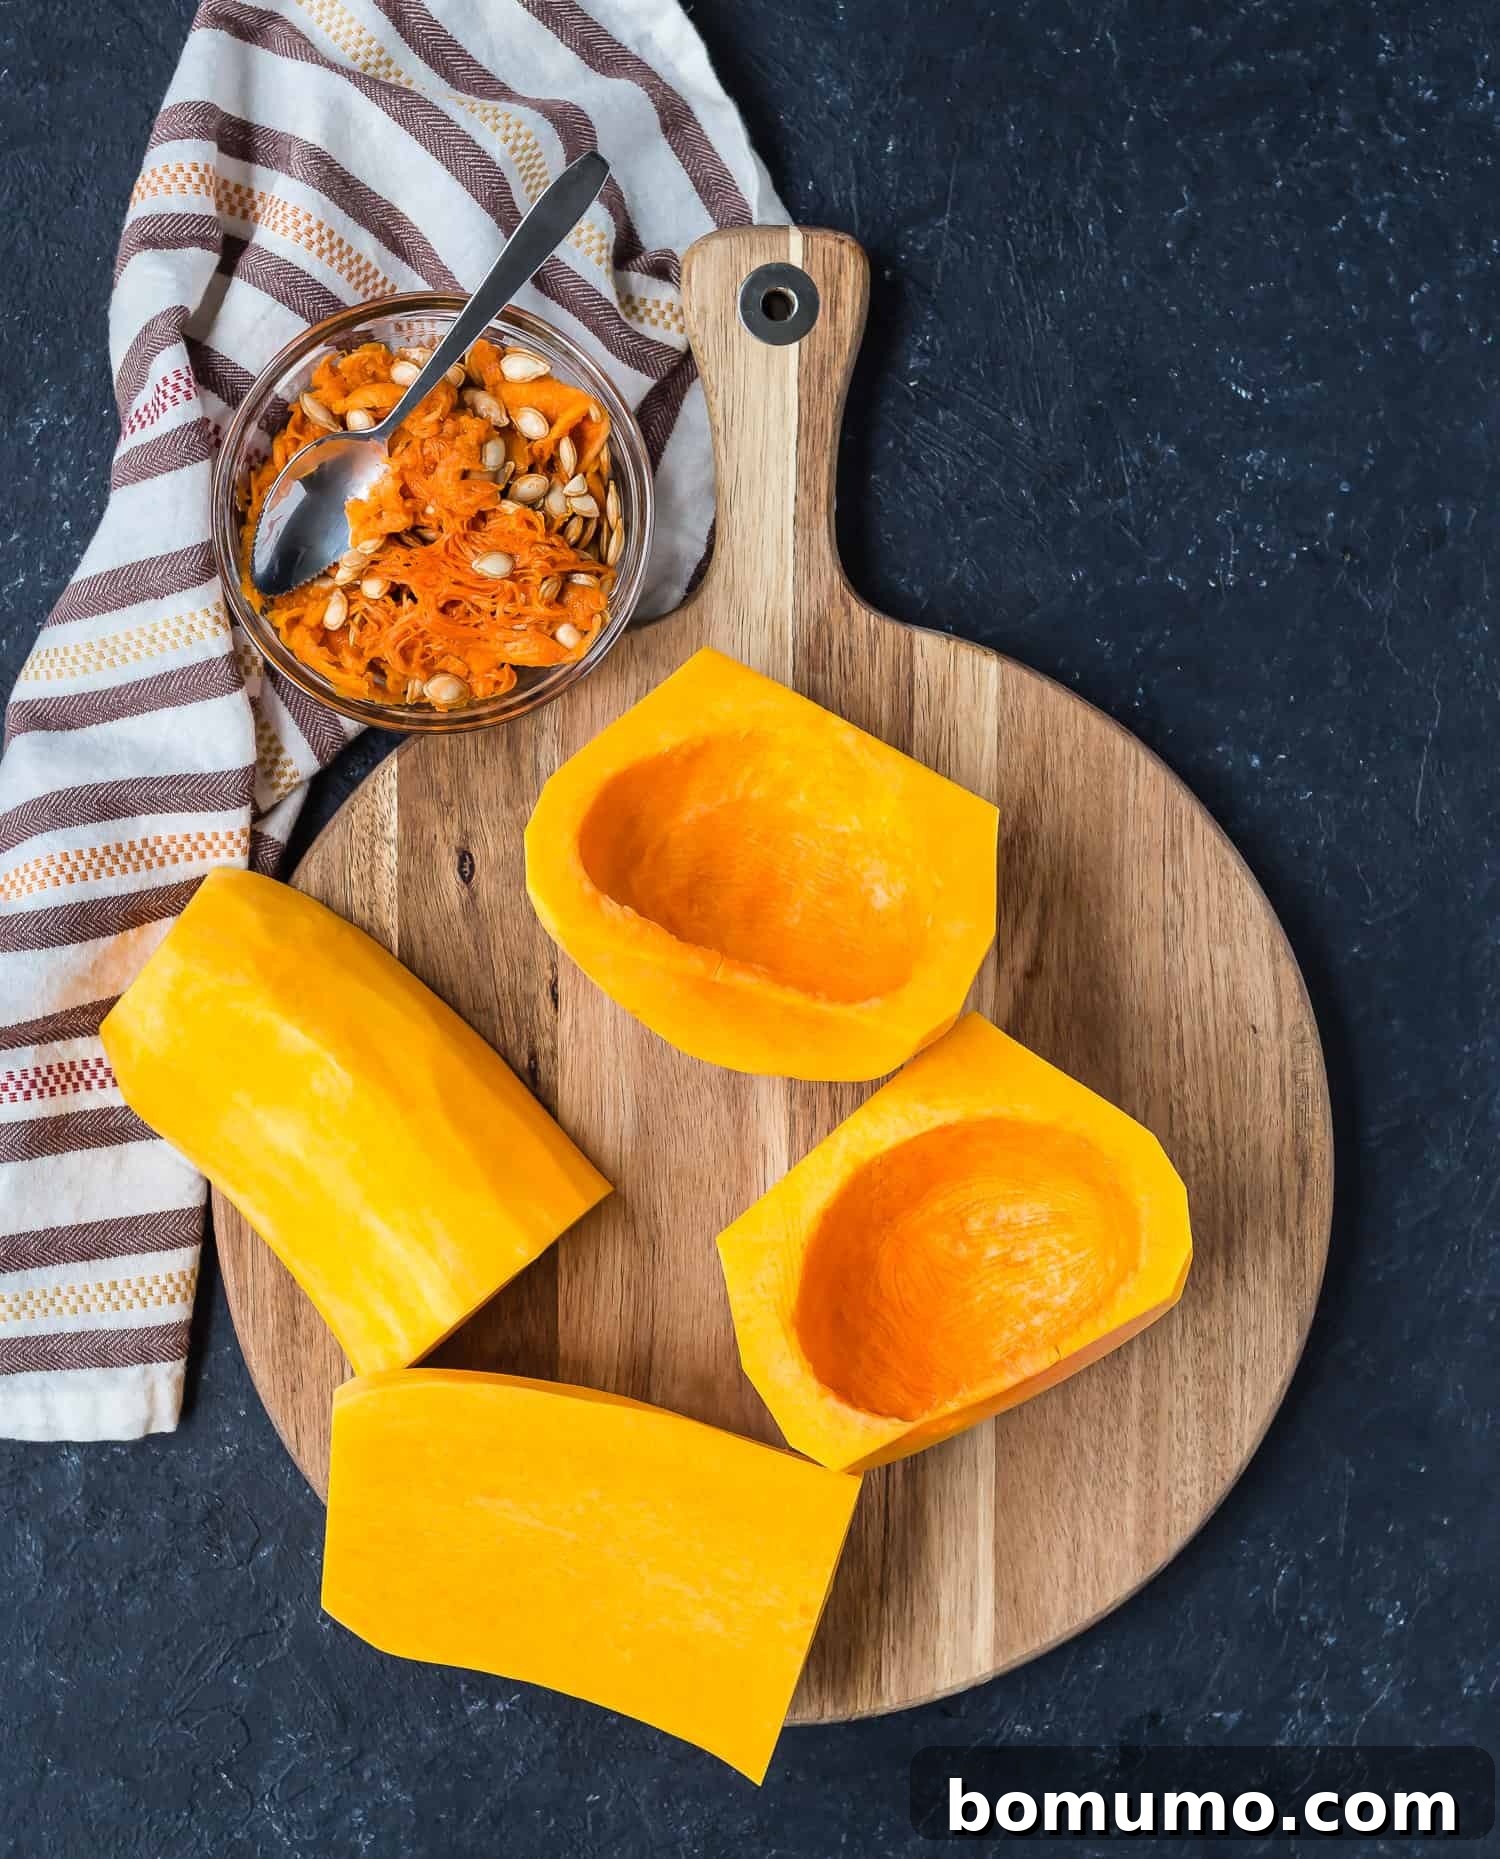
Now, it’s time to tackle the seeds. Use a spoon to scrape out the stringy pulp and seeds from the bulbous sections of the squash. A grapefruit spoon, with its serrated edge, can be particularly effective for this task, but a regular spoon or even your fingers will work just fine. Discard the seeds and stringy bits.
Step 5: Cube the Squash
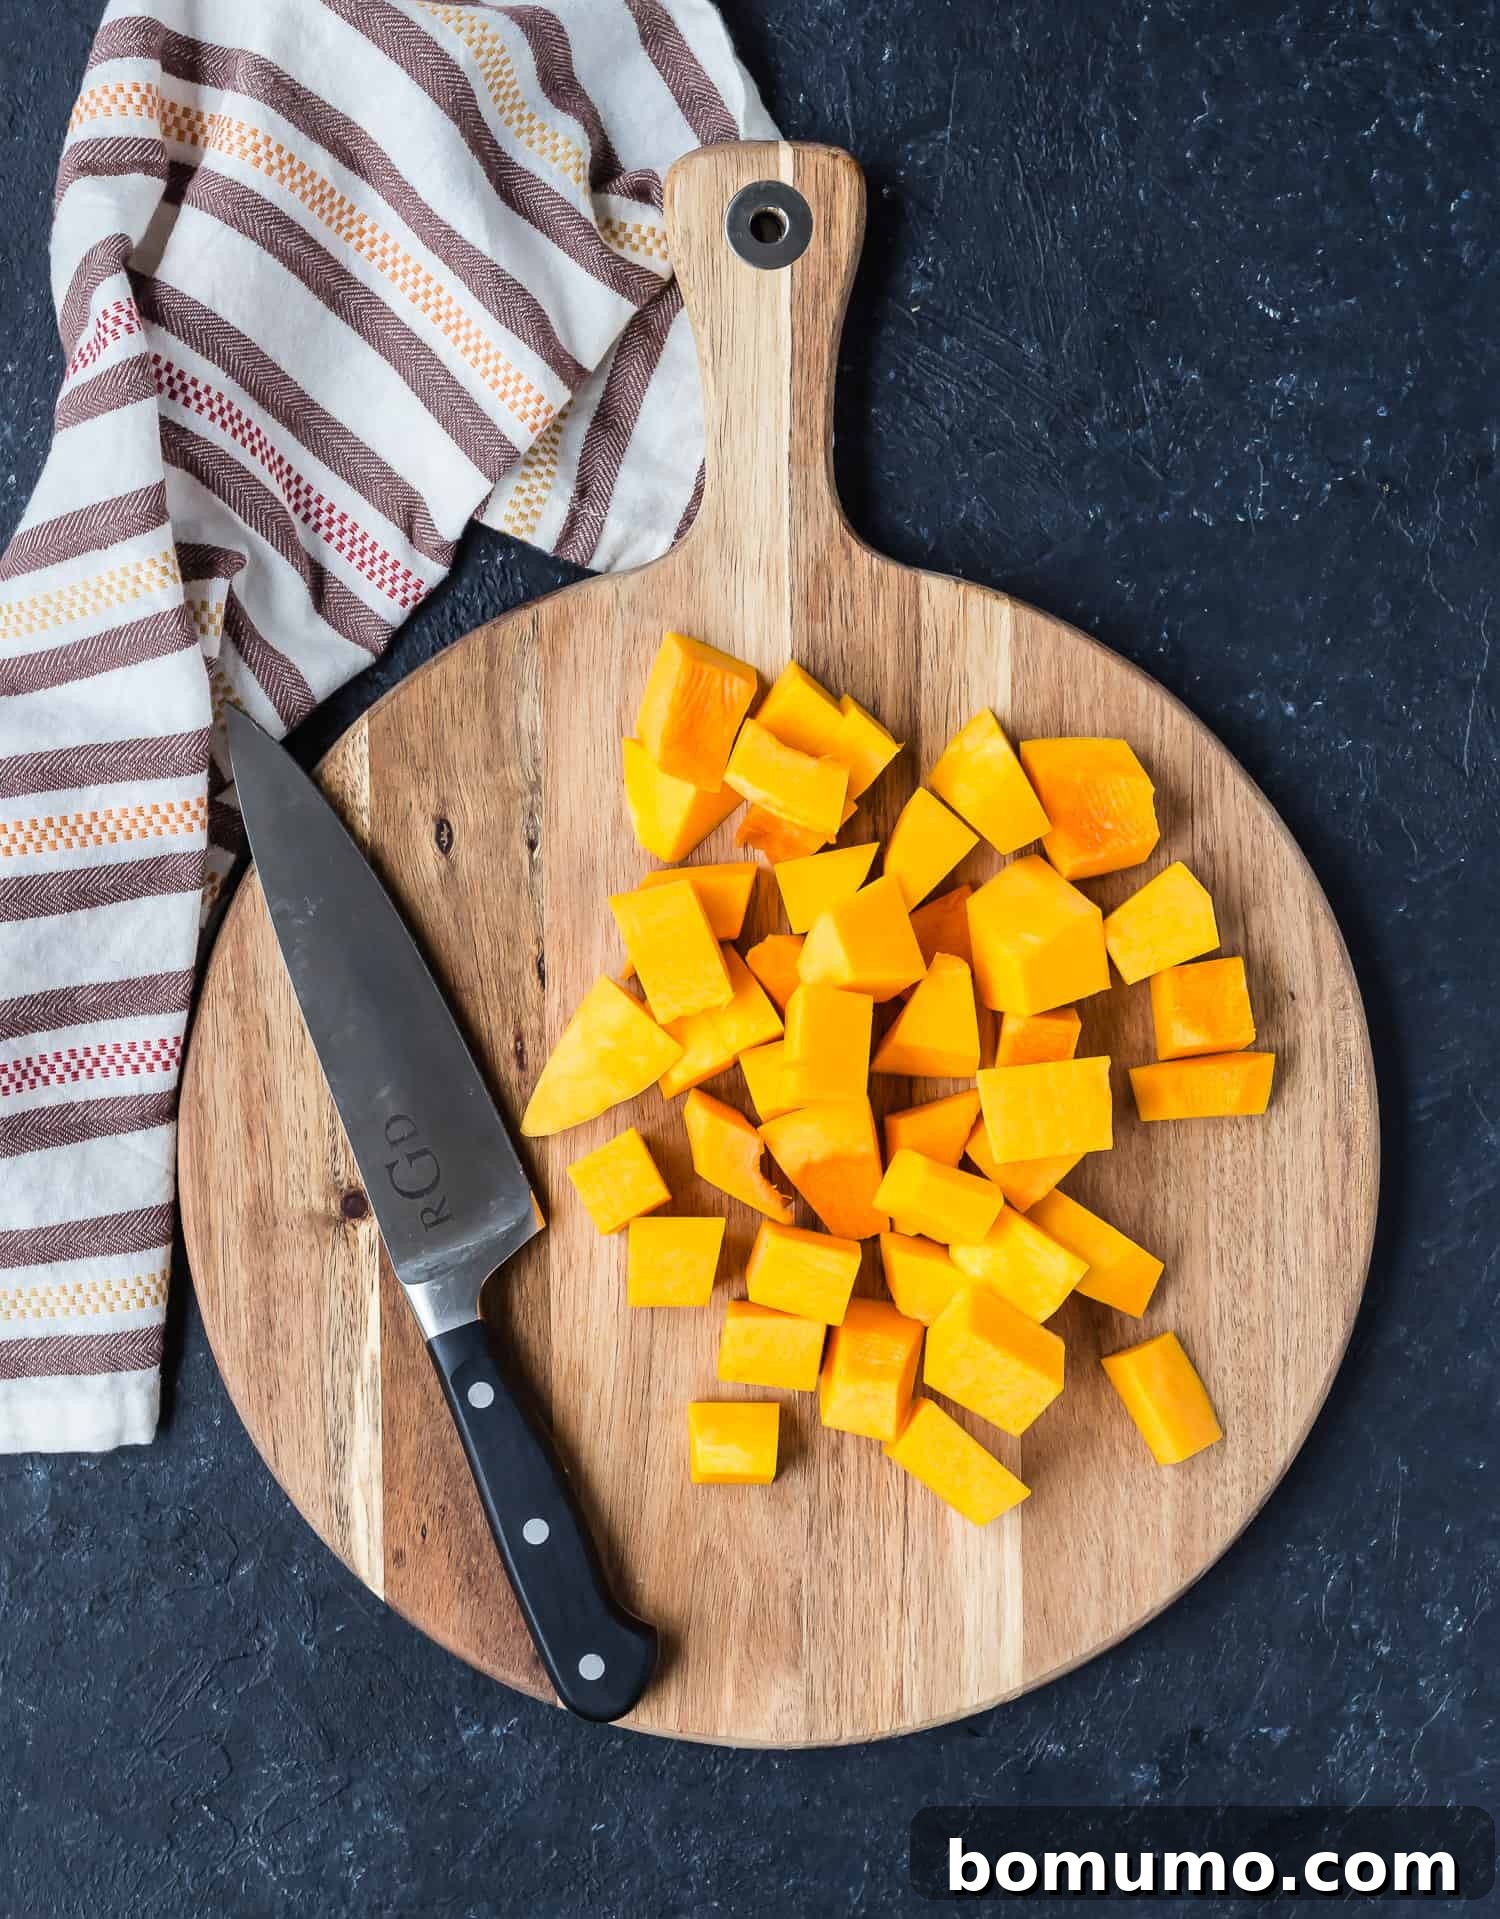
With the squash cleaned and deseeded, you can now cut it into uniform cubes. The size of the cubes can vary depending on your recipe, but a general recommendation is ¾ to 1-inch cubes. Remember, larger cubes will require a longer cooking time, while smaller cubes cook faster. Aim for consistency in size to ensure even cooking. Take your time, slicing the squash into planks, then sticks, and finally into cubes. The more uniform your pieces, the better they will roast or cook.
Essential Tools for Perfect Squash Preparation
Having the right tools can make all the difference in preparing tough-skinned winter squash. These are my go-to items that ensure safety and efficiency:
- Boos Block cutting board: A heavy, stable cutting board is a worthwhile investment. It prevents slipping and provides a spacious surface, making it safer and more comfortable to chop large vegetables.
- High-quality vegetable peeler: A sharp, ergonomic peeler can effortlessly glide through butternut squash skin, saving you time and effort while preventing nicks and cuts.
- Vegetable brush: Essential for thoroughly cleaning the squash and removing any dirt or debris before you begin peeling.
- Grapefruit spoon: The serrated edges of a grapefruit spoon are surprisingly effective for scraping out seeds and fibrous strands from the squash cavity, making the task quick and easy.
How to Roast Butternut Squash Cubes for Maximum Flavor
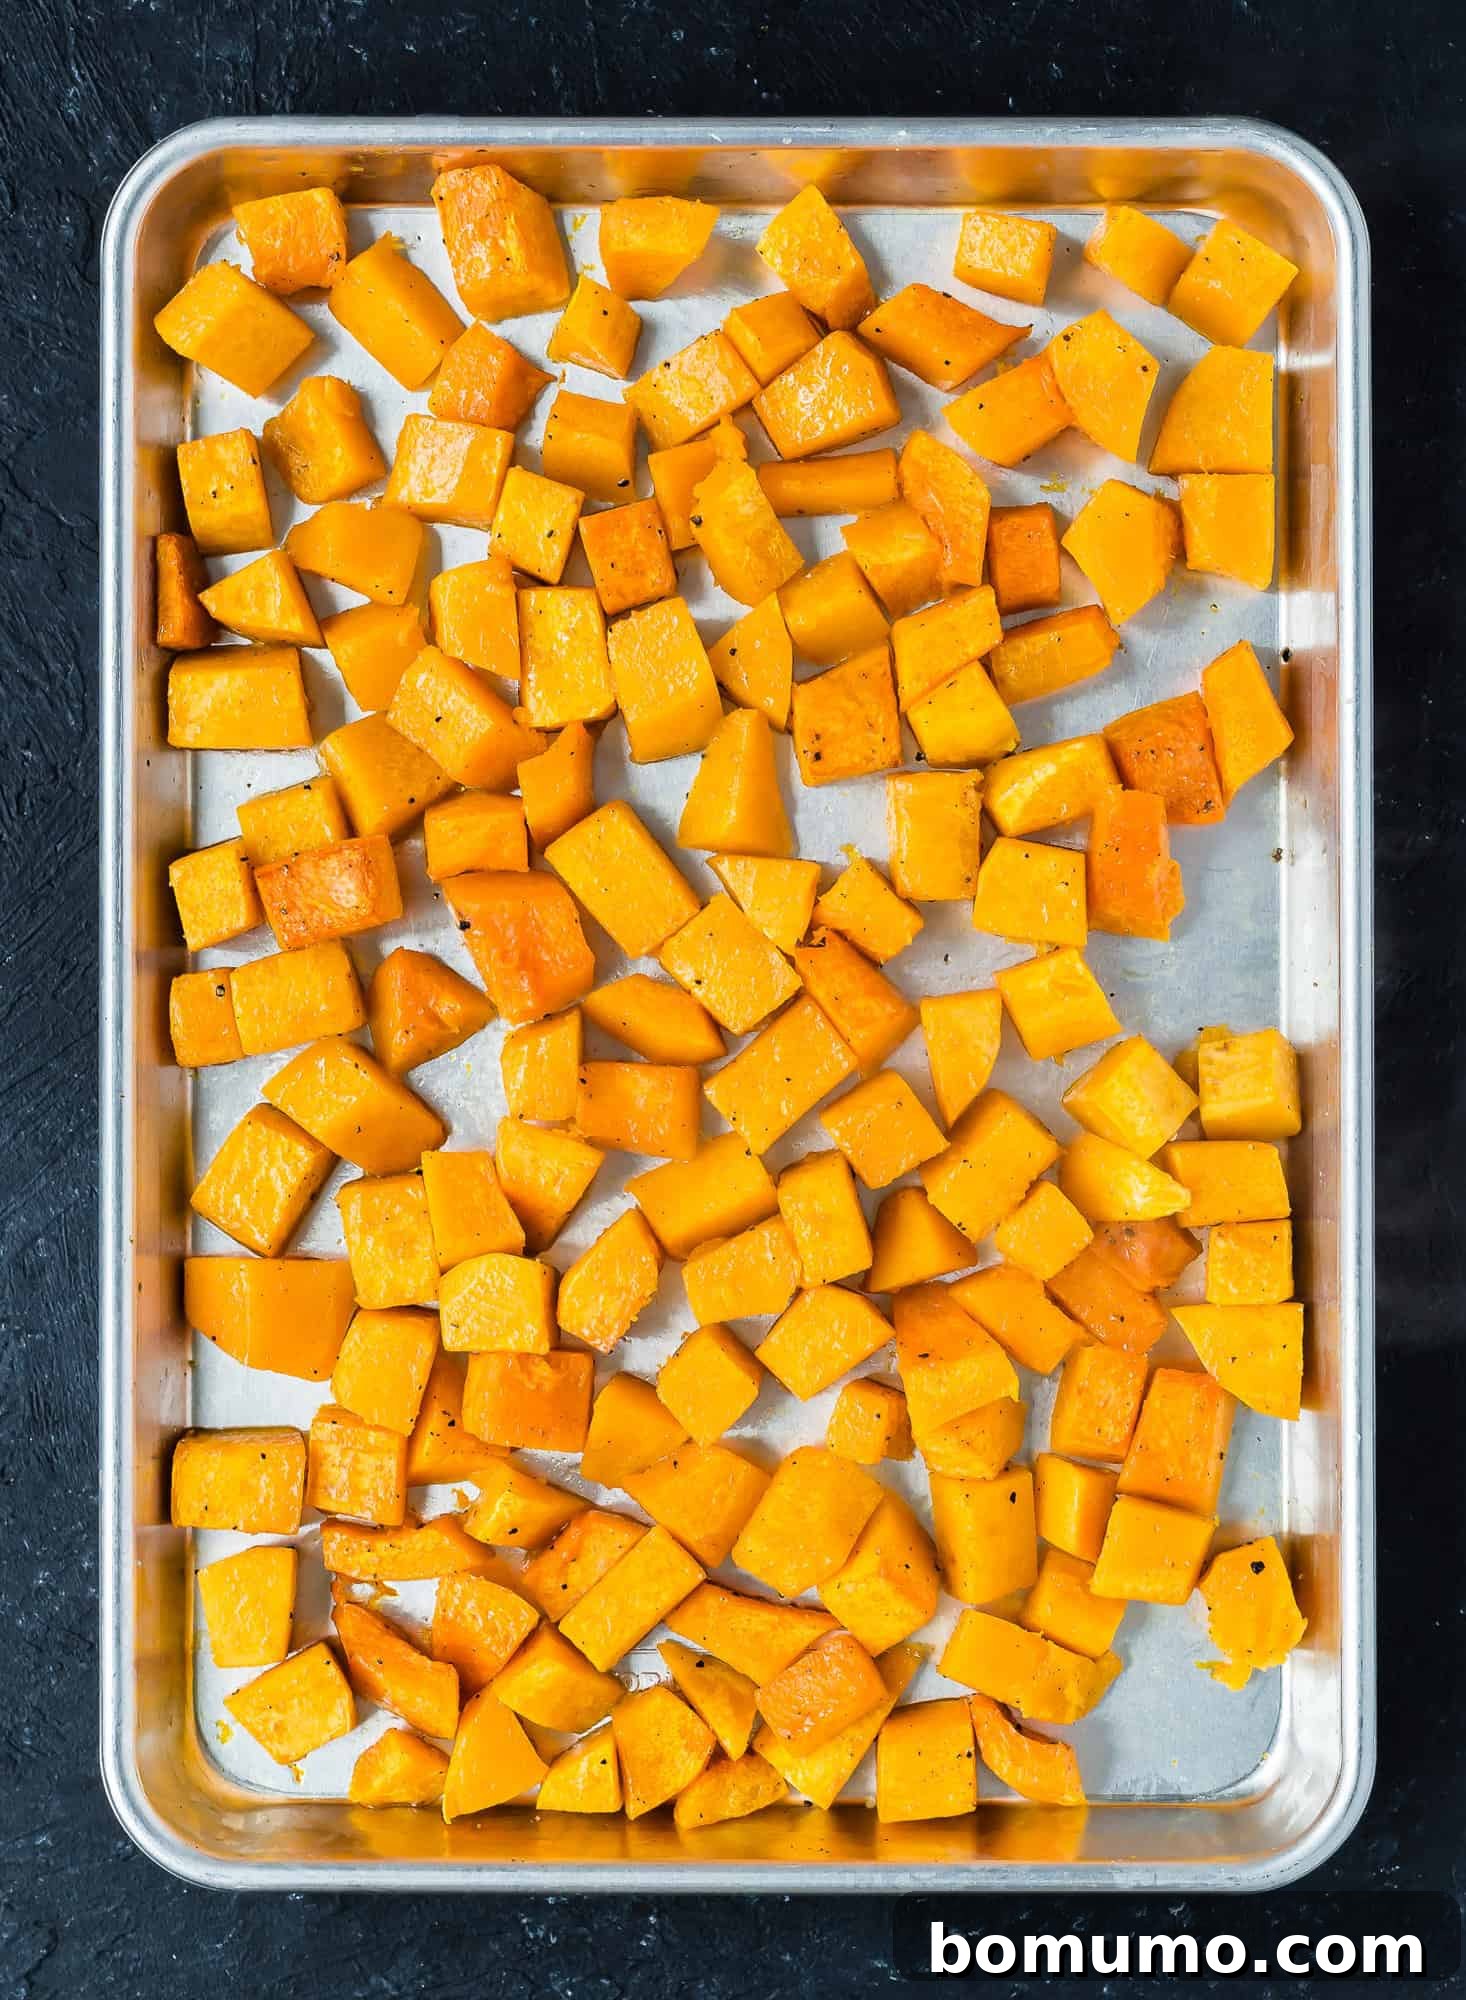
Roasting butternut squash cubes is arguably one of the most popular and flavorful ways to prepare this versatile vegetable. The high heat of the oven caramelizes the natural sugars, creating sweet, tender, and slightly crispy edges that are simply irresistible. This method enhances the squash’s inherent sweetness, making it a fantastic addition to a variety of meals.
Roasted butternut squash cubes make an excellent side dish for almost any meal, from weeknight dinners to holiday feasts. They’re also superb additions to hearty salads, grain bowls, or as a flavorful component in vegetarian tacos and quesadillas. For a truly unique and seasonal dish, try them in this fall-inspired flatbread.
Even if you plan to make a creamy butternut squash soup, roasting the squash first can elevate its flavor profile significantly. It adds a depth that simply boiling cannot achieve, resulting in a richer, more complex soup like this roasted butternut squash soup. It’s an extra step that is often worth the delicious reward.
Method: Roasted Butternut Squash Cubes
- Preheat your oven to 425ºF (220ºC). A higher temperature is key for achieving that desirable caramelization.
- On a large, rimmed baking sheet, toss the prepared butternut squash cubes with olive oil, salt, and black pepper. For a medium-sized squash, typically 1 to 2 tablespoons of olive oil, ¼ to ½ teaspoon of salt, and ⅛ to ¼ teaspoon of black pepper are sufficient. Ensure all the squash pieces are evenly coated with oil and seasonings for consistent roasting.
- Spread the squash in a single layer on the baking sheet to prevent steaming. Place the tray in the preheated oven and roast for 25 to 30 minutes. Halfway through the cooking time (around 12-15 minutes), stir the squash to ensure even browning. Continue roasting until the squash is golden brown, tender when pierced with a fork, and slightly caramelized at the edges. Be careful not to overcook, as this can result in a mushy texture.
Customize Your Roasted Butternut Squash
The beauty of roasted butternut squash lies in its adaptability. Feel free to experiment with different flavor combinations to suit your palate:
- Explore various oils: While olive oil is a classic choice, melted coconut oil lends a subtle sweetness that pairs wonderfully with squash, especially for sweeter preparations. Avocado oil is another excellent option, offering a neutral flavor and high smoke point.
- Experiment with spices: For a warming, autumnal touch, sprinkle with cinnamon, nutmeg, or a hint of allspice. If you prefer savory profiles, try dried sage, rosemary, thyme, or a pinch of cayenne pepper for a gentle kick. My spicy sweet roasted butternut squash recipe is a fantastic starting point for bold flavors.
- Adjust cube size: The cooking time is directly affected by the size of your squash pieces. If you prefer larger, more substantial cubes, anticipate a longer roasting time. Conversely, smaller cubes will cook more quickly. Always test for tenderness with a fork to ensure perfect results.
How to Roast Butternut Squash Halves for Easy Preparation
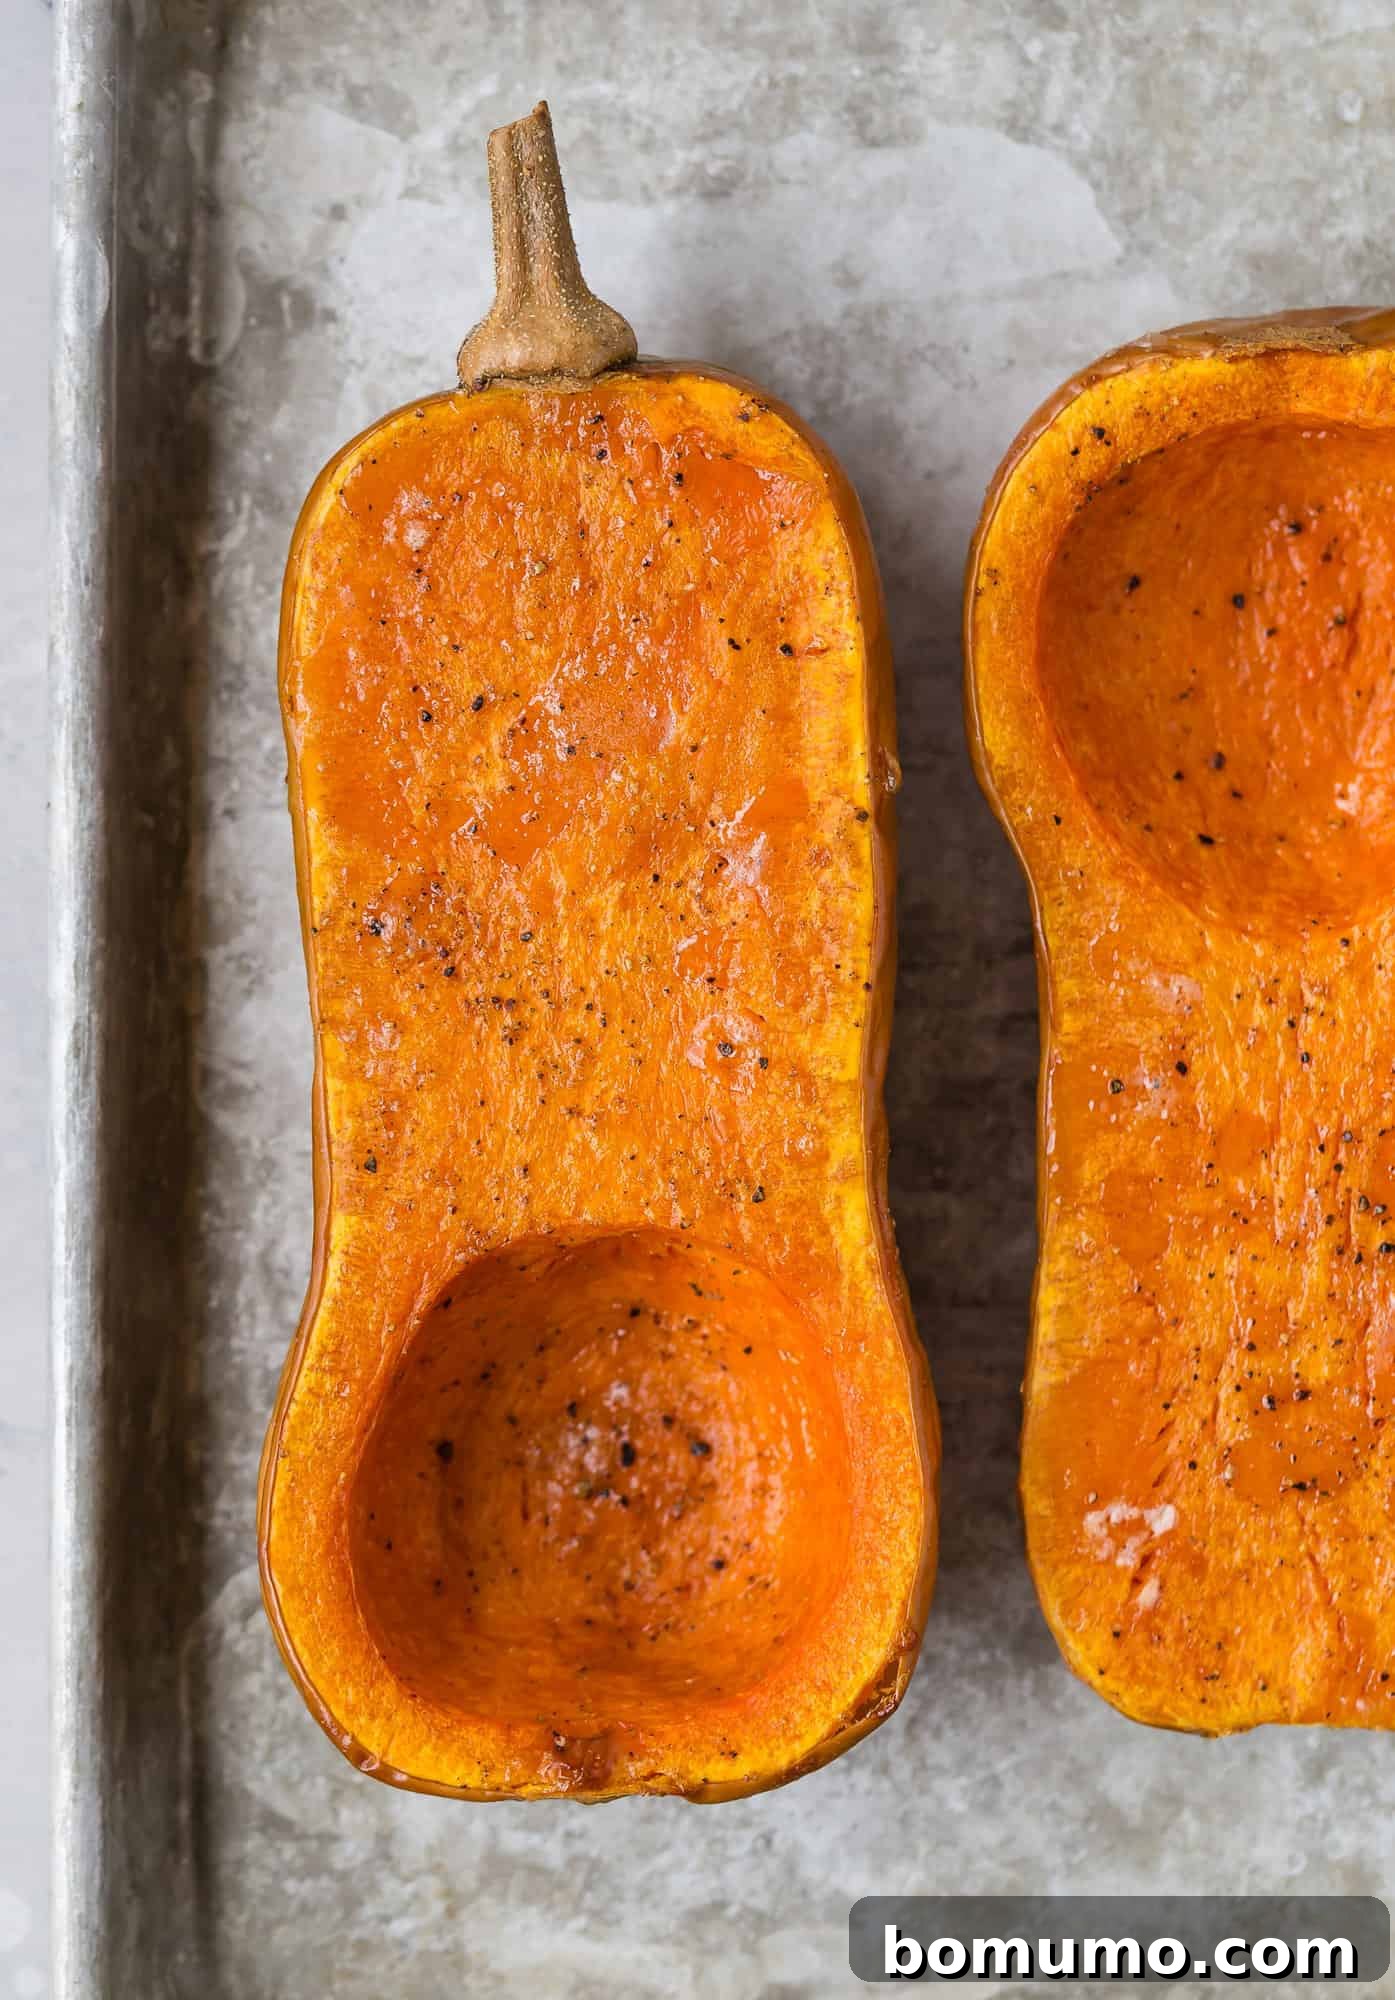
Roasting butternut squash in halves is a wonderfully simple and hands-off method, perfect for busy days or when you want to minimize prep work. The biggest advantage here is that it requires absolutely no peeling beforehand! This technique is ideal if you plan to mash the squash for a side dish or use it as the base for creamy soups. It’s also the go-to method for preparing delicious stuffed squash, where the roasted shell becomes a natural serving bowl. Try it with my comforting mashed butternut squash recipe or this incredible stuffed butternut squash, featuring bacon and cheddar for an unforgettable meal.
Keep in mind that roasting halves takes longer than roasting cubed squash, due to the larger mass. Plan your cooking time accordingly to ensure the squash is fork-tender throughout.
Method: Roasted Butternut Squash Halves
- Preheat oven: Set your oven to 425ºF (220ºC). For easier cleanup, you can line a baking sheet with parchment paper or aluminum foil.
- Prepare the squash: Give the squash a good scrub under running water. Carefully slice the squash in half lengthwise from stem to end. You can trim off the stem end first if it makes slicing easier, though leaving it on adds a rustic visual appeal. Using a spoon, scoop out all the seeds and fibrous strands from both halves.
- Season and place: Lightly brush the cut surfaces of each squash half with olive oil. Sprinkle with a generous pinch of salt and pepper. You can place the squash halves cut-side up or cut-side down on your prepared baking sheet. Roasting cut-side down can lead to more browning and a richer, caramelized flavor on the surface, while cut-side up is perfect for adding additional flavorings like a drizzle of maple syrup, brown sugar, or a pat of butter, which will melt and seep into the flesh as it cooks – a favorite technique of my mother’s for extra deliciousness!
- Roast until tender: Bake for 35 minutes to 1 hour, or possibly longer, depending on the size and thickness of your squash. The squash is done when the flesh is easily pierced with a fork in its thickest part and appears soft and slightly caramelized.
Quick and Easy Butternut Squash in an Instant Pot
The Instant Pot is a true kitchen hero, renowned for its ability to drastically cut down cooking times. It’s a fantastic tool for preparing butternut squash, especially when you need it cooked quickly and tender. There are a few different approaches you can take, depending on the size of your squash and your desired outcome.
Cooking a Whole Butternut Squash in an Instant Pot
This is by far the easiest method, requiring no peeling or cutting before cooking! The main constraint is finding a butternut squash that fits comfortably inside your Instant Pot. This method yields a super-tender squash perfect for mashing or pureeing.
- Place the trivet or steamer basket at the bottom of your Instant Pot and add 1 cup of water.
- Carefully place the whole, unpeeled squash onto the trivet. Secure the lid and ensure the venting knob is sealed.
- Set the Instant Pot to High Pressure for 30 minutes. Once cooking is complete, allow the pressure to release naturally for 10 minutes before carefully performing a quick release of any remaining pressure.
- Once the lid can be safely removed, carefully take out the squash. Let it cool slightly, then cut it in half, scoop out the seeds and fibrous strands, and easily spoon out the tender flesh.
Cooking Quartered or Halved Butternut Squash in an Instant Pot
If your squash is too large to fit whole, or if you prefer a slightly shorter cooking time, quartering or halving it before pressure cooking is a great alternative. This method still bypasses the need for peeling, saving you precious prep time.
- Place the trivet or steamer basket in the bottom of your Instant Pot and add 1 cup of water.
- Thoroughly scrub the squash clean. Carefully cut it into quarters (or halves, if preferred). Scoop out all the seeds and fibrous material.
- Arrange the squash quarters/halves in the steamer basket. Secure the lid and set the Instant Pot to High Pressure for 10 minutes.
- After cooking, allow the pressure to naturally release for 10 minutes, then perform a quick release. Carefully remove the squash sections and scoop out the tender flesh.
Cooking Butternut Squash Cubes in an Instant Pot
For recipes that specifically call for cubed squash, the Instant Pot can cook them to perfect tenderness in a fraction of the time compared to stovetop methods. This is ideal when you need soft squash for purees or soups and want it ready fast.
- First, wash, peel, deseed, and chop your butternut squash into 1-inch cubes (refer to the “How to Peel and Cube” section above if you need a refresher).
- Place a steamer basket in the bottom of your Instant Pot and add 1 cup of water.
- Add the cubed squash to the steamer basket. Secure the lid and set the Instant Pot to High Pressure for just 5 minutes.
- Once the cooking cycle is complete, immediately perform a quick release of the pressure. The squash will be perfectly tender, ready to be mashed, pureed into a delicious soup, or frozen for future use.
Effortless Butternut Squash with a Slow Cooker
For truly hands-off cooking, the slow cooker is an excellent choice for preparing butternut squash. This method excels at producing incredibly tender squash with minimal effort, allowing you to go about your day while dinner practically cooks itself. It’s particularly well-suited for recipes where you want a very soft, mashable squash, such as creamy mashes or rich soups. You can even use the slow cooker for complete meals that feature squash, like this comforting slow cooker creamy chicken soup with quinoa and squash or these savory slow cooker Moroccan chicken thighs.
Method: Slow Cooker Butternut Squash
- Begin by thoroughly washing the butternut squash. Place the whole, unpeeled squash directly into your slow cooker. For exceptionally easy cleanup, you can line the slow cooker with foil or wrap the squash itself in foil before placing it inside.
- Cover the slow cooker with its lid. Cook on high for 4 to 8 hours, or on low for 6 to 10 hours, depending on the size of your squash. The squash is ready when it is tender enough to be easily pierced with a fork all the way through.
- Once cooked, carefully remove the hot squash from the slow cooker and let it cool for a few minutes until it’s safe to handle.
- Using a sharp knife, carefully cut the squash in half lengthwise from stem to end, being mindful of any escaping steam. Scoop out and discard the seeds and fibrous strands, then use a large spoon to easily scrape the soft, cooked flesh from the skin. The tender squash is now ready for your desired recipe!
Storing and Freezing Cooked Butternut Squash
Cooked butternut squash is a wonderful ingredient to have on hand for quick meals and meal prep. Proper storage ensures it stays fresh and flavorful for longer.
Refrigerate: Store any leftover cooked butternut squash in an airtight container in the refrigerator. It will remain fresh for approximately 3 to 4 days.
Freeze: Butternut squash freezes beautifully, whether mashed or in cubes. For mashed squash, simply transfer it to a zip-top freezer bag, pressing out as much air as possible, or an airtight freezer-safe container. For cooked butternut squash cubes, spread them in a single layer on a parchment paper-lined baking sheet and freeze until solid. This “flash-freezing” step prevents the cubes from sticking together. Once frozen, transfer the solid cubes to a freezer bag or container. Cooked butternut squash can be stored in the freezer for 3 to 4 months without significant loss of quality.
How Long Does Butternut Squash Last?
Understanding the shelf life of butternut squash, both cooked and uncooked, helps in meal planning and reducing waste:
- Cooked Butternut Squash: Stored in an airtight container, it will last 3 to 4 days in the refrigerator and up to 3 to 4 months in the freezer.
- Uncooked, Whole Butternut Squash: Uncut and stored in a cool, dry place (like a pantry or cellar), whole butternut squash can last an impressive 3 to 4 months. Always inspect it before use; discard if it becomes soft, squishy, or shows any signs of mold.
Explore More Squash Creations
If you’ve made it this far, your love for squash must be as deep as mine! I hope this guide has inspired you to confidently tackle butternut squash with any method you choose. Don’t stop here – dive deeper into the world of winter squash with our ultimate guide to winter squash, packed with even more delicious recipes and cooking inspiration!
How to Cook Butternut Squash
★
★
★
★
★
Rachel Gurk
5
45
50
4 servings
Print Recipe
Ingredients
- 1 medium sized butternut squash (between 2 ½ and 3 pounds)
- 1 teaspoon to 1 tablespoon olive oil (for oven methods)
- ¼ teaspoon salt, or to taste (for oven methods)
- ⅛ teaspoon pepper, or to taste (for oven methods)
Instructions
OVEN METHOD, halved:
-
Preheat oven to 425ºF. Prepare a baking pan large enough to hold both halves of the squash by lining it with parchment paper or foil for easy cleanup.
-
Scrub the whole squash well with a vegetable brush. Carefully cut it in half lengthwise and scoop out the seeds and fibrous strands. Brush the cut sides with olive oil and season with salt and pepper. Place the squash on the prepared baking pan, either cut side up or cut side down.
-
Bake for 35 to 60 minutes, with the exact time depending on the size of the squash. It is ready when the flesh is fork-tender (easily pierced with a fork in its thickest part).
-
Allow the squash to cool slightly, then carefully scrape the cooked flesh from the skin using a large spoon. Transfer the cooked squash to a large bowl.
OVEN METHOD, cubed:
-
Preheat your oven to 425ºF.
-
On a large, rimmed baking sheet, toss the peeled and cubed butternut squash with olive oil, salt, and pepper. For a medium-sized squash, use 1-2 tablespoons of oil, 1/4-1/2 teaspoon of salt, and 1/8-1/4 teaspoon of black pepper. Ensure all cubes are evenly coated with the oil and seasonings.
-
Spread the squash in a single layer on the baking sheet and roast for 25-30 minutes. Stir the squash once halfway through cooking. Continue roasting until the cubes are golden brown, tender when pierced with a fork, and slightly caramelized. Avoid overcooking to prevent a mushy texture.
SLOW COOKER METHOD:
-
Thoroughly scrub the whole butternut squash with a vegetable brush. Place the squash into your slow cooker. For easier cleanup, you can line the slow cooker with foil or wrap the squash in foil.
-
Cook on high for 4-8 hours, or on low for 6-10 hours, until the squash is easily pierced with a fork.
-
Carefully remove the cooked squash from the slow cooker and let it cool slightly until it’s safe to handle. Cut it in half lengthwise, discard the seeds and fibrous strands, and gently scrape the cooked flesh from the skin into a bowl.
INSTANT POT/PRESSURE COOKER METHOD:
-
For all Instant Pot methods, place a steamer basket or trivet in the bottom of the Instant Pot and add 1 cup of water.
-
For a whole squash: Scrub the squash well with a vegetable brush. Place the whole squash in the steamer basket. Secure the lid and set for high pressure for 30 minutes. Allow pressure to naturally release for 10 minutes before carefully removing the lid.
-
For a quartered squash: Scrub the squash well with a vegetable brush. Cut it into quarters and remove the seeds. Place the quarters in the steamer basket. Secure the lid and set for high pressure for 10 minutes. Allow pressure to naturally release for 10 minutes before carefully removing the lid.
-
For squash cubes: Scrub the squash well with a vegetable brush. Peel, remove seeds, and cut into 1-inch cubes. Place the cubes in the steamer basket. Secure the lid and set for high pressure for 5 minutes. Allow pressure to naturally release for 10 minutes before carefully removing the lid.
Notes
- Cook and prep times indicated in this recipe card are specific to the method of baking squash halves in the oven.
- Store cooked squash in the refrigerator for up to 4 days or freeze it in an airtight freezer container or freezer bag for up to 4 months.
Nutrition Information
Calories: 51kcal
Carbohydrates: 5g
Fat: 3g
Polyunsaturated Fat: 3g
Sodium: 134mg
Fiber: 2g
Sugar: 1g
Nutrition information is automatically calculated and provided for approximation only. It may vary based on specific ingredients and preparation methods.
Did You Make This?
Share a comment and rating below! I love hearing what you think!