
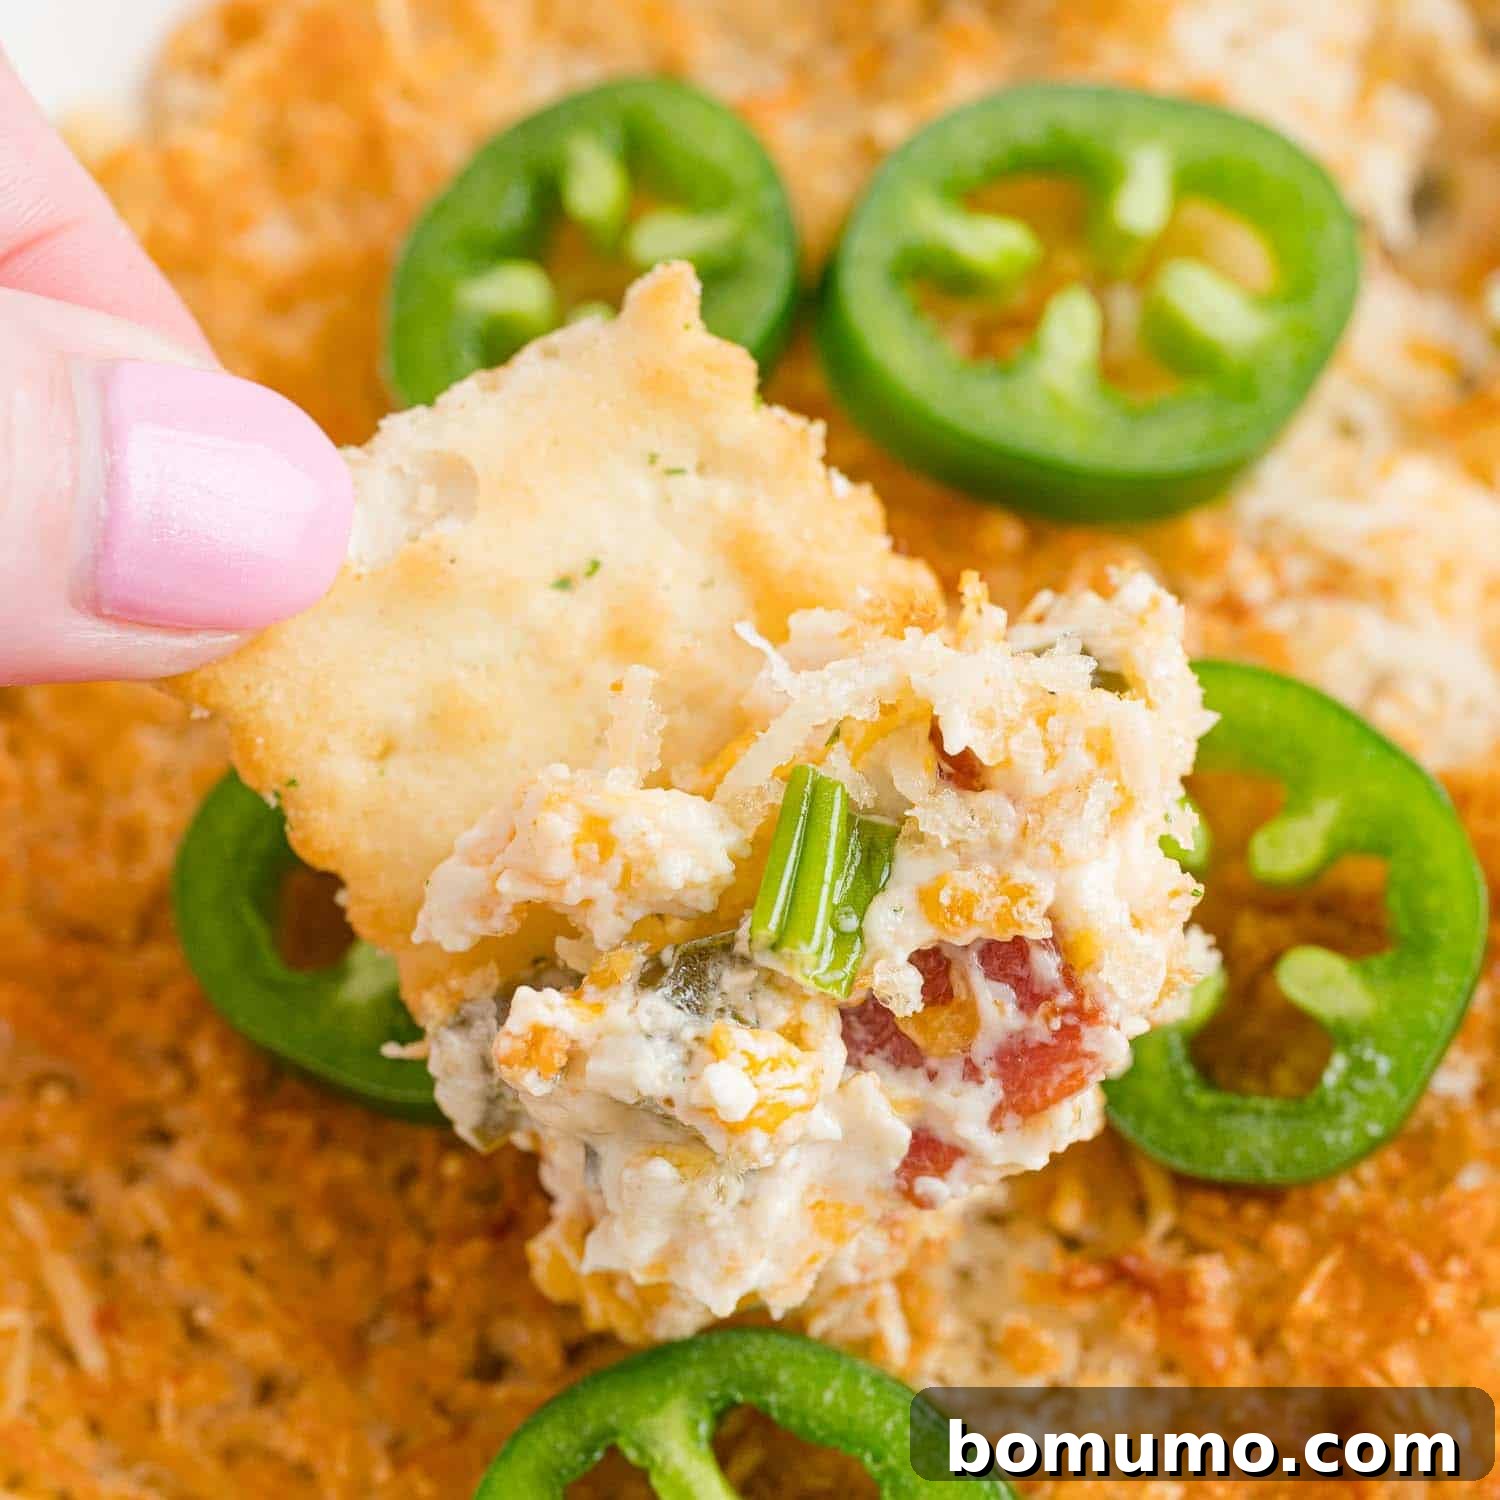
Recipe Overview: Irresistible Jalapeño Popper Dip
Why You’ll Adore This Recipe: Prepare to be captivated by this warm, creamy, and undeniably delicious jalapeño popper dip! It’s a crowd-pleaser that consistently earns rave reviews, thanks to its harmonious blend of savory bacon, rich cream cheese, sharp cheddar, and just the right kick from diced jalapeño peppers. This isn’t just a dip; it’s a culinary experience that promises comfort and excitement in every scoop. Its melty, cheesy goodness makes it the perfect companion for crispy tortilla chips, sturdy crackers, or a colorful assortment of fresh crudités, ensuring there’s a dipper for every preference.
Effort and Time Commitment: Get ready to whip up this amazing appetizer with minimal fuss. It requires just 20 minutes of active preparation to combine all the delicious ingredients, followed by a quick 20-minute bake in the oven. In less than an hour, you’ll have a hot, bubbling, and incredibly flavorful dip ready to delight your guests.
Essential Kitchen Equipment: You’ll only need a couple of basic kitchen items: a reliable skillet for cooking the bacon and peppers, and a versatile baking dish to bring all the flavors together in the oven. Simple tools for a spectacular outcome!
Generous Servings: This recipe is designed to impress a gathering, yielding approximately 12 servings. It’s the ideal dish to bring to a potluck, serve at a party, or simply enjoy with a larger group of friends and family. Expect requests for seconds, so don’t be shy about making a double batch!
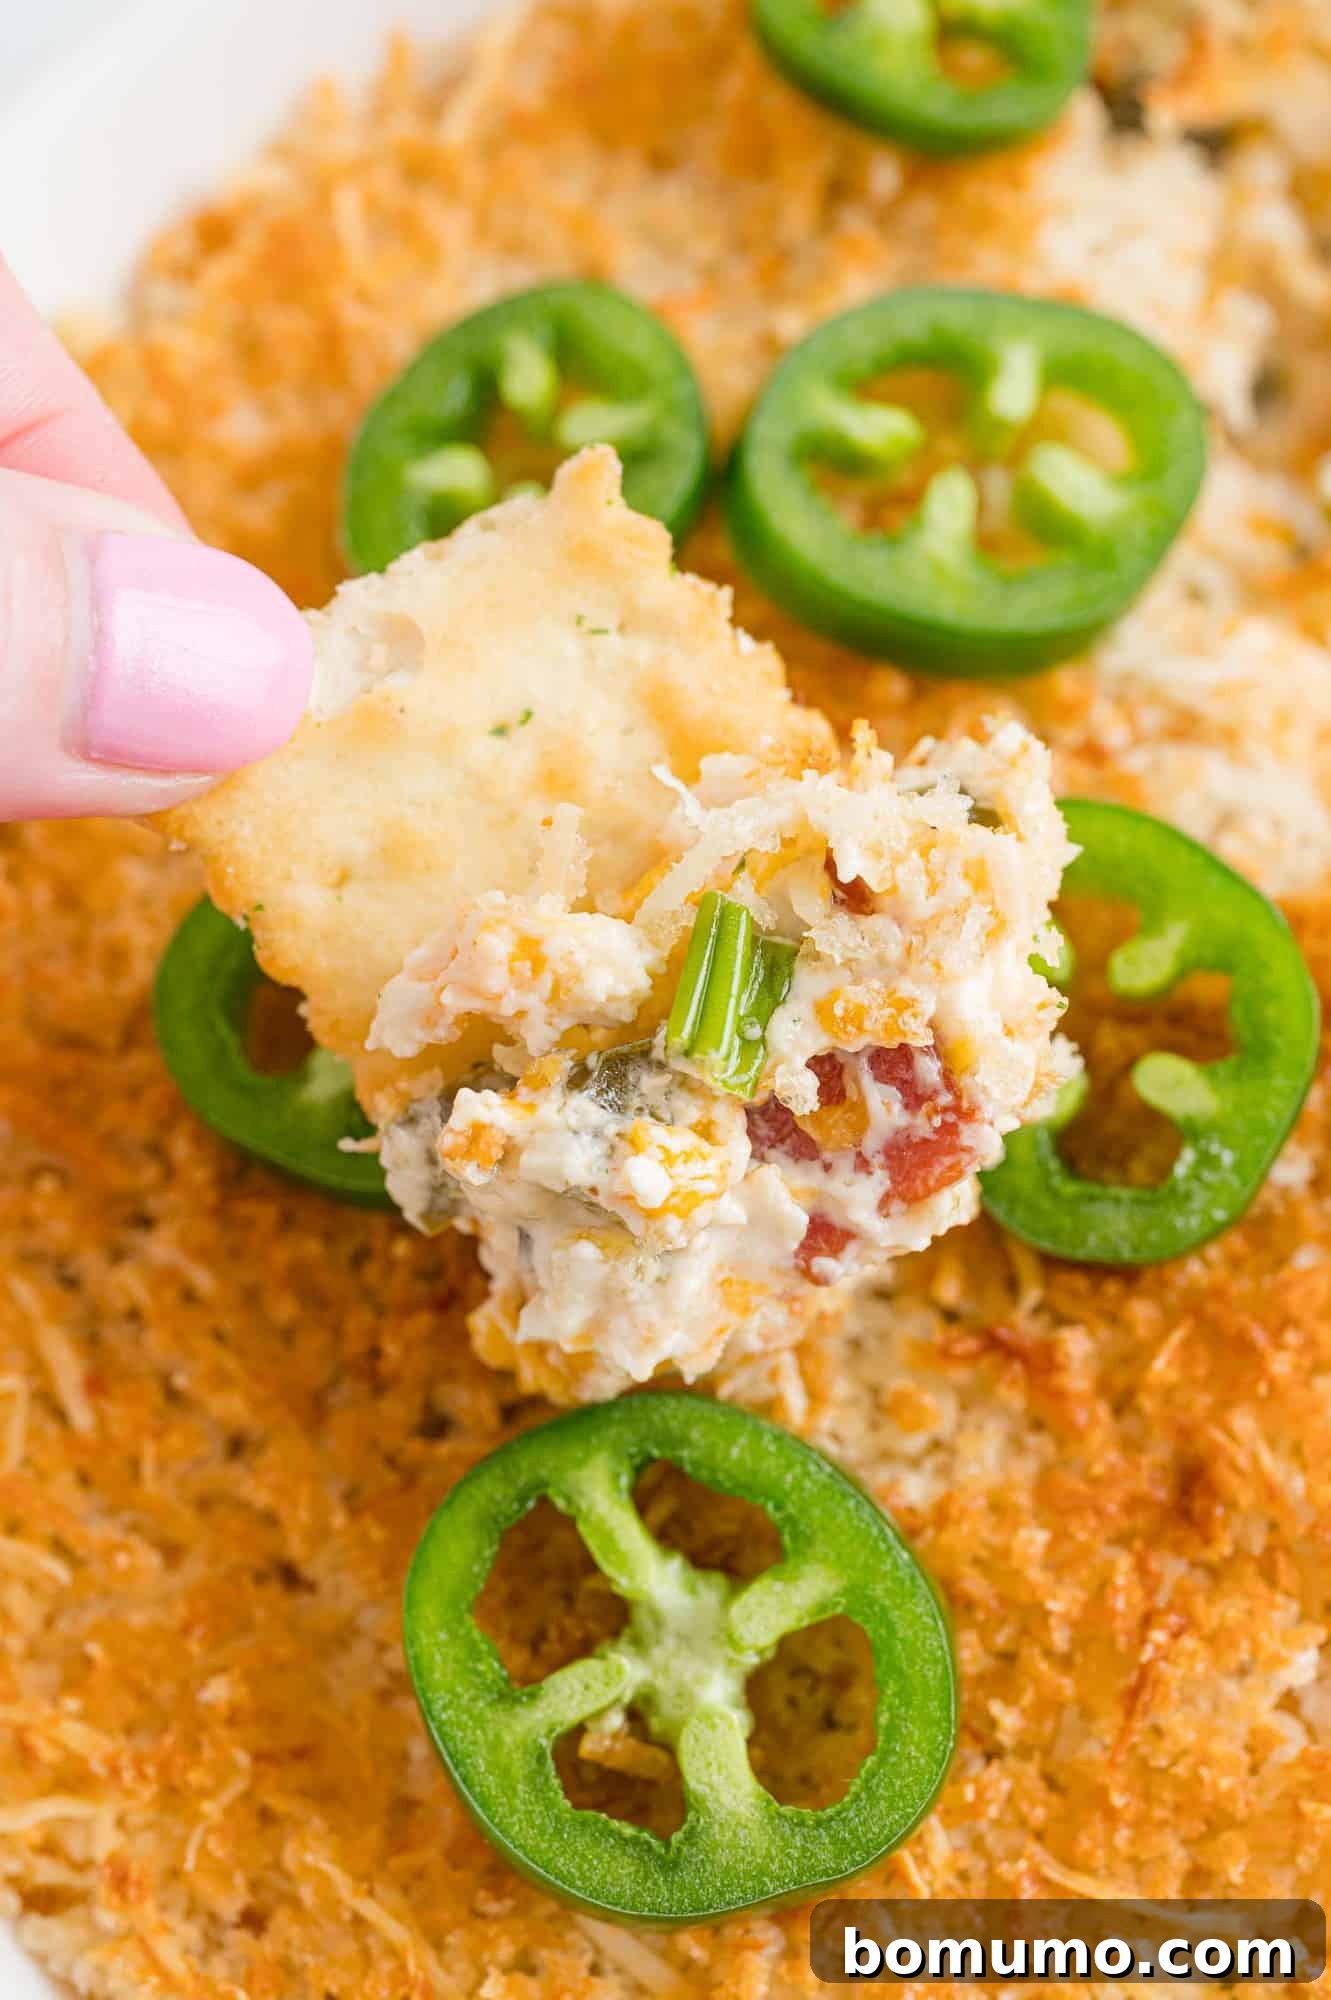
Experience the Unforgettable: Our Irresistible Jalapeño Popper Dip
As if the classic cheesy jalapeño poppers weren’t tempting enough, we’re taking that beloved flavor profile to a whole new level with this warm, creamy, and utterly irresistible jalapeño popper dip! There’s something undeniably magical about warm, melty cheese dips, and this recipe is no exception. It’s the kind of dish that disappears quickly from any table, making it an absolute must-have for any social gathering, game day event, or festive celebration.
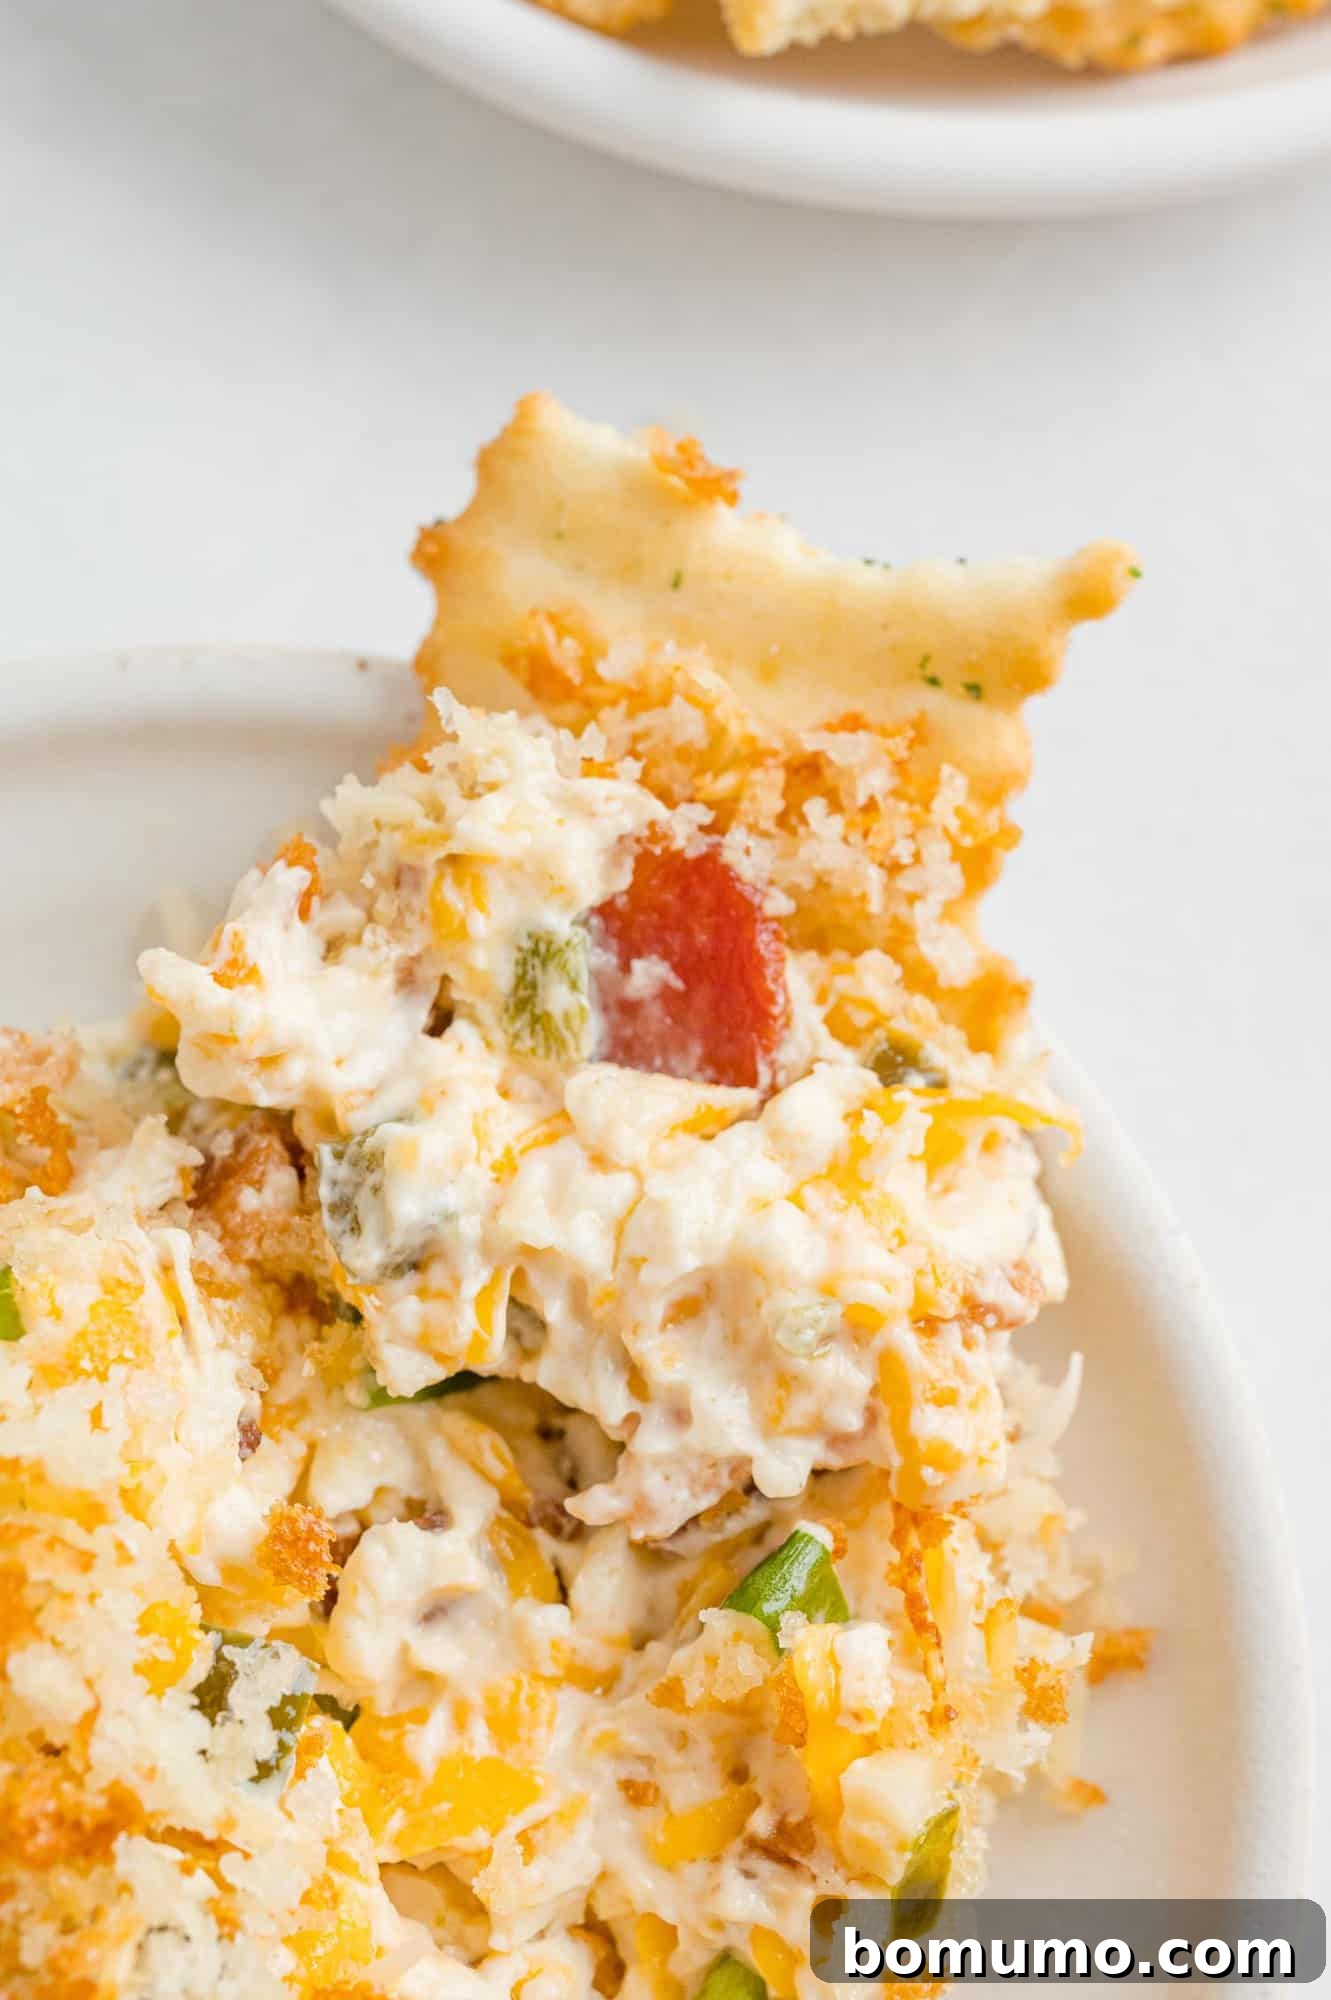
This deconstructed jalapeño popper dip captures all the vibrant flavors and comforting textures of its appetizer namesake, but in an effortlessly dippable format. Imagine a luscious, creamy cheese base brimming with finely diced jalapeño peppers that offer a balanced warmth, savory bits of crispy bacon, and fresh green onions for a subtle sharpness. Generous amounts of rich cheddar cheese melt into a gooey masterpiece, creating a symphony of flavors that will have everyone coming back for more. It’s truly for your own protection – invite a group of friends over to help you devour this incredible creation!
If your taste buds crave the zesty kick of peppers combined with rich, melted cheese, you’re in for a treat. Beyond this amazing dip, we highly recommend exploring these stuffed mini sweet peppers for another delightful pepper-centric appetizer. And for those who love a spicy, cheesy dip, don’t miss our legendary Crockpot Buffalo Chicken Dip – it’s another guaranteed hit!
All About This Deconstructed Jalapeño Popper Dip
Enjoy the Classic Popper Flavor, Made Easier. This warm jalapeño popper dip is essentially a reimagined version of the popular appetizer, preserving all the delicious components while simplifying the preparation significantly. Instead of meticulously stuffing individual pepper halves, you combine all the flavorful ingredients into a single baking dish. This “deconstructed” approach not only saves you valuable time and effort in the kitchen but also eliminates the need for messy deep-frying, offering a healthier and more convenient alternative without compromising on taste. It’s all the creamy, spicy, and cheesy goodness you love, in a simple, scoopable form.
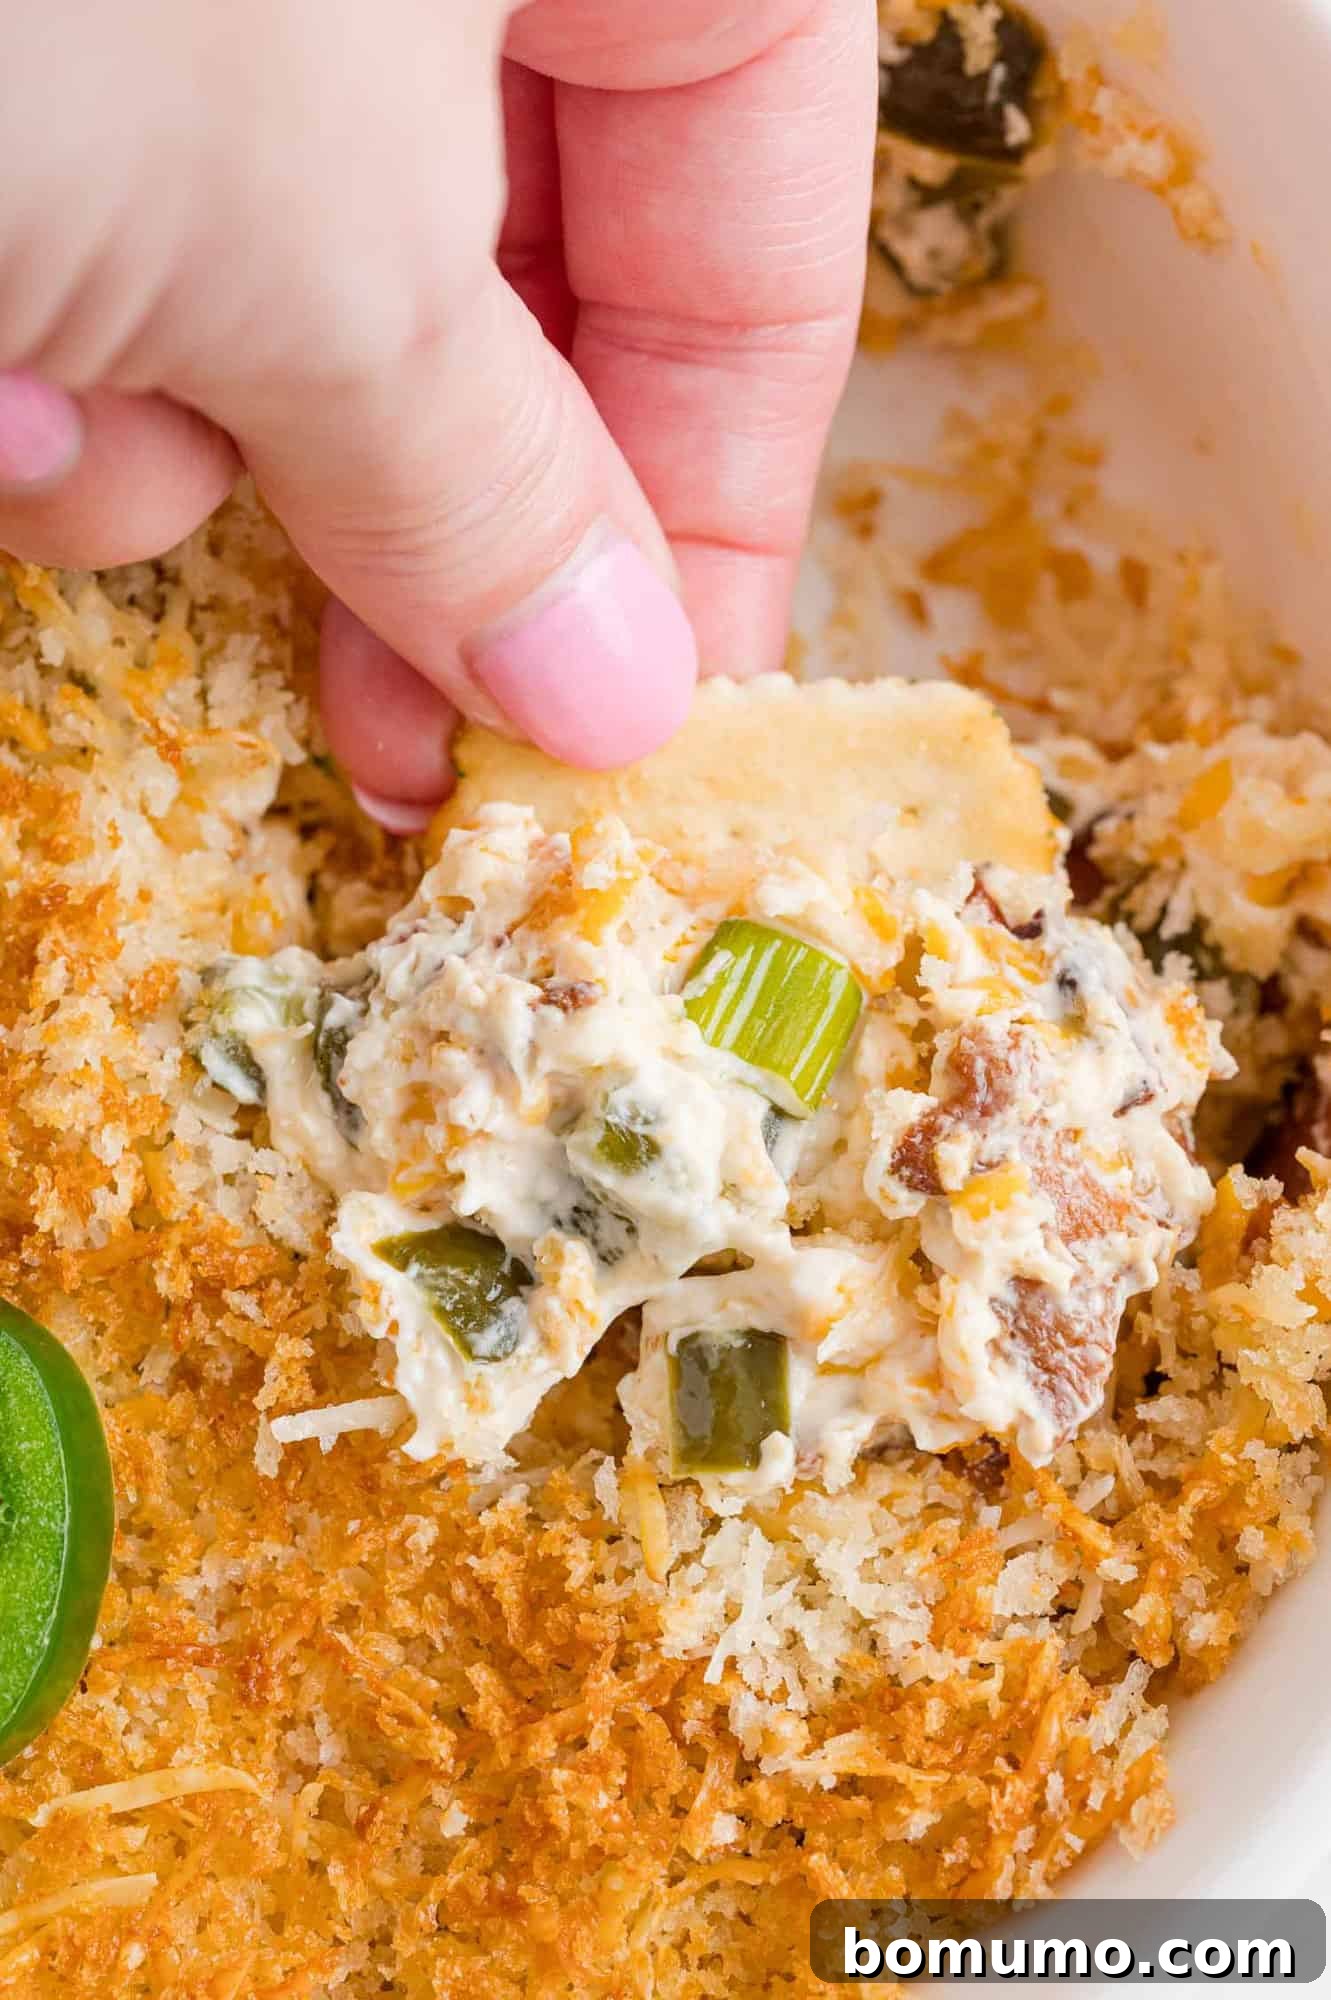
Achieve That Craveable Crispy Topping. For those who adore the golden, crunchy exterior of traditional deep-fried poppers, fear not! This dip delivers a satisfying crunch thanks to its irresistible golden-brown panko topping. Panko breadcrumbs are known for their light, airy texture and superior crispiness when baked, creating a delightful contrast to the creamy interior. Paired with your favorite crispy dippers, this topping provides that essential textural element, elevating the dip from simply delicious to truly extraordinary.
Customizing the Heat: Is the Dip Really Spicy?
The beauty of cooking with jalapeño peppers is their versatile heat level. While generally considered mild to moderately spicy, the actual kick can vary significantly from pepper to pepper. To gauge the spiciness of your particular jalapeños, we recommend a small nibble of raw pepper before adding it to your dip. For those who prefer a milder flavor, or if your peppers turn out to be particularly potent, you can easily reduce the heat by removing the ribs and seeds, as these parts contain the highest concentration of capsaicin, the compound responsible for the spice.
If you’re still concerned about the heat level or catering to sensitive palates, consider substituting some or all of the jalapeño peppers with milder alternatives. Poblano peppers offer a slight earthy flavor with minimal heat, while bell peppers (green, red, or yellow) provide a sweet crunch with no spice at all. Conversely, if you’re a true heat seeker, you can leave some seeds in, or even add a pinch of cayenne pepper or a dash of hot sauce to amplify the fiery sensation. Remember to wear gloves when handling hot peppers to avoid skin irritation!
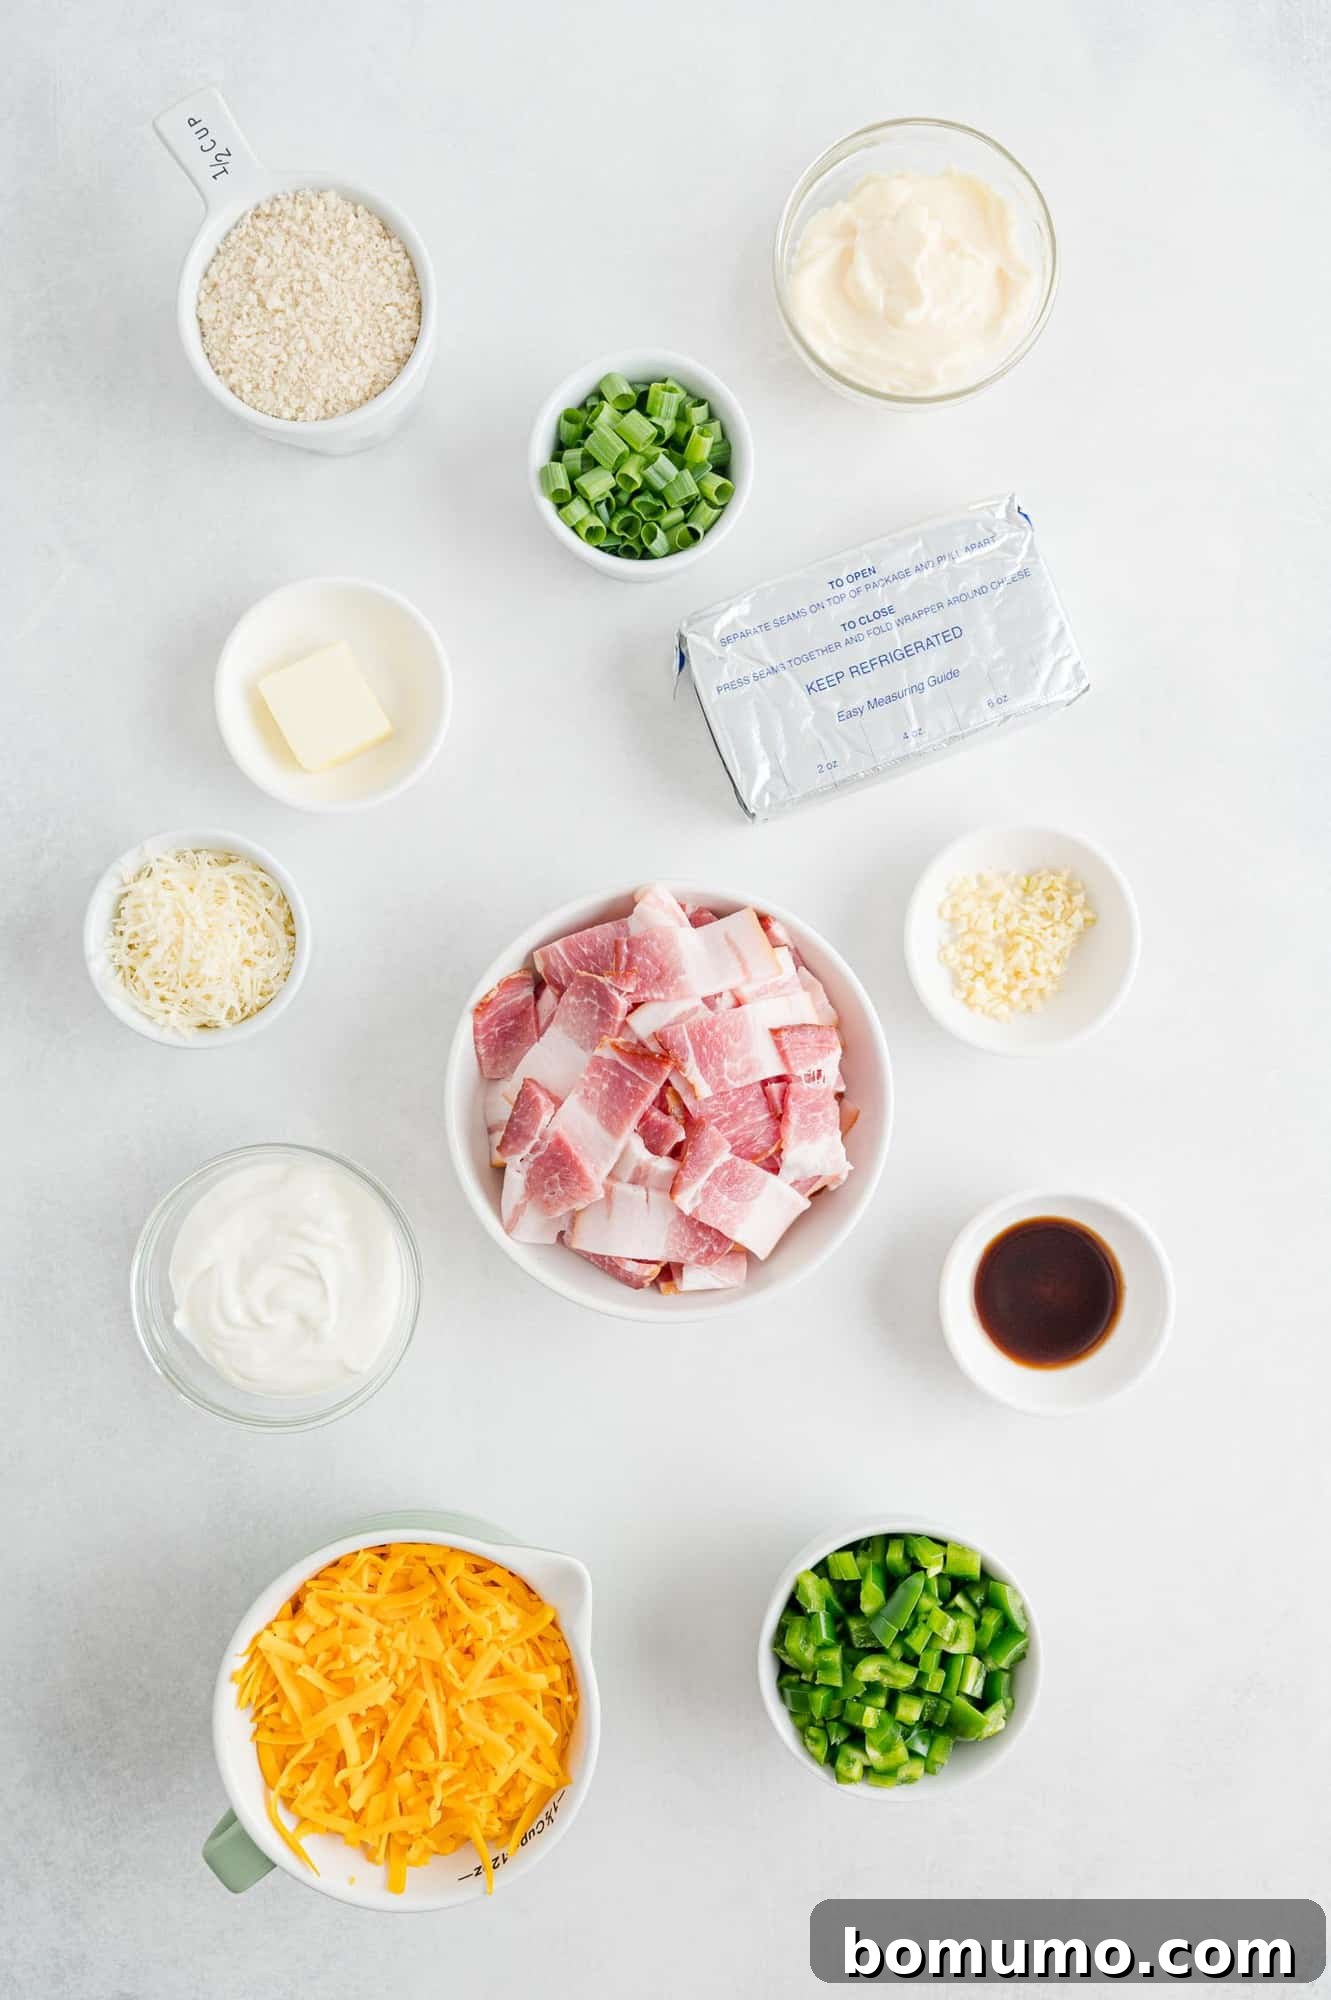
Key Ingredients for the Perfect Jalapeño Popper Dip
Crafting an exceptional jalapeño popper dip starts with selecting the right ingredients. Here’s a closer look at each component and why it’s essential:
- Jalapeño Peppers: The star of the show! You’ll need about four slim, dark green peppers for the main dip, with one or two extra if you wish to use them as a vibrant garnish. When selecting, look for firm, smooth-skinned peppers. Remember that smaller jalapeños tend to be hotter than larger ones. For a milder dip, ensure you remove all seeds and white membranes (the ribs) thoroughly.
- Bacon: Crispy, salty bacon adds an incredible depth of flavor and textural contrast to the creamy dip. Approximately 8 slices will be perfect. Center-cut bacon is often a bit leaner, while thick-cut bacon offers more chew. Turkey bacon can be a lighter alternative, or for a delightful vegetarian version, simply omit the bacon and perhaps add a dash of smoked paprika for a hint of smoky flavor. Make sure to cook it until it’s perfectly crisp to maximize its impact.
- Cream Cheese: The foundation of our dip’s luxurious creaminess. Full-fat cream cheese is highly recommended here, as its richness contributes significantly to the decadent texture and flavor. While low-fat options exist, they often result in a less satisfying mouthfeel in a cheesy dip like this. For effortless blending, remember to take your block of cream cheese out of the refrigerator at least an hour before you start cooking, allowing it to soften completely at room temperature.
- Cheddar Cheese: With its distinct sharp and tangy profile, cheddar cheese is truly the superior choice for this dip. It melts beautifully and provides that classic “popperness.” If you’re looking for alternatives, a Mexican blend cheese offers a similar melty quality, or for an amplified heat experience, consider using Pepper Jack or a spicy cheddar. Freshly grated cheddar will melt smoother and incorporate better than pre-shredded varieties, which often contain anti-caking agents.
- Green Onions: These provide a fresh, mild oniony flavor and a lovely bright green speckle throughout the dip, adding both visual appeal and a gentle aromatic note that complements the richness of the cheese and bacon. They’re a subtle but important element.
- Mayonnaise: Yes, both mayonnaise AND sour cream! This duo is responsible for the dip’s exceptional creaminess and luxurious texture. Mayonnaise adds a savory tang and helps achieve that perfect “dippability,” ensuring the dip isn’t too stiff and spreads smoothly onto your chosen accompaniment.
- Sour Cream: Another essential for achieving that ultra-creamy, luscious consistency. Like the cream cheese, full-fat sour cream will deliver the best results, contributing to the rich flavor and smooth texture that makes this dip so incredibly satisfying.
- Garlic: Two minced cloves of fresh garlic are a great starting point, infusing the dip with an aromatic depth. If you’re a garlic enthusiast, feel free to add an extra clove or two. Conversely, if garlic isn’t your preference, you can certainly omit it without sacrificing the overall deliciousness of the dip, though it does add a lovely layer of flavor.
- Worcestershire Sauce: Just a single teaspoon of this magical condiment works wonders! It adds a subtle but important layer of umami (savory depth) that enhances all the other flavors in the dip, making it more complex and irresistible without being overtly noticeable.
- Panko Bread Crumbs: Key to achieving that delightful crispy topping. Panko, a Japanese-style bread crumb, is larger and has a looser, airier texture than traditional bread crumbs, making it superior for creating a light, golden, and exceptionally crunchy crust.
- Parmesan Cheese: A quarter cup of shredded or grated Parmesan cheese is mixed into the panko topping. It provides a salty, nutty, and savory note, complementing the cheddar and contributing to the golden-brown crispness of the crust.
- Butter: Melted butter is combined with the panko and Parmesan. It helps the topping brown beautifully in the oven, imparting a rich, savory flavor and ensuring a uniformly crispy texture.
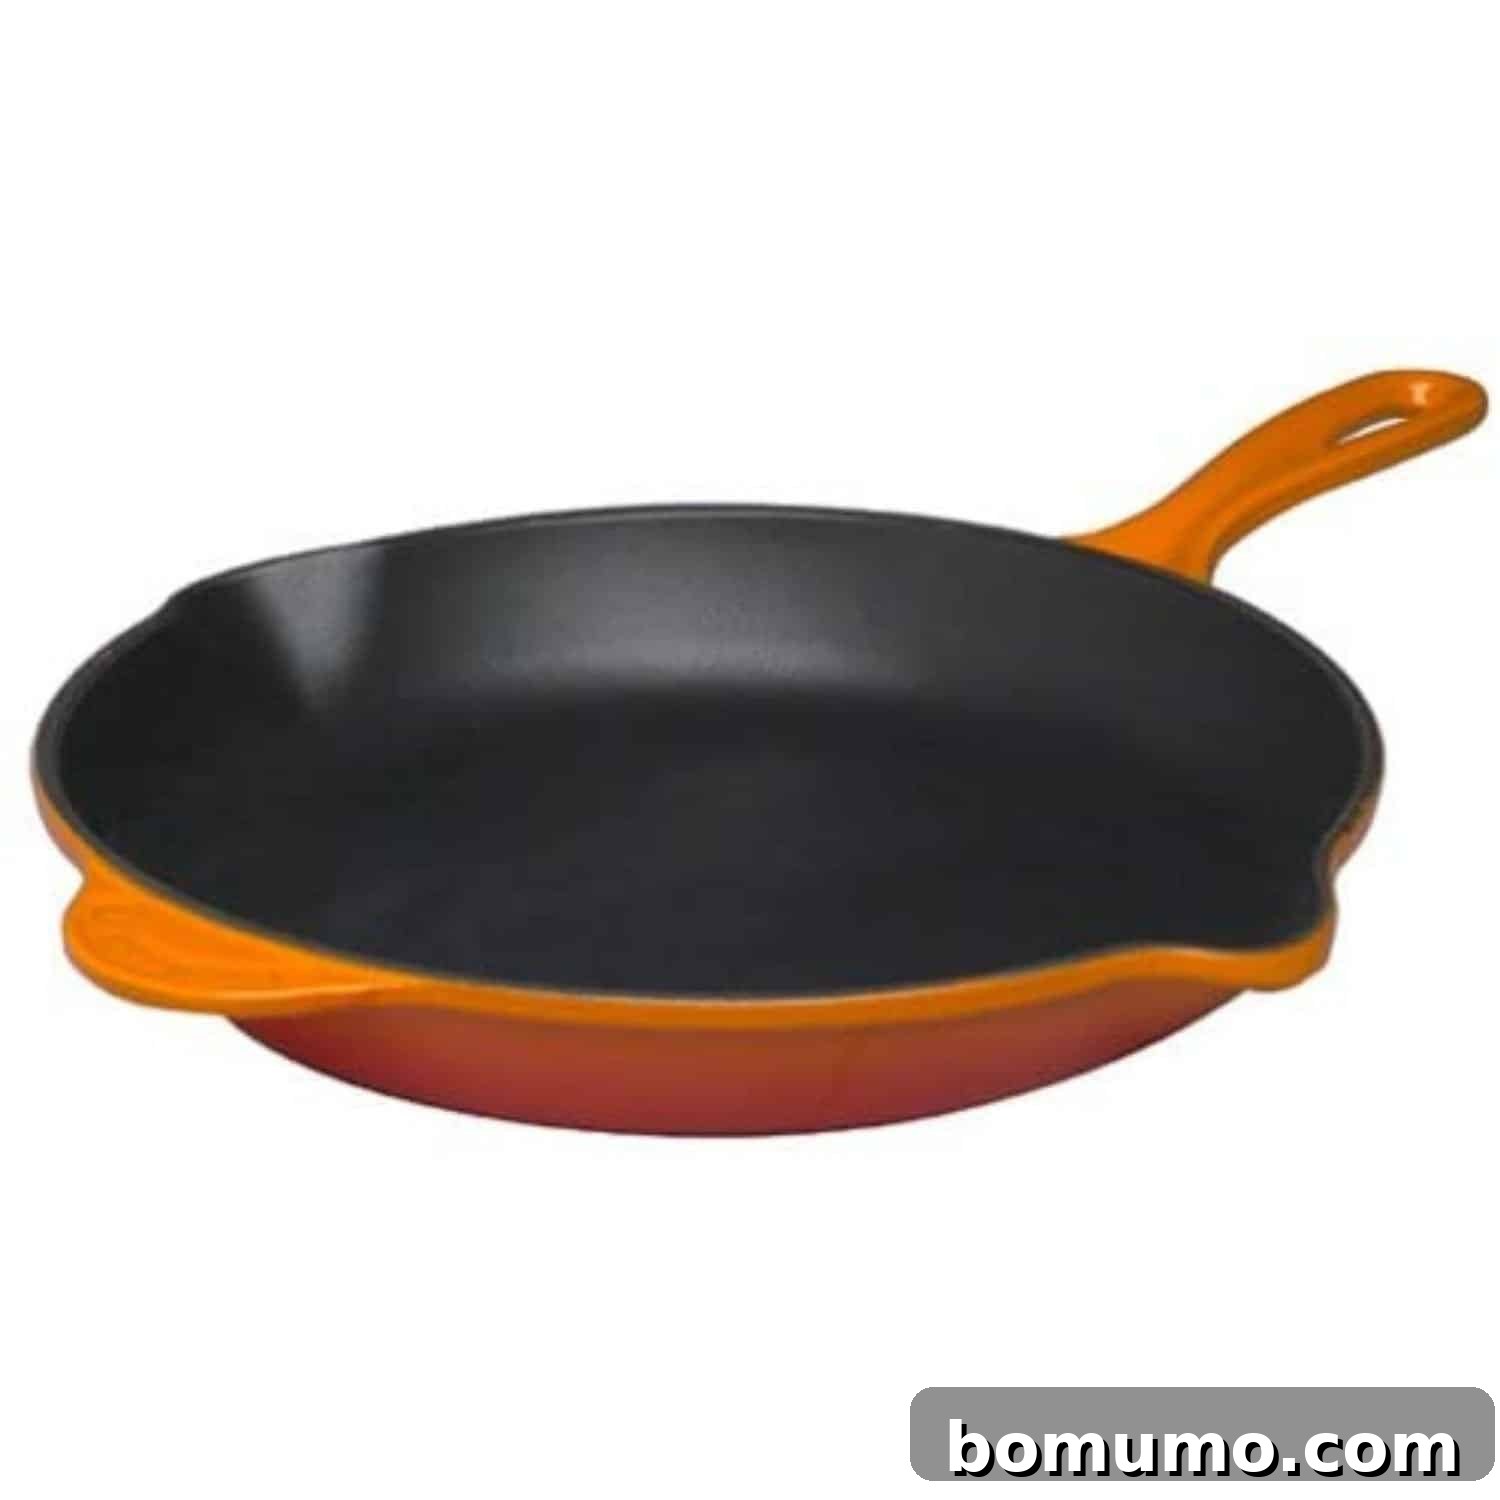
The Advantage of Cast Iron Skillets for Dips
When it comes to serving warm, bubbling dips like our Jalapeño Popper Dip, cast iron skillets are an unparalleled choice. These heavy-duty pans are not only incredibly durable but also excel at heat retention, meaning your dip will stay wonderfully warm throughout your gathering, ensuring every last scoop is as enjoyable as the first. Whether you opt for a classic black seasoned skillet or a vibrant enameled version, they add a rustic yet elegant touch to your table presentation, transitioning beautifully from oven to serving. I personally adore using an enameled cast iron skillet for this dip, as it provides even heating and makes for a stunning centerpiece.
Step-by-Step: Crafting Your Delicious Jalapeño Popper Dip
Making this incredible dip is surprisingly straightforward. Follow these simple steps for a perfect, warm, and cheesy appetizer:
Step 1: Initial Preparation. Begin by preheating your oven to 350ºF (175ºC). Choose your baking vessel: an 8×8 inch baking dish or a medium-sized oven-safe skillet works perfectly. Lightly spray it with nonstick cooking spray to prevent sticking and ensure easy cleanup. Having your equipment ready sets you up for a smooth cooking process.
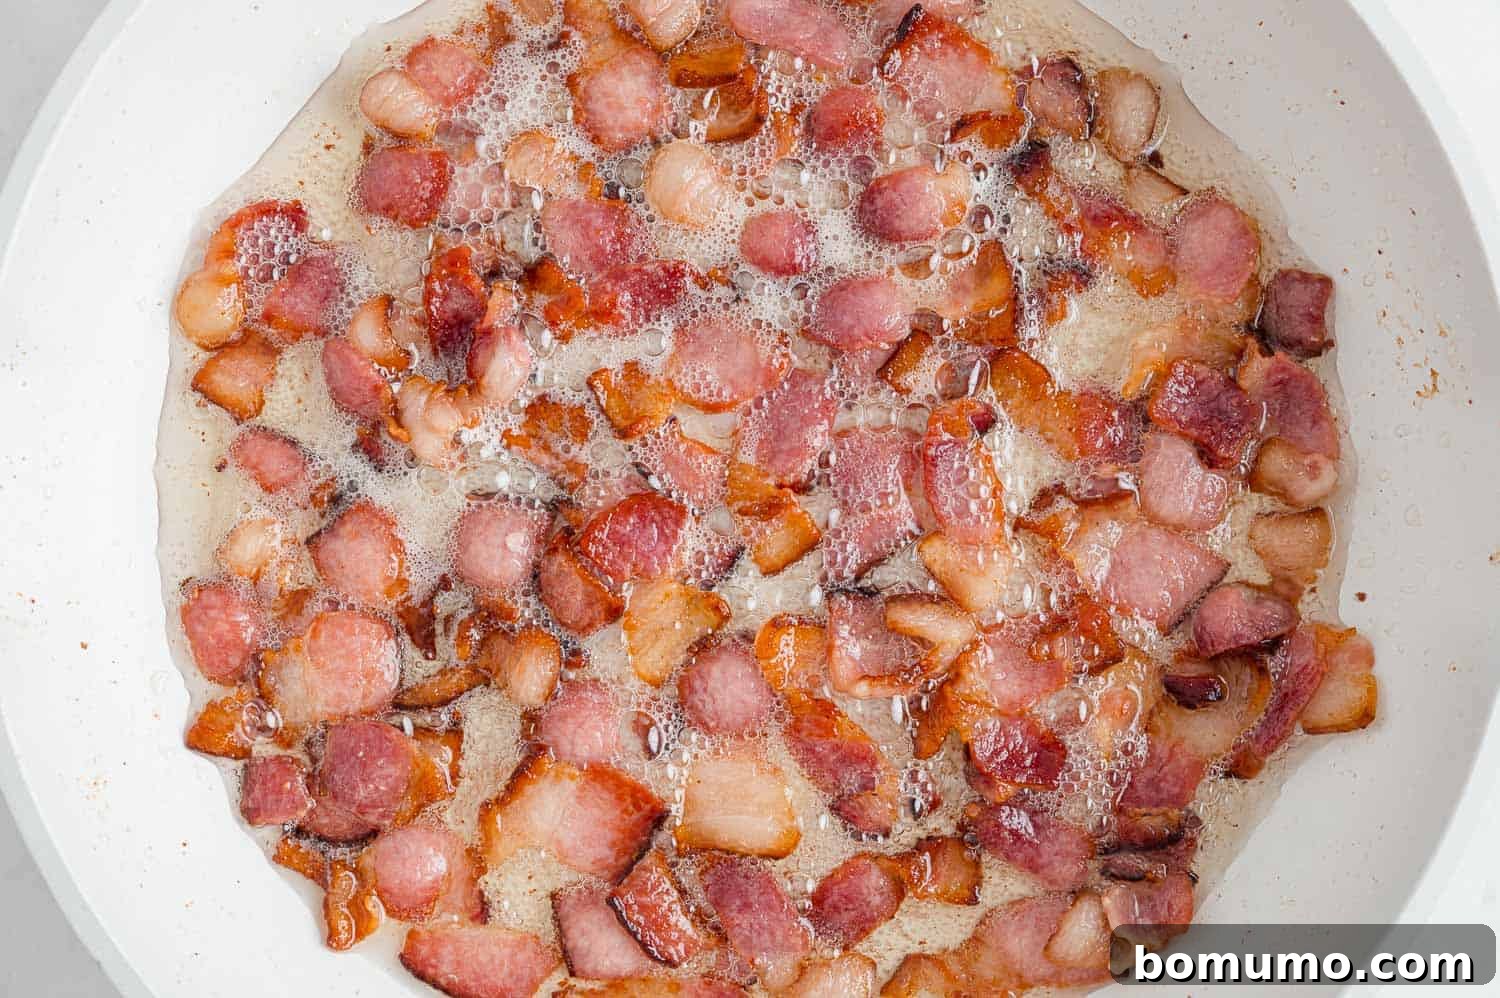
Step 2: Cook the Bacon to Crispy Perfection. In a large skillet, cook the chopped bacon over medium heat. Stir occasionally until the bacon pieces are beautifully browned and wonderfully crisp. Once cooked, transfer the bacon to a plate lined with paper towels to drain any excess grease. This step ensures your bacon bits are crunchy and not greasy in the final dip. Leave about one tablespoon of bacon grease in the skillet for the next step, as it will infuse the peppers with extra flavor.
Step 3: Soften the Jalapeño Peppers. With the reserved tablespoon of bacon grease in the skillet, return the pan to medium heat. Add your finely diced jalapeño peppers. Sauté them for approximately five minutes, stirring frequently, until they have softened slightly. This process not only tenderizes the peppers but also mellows out some of their raw spicy edge, allowing their flavor to blend more harmoniously with the creamy elements of the dip.
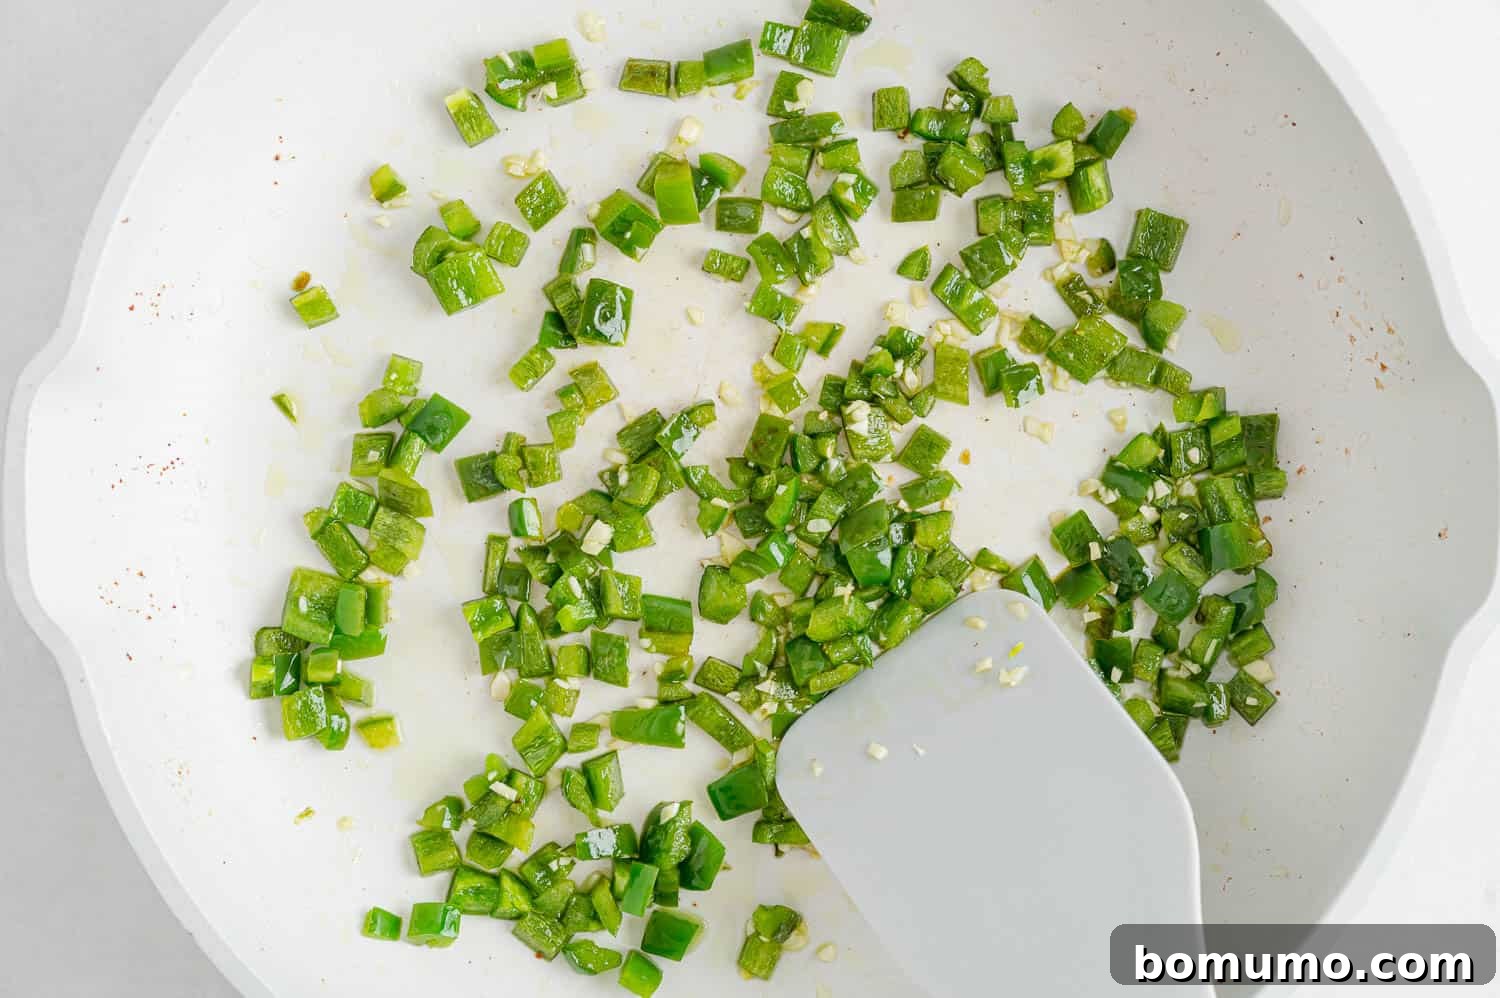
Step 4: Sauté the Garlic for Fragrance. To the softened jalapeños, add the minced garlic. Continue to sauté for just one more minute, stirring constantly to prevent burning, until the garlic becomes wonderfully fragrant. The aroma will tell you it’s ready! Immediately remove the pan from the heat to prevent the garlic from overcooking and turning bitter.
Step 5: Combine All the Delicious Dip Ingredients. In a large mixing bowl, bring together the softened cream cheese, rich mayonnaise, tangy sour cream, fresh chopped green onions, and a teaspoon of Worcestershire sauce. Stir these creamy ingredients thoroughly until they are well blended and smooth. Next, gently fold in the shredded cheddar cheese, followed by the cooked jalapeño and garlic mixture, and finally, the crumbled crispy bacon. Mix everything until all components are evenly distributed and beautifully combined, creating a uniform, enticing mixture.
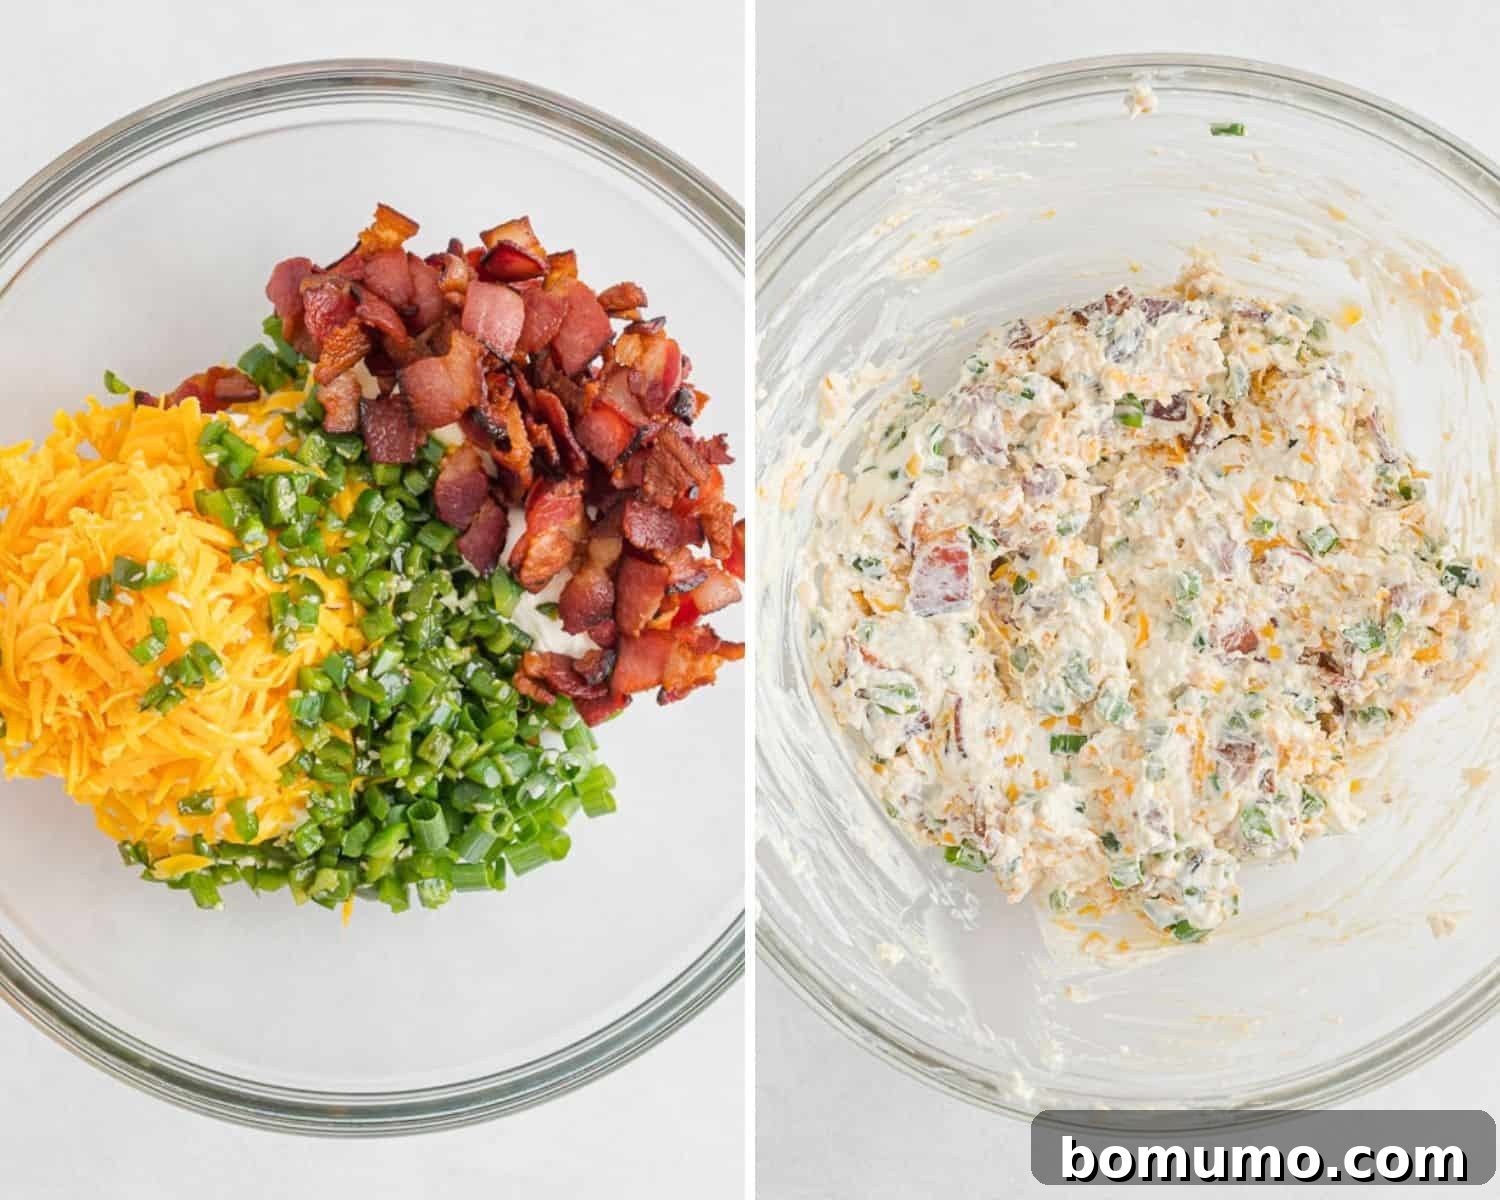
Step 6: Prepare and Apply the Crispy Topping. Scrape the entire dip mixture into your prepared baking dish, using a spatula to smooth out the top evenly. In a separate small bowl, melt the butter. Add the panko bread crumbs and shredded Parmesan cheese to the melted butter, tossing until the crumbs are thoroughly coated. This butter-Parmesan mixture will form our irresistible golden crust. Generously sprinkle this topping all over the surface of the dip, ensuring an even layer for maximum crunch.
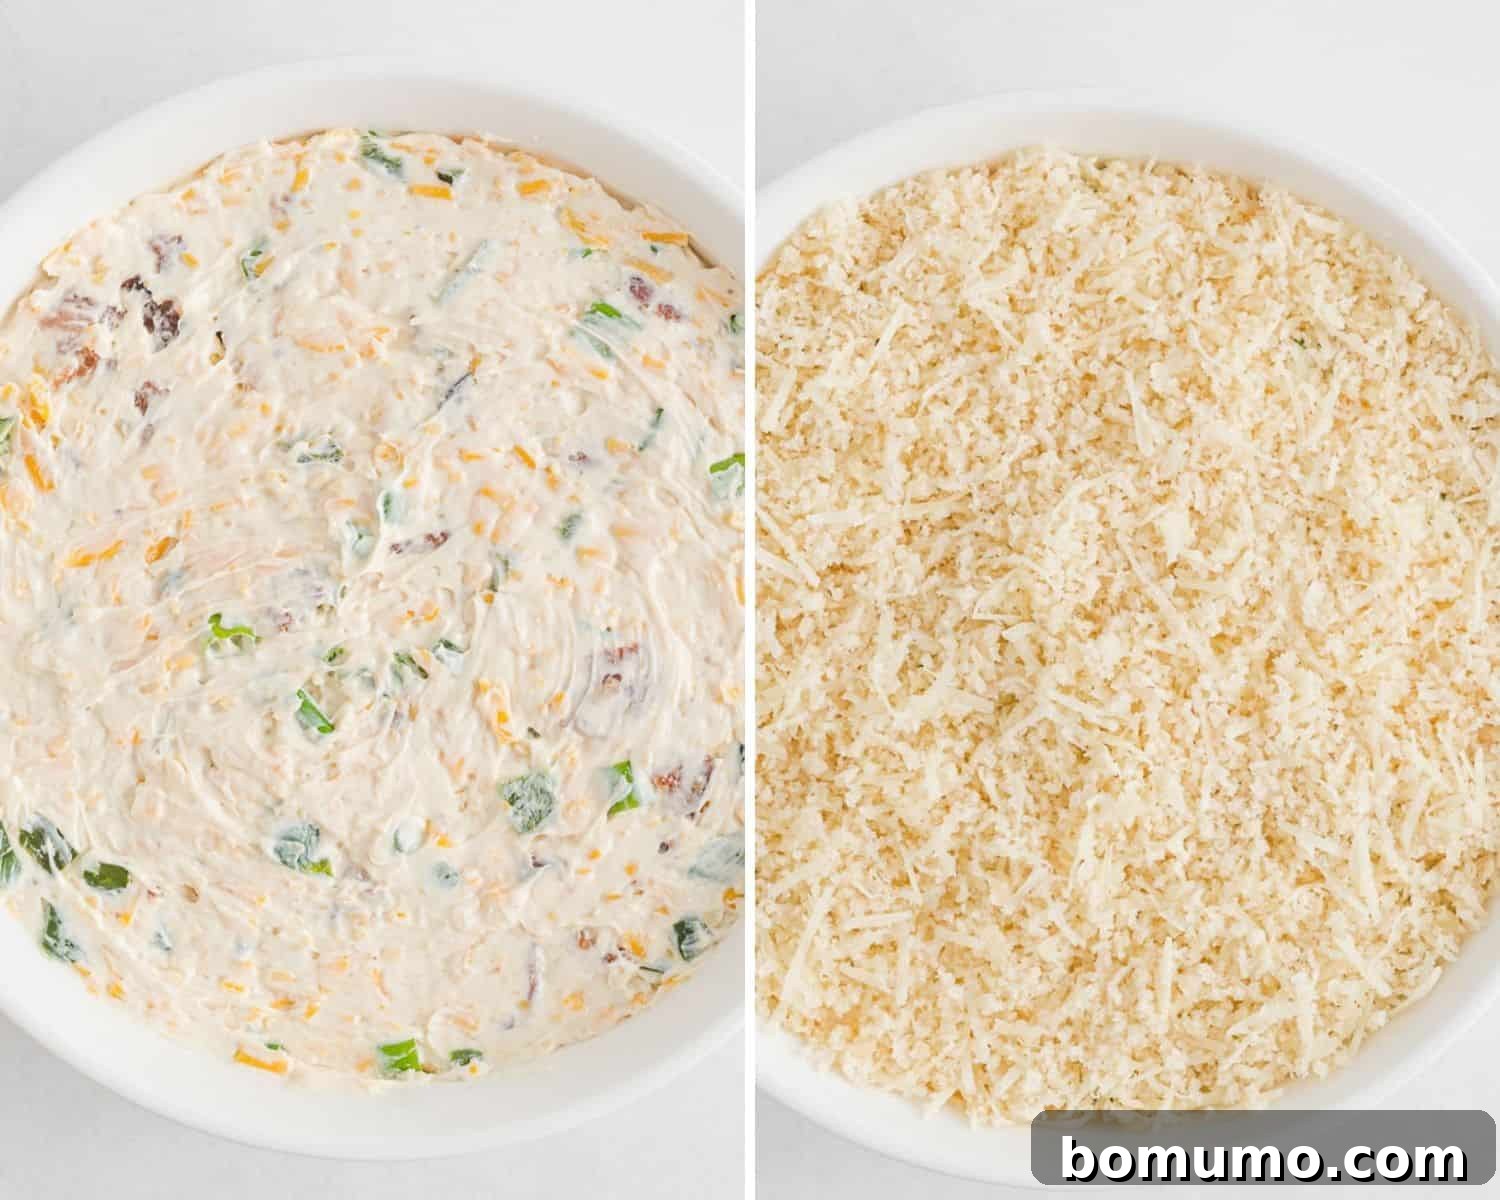
Step 7: Bake to Golden Perfection. Place the baking dish into your preheated oven. Bake for approximately 20 minutes, or until the dip is thoroughly warmed through, bubbly around the edges, and the panko topping has achieved a beautiful golden-brown color. It’s crucial not to overheat the dip, as this can cause the cheese and creamy base to separate. If, after 20 minutes, you desire a deeper golden hue or a crisper topping, you can carefully broil the dip for 1 to 2 minutes. **Watch it very closely during this stage!** Broilers work quickly, and the topping can go from perfectly golden to burnt in a matter of seconds. Serve immediately and enjoy!
Serving Your Jalapeño Popper Dip: Perfect Pairings
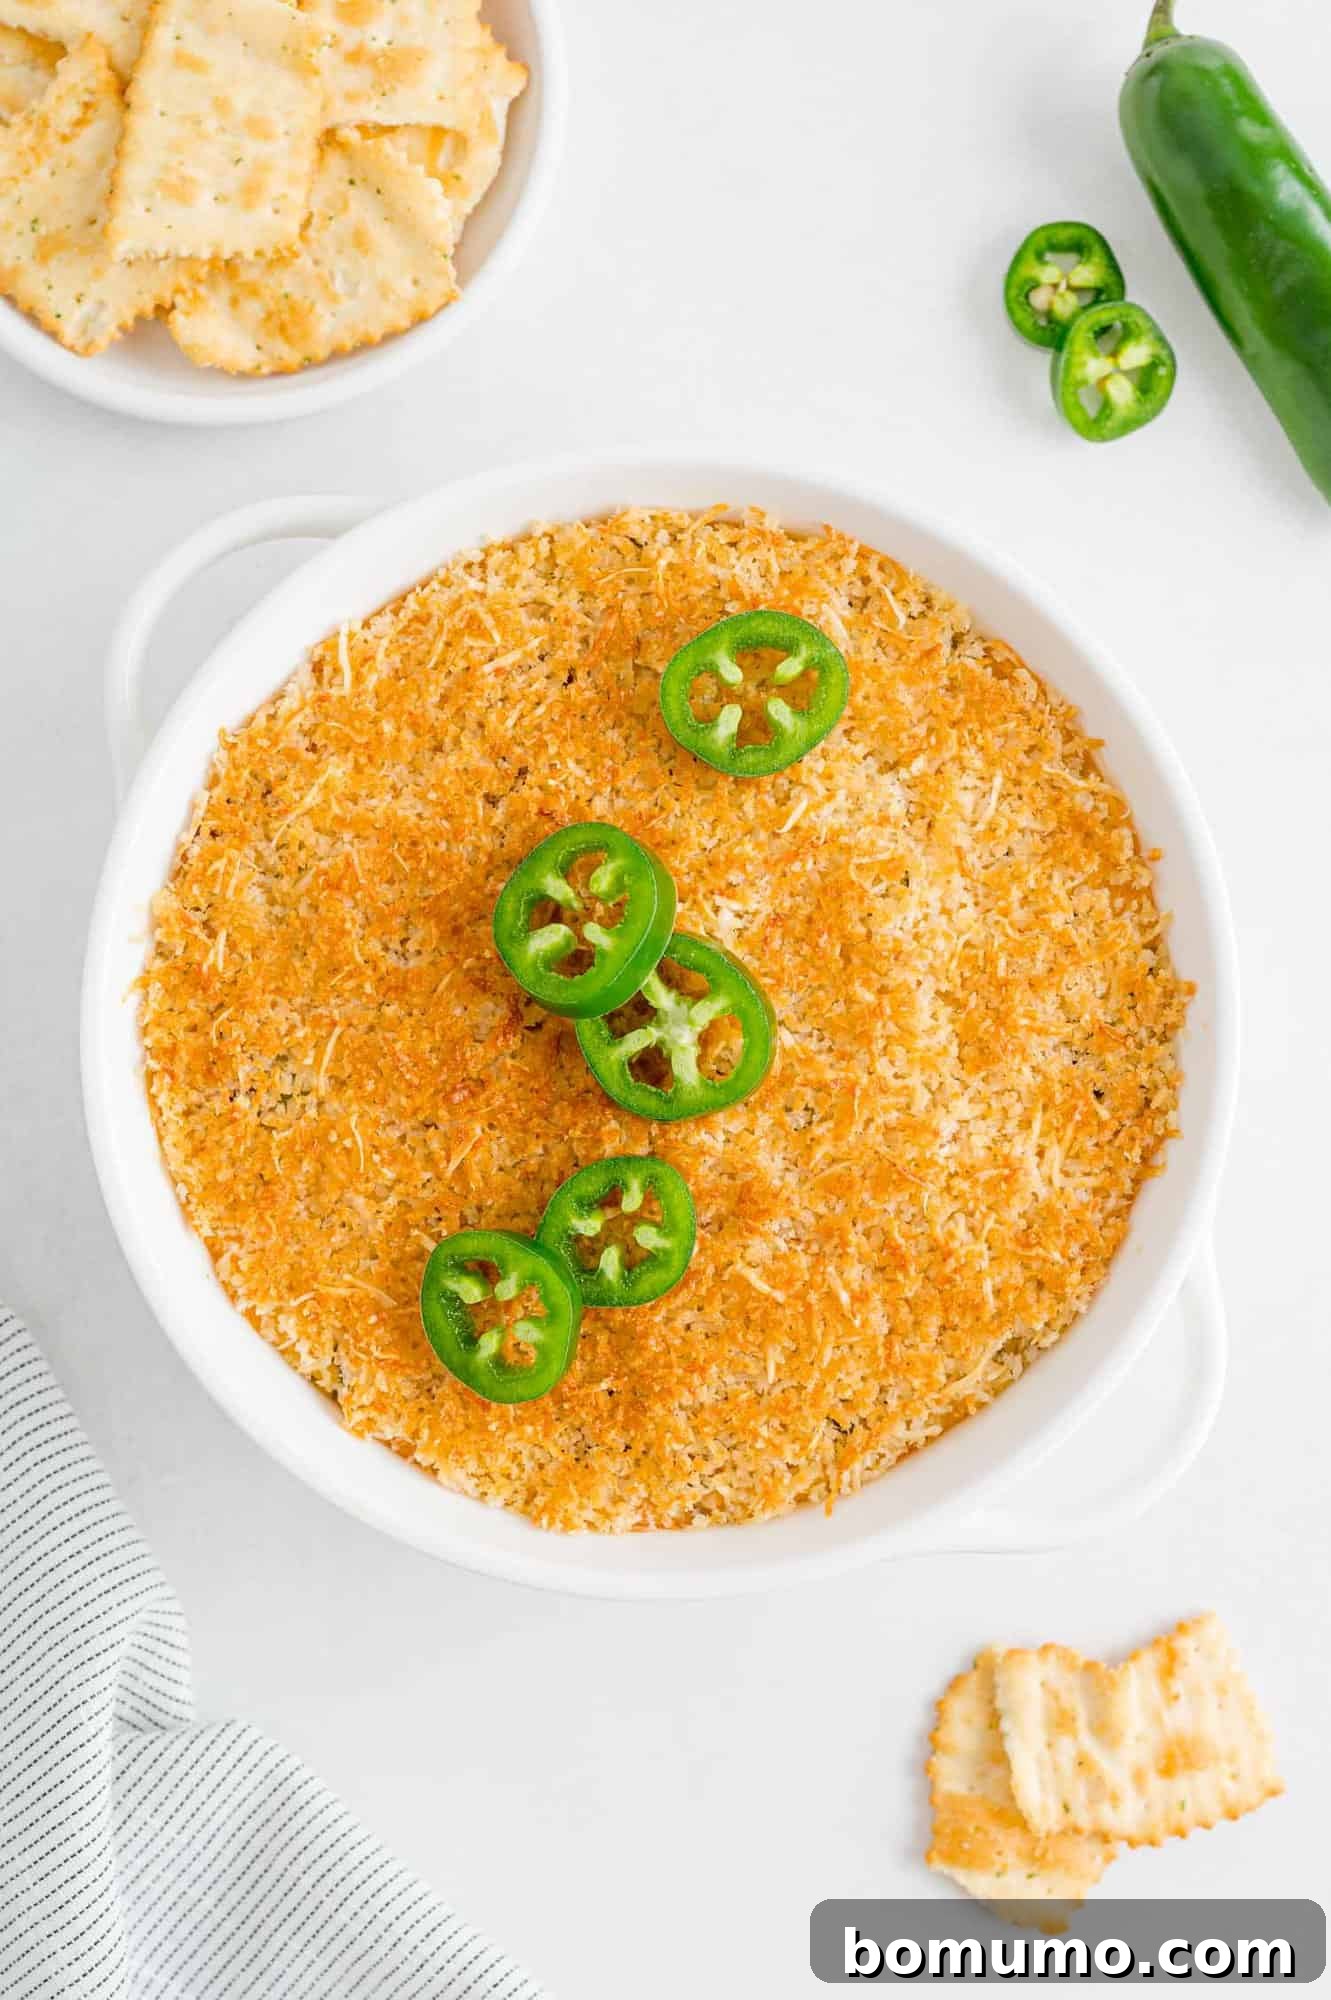
Once your warm and bubbling Jalapeño Popper Dip emerges from the oven, it’s ready to be the star of your appetizer spread! Its rich, creamy texture and vibrant flavors pair wonderfully with a variety of dippers. Classic choices include hearty tortilla chips, which offer a satisfying crunch and are perfect for scooping up generous portions. For a healthier twist, consider serving with homemade baked tortilla chips or crispy air fryer tortilla chips. Sturdy crackers or bagel chips also make excellent dippers, as do crisp, homemade crostini, which add a touch of elegance.
While this dip is definitely best enjoyed with chips or crackers, for a lighter option, a colorful array of crudités can also work. Think crunchy celery sticks, refreshing cucumber rounds, or vibrant bell pepper strips. For a truly festive experience, consider pairing this savory dip with a refreshing and spirited beverage like a spicy Paloma or a large batch of sweet and fruity strawberry margarita punch. Don’t forget an extra sprinkle of fresh, thinly sliced jalapeños on top for a beautiful garnish and an extra burst of flavor!
Exciting Variations for Your Jalapeño Popper Dip
This jalapeño popper dip recipe is incredibly versatile, allowing for easy adjustments to suit various dietary needs or taste preferences. Here are some fantastic ways to customize your dip:
- Vegetarian Delight: Easily transform this into a vegetarian-friendly dish by simply omitting the bacon. The dip is so rich and flavorful that you’ll hardly miss it. To cook the peppers and garlic, use a tablespoon of olive oil instead of bacon grease. For an added layer of flavor that mimics smokiness, try incorporating a teaspoon of smoked paprika into the cheese mixture.
- Savory Sausage Twist: Instead of bacon, consider using savory sausage. Brown a 16 oz. roll of your favorite pork or turkey sausage (spicy sausage works wonderfully for extra heat!). Drain the fat, then mix the cooked sausage directly into the creamy base along with the other ingredients.
- Keto-Friendly & Gluten-Free: For a dip that fits a keto or gluten-free lifestyle, simply omit the panko bread crumb topping. The dip itself is naturally low-carb and gluten-free. Serve it with crisp celery sticks, refreshing cucumber slices, or colorful bell pepper strips instead of traditional crackers or chips.
- No Mayonnaise? No Problem!: If mayonnaise isn’t to your liking, you can substitute it with an equal amount of thick Greek yogurt for a slight tangy kick and added protein, or simply use additional sour cream to maintain the dip’s luscious creaminess.
- Prefer a Cold Dip? While this recipe truly shines when served warm, if you’re in the mood for a chilled appetizer, we have plenty of other fantastic options. Explore delightful recipes like our creamy Spinach Dip, the zesty Mexicali Dip, or the always-popular Seven Layer Dip, all perfect for a refreshing spread.
- Exploring Non-Creamy Alternatives: Sometimes a lighter, brighter dip is what you crave. For delicious non-creamy options that still pack a punch, try our vibrant Black Bean Corn Salsa or the hearty and flavorful Black Bean and Avocado Salad, which doubles beautifully as a chunky dip.
Smart Tip: Freezing Jalapeño Peppers for Future Use
Don’t let extra jalapeño peppers go to waste! Freezing them is an excellent way to preserve their freshness and flavor for future culinary endeavors. Simply chop the peppers (removing seeds and ribs if you prefer less heat), then spread them in a single layer on a baking sheet to flash freeze. Once frozen solid, transfer them to airtight freezer bags or containers. They can be stored in the freezer for up to a year. There’s no need to thaw them before adding them to hot dishes like stews, soups, or your favorite chili recipe – they cook perfectly right from frozen.
If you’re constantly seeking new ways to incorporate these versatile peppers into your meals, consider making a batch of our creamy Jalapeño Ranch Dip, perfect for salads or as a veggie dip. Another crowd-pleaser is our Cheesy Baked Corn with Bacon and Jalapeño, which perfectly balances sweet, savory, and spicy notes.
Make-Ahead Magic: Prepare Your Dip in Advance
Make-Ahead Magic: Prepare Your Dip in Advance
Planning a party or gathering? This Jalapeño Popper Dip is an excellent candidate for make-ahead preparation, taking some stress out of your event day. You can assemble the entire dip, including mixing the creamy base and spreading it into your baking dish, up to a full day in advance. Simply cover it tightly with plastic wrap and refrigerate it. Store the panko topping mixture separately in an airtight container at room temperature.
When you’re ready to serve, simply sprinkle the prepared topping over the chilled dip and bake as directed. Keep in mind that a cold dip will require a few extra minutes in the oven to heat through completely and achieve that perfect bubbly consistency. This foresight allows you to enjoy your guests without being tethered to the kitchen, making entertaining a breeze!
Storage & Reheating Tips for Leftovers
Storage & Reheating Tips for Leftovers
Prompt Refrigeration is Key. This Jalapeño Popper Dip is truly at its peak when served fresh and warm, straight from the oven. However, if you happen to have any delicious leftovers, they can be stored in an airtight container in the refrigerator for up to two days. It’s crucial to refrigerate any remaining dip promptly, ideally within two hours of being served, to ensure food safety. If the dip has been sitting out at room temperature for an extended period, especially at a party, it’s best to discard any remaining portions to avoid potential health risks.
Reheating for Continued Enjoyment. To gently reheat leftover dip and bring back its creamy texture, cover the oven-safe container or transfer the dip to a microwave-safe dish. Microwave it on 50% power in short intervals, stirring occasionally, until it’s warmed through. This low and slow method prevents the cheese from separating and becoming oily. Alternatively, you can reheat it in a toaster oven or conventional oven at 300°F (150°C) until warm and bubbly. If the topping has lost some of its crispiness, a quick minute or two under the broiler can revive its crunch, but watch it carefully!
Explore More Cheesy Dip Sensations
Baked Goat Cheese Dip with Lemon and Thyme
Crab Rangoon Dip
Slow Cooker Spinach Artichoke Dip
Hot Caprese Dip Recipe
Jalapeño Popper Dip
Rachel Gurk
20 minutes
20 minutes
40 minutes
12
Saved
Pin
Ingredients
-
8
slices
bacon, cut into ½ inch pieces -
4
jalapeño peppers, diced
(more for garnish if desired) -
2
cloves
garlic, minced -
8
ounces
cream cheese, softened
(one block) -
⅓
cup
chopped green onions -
⅓
cup
mayonnaise -
⅓
cup
sour cream -
1
teaspoon
Worcestershire sauce -
1 ½
cups
(6 oz.) shredded cheddar cheese
Topping:
-
½
cup
panko bread crumbs -
¼
cup
shredded Parmesan cheese -
1
tablespoon
butter
Instructions
-
Preheat oven to 350ºF (175ºC). Prepare an 8 x 8 inch baking dish or a medium-sized oven-safe skillet by lightly spraying it with nonstick cooking spray.
-
In a large skillet, cook the bacon, cut into ½ inch pieces, over medium heat until it is crispy and browned. Remove the cooked bacon and place it on a paper towel-lined plate to drain. Pour off all but 1 tablespoon of the rendered bacon grease from the skillet.
-
Return the pan with the reserved bacon grease to medium heat. Add the diced jalapeño peppers and cook, stirring occasionally, until they have softened, which should take about 5 minutes. Then, add the minced garlic and cook for approximately 1 minute more, stirring constantly, until the garlic becomes fragrant. Remove the skillet from the heat.
-
In a large bowl, combine the softened cream cheese, chopped green onions, mayonnaise, sour cream, and Worcestershire sauce. Stir until the mixture is smooth and well blended. Fold in the shredded cheddar cheese, followed by the cooked jalapeño and garlic mixture, and finally, the crumbled bacon. Stir until all ingredients are thoroughly combined.
-
Spread the prepared dip mixture evenly into your greased baking dish, smoothing the top with a spatula. In a small separate bowl, melt the butter. Add the panko bread crumbs and shredded Parmesan cheese to the melted butter and toss until the breadcrumbs are fully coated.
-
Generously sprinkle the panko and Parmesan topping over the cream cheese mixture. If desired, you can add extra thinly sliced jalapeños on top for garnish and an extra touch of heat.
-
Bake the dip in the preheated oven for about 20 minutes, or until it is golden brown on top and heated through and bubbly. For an extra golden and crispier crust, carefully broil the dip for 1 to 2 minutes, watching it very closely to prevent burning.
-
Serve your warm and irresistible Jalapeño Popper Dip immediately with tortilla chips, crackers, or your favorite fresh vegetables. Enjoy!
Notes
- Vegetarian: Omit the bacon. Use olive oil to sauté the peppers and garlic. For a smoky flavor, consider adding a pinch of smoked paprika.
- Sausage option: Make this dip with sausage instead of bacon. Brown a 16 oz. roll of pork or turkey sausage (spicy if you like). Drain the fat before mixing into the dip.
- Keto friendly and gluten free: Omit the bread crumb topping and serve with celery sticks, cucumber slices, and bell pepper strips instead of crackers or chips.
- No Mayo: Replace the mayonnaise with an equal amount of Greek yogurt or additional sour cream.
Video
Nutrition
Calories:
216
kcal
,
Carbohydrates:
5
g
,
Protein:
10
g
,
Fat:
17
g
,
Saturated Fat:
7
g
,
Polyunsaturated Fat:
4
g
,
Monounsaturated Fat:
5
g
,
Trans Fat:
1
g
,
Cholesterol:
34
mg
,
Sodium:
424
mg
,
Potassium:
135
mg
,
Fiber:
1
g
,
Sugar:
2
g
,
Vitamin A:
298
IU
,
Vitamin C:
6
mg
,
Calcium:
209
mg
,
Iron:
1
mg
Nutrition information is automatically calculated, so should only be used as an approximation.
Did You Make This?
Share a comment and rating below! I love hearing what you think!