
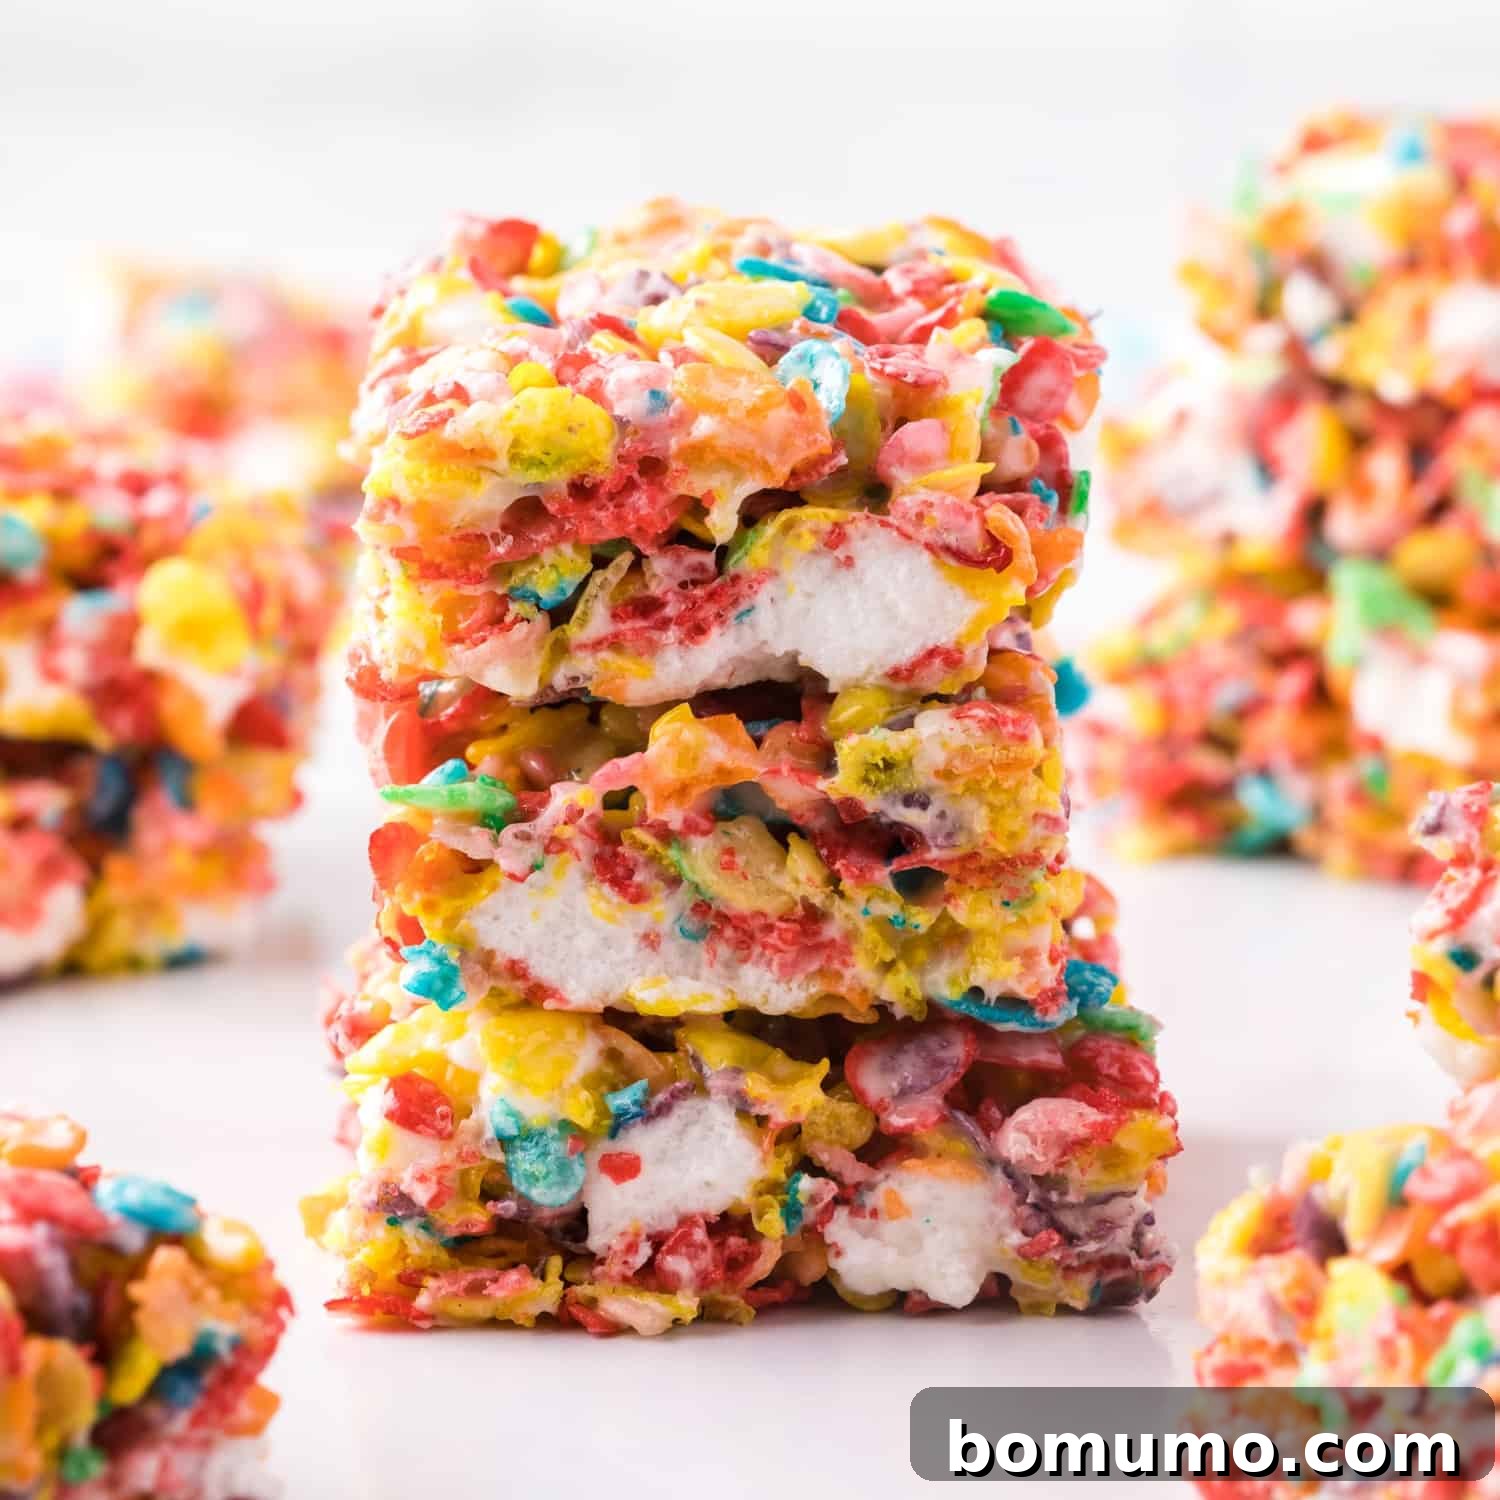
Recipe Overview: Dive into the World of No-Bake Fruity Pebbles Treats!
Why you’ll love it: These vibrant, chewy, and utterly delicious Fruity Pebbles treats are the ultimate no-bake dessert, requiring only three simple ingredients! Imagine sinking your teeth into a wonderfully ooey-gooey marshmallow bar, bursting with sweet, fruity flavor and an irresistible crispy, crackly crunch. It’s a nostalgic favorite with a colorful twist that captivates both young and old, promising a delightful sensory experience.
How long it takes: Prepare these delightful bars in just 15 minutes of active time, followed by a quick 10-minute cooling period before they’re ready to be sliced and enjoyed. This makes for a total of only 25 minutes from start to finish – fast, fun, and packed with flavor!
Equipment you’ll need: You’ll only need a standard 9×13 inch baking dish (or a similar size for thicker bars) and a deep-sided, non-stick saucepan to melt your marshmallows. Minimal fuss and straightforward preparation ensure maximum enjoyment with little cleanup.
Servings: This incredibly simple yet satisfying recipe yields approximately 20 generous bars. It’s perfect for sharing at parties, packing into lunchboxes, bringing to potlucks, or simply enjoying as a delightful sweet snack throughout the week. Be warned: they disappear quickly!
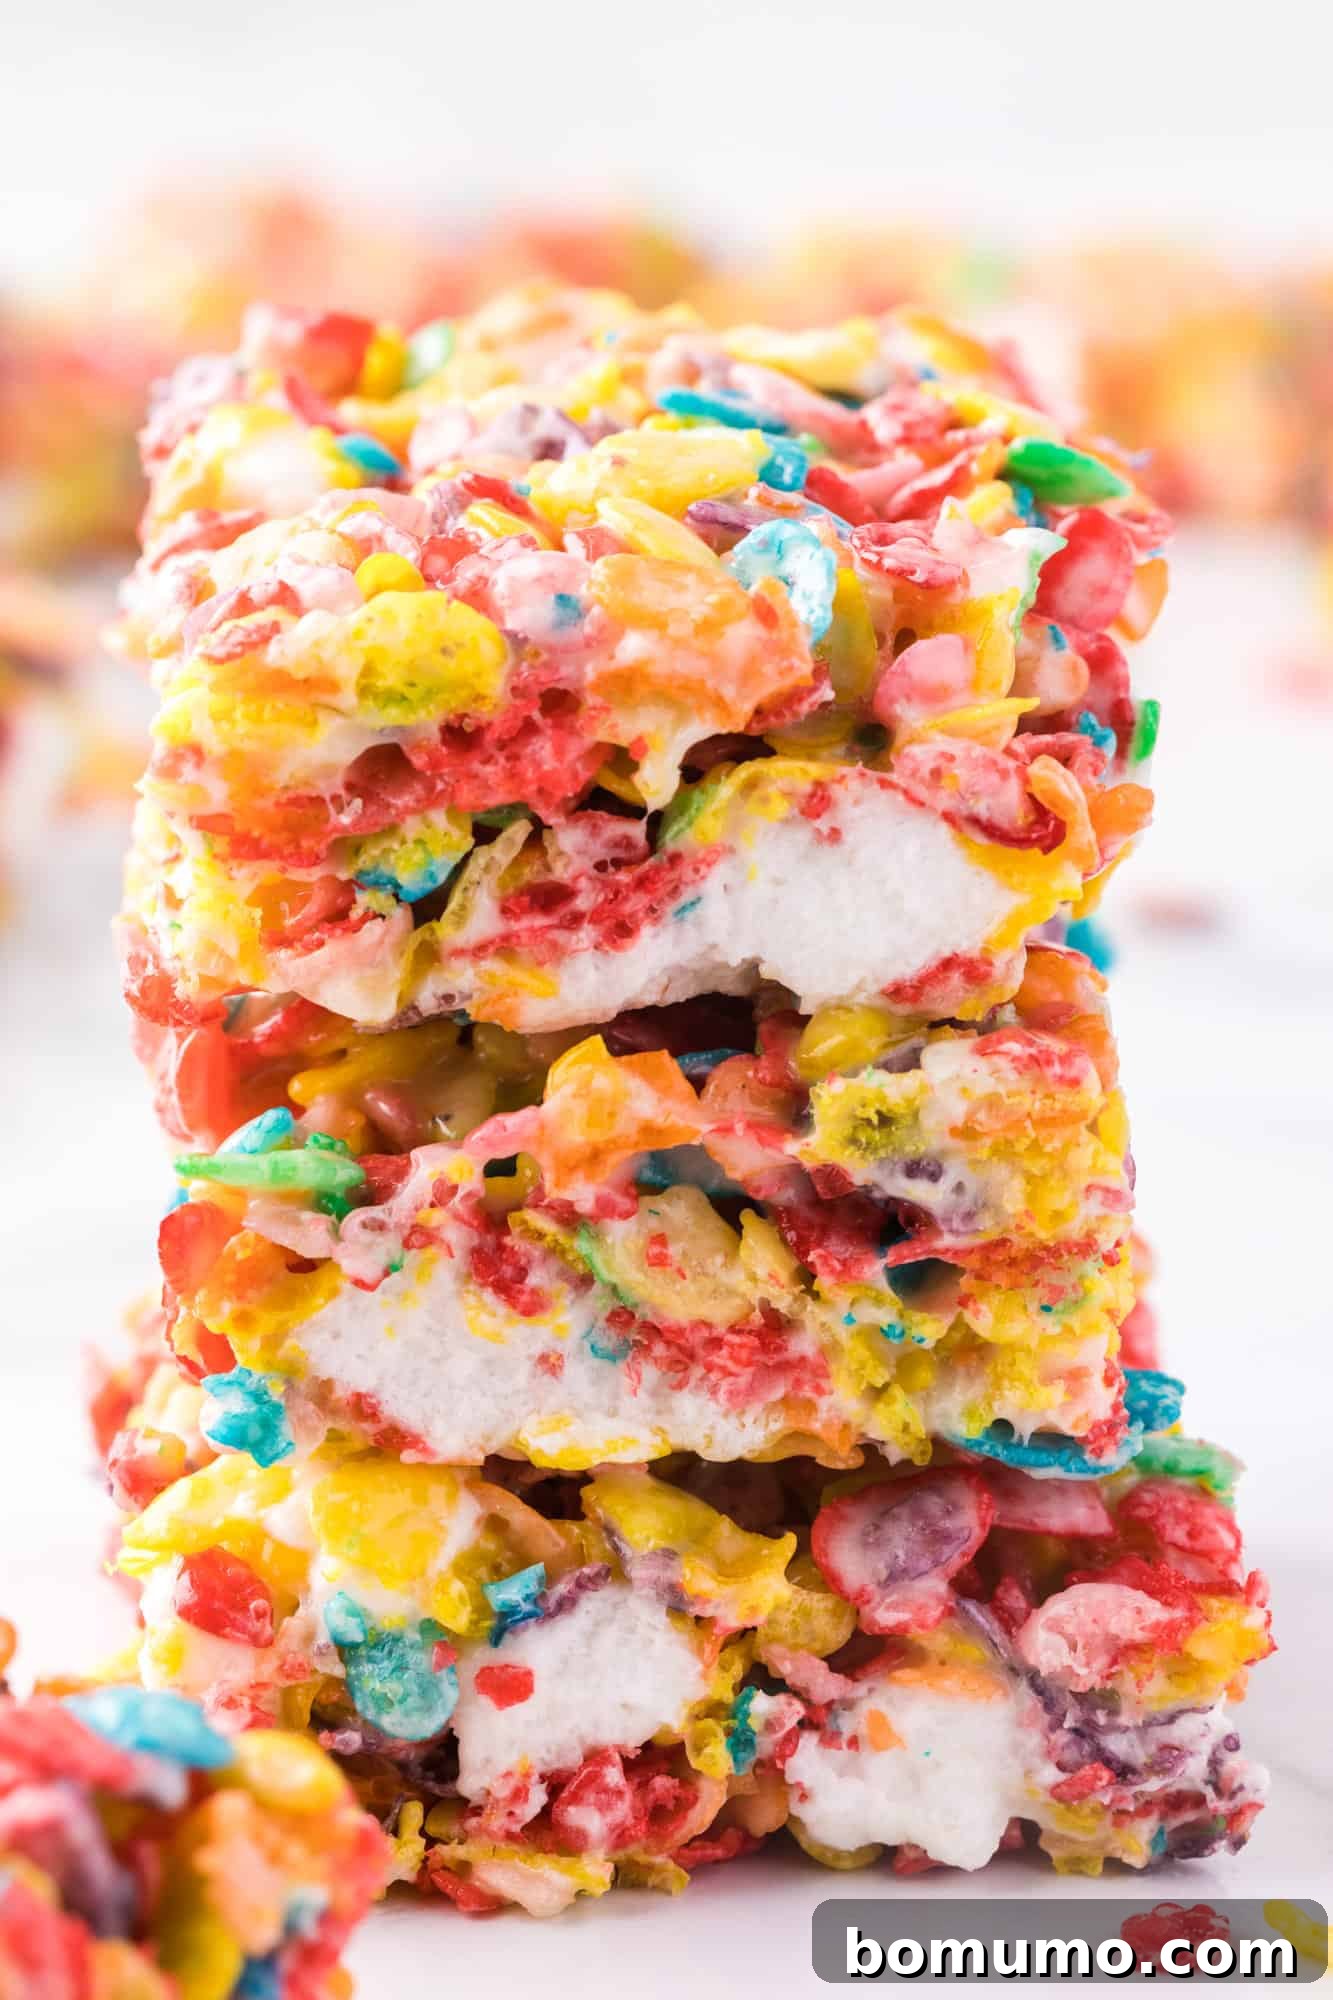
Irresistibly Sweet and Gooey Fruity Pebbles Treats: A Colorful Twist on a Classic
There’s something inherently comforting and undeniably delightful about a classic crispy rice cereal treat. The buttery, chewy texture and simple sweetness evoke fond memories for many, making it a timeless family favorite. Building on that beloved foundation, these homemade Fruity Pebbles treats take the experience to a whole new level by infusing every bite with an exuberant burst of vibrant, fruity flavor. Imagine the same delightful chewiness and satisfying crunch of traditional Rice Krispies treats, but transformed into a captivating, rainbow-colored confection that’s both exhilarating to make and incredibly satisfying to savor. It’s truly a party in your mouth!
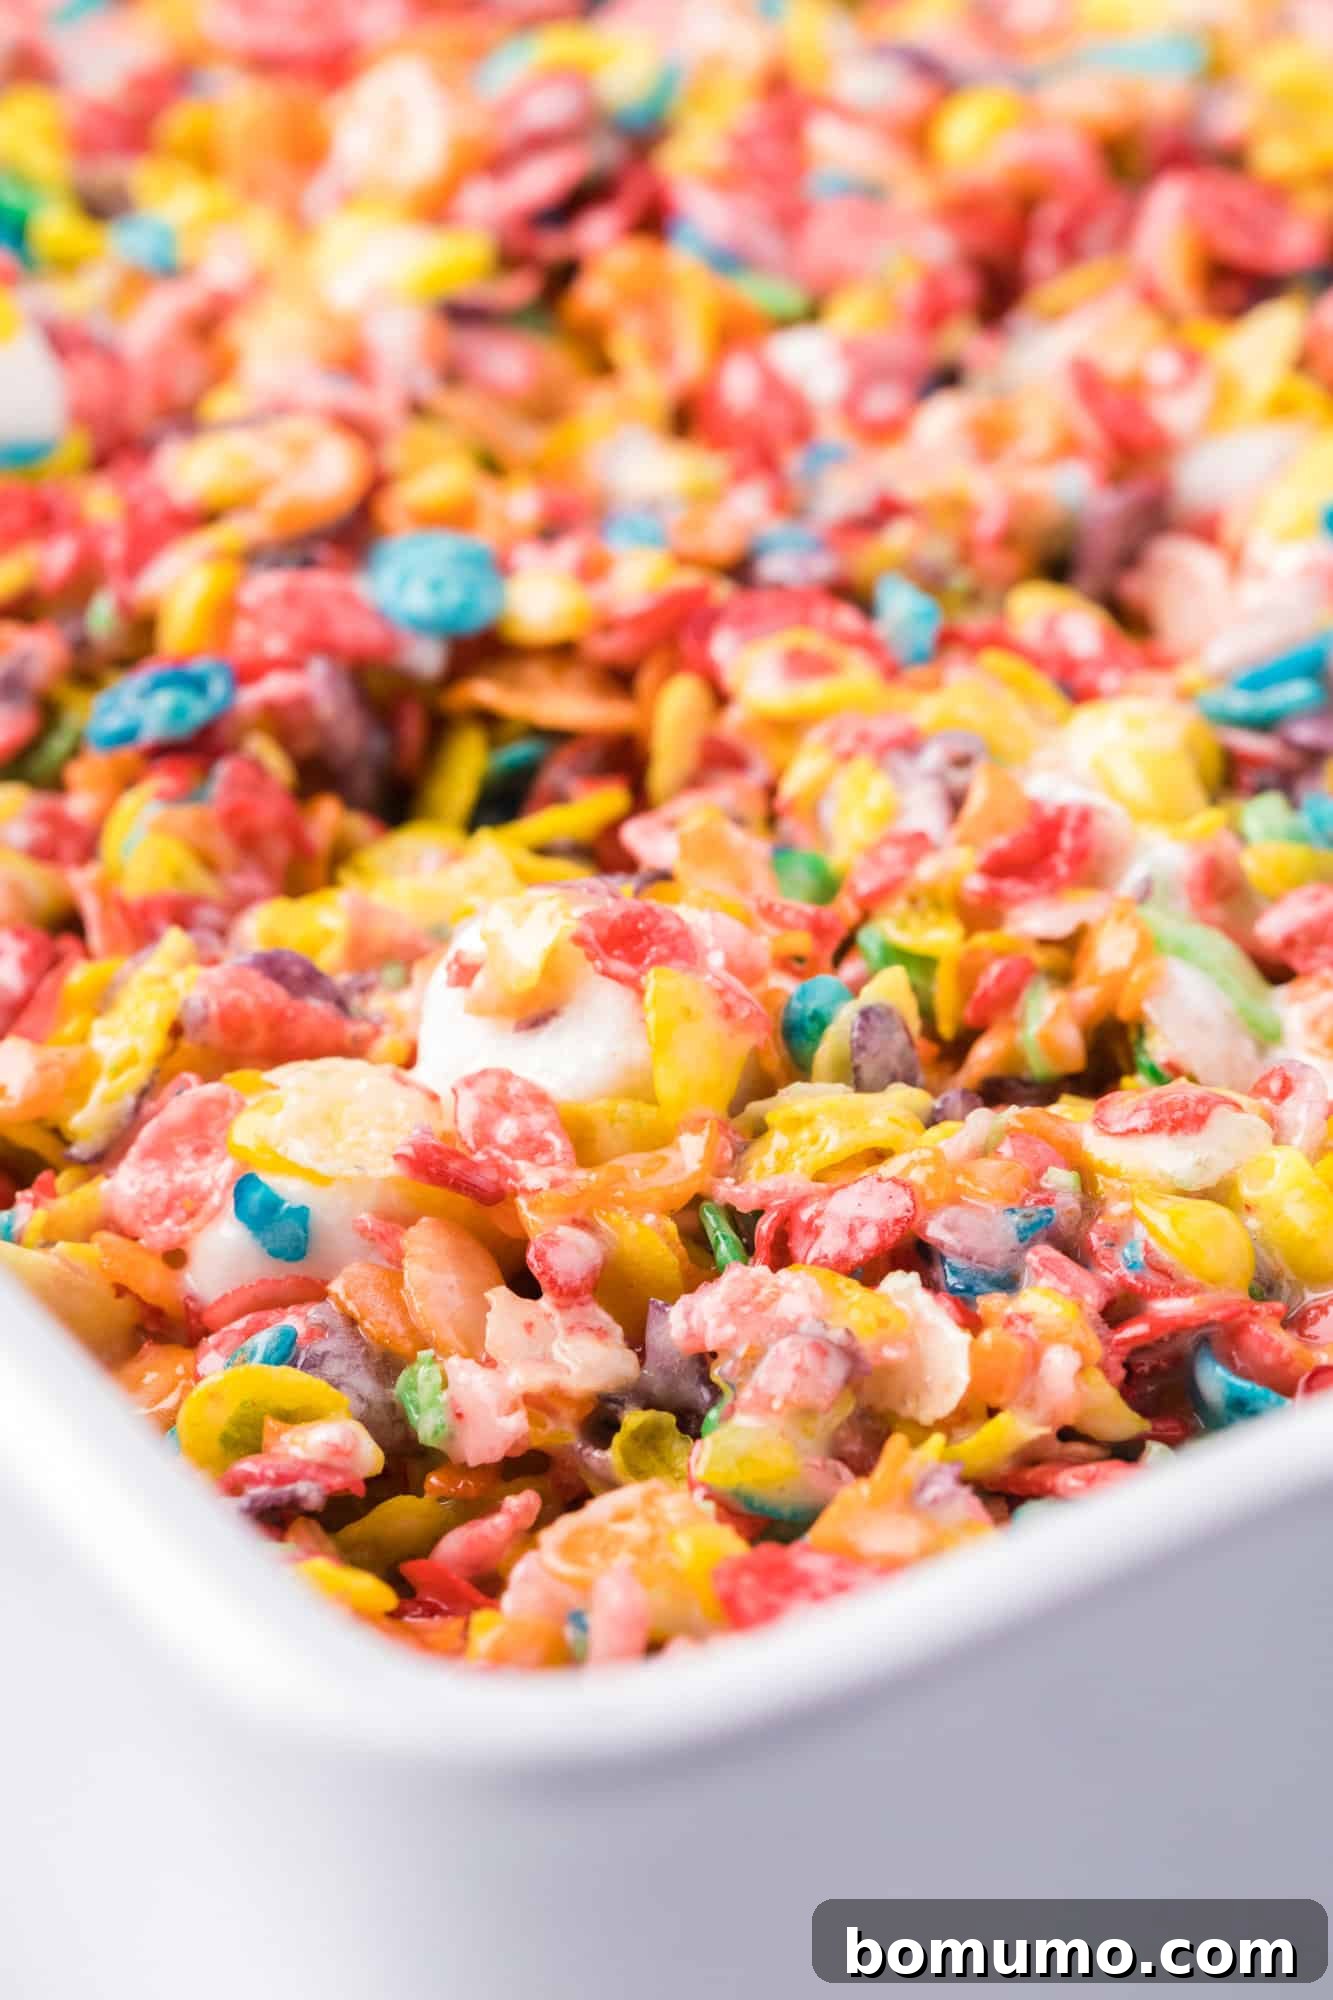
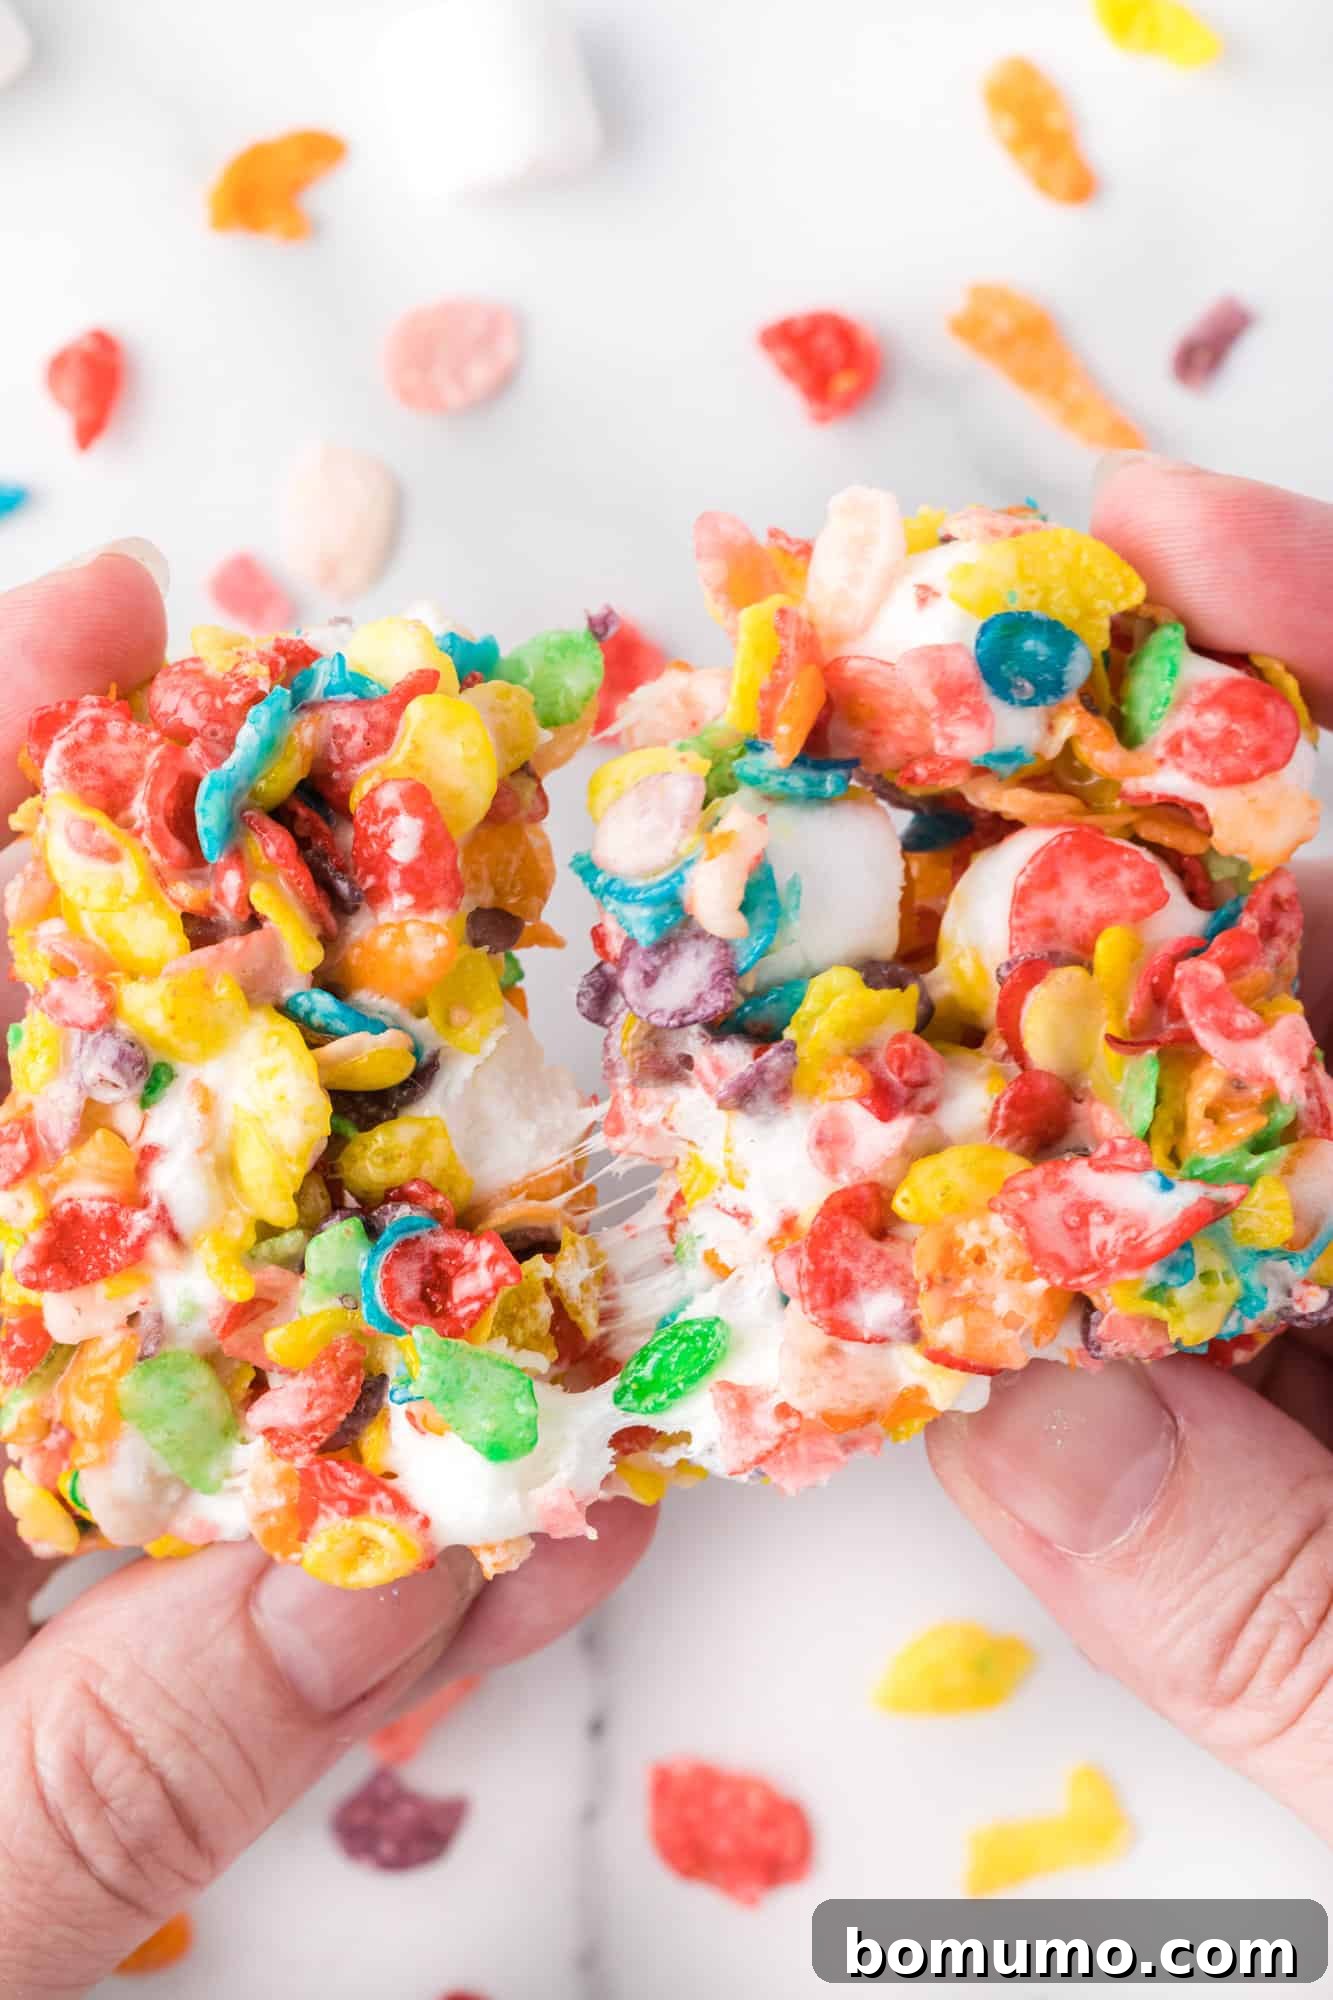
As you gently pull apart one of these extraordinary bars, you’ll be greeted by tantalizing strings of gooey, perfectly melted marshmallow, beautifully interlaced with the crisp, crackly goodness of fruity-flavored rice cereal. Each individual square is a stunning mosaic of bright, cheerful colors, promising a sensory explosion of both taste and texture. The interplay between the sweet, tangy cereal and the rich, buttery marshmallow creates a harmony that’s simply irresistible. This Fruity Pebbles treats recipe isn’t just a simple snack; it’s an experience, a playful indulgence, and a must-try creation that will quickly become a cherished addition to your dessert repertoire. Get ready to embark on a simple, yet incredibly rewarding culinary adventure that brings joy with every colorful, chewy bite!
Why You’ll Fall in Love with This Easy Fruity Pebbles Treats Recipe
These no-bake Fruity Pebbles bars aren’t just another simple dessert; they’re a symphony of flavors and textures designed to delight and impress without any fuss. Here’s a detailed look at why this particular recipe stands out from the crowd and why you’ll find yourself making it again and again for every occasion:
- Explosion of Unforgettable Fruity Flavor: What truly sets these treats apart from regular crispy rice cereal bars is the profound and captivating taste profile. The intense, sugary-sweet, and slightly tangy fruity flavor of Fruity Pebbles cereal absolutely shines through, creating a wonderfully vibrant and delicious experience that awakens the palate. It’s a playful, nostalgic twist that makes every bite feel like a celebration, a delightful departure from the ordinary, appealing intensely to both children and adults.
- Perfectly Soft and Chewy Texture, Never Hard: We all know the disappointment of biting into a tough, brittle, or rock-hard cereal treat. This recipe guarantees bars that are consistently incredibly soft, delightfully pliable, and perfectly chewy – never overly dense or stiff. Each bite delivers that satisfying, yielding give, making them utterly irresistible to everyone, from the pickiest toddlers to the most discerning dessert connoisseurs. The soft, yet structured chew is a hallmark of a well-made marshmallow treat.
- Glorious Pockets of Melty Marshmallow Goo: One of the secret weapons to their extraordinary gooeyness lies in a clever technique: stirring in a generous portion of whole mini marshmallows right at the very end of the cooking process. As the mixture cools, these additions soften and become wonderfully melty, creating delightful pockets of warm, soft, and extra gooey marshmallow throughout each and every bar. This ensures an additional layer of irresistible sweetness and chewiness that’s truly addictive, taking these treats from merely good to absolutely phenomenal.
- Unbelievably Quick and Effortless Preparation: Give your oven a well-deserved day off because these soft, chewy, and vibrant no-bake treats are incredibly fast to prepare. They come together with minimal effort and just a few easy-to-find ingredients, making them perfect for busy schedules. Everything is whipped up on the stovetop in a single pan, which means cleanup is an absolute breeze. They’re the ideal solution for last-minute cravings, spontaneous gatherings, an impromptu dessert, or a fun, interactive afternoon activity with the kids. In mere minutes, you’ll have a fresh batch of these colorful delights ready to cool.
- A Versatile and Visually Stunning Treat for Any Occasion: Whether you’re planning a lively birthday party, contributing to a school bake sale, hosting a potluck, or simply looking for a cheerful weekend family snack, these Fruity Pebbles treats fit seamlessly into any event. Their naturally vibrant colors make them incredibly appealing and festive for celebrations, while their simple, comforting charm makes them a perfect everyday indulgence. They are universally loved and consistently prove to be a show-stopping hit wherever they appear!
Essential Ingredients for Your Fruity Pebbles Treats
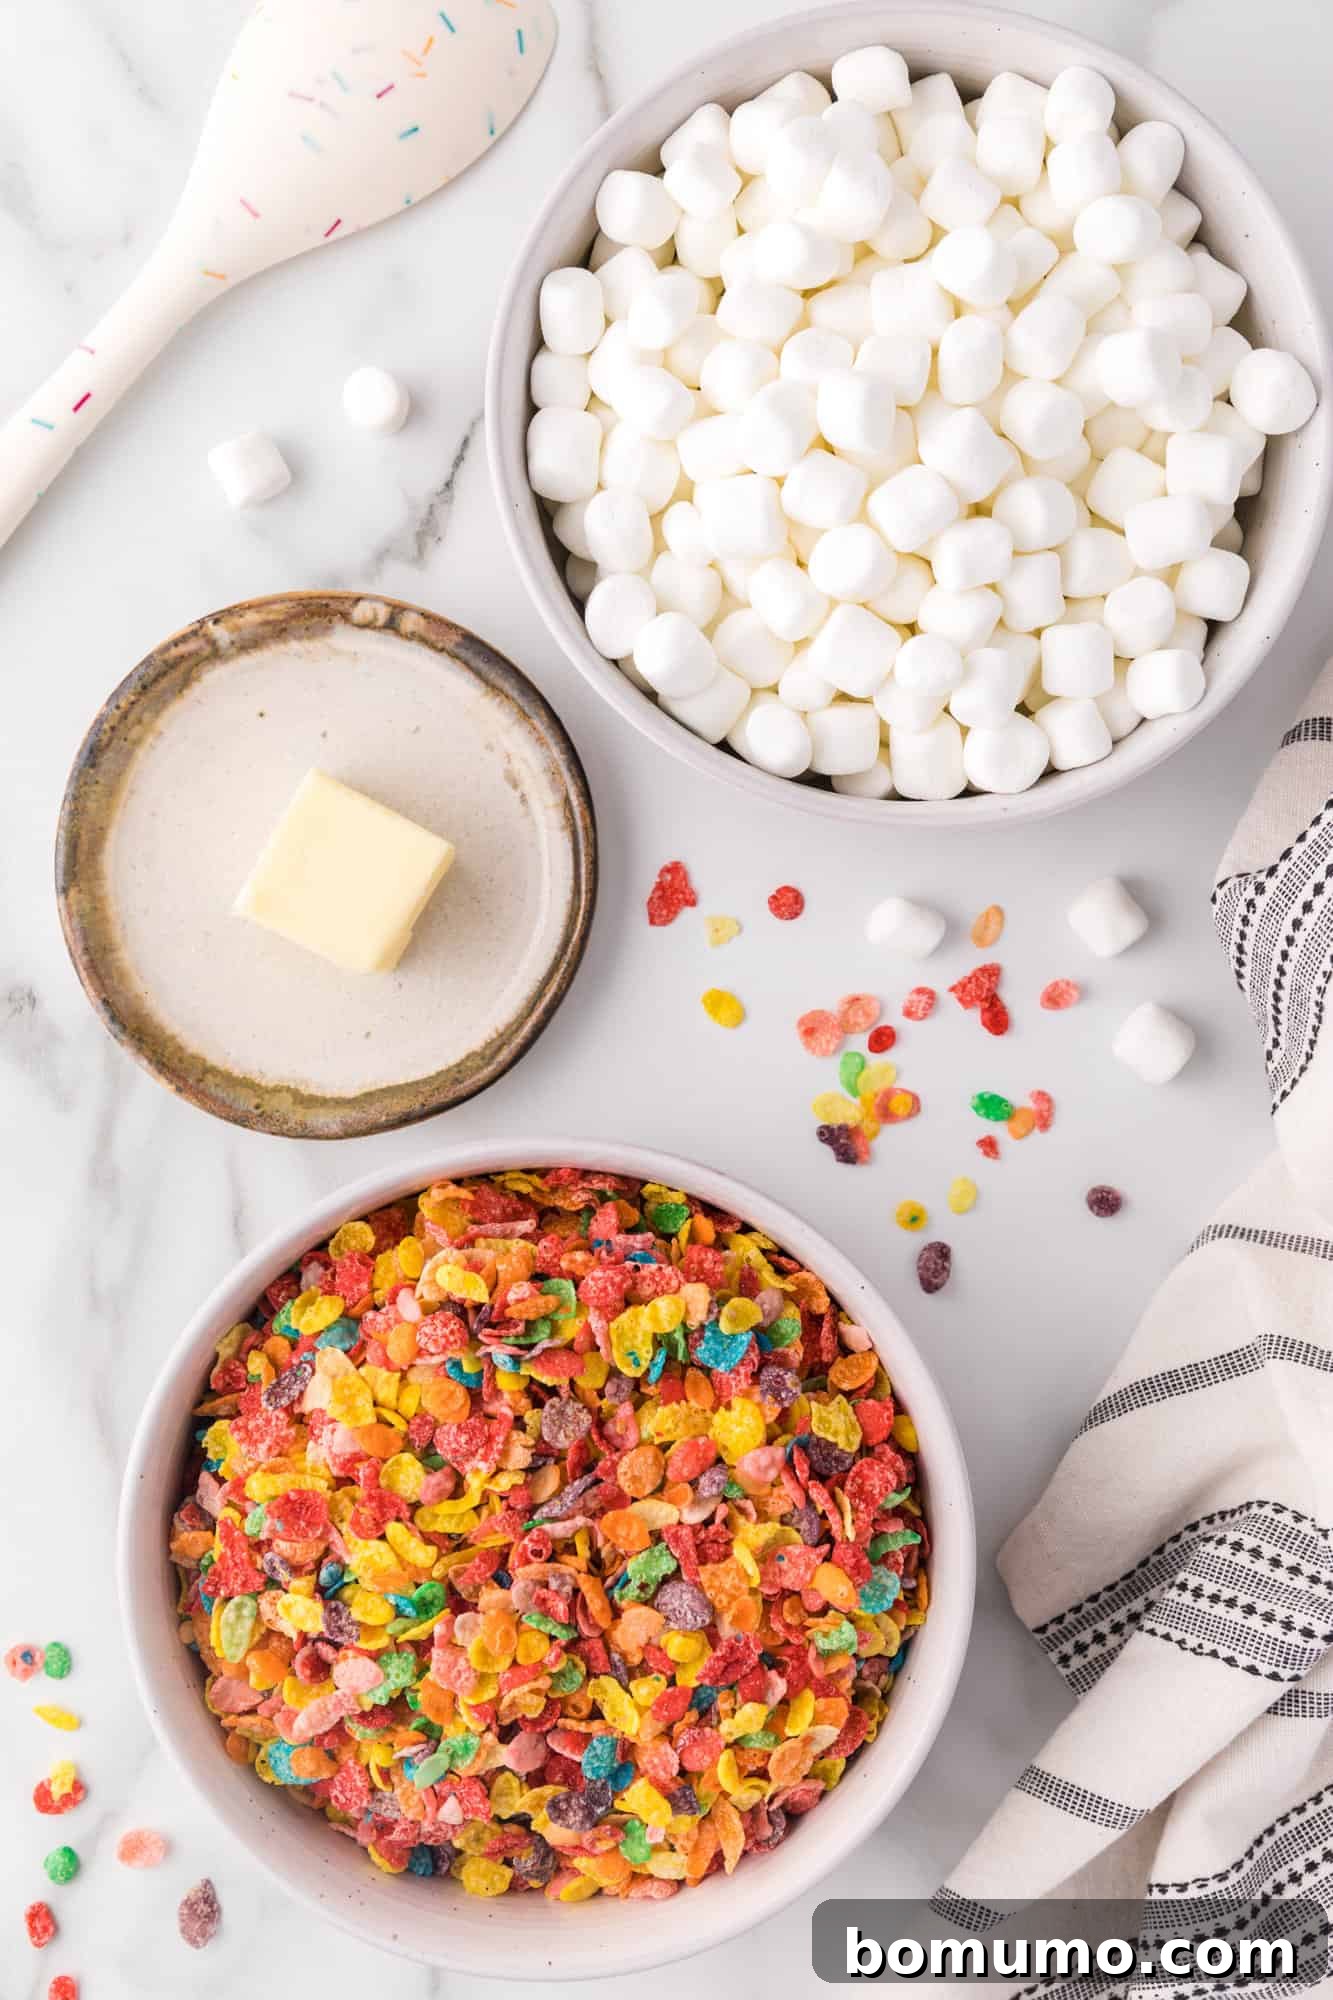
One of the most appealing aspects of this irresistible recipe is its incredible simplicity. You truly only need three core ingredients to create these wonderfully flavorful, chewy, and visually stunning Fruity Pebbles treats. While the ingredient list is short and sweet, selecting the right components and understanding their roles can make all the difference in achieving that perfect taste and texture. Below, I’ll provide some detailed notes and helpful tips on each ingredient, ensuring you’re set up for success. For precise measurements and the full, comprehensive recipe instructions, always refer to the complete recipe card provided at the very end of this article.
- Butter: For this recipe, we highly recommend using unsalted butter. Unsalted butter gives you complete and precise control over the overall saltiness of your treats, allowing the delightful sweet and intensely fruity notes to truly shine without any unexpected savory interference. However, if you happen to prefer a very subtle sweet-and-salty contrast, which many enjoy, salted butter can also be used effectively. Just be mindful of the added salt. Regardless of your choice, ensure you’re using good quality butter, as it forms the foundational flavor and richness of your bars.
- Mini Marshmallows: These delightful little puffs are undoubtedly the gooey, chewy heart and soul of your treats! You will need a total of 8 cups of mini marshmallows for this recipe. Specifically, 6 cups will be gently melted down to form the essential binding agent, creating that iconic sticky, pliable base. An additional 2 cups of whole mini marshmallows will then be stirred in right at the very end to create those delightful, distinct pockets of soft, melty marshmallow goodness that make these bars extra special. For your convenience, a standard 10 oz bag of mini marshmallows typically contains approximately 6 cups. Therefore, plan to pick up two bags to ensure you have enough for both the melted base and the delicious, un-melted additions. Using fresh marshmallows is absolutely crucial for the best melt, the most desirable elasticity, and the perfect chewiness; older, stale, or dried-out marshmallows tend to result in treats that are unpleasantly hard and less appealing.
- Fruity Pebbles Cereal: This vibrant, crispy rice cereal is undeniably the star of the show! It’s what imparts these treats with their distinctive, eye-catching rainbow colors and their unmistakable, intense fruity flavor. While brand-name Fruity Pebbles are highly recommended for their authentic taste, signature crisp texture, and vibrant hues, a high-quality store brand of fruity crisp rice cereal can serve as a perfectly suitable and delicious alternative if you prefer. An 11 oz box of cereal will generously provide more than enough for the 6 cups required for this recipe, likely leaving you with some extra to enjoy for breakfast – or, more realistically, to snack on while you eagerly wait for your treats to cool!
How Many Cups Of Cereal Do I Need For Fruity Pebbles Treats?
How Many Cups Of Cereal Do I Need For Fruity Pebbles Treats?
For this irresistible recipe, you will need precisely 6 cups of Fruity Pebbles cereal. An 11 oz box of Fruity Pebbles typically contains more than this amount, usually around 8-10 cups, so purchasing one standard-sized box will ensure you have plenty for your treats, perhaps even with a little extra for a quick snack while you’re cooking, or for topping other desserts!
How to Make Perfect Fruity Pebbles Treats: A Step-by-Step Guide for No-Bake Success
Crafting these vibrant and incredibly delicious Fruity Pebbles treats is an absolute breeze, making them the perfect snack or dessert to whip up spontaneously, whether for an impromptu treat or a planned gathering. With minimal preparation and straightforward effort, you are guaranteed to achieve perfectly gooey, delightfully chewy, and flavorful bars every single time. Follow these simple yet crucial steps for a flawless batch:
- Prepare Your Baking Pan: Begin by generously greasing a 9×13 inch baking pan with butter. Alternatively, and for even easier removal and cleanup, you can line the pan with parchment paper, allowing an overhang on the sides. This crucial first step prevents the sticky marshmallow mixture from adhering to the pan and ensures your finished treats will lift out cleanly and effortlessly once cooled.
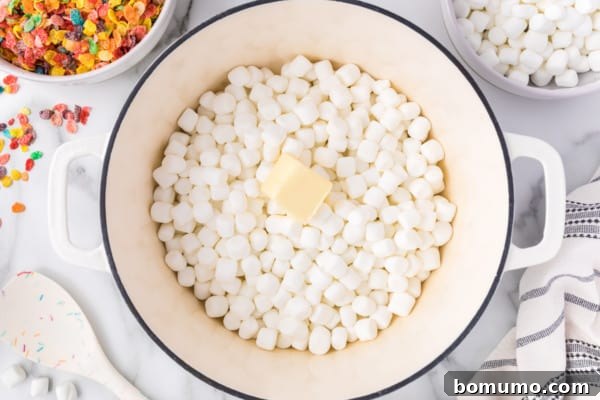
- Gently Melt the Marshmallows and Butter: In a large, deep, preferably non-stick saucepan, combine 2 tablespoons of butter and 6 cups of mini marshmallows. Place the saucepan over very low heat. It is absolutely essential to stir continuously and gently as the butter melts and the marshmallows begin to soften and combine. The key here is to use consistently low heat to ensure a smooth, soft, and pliable mixture, preventing the marshmallows from becoming too hard, grainy, or caramelizing too quickly. Continue stirring until the mixture is completely smooth, with no visible lumps of marshmallow remaining. This usually takes about 5-7 minutes.
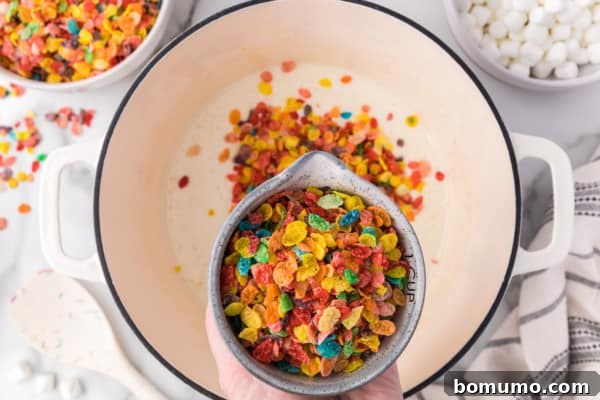
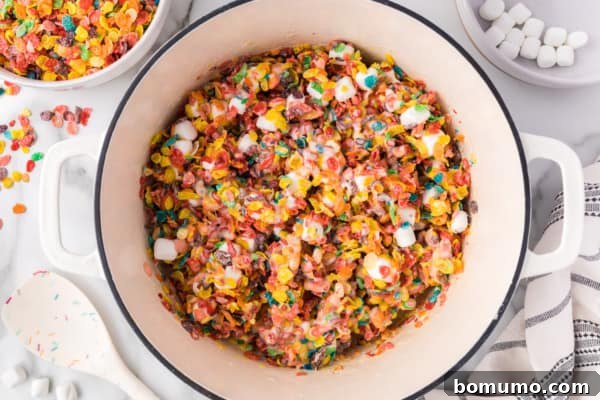
- Carefully Incorporate the Cereal and Extra Marshmallows: Once the marshmallow mixture is perfectly smooth and velvety, immediately remove the pan from the heat source to prevent further cooking. First, gently fold in the 6 cups of Fruity Pebbles cereal. Use a sturdy spatula or spoon to mix carefully until the cereal is mostly coated with the warm, gooey marshmallow mixture. Work quickly but gently. Next, immediately add the remaining 2 cups of whole mini marshmallows. Continue to stir just until the cereal and the added whole marshmallows are evenly coated. Be careful not to overmix at this stage, as excessive stirring can crush the cereal and compromise the desired crispy-chewy texture of your finished treats.
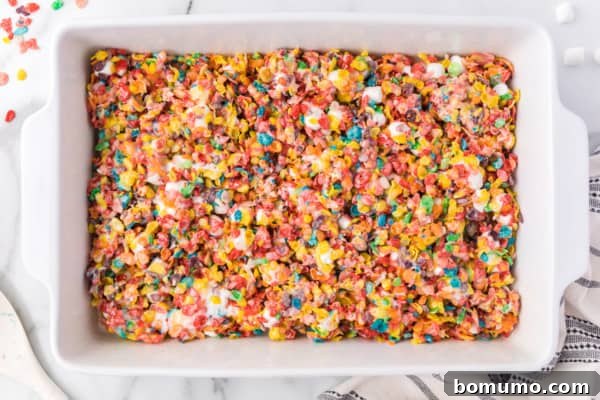
- Press into the Prepared Pan: Lightly spray your hands with nonstick baking spray or rub them with a very small amount of butter to prevent the sticky mixture from adhering to your skin. Then, gently press the warm Fruity Pebbles mixture evenly into your prepared 9×13 inch pan. It’s vitally important to press gently and evenly across the entire surface; resist the strong urge to press down too firmly or compact the mixture excessively. If you press too hard, you’ll compress the treats, making them dense, hard, and losing that delightful, airy chewiness. The goal is a light, cohesive, yet yielding bar.
- Cool and Serve Your Delicious Treats: Allow your delightful Fruity Pebbles treats to cool undisturbed at room temperature for at least 10 minutes. For thicker bars or in warmer environments, 15-20 minutes might be ideal. During this essential cooling period, the marshmallow base will firm up just enough, making the bars much easier to cut cleanly into perfect squares or rectangles without them falling apart or sticking excessively to your knife. Once cooled sufficiently, use a sharp knife (lightly greased if needed for cleaner cuts) to slice them into your desired size. Serve immediately and watch with delight as these vibrant, chewy creations disappear in no time!
Expert Tips for Crafting the Best Fruity Pebbles Treats Every Time
While making these delightful marshmallow treats might seem like an incredibly simple task, a few key techniques and insider tips can significantly elevate your Fruity Pebbles treats from merely good to absolutely amazing. These tried-and-true principles, often applied to classic Rice Krispies treats, are equally vital here to ensure your bars are perfectly gooey, delightfully chewy, and bursting with flavor every single time. Pay attention to these details for consistently spectacular results:
- Always Opt for Fresh Marshmallows: This is arguably the most critical tip for achieving wonderfully soft, springy, and chewy treats. Fresh marshmallows possess a higher moisture content and a naturally softer texture, which translates directly into a smoother, more even melt and a more pliable, perfectly gooey final product. Stale or older marshmallows, on the other hand, tend to be drier, much harder to melt evenly, and often result in treats that are unpleasantly tough, brittle, or even “brick-like” in texture. Always check the expiration date on your marshmallow bags and prioritize using newly opened ones for the best possible outcome.
- Understanding Marshmallow Size and Flexibility: This recipe specifically calls for mini marshmallows, primarily because they melt quickly and integrate beautifully and uniformly into the cereal mixture, creating a consistent base. However, if you find yourself without mini marshmallows, don’t despair! You can certainly use regular-sized marshmallows. A standard 10 oz bag of regular marshmallows is roughly equivalent to 6 cups of mini marshmallows by volume. If you opt for regular marshmallows, you’ll want to omit the step where you stir in additional whole marshmallows at the end, as the larger pieces won’t create the same desired effect of small, melty pockets. Just ensure your melted marshmallow base is perfectly smooth before adding your cereal.
- The Golden Rule: Do Not Overheat the Marshmallow Mixture: Patience is truly a virtue when it comes to melting butter and marshmallows. Always use consistently low to medium-low heat. The moment the marshmallows are fully melted and appear smooth and glossy, remove the pan immediately from the heat source. Overheating the marshmallow mixture is a common pitfall that can cause the sugars to caramelize or harden prematurely. This leads to Fruity Pebbles treats that are unpleasantly stiff, dry, or even crunchy instead of wonderfully soft and delightfully chewy. Gentle heat and watchful stirring yield the best, most tender results.
- Practice Gentle Pressing, Not Forceful Compacting: Once the warm cereal mixture is transferred to your prepared baking pan, it’s crucial to resist the strong urge to compact it too forcefully. Using a light, even touch when pressing the mixture into the pan helps to maintain tiny pockets of air within the bars. This aeration is what contributes to treats that are soft, airy, and wonderfully chewy. If you press down too hard, you’ll inevitably end up with dense, hard, and unappealing bars that have lost their signature light and crisp texture. Think of it as gently coaxing the mixture into place rather than flattening it aggressively.
- Grease Your Hands (or Tools!) for Effortless Handling: The warm marshmallow mixture is notoriously sticky, which can make spreading it into the pan a messy ordeal. To prevent frustration and ensure an even, clean spread, lightly grease your hands with butter or a nonstick cooking spray before you begin pressing the mixture into the pan. Alternatively, you can use a piece of parchment paper or wax paper, or even the back of a lightly greased spatula, to press the mixture down effectively without it sticking to you or your tools.
- Allow Adequate Cooling Time for Perfect Slices: While it’s incredibly tempting to cut into these colorful, aromatic treats immediately, giving them at least 10 minutes (or even 15-20 minutes for thicker bars or in warmer environments) to cool and set is absolutely essential. This crucial cooling period allows the marshmallow to firm up just enough, making the bars significantly easier to slice cleanly and neatly into perfect squares or rectangles without them falling apart, losing shape, or sticking excessively to your knife. Patience here pays off in presentation and texture!
- Parchment Paper for Seamless Removal and Cleanup: For the ultimate easy cleanup and effortlessly neat removal, consider lining your baking pan with parchment paper, ensuring that you leave a generous overhang on the sides. Once the treats have cooled and set, you can simply use these overhangs to lift the entire slab of treats out of the pan, place it on a clean cutting board, and then slice it without any mess or struggle. This technique is a game-changer for sticky treats!
Unleash Your Creativity: Make These Fruity Pebbles Treats Uniquely Yours
While this Fruity Pebbles treats recipe is undeniably perfect and delicious as is, it also serves as a fantastic, versatile canvas for your culinary creativity. Don’t hesitate to experiment and customize these vibrant bars to perfectly suit your personal taste preferences, dietary needs, or the specific occasion you’re celebrating. Here are a few fun variation ideas to inspire you and get your creative juices flowing:
- Explore Butter Alternatives: If you’re looking for a dairy-free option or simply want to experiment with a slightly different flavor profile, you can easily replace the butter. Unflavored coconut oil works wonderfully, imparting a very subtle tropical hint while maintaining a similar texture and binding capability. Olive oil, particularly a light-tasting variety, can also be used as a replacement, though it might subtly alter the overall flavor. For a richer, deeper, and more complex nutty flavor, browning the butter before adding the marshmallows can be an exquisite choice, adding remarkable depth to the sweet, gooey marshmallows.
- Customize the Thickness and Shape: The standard 9×13 inch pan is designed to yield approximately 20 evenly sized, perfectly proportioned bars. However, if you prefer thicker, more substantial, and perhaps even chewier treats, simply opt for a smaller baking pan, such as an 8×8 inch square baking dish. For charming, bite-sized individual servings, you can press the mixture into well-greased muffin tins or even use fun cookie cutters (after allowing the mixture to cool briefly to firm up) to create playful shapes that are perfect for children’s parties or festive holiday gatherings.
- Explore Different Cereal Varieties: Not a fan of Fruity Pebbles, or simply want to try something completely new? This recipe is incredibly versatile and forgiving! You can easily swap out Fruity Pebbles for other beloved crispy cereals. Cocoa Pebbles, for instance, will give you a deliciously rich, chocolatey version, reminiscent of classic chocolate cereal bars. For a timeless and comforting taste, traditional Rice Krispies cereal works perfectly and allows other flavors to shine. Other exciting cereals like Cinnamon Toast Crunch (for a spicy-sweet kick) or even Lucky Charms (for extra marshmallow fun and magic) could also be used for truly unique and delightful flavor combinations.
- Delightful Add-ins and Exciting Mix-ins: Elevate your treats to the next level with a diverse array of delicious additions! Consider stirring in a generous handful of white chocolate chips for extra sweetness and creamy indulgence, or a handful of dark chocolate chips for a rich, sophisticated contrast. Finely chopped pretzels add a wonderful salty crunch that beautifully balances the sweetness, while mini M&M’s or other small, colorful candies bring additional visual appeal, texture, and bursts of flavor. For a touch of celebratory sparkle, sprinkle some vibrant rainbow sprinkles over the top immediately after pressing the mixture into the pan. Just remember to be mindful not to overcrowd the mixture with too many add-ins, as an excessive amount can sometimes make your treats crumbly, less cohesive, and harder to hold together.
- Creative Drizzles and Decorations: Once your bars have cooled and set, take them to the next level of gourmet presentation and flavor with a decorative drizzle. A swirl of melted white chocolate, a zig-zag of milk chocolate, or even a simple vanilla or lemon glaze can add an elegant touch. You can also sprinkle on extra crushed Fruity Pebbles for intensified flavor and crunch, more colorful sprinkles, or a delicate dusting of powdered sugar for an extra festive and professional-looking finish.
How to Store Your Fruity Pebbles Treats for Maximum Freshness
How to Store Your Fruity Pebbles Treats for Maximum Freshness
Ensuring your Fruity Pebbles treats stay wonderfully soft, delightfully chewy, and absolutely delicious is key to enjoying them long after they’re initially made. Proper storage techniques will significantly help maintain their fresh texture, vibrant colors, and irresistible flavor. Here’s a comprehensive guide on how to store your delightful no-bake bars, whether for immediate enjoyment or a slightly longer period:
- Room Temperature Storage (Highly Recommended for Best Quality): Like nearly all marshmallow-based treats, these Fruity Pebbles bars are undeniably at their absolute peak of perfection on the very day they are made. The gooey texture, fresh crispness of the cereal, and intense flavor are simply unparalleled. However, they can be stored quite effectively for a few days without a significant drop in quality. Once your treats have cooled completely to room temperature and have been neatly cut into individual bars, arrange them in a single layer inside an airtight container. If stacking is necessary, place a sheet of parchment paper or wax paper between layers to prevent them from sticking together. Store this sealed container at room temperature, away from any direct sunlight, heat sources, or excessive humidity, for up to 3 days. Beyond this timeframe, they might gradually start to lose some of their signature chewiness and could become a bit firmer or slightly less appealing.
- Freezer Storage (Optional, with Important Considerations): While these vibrant bars are truly best enjoyed fresh for that optimal texture, if you find yourself with an abundance of treats or wish to prepare them well in advance for a future event, they can indeed be frozen. It’s generally not highly recommended as freezing can sometimes subtly alter the delicate texture of marshmallow treats, potentially making them slightly firmer, more brittle, or a little drier upon thawing. However, in a pinch, it’s a viable option. To freeze them successfully, ensure the treats are completely and thoroughly cooled. Wrap individual bars tightly and meticulously in plastic wrap, ensuring no air pockets. Then, place these individually wrapped bars in a single layer inside a freezer-safe, airtight container or a heavy-duty freezer bag. They can be stored in the freezer for up to 3 months. When you’re ready to indulge, simply take the desired number of bars out of the freezer and let them thaw gently at room temperature for approximately 30-60 minutes before serving.
Discover More Irresistible No-Bake Treats!
Brigadeiros (Brazilian Fudge Balls)
Cinnamon Toast Crunch Bars
Easy Christmas Tree Rice Krispie Treats
No Bake Peanut Butter Bars
Fruity Pebbles Treats: The Ultimate No-Bake Recipe
Ingredients
- 2 tablespoons unsalted butter (plus additional to grease the pan)
- 8 cups mini marshmallows, divided (6 cups melted, 2 cups stirred in for extra gooey pockets)
- 6 cups fruity crisp rice cereal (such as Fruity Pebbles, for authentic flavor and vibrant color)
Instructions
-
Grease a 9 × 13 inch baking pan generously with butter, or line it with parchment paper, leaving an overhang on the sides for easy removal.
-
In a large, deep nonstick saucepan, melt 2 tablespoons of butter and 6 cups of mini marshmallows over very low heat. Stir constantly and gently until the mixture is completely smooth and free of any marshmallow lumps. Be careful not to overheat.
-
Immediately remove the pan from the heat. First, gently stir in the 6 cups of fruity crisp rice cereal until it is mostly coated with the warm marshmallow mixture. Then, quickly stir in the remaining 2 cups of whole mini marshmallows. Continue stirring just until both the cereal and the added whole marshmallows are thoroughly coated with the sweet marshmallow and butter combination. Do not overmix.
-
Lightly spray your hands with nonstick baking spray or coat them with a thin layer of butter. Gently and evenly press the mixture into the prepared pan. It is crucial to avoid pressing too firmly, as this can compress the treats and result in a hard, dense texture rather than a soft, chewy one.
-
Allow the treats to cool at room temperature for a minimum of 10 minutes (or longer for thicker bars) before carefully slicing them into squares with a sharp, lightly greased knife. Serve and enjoy!
Notes
- Storage: For the absolute best texture and flavor, consume these treats on the day they are made. Store any cooled, cut squares in an airtight container at room temperature for up to 3 days to maintain freshness.
- If you prefer a less gooey texture and fewer distinct marshmallow pockets, the additional 2 cups of mini marshmallows stirred in with the cereal can be completely omitted from the recipe.
- For thicker, more substantial bars, you can use a smaller pan size (e.g., an 8×8 inch square baking dish) instead of a 9×13 inch pan. For charming individual servings, the mixture can also be pressed into well-greased muffin tins.
Recipe Video
Watch this short video to see just how easily these delightful Fruity Pebbles Treats come together in your kitchen!
Nutrition Facts
Nutrition information is automatically calculated and provided for approximation purposes only. Please consult a qualified nutritionist or dietary professional for precise dietary advice tailored to your needs.