

Why You’ll Adore These Cookies: Prepare to fall in love with these peppermint chocolate sugar cookies! They offer a delightful twist on classic sugar cookies, making them an absolute dream for any chocolate enthusiast. The dough is incredibly easy to roll out, and the best part? No chilling time required, meaning you can enjoy freshly baked cookies in no time!
Quick & Convenient: With just 15 minutes of active preparation, you’ll be well on your way to baking perfection.
Essential Tools: You’ll only need basic kitchen equipment: a mixing bowl, an electric mixer, a trusty rolling pin, your favorite cookie cutters, baking sheets, and an oven.
Generous Yield: This recipe effortlessly produces approximately 60 charming small star cookies, perfect for sharing or savoring over time.

Peppermint Chocolate Sugar Cookies: Your Go-To No-Chill Recipe for Festive Baking
Embrace the irresistible magic of mint and chocolate with these spectacular peppermint chocolate sugar cookies! If you’re a fan of this classic flavor pairing, you’re in for a treat. These cookies are not just incredibly soft and rich with dark chocolate flavor, but they also boast a subtle, refreshing hint of peppermint that makes them truly sparkling. What’s more, they are remarkably easy to prepare – a truly “no-chill” dough means less waiting and more baking enjoyment! Their beautiful appearance on any cookie platter is just an added bonus to their phenomenal taste, making them perfect for holiday gatherings or any time you crave a special treat.
My quest for a reliable cut-out cookie recipe that didn’t demand hours of chilling led me to a fantastic discovery. A fellow blogger, Katrina, crafted what she confidently calls the best sugar cookie recipe. Her method is wonderfully simple, the dough requires absolutely no chilling time – a game-changer for busy bakers – and the cookies maintain their intricate shapes perfectly during baking, with no unwanted spreading. This incredible base recipe became the foundation for my ultimate peppermint chocolate cookies.
I found that Katrina’s foundational sugar cookie recipe served as the perfect canvas for my peppermint chocolate vision. By simply omitting the almond extract and introducing a generous amount of cocoa powder and a touch of invigorating peppermint extract, I was able to create a unique sugar cookie that bursts with a harmonious blend of rich chocolate and cool mint. These cookies are ideal for holiday gatherings, special occasions, or simply to satisfy a craving for something truly special and wonderfully easy to make.

Key Ingredients for Perfect Peppermint Chocolate Sugar Cookies
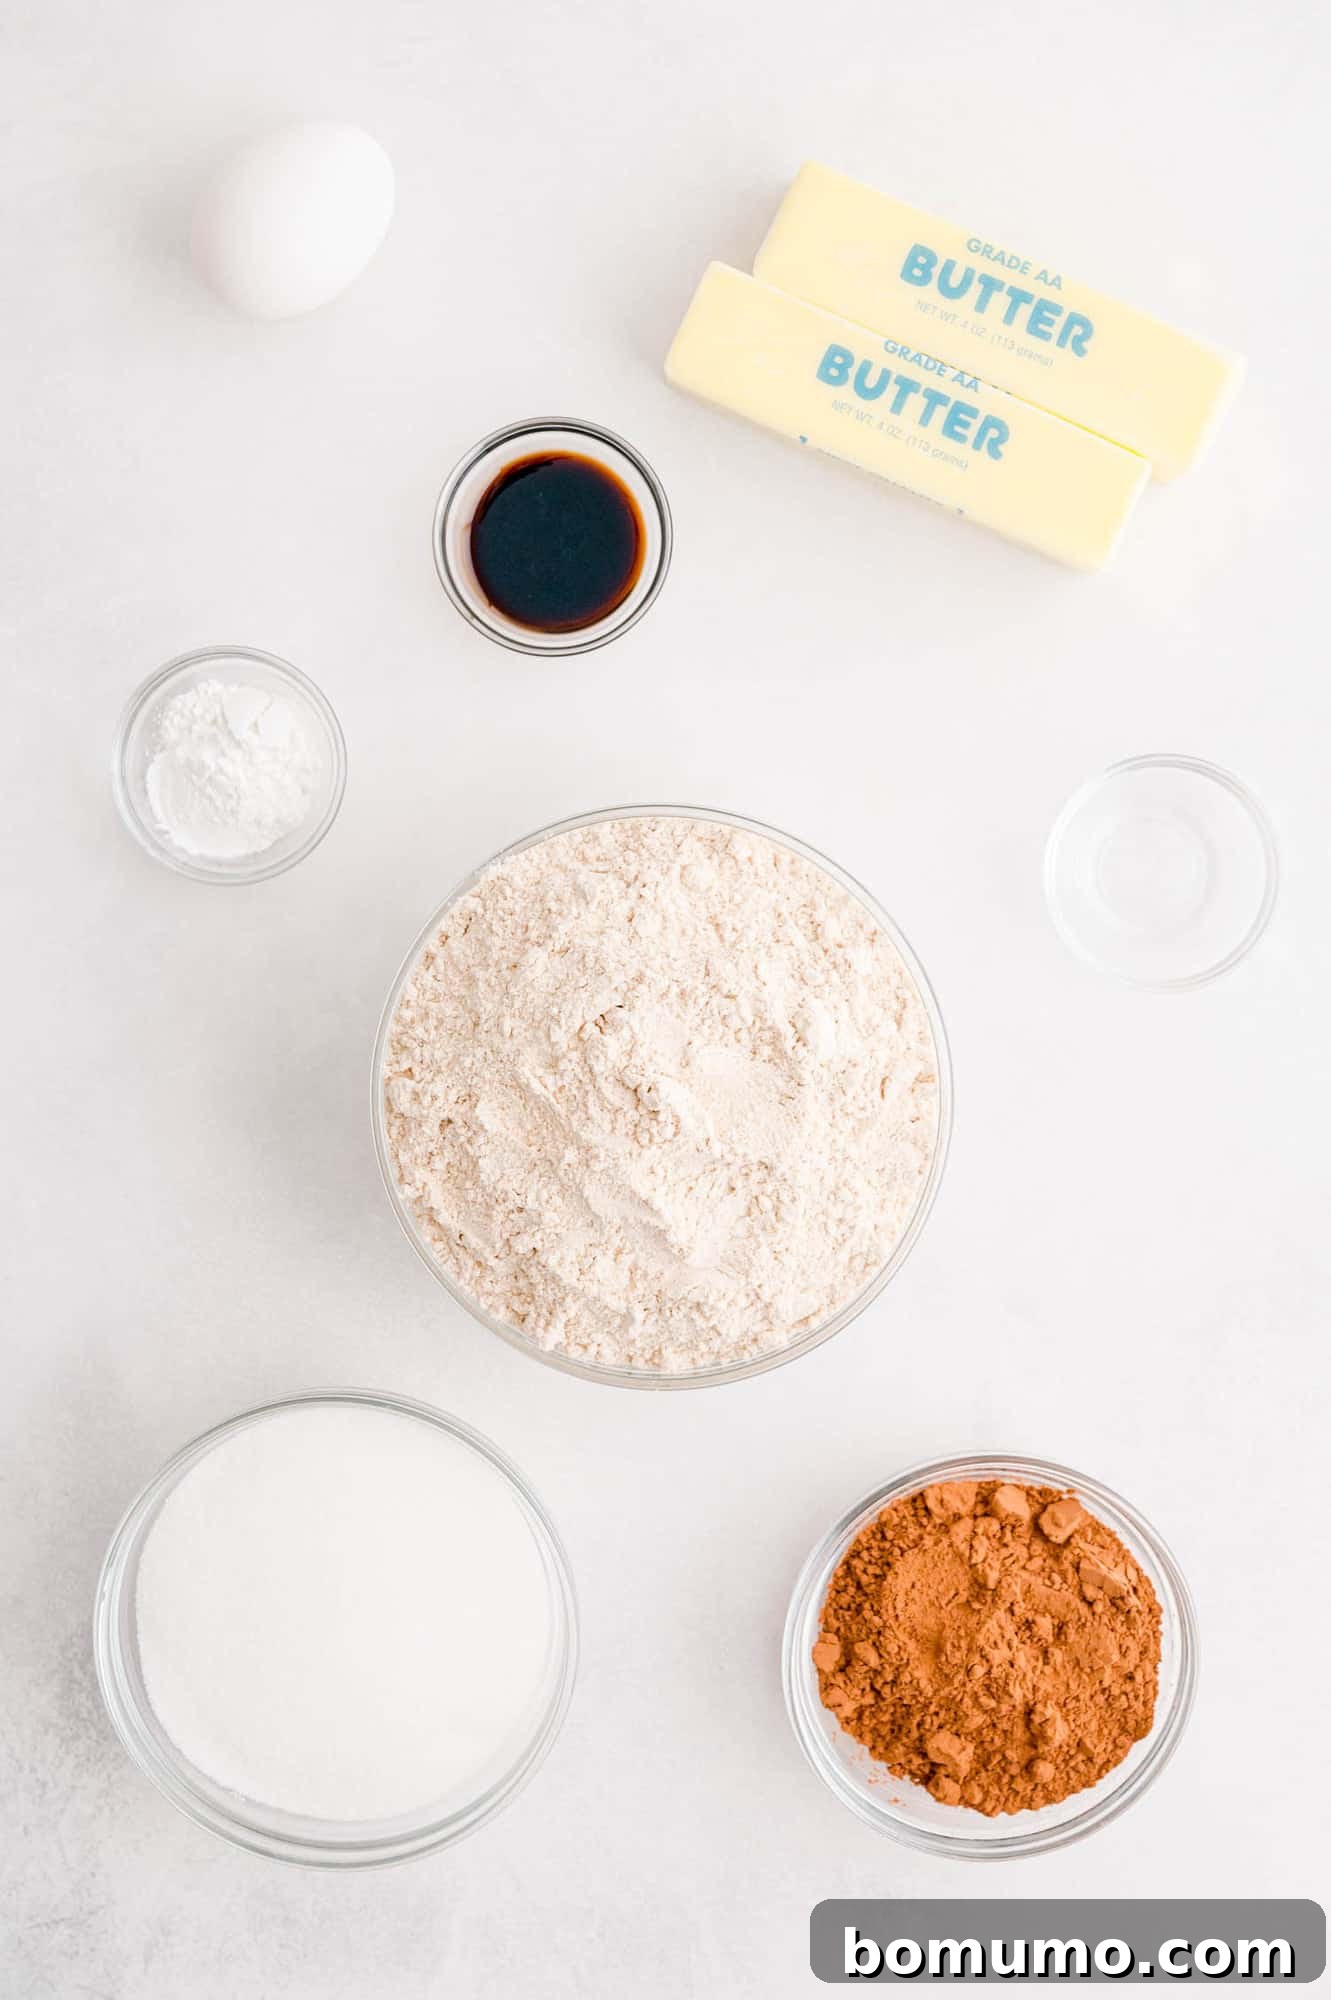
Crafting delicious cookies starts with understanding each ingredient’s role. Here’s a detailed look at what you’ll need to create these irresistible treats, along with some helpful tips for each component:
- Unsalted Butter: For baking, unsalted butter is always my preference as it gives you complete control over the salt content in your recipe. It’s crucial that your butter is properly softened to room temperature before you begin. This allows it to cream smoothly with the sugar, creating a light and airy base for your cookies. If you’re short on time and forgot to take it out, you can gently soften butter in the microwave. Use a very low power setting (around 10-20%) for short bursts (15-30 seconds) until it’s pliable but not melted. Over-softened or melted butter will result in greasy, flat cookies.
- Granulated White Sugar: Simple granulated sugar is all that’s required for both the cookie dough and for coating the cookies before baking. It provides essential sweetness, contributes to the cookie’s structure and helps create that desirable tender-crisp texture. Coating them in sugar also adds a beautiful, sparkling finish, especially appealing for holiday themes.
- Pure Vanilla Extract: A staple in most cookie recipes, pure vanilla extract enhances the overall flavor profile, adding warmth and depth that complements both the chocolate and peppermint. Always opt for pure vanilla for the best taste; imitation vanilla can leave an artificial aftertaste.
- Peppermint Extract: This is where the signature mint flavor comes from! Peppermint extract is incredibly potent, so a little goes a long way. Resist the urge to add more than the recipe specifies, as it can quickly become overwhelming and give your cookies a toothpaste-like flavor instead of a subtle, refreshing hint. Measure carefully with a clean measuring spoon.
- Large Egg: Just one large egg plays a vital role in binding the dough together, adding moisture, and helping to create a tender crumb structure. Ensure your egg is also at room temperature for better, smoother incorporation into the creamed butter and sugar mixture.
- Baking Powder: As a chemical leavening agent, baking powder ensures that your cookies aren’t overly dense or hard. It reacts with moisture and heat to create small air bubbles, helping them rise slightly and achieve that pleasant, tender sugar cookie texture without spreading too much on the baking sheet.
- All-Purpose Flour: This versatile flour provides the primary structure for your cookies. For a slightly different nutritional profile and subtle nutty flavor, you can substitute a portion or all of the all-purpose flour with white whole wheat flour. Just be aware that whole wheat flour can sometimes absorb more liquid, so the dough might be slightly stiffer and require a tiny bit more liquid if it feels too dry.
- Unsweetened Cocoa Powder: This is what gives our cookies their rich, dark chocolate color and intense flavor. Look for it in the baking aisle of your local grocery store. Beyond these cookies, cocoa powder is a fantastic ingredient for many desserts like ginger-spiced hot cocoa, decadent chocolate cake, fudgy brownies, and creamy chocolate cream cheese frosting. It’s also surprisingly high in antioxidants and contains no sugar, making it a wonderful ingredient to incorporate into treats like triple chocolate banana muffins that even your kids will love as a wholesome snack.
- Salt: A pinch of salt is essential to balance the sweetness and enhance all the other flavors in the cookie, particularly bringing out the rich notes of the chocolate. Don’t skip it, as it makes a noticeable difference in the final taste profile!
Essential Equipment for No-Chill Cookie Baking
Having the right tools at hand makes the baking process smoother, more efficient, and ultimately more enjoyable. Here’s a list of the essential equipment you’ll need to create these delightful peppermint chocolate sugar cookies:
- Mixing Bowl: A large, sturdy mixing bowl is essential for combining your wet and dry ingredients without spills or mess. Glass or stainless steel bowls work best.
- Electric Mixer: Whether you use a stand mixer with a paddle attachment or a good quality hand mixer, an electric mixer will make creaming the butter and sugar much easier and ensures a light, fluffy base for your dough. While you can mix by hand, an electric mixer saves time and effort.
- Rolling Pin: To achieve an even thickness for your cut-out cookies, a rolling pin is indispensable. Any standard rolling pin will do the job perfectly.
- Cookie Cutters: Unleash your creativity! While star-shaped cutters are classic for this recipe, especially for holidays, feel free to use any shapes you desire. Various sizes can also add visual interest to your cookie platter.
- Baking Sheets: You’ll need at least one, and ideally two, non-stick baking sheets or standard sheets lined with parchment paper. Having multiple sheets allows you to keep the baking process continuous.
- Parchment Paper: Lining your baking sheets with parchment paper is highly recommended. It prevents cookies from sticking, ensures more even baking by protecting the bottoms from direct heat, and makes cleanup incredibly easy.
- Oven: A properly calibrated and preheated oven is key to successful cookie baking. Ensure it reaches the specified temperature before placing your cookies inside.
- Spatula: A thin, flexible metal spatula is perfect for carefully transferring baked cookies from the hot sheet to a cooling rack without breaking them.
- Wire Cooling Rack: Essential for allowing cookies to cool completely. Air circulation underneath prevents condensation and keeps the cookie bottoms from becoming soggy.
- Measuring Cups and Spoons: Accurate measurements are crucial in baking. Have a set for dry ingredients and liquid measuring cups for wet ingredients.
Step-by-Step Guide to Making Chocolate Peppermint Cut-Out Cookies
Get ready to whip up a batch of these amazing no-chill cookies with ease! Follow these detailed steps for guaranteed success and a delightful baking experience:
1. Prepare Your Oven and Baking Sheets
Before you even begin mixing, take a moment to prepare your baking environment. Preheat your oven to 350°F (175°C). Since this is a no-chill dough, your cookies will be ready to bake quite quickly, and it’s essential to have your oven at the correct temperature to ensure even baking and prevent burnt bottoms. While the oven heats, line a couple of baking sheets with parchment paper; this simple step prevents sticking, aids in even baking, and makes clean-up remarkably easier.
2. Cream Wet Ingredients to Perfection
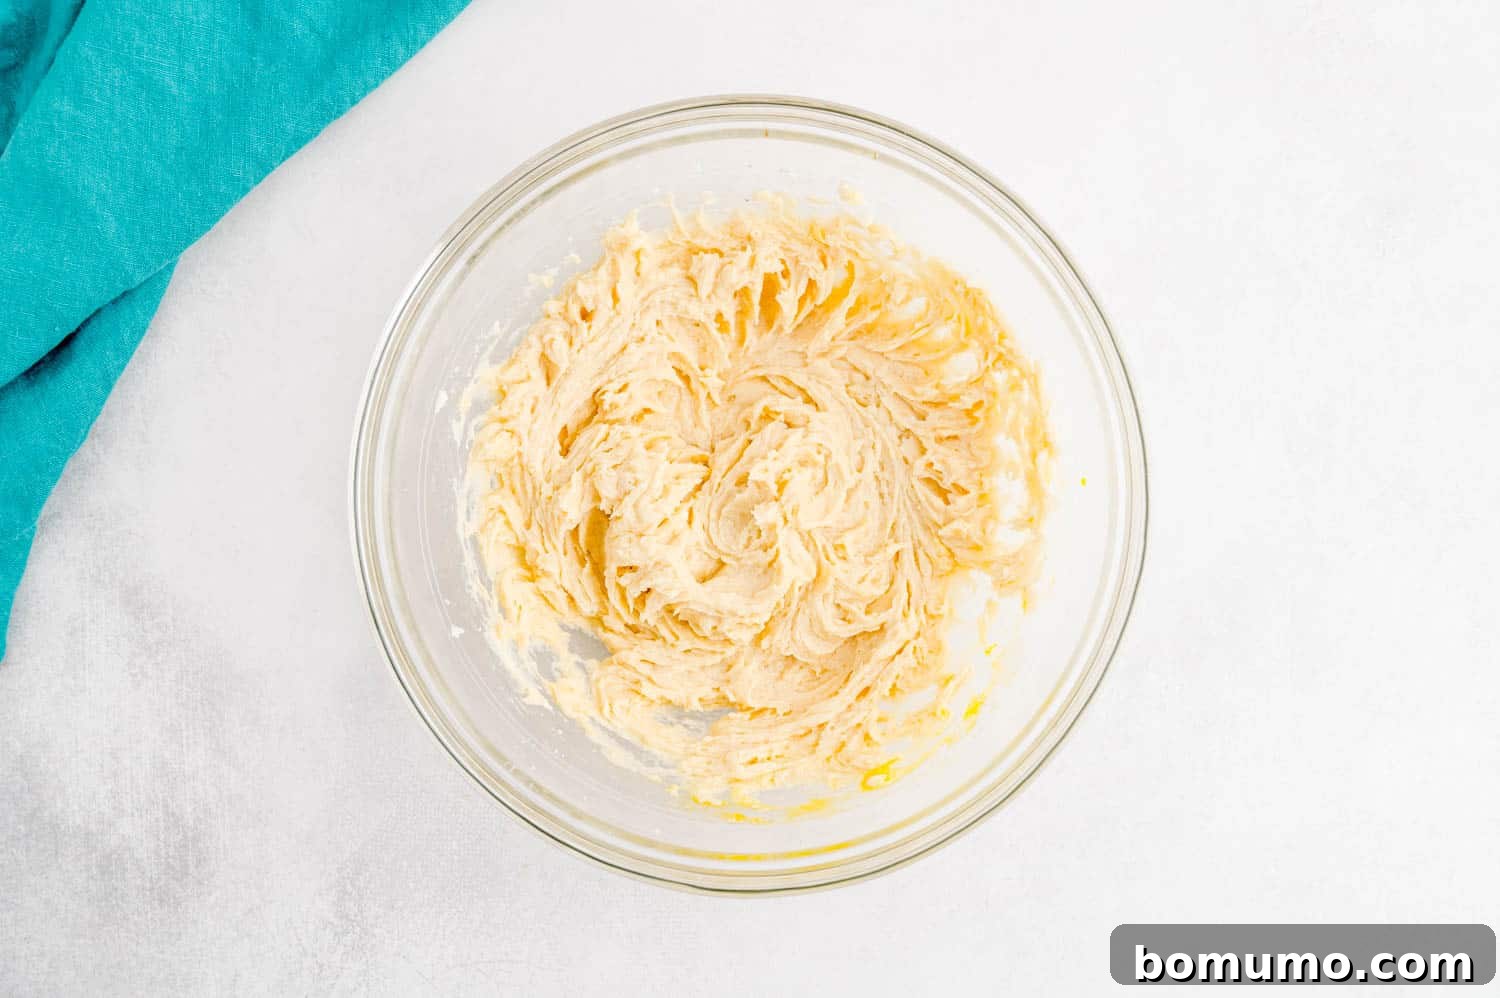
In a large mixing bowl, using either your stand mixer fitted with the paddle attachment or a good hand mixer, combine the softened unsalted butter and granulated sugar. Beat them together on medium speed until the mixture becomes wonderfully light and fluffy, typically taking about 2-3 minutes. This crucial creaming process incorporates air into the butter and sugar, which contributes significantly to the cookies’ tender texture. Next, add the large egg, pure vanilla extract, and the potent peppermint extract. Continue to beat until all ingredients are thoroughly combined and the mixture is smooth, making sure to scrape down the sides of the bowl as needed to ensure everything is fully incorporated.
3. Whisk Together the Dry Ingredients
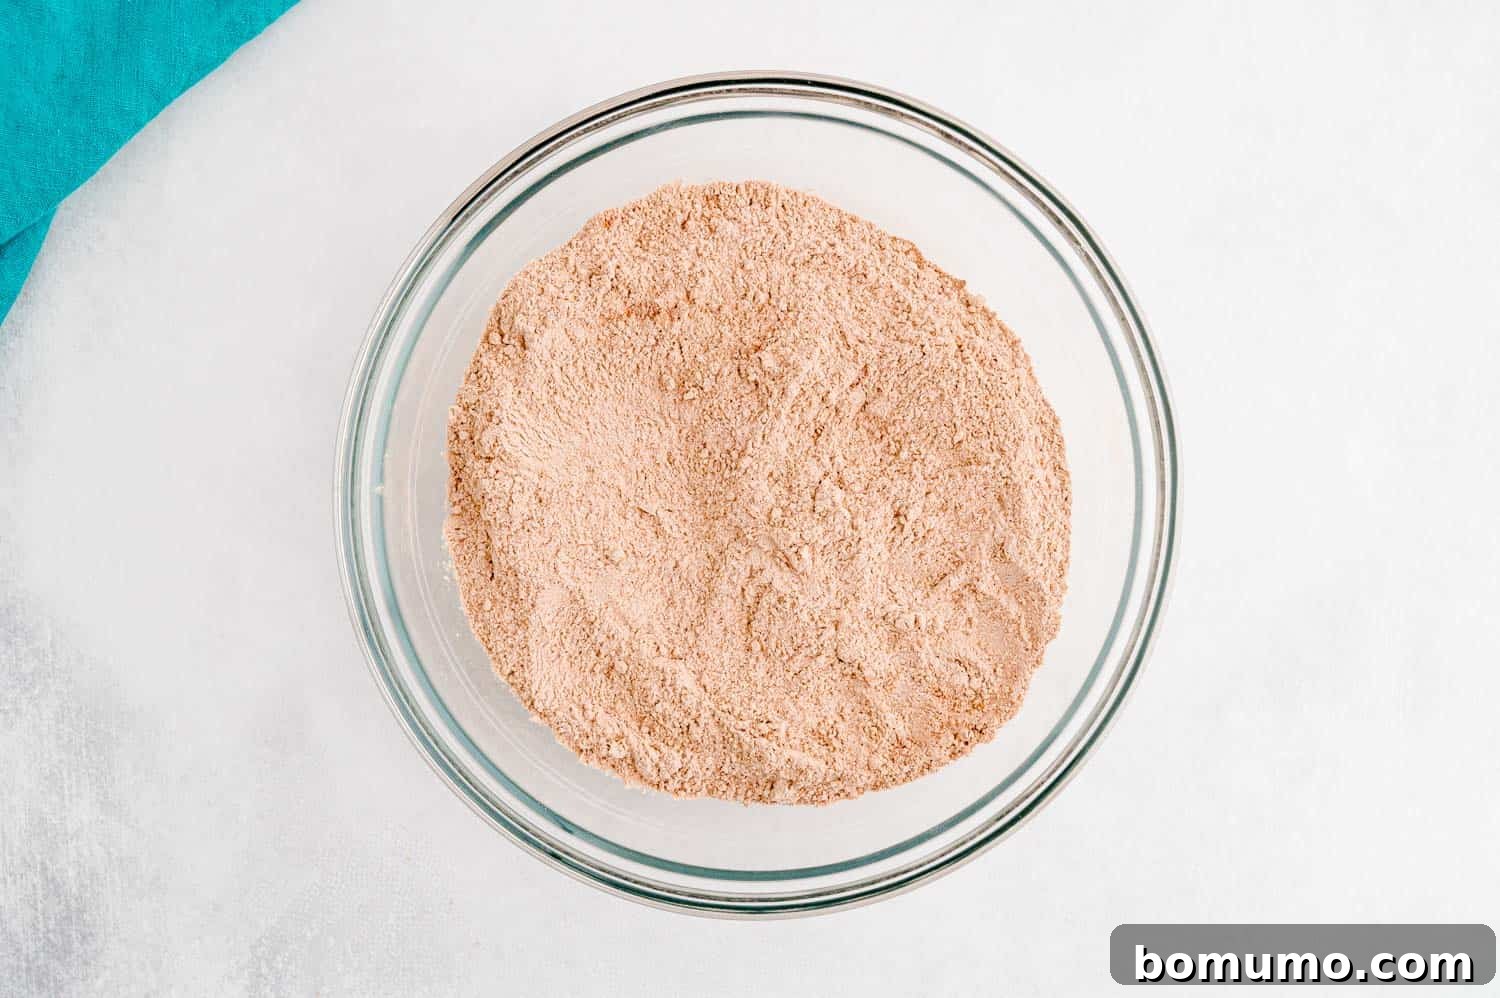
In a separate medium-sized bowl, combine the all-purpose flour, unsweetened cocoa powder, baking powder, and salt. Use a whisk to thoroughly mix these dry ingredients together. Whisking ensures they are evenly distributed, which is vital for the proper rise and texture of your cookies. If your cocoa powder has any noticeable dry or hard lumps, it’s a good idea to sift it before adding it to the flour mixture. This extra step guarantees a smooth dough texture and prevents pockets of unmixed cocoa in your final cookies.
Pro Tip: Measuring Flour Accurately
Accurate flour measurement is a secret weapon for perfect cookies. Always use a dry measuring cup (one without a pouring spout). Gently spoon the flour into the measuring cup until it overflows, then level it off with the flat side of a knife or a straight edge. Never scoop flour directly with the measuring cup from the bag, as this compacts the flour, leading you to inadvertently use too much. Excess flour can result in dry, crumbly, or dense cookies that lack the desired tender texture.
4. Form the Perfect Cookie Dough
With your mixer on low speed, gradually add the whisked dry ingredients to the creamed butter mixture. Mix until just combined, being careful not to overmix, as this can develop the gluten in the flour and lead to tough cookies. The dough may seem a bit dry and crumbly at first, but don’t worry – persevere! As you continue to mix, either with your mixer or by hand if it becomes too stiff for your machine, the dough will come together beautifully. It should reach a perfect, pliable consistency, much like soft Play-Doh, easy to handle and roll out without being sticky or overly crumbly.

5. Roll Out the Dough with a Chocolatey Dust
Scrape the dough out of the bowl and gently form it into a ball or a flattened disk. Instead of dusting your countertop and rolling pin with flour (which can leave unsightly white streaks on your dark chocolate cookies), use unsweetened cocoa powder. This keeps your cookies looking pristine and beautifully dark, enhancing their rich appearance. If you’re concerned about staining your countertop with cocoa, simply place a large sheet of parchment paper down first before dusting with cocoa powder.
Roll the dough out evenly. For softer, chewier cookies that have a melt-in-your-mouth quality, aim for a thickness of about one-quarter inch. If you prefer a crispier cookie with a satisfying snap, roll it more thinly, around one-eighth inch. Ensure even thickness across the dough for uniform baking. If the dough starts to stick while rolling, sprinkle a little more cocoa powder on the surface and on your rolling pin as needed.

6. Cut Out Your Favorite Shapes
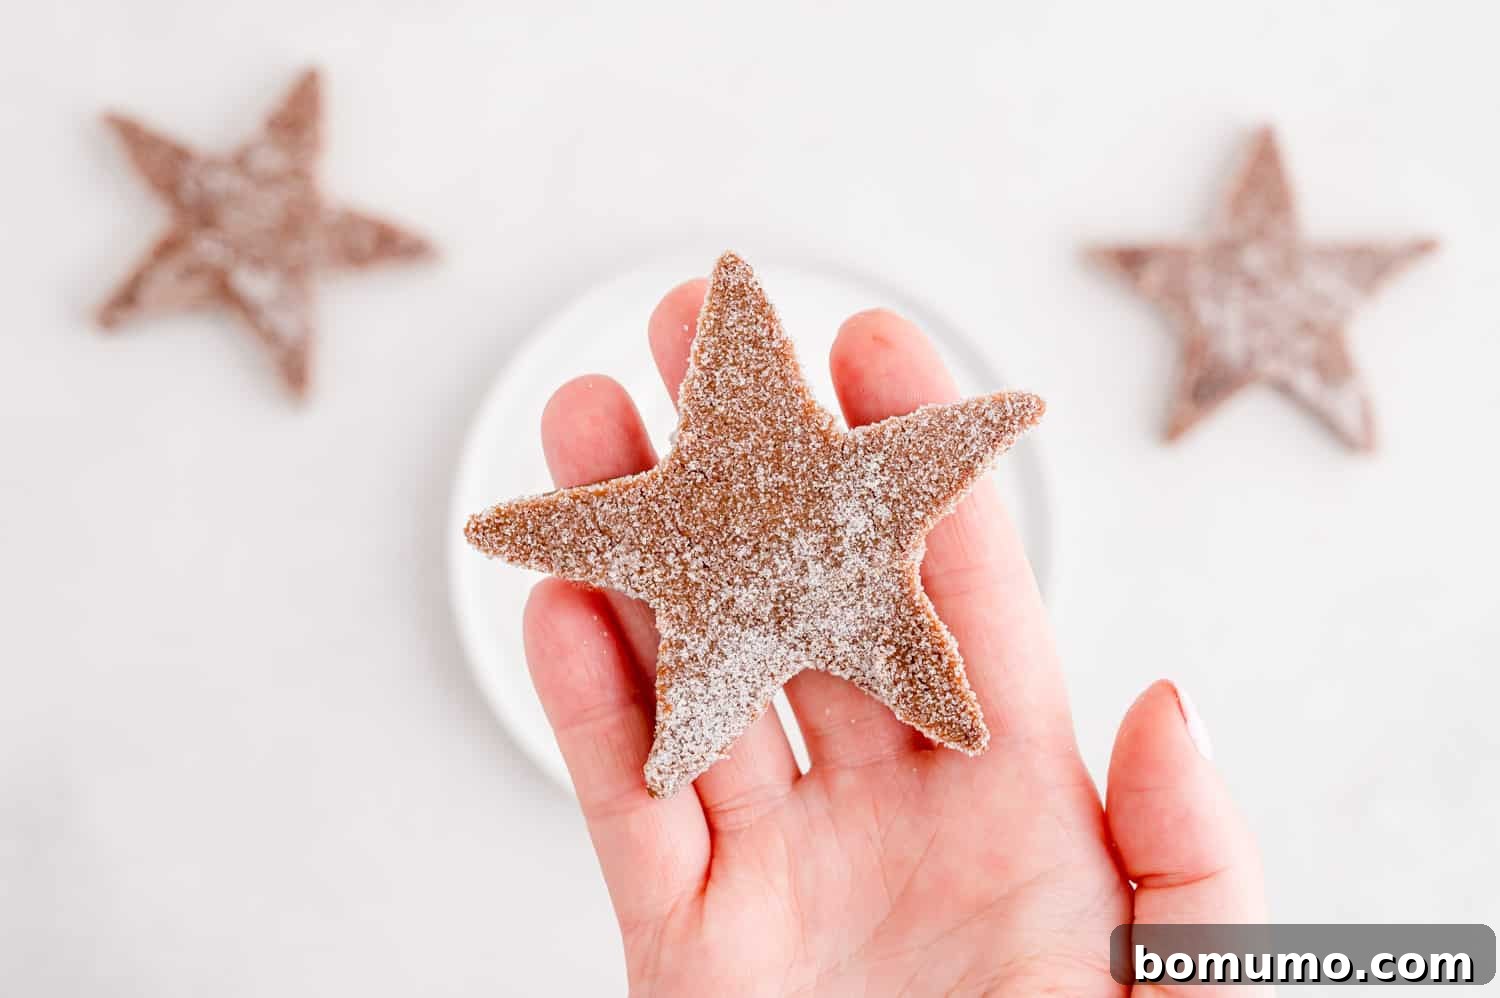
Now for the fun part that truly makes these cookies special! Use your chosen cookie cutters to cut out as many shapes as possible from the rolled dough. Star shapes are particularly charming and festive for these peppermint chocolate cookies, but feel free to use any design you love – from simple rounds using a biscuit cutter to more intricate holiday figures like snowflakes or gingerbread men. Maximize your yield by arranging the cutters closely. Don’t forget to gather the dough scraps, gently re-roll them, and cut out more cookies until all the dough is used. This ensures no delicious dough goes to waste!
If you’re not planning on decorating your baked cookies with icing or chocolate drizzle, consider an optional step: dipping them in granulated sugar before baking. This adds a lovely sparkle and a touch of extra sweetness and crunch to the finished product, making them appealing even without frosting.
7. Arrange on Baking Sheets
Carefully transfer your cut-out cookies to the prepared baking sheets. Because this dough is specifically designed not to spread excessively in the oven, you can place the cookies fairly close together on the sheet. However, ensure there’s still a small space between them – ideally about half an inch – so their sides are not touching. This allows for proper air circulation around each cookie, promoting even baking and preventing them from merging into one another. Efficiently fill your baking sheets to get the most cookies baked in each batch.
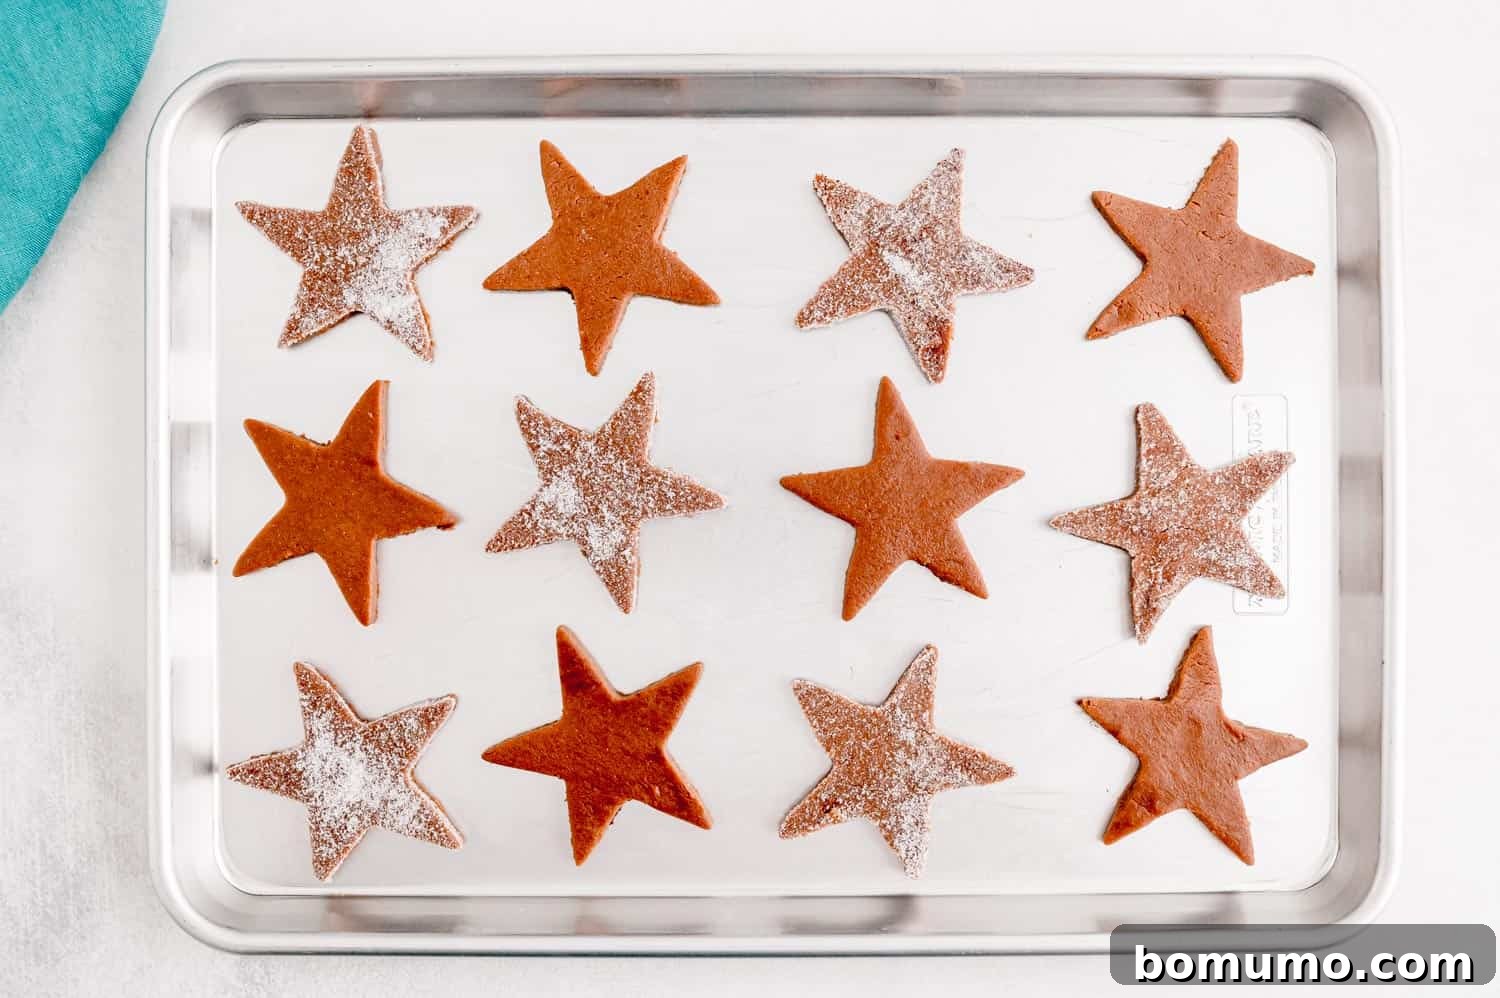
8. Bake Until Perfectly Done
Bake the cookies in your preheated oven for approximately 7 to 9 minutes. The exact baking time can vary depending on your oven’s calibration and the thickness and size of your cookies. Since these are dark chocolate cookies, it can be a little tricky to determine doneness by color alone, as they won’t turn golden brown. Instead, look for cues like the edges appearing set and the center feeling fairly firm to the touch when gently pressed. If you’re unsure, baking them for an extra minute or two will make them a bit crispier. For a softer cookie, remove them closer to the 7-minute mark. Avoid overbaking, which can lead to dry, crumbly cookies. Trust your senses more than the clock alone!
9. Cool and Prepare for Decorating
Once baked, allow the cookies to cool on the baking sheet for a few minutes – typically 2 to 3 minutes. This initial cooling period allows them to set fully and become firm enough to handle without breaking. Then, using a thin spatula, carefully transfer them to a wire cooling rack to cool completely. It’s essential that the cookies are entirely cool before you attempt to frost or decorate them; otherwise, your delicious toppings will melt, smudge, and slide right off, creating a messy rather than a magnificent result.
10. Decorating Your Peppermint Chocolate Masterpieces
These peppermint chocolate cut-out cookies are absolutely beautiful on their own, but decorating adds an extra layer of festive charm and flavor! You can keep it simple yet elegant with a delicate drizzle of melted white chocolate or a smooth, homemade white icing. For an added festive crunch and burst of mint, sprinkle them with finely crushed peppermint candies or colorful sanding sugar while the drizzle is still wet. Don’t feel obligated to decorate every single one – some look just as delightful left plain, resembling mini star-shaped brownies, and are absolutely heavenly served alongside a scoop of creamy vanilla ice cream or a warm cup of milk. The possibilities for creative expression are endless!
You’ll truly enjoy the simplicity and consistent success of these cookies. The dough rolls out effortlessly, and the resulting cookies are always a hit, holding their shape and delivering on flavor. I can’t wait for you to experience the joy of baking and tasting them!

Delicious Recipe Variations to Try
While the classic peppermint chocolate sugar cookie is an absolute winner, these variations offer exciting new flavor profiles to explore, perfect for any occasion or to simply cater to different preferences:
- For Crispier Cookies: If you love a satisfying crunch with your cookies, achieving this is simple! You can either roll your dough out a bit thinner than recommended, aiming for approximately one-eighth of an inch, or bake the cookies for an extra minute or two beyond the recommended time. Remember to keep a close eye on them during the extended baking to prevent any burning, especially with dark chocolate cookies.
- Mexican Hot Chocolate Cookies: Transport your taste buds to a cozy, spiced paradise! To make this delightful variation, omit the peppermint extract entirely. Instead, increase the pure vanilla extract to 1 ½ teaspoons to deepen its warm notes, and add 1 ½ teaspoons of ground cinnamon to your dry flour mixture. The fragrant spices will create a rich, inviting flavor reminiscent of authentic Mexican hot chocolate.
- Ultimate Dark Chocolate Cookies: For the purist chocolate lover who craves an intense cocoa experience, this variation is a dream. Skip the peppermint extract. Boost the pure vanilla extract to 1 ½ teaspoons to enhance the deep, complex chocolate notes. Once baked and cooled, elevate these cookies further by drizzling them generously with melted dark or semi-sweet chocolate chips and sprinkling them with chocolate jimmies or finely grated chocolate shavings for an extra layer of chocolatey indulgence.
- No Cookie Cutters? No Problem!: If you don’t have cookie cutters on hand, or simply prefer a drop cookie for ease, you can still enjoy these delicious flavors! Consider making chocolate peppermint kiss cookies, which are a festive and simple alternative that require no rolling or cutting. Or, explore making peppermint-flavored Lofthouse-style sugar cookies for a distinctively soft, cake-like texture with creamy frosting, offering a different but equally delightful experience.

Prepare Ahead for Stress-Free Baking
One of the best ways to enjoy holiday baking without the rush is to prepare components in advance. These peppermint chocolate sugar cookies are wonderfully adaptable for make-ahead convenience, allowing you to enjoy fresh cookies with minimal last-minute effort:
- Prepare the Dough Ahead: Even though this dough doesn’t technically require chilling before rolling, you absolutely can make it a day or two in advance to fit your schedule. Once your dough is mixed, form it into a cohesive ball or a flattened disk. Wrap it tightly in plastic wrap, ensuring no air can get to it, and then place it in an airtight container or a large freezer bag. Store it in the refrigerator for up to two days. When you’re ready to bake, take the dough out of the fridge at least 30 minutes to an hour before you plan to roll it out. This allows it to soften slightly and become more pliable and easier to work with.
- Freeze the Dough for Longer Storage: For extended planning or to have a batch of dough ready for future cravings, this dough freezes beautifully for up to one month. After mixing, shape the dough into a flat disk (this makes thawing quicker), wrap it thoroughly in multiple layers of plastic wrap, then add an additional layer of heavy-duty aluminum foil to prevent freezer burn. Finally, place it in a heavy-duty freezer bag, expelling as much air as possible. Label with the date. When you’re ready to bake, transfer the frozen dough to the refrigerator to thaw overnight. Once thawed, let it sit at room temperature for at least 30 minutes before rolling it out and cutting your festive shapes.
Keeping Your Cookies Fresh: Storage Solutions
To ensure your delicious peppermint chocolate sugar cookies remain fresh, tender, and enjoyable for as long as possible, proper storage is key. Here are some tips for storing your baked creations:
- Storing Baked Cookies at Room Temperature: Once your cookies have completely cooled and any frosting or drizzle has fully set and hardened, stack them carefully in an airtight container. Placing sheets of wax paper or parchment paper between layers will help prevent them from sticking together and also protect any delicate decorations. Stored this way at room temperature, away from direct sunlight and heat, they will remain wonderfully fresh for up to a week. For best results, avoid storing decorated and undecorated cookies in the same container unless the decorations are fully dry.
- Freezing Baked Cookies for Longer Preservation: For longer storage, baked cookies can be frozen for up to one month. To freeze effectively, first place the completely cooled, undecorated cookies in a single layer on a baking sheet and freeze until they are firm (this step, known as flash-freezing, prevents them from sticking together once combined). Once firm, transfer them to an airtight freezer-safe container or a heavy-duty freezer bag, again separating layers with wax paper or parchment paper. Thaw them at room temperature when you’re ready to enjoy them. If you plan to decorate them, it’s often best to freeze them plain and then decorate them after they have thawed completely, as some frostings or drizzles may not fare as well during the freezing and thawing process.
Sharing the Joy: Ideas for “Leftover” Cookies
While the concept of “leftover cookies” might seem like an urban legend when these delicious treats are around, it’s always wonderful to spread a little happiness! If you find yourself with an abundance of these delightful peppermint chocolate sugar cookies, consider sharing them and brightening someone’s day:
- Brighten Your Neighborhood: Package a small plate of cookies for a neighbor, a busy family member, or a friend who could use a sweet surprise. A thoughtful gesture can go a long way in building community spirit.
- Community Kindness: Share a batch with your local senior community center, a fire station, a police department, or even a local hospital staff. These small acts of kindness are always deeply appreciated by those who serve our communities.
- Thank Essential Workers: Leave a plate with an appreciative note for your hardworking delivery drivers, postal workers, or garbage collectors. A sweet treat is a wonderful and unexpected way to show gratitude for their tireless efforts, especially during busy seasons.
One thing is for sure: a plate of homemade cookies, especially ones as charming and delicious as these peppermint chocolate sugar cookies, is almost guaranteed to bring a genuine smile to anyone’s face!
Discover More Festive Cookie Recipes
Brigadeiros (Brazilian Fudge Balls)
Sand Tart Cookies (Slice & Bake Buttery Sugar Cookies)
Easy Christmas Tree Rice Krispie Treats
Lofthouse Cookies – flavor & frosting options!
Peppermint Chocolate Sugar Cookies
Rachel Gurk
15
7
22
30

Pin Recipe
Print Recipe
Peppermint chocolate sugar cookies are a fun take on the traditional sugar cookie – perfect for the chocolate lover!
Ingredients
- 1 cup unsalted butter, softened (2 sticks)
- 1 cup granulated white sugar
- 1 teaspoon pure vanilla extract
- ½ teaspoon peppermint extract
- 1 large egg
- 2 teaspoons baking powder
- ½ teaspoon salt
- 2 ¾ cups all-purpose flour (or white whole wheat flour)
- ½ cup cocoa powder, plus extra for rolling out cookies
Instructions
-
Preheat oven to 350°F (175°C). Line baking sheets with parchment paper.
-
In a large bowl, cream together butter and sugar until light and fluffy. Beat in vanilla extract, peppermint extract, and egg until well combined.
-
In a separate bowl, whisk together baking powder, salt, flour, and cocoa powder. Gradually add the dry ingredients to the wet mixture, mixing on low speed until a dough forms. The dough will be stiff; mix by hand if necessary to fully incorporate the flour.
-
Dust your countertop and rolling pin with cocoa powder. Roll out the cookie dough to approximately ¼-inch thickness for soft cookies, or ⅛-inch for crispier ones. Use your favorite cookie cutters to cut out shapes. Re-roll any scraps to use all the dough.
-
If not frosting, dip cookies in granulated sugar for a sparkling finish before baking.
-
Place cookies on the prepared baking sheets, allowing a small space between them as they will not spread significantly.
-
Bake for 7 to 9 minutes, or until the edges are set and the centers are firm to the touch. Let cool on the baking sheet for 2-3 minutes before transferring to a wire rack to cool completely. Decorate once fully cooled.
Notes
- Yield: This recipe yields approximately 60 small star cookies. Serving size: 2 cookies. The actual yield will vary based on the size of your cookie cutters and the thickness of your rolled dough.
- Storage: Baked cookies can be stored in an airtight container at room temperature for up to a week. For longer preservation, they can be frozen for up to one month. Refer to the “Make-Ahead Ideas” and “Storage Tips” sections for detailed instructions on preparing and storing dough and baked cookies.
- To Decorate: For a festive touch, drizzle cooled cookies with melted white chocolate or a simple white icing, then immediately sprinkle with crushed peppermint candies or colored sugar.
- Crispier Cookies: For a delightful crunch, roll the dough more thinly (about ⅛-inch) and/or bake for an additional minute or two.
- Mexican Hot Chocolate Variation: Omit the peppermint extract. Increase pure vanilla extract to 1 ½ teaspoons and add 1 ½ teaspoons of ground cinnamon to the dry flour mixture.
- Dark Chocolate Cookie Variation: Exclude the peppermint extract and increase the vanilla extract to 1 ½ teaspoons. After baking and cooling, drizzle with melted chocolate chips and adorn with chocolate jimmies for an intense chocolate experience.
Video Tutorial
Nutrition Information
Serving: 2cookies
,
Calories: 123kcal
,
Carbohydrates: 15g
,
Protein: 2g
,
Fat: 7g
,
Saturated Fat: 4g
,
Polyunsaturated Fat: 1g
,
Monounsaturated Fat: 2g
,
Trans Fat: 1g
,
Cholesterol: 22mg
,
Sodium: 70mg
,
Potassium: 38mg
,
Fiber: 2g
,
Sugar: 7g
,
Vitamin A: 197IU
,
Calcium: 28mg
,
Iron: 1mg
Please note: Nutrition information is automatically calculated and should be considered an approximation.
Did You Bake These Cookies?
Share your thoughts and a rating below! I’d love to hear how they turned out for you!