
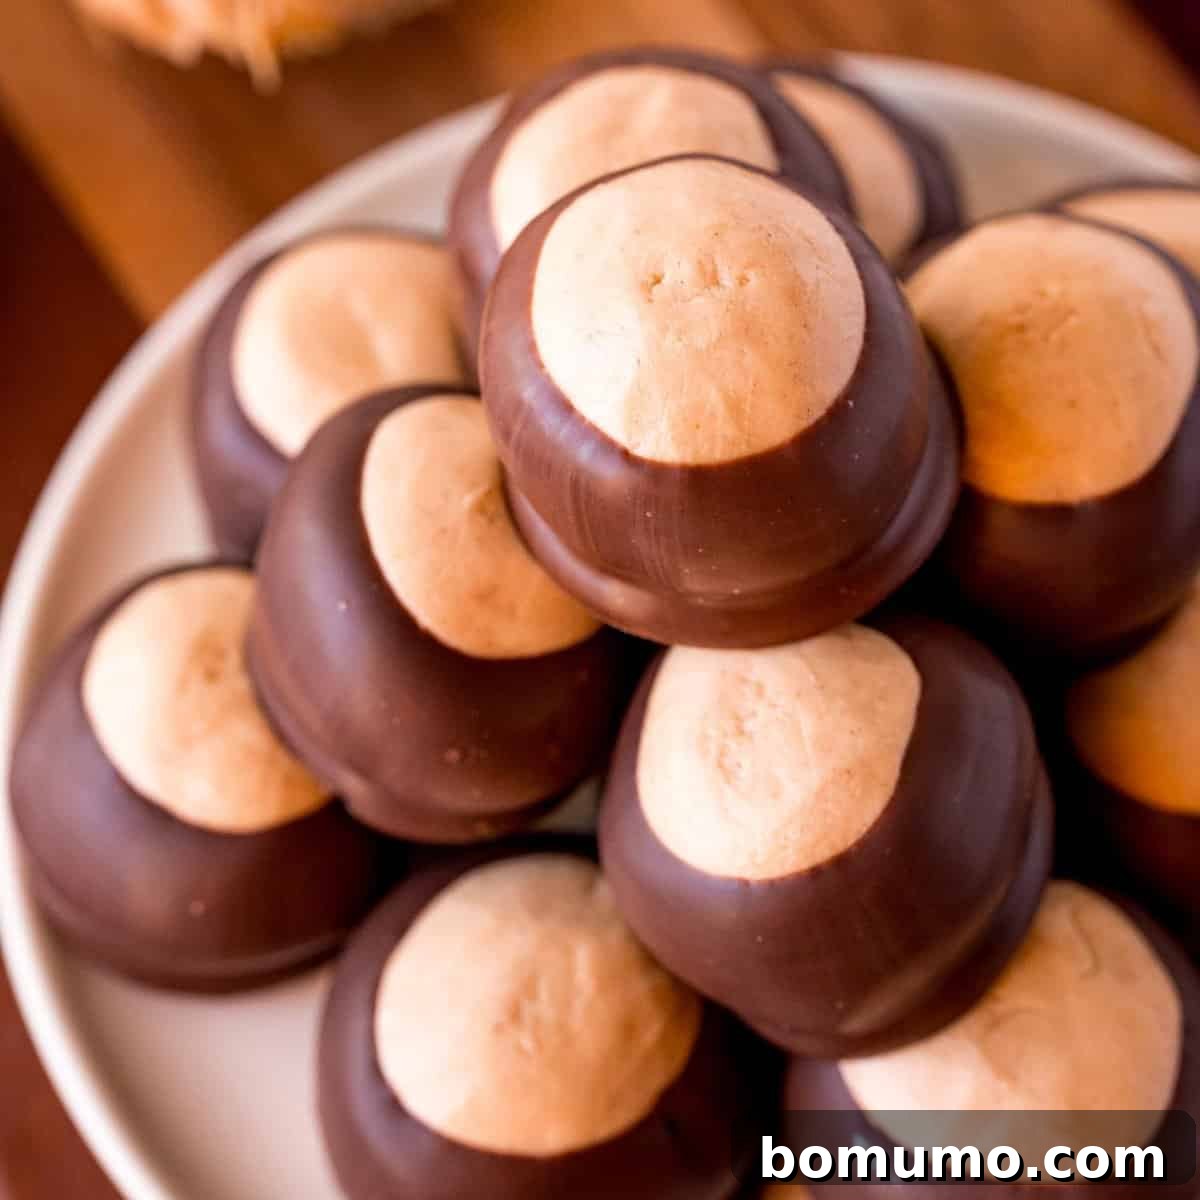
Recipe Overview: Crafting Irresistible Buckeye Candies
Why You’ll Adore This Recipe: Get ready to discover your new favorite sweet treat! It’s rare to find someone who can resist the delightful charm of these no-bake Buckeye candies. Each bite delivers a rich, creamy explosion of peanut butter, perfectly contrasted by a luscious chocolate coating. If you’re a devoted fan of the classic Reese’s Peanut Butter Cup, then these homemade Buckeyes are destined to capture your heart and palate. They are simply that good – an irresistible blend of flavors and textures.
Effort & Time Commitment: Creating a batch of these iconic confections is surprisingly straightforward. You’ll spend approximately 30 minutes on active preparation, involving mixing and shaping. Following this, a crucial hour of chilling time is required to ensure the peanut butter balls firm up perfectly, making them easy to dip and giving them their signature melt-in-your-mouth texture. This minimal hands-on time makes Buckeyes an ideal project for both seasoned and novice home confectioners.
Essential Equipment You’ll Need: You won’t need a pantry full of specialized tools for this recipe. Gather a sturdy mixing bowl, an electric mixer (either a handheld or stand mixer will work efficiently), a reliable cookie sheet or flat tray to facilitate the chilling process, and a handful of simple toothpicks for effortless dipping. These basic kitchen essentials are all it takes to bring these delicious treats to life.
Generous Yield: This recipe is designed to produce a substantial batch, yielding approximately 42 individual Buckeye candies. This makes them perfect for sharing at holiday gatherings, gifting to friends and family, or simply ensuring you have plenty of delightful treats on hand to satisfy your sweet cravings over several days.
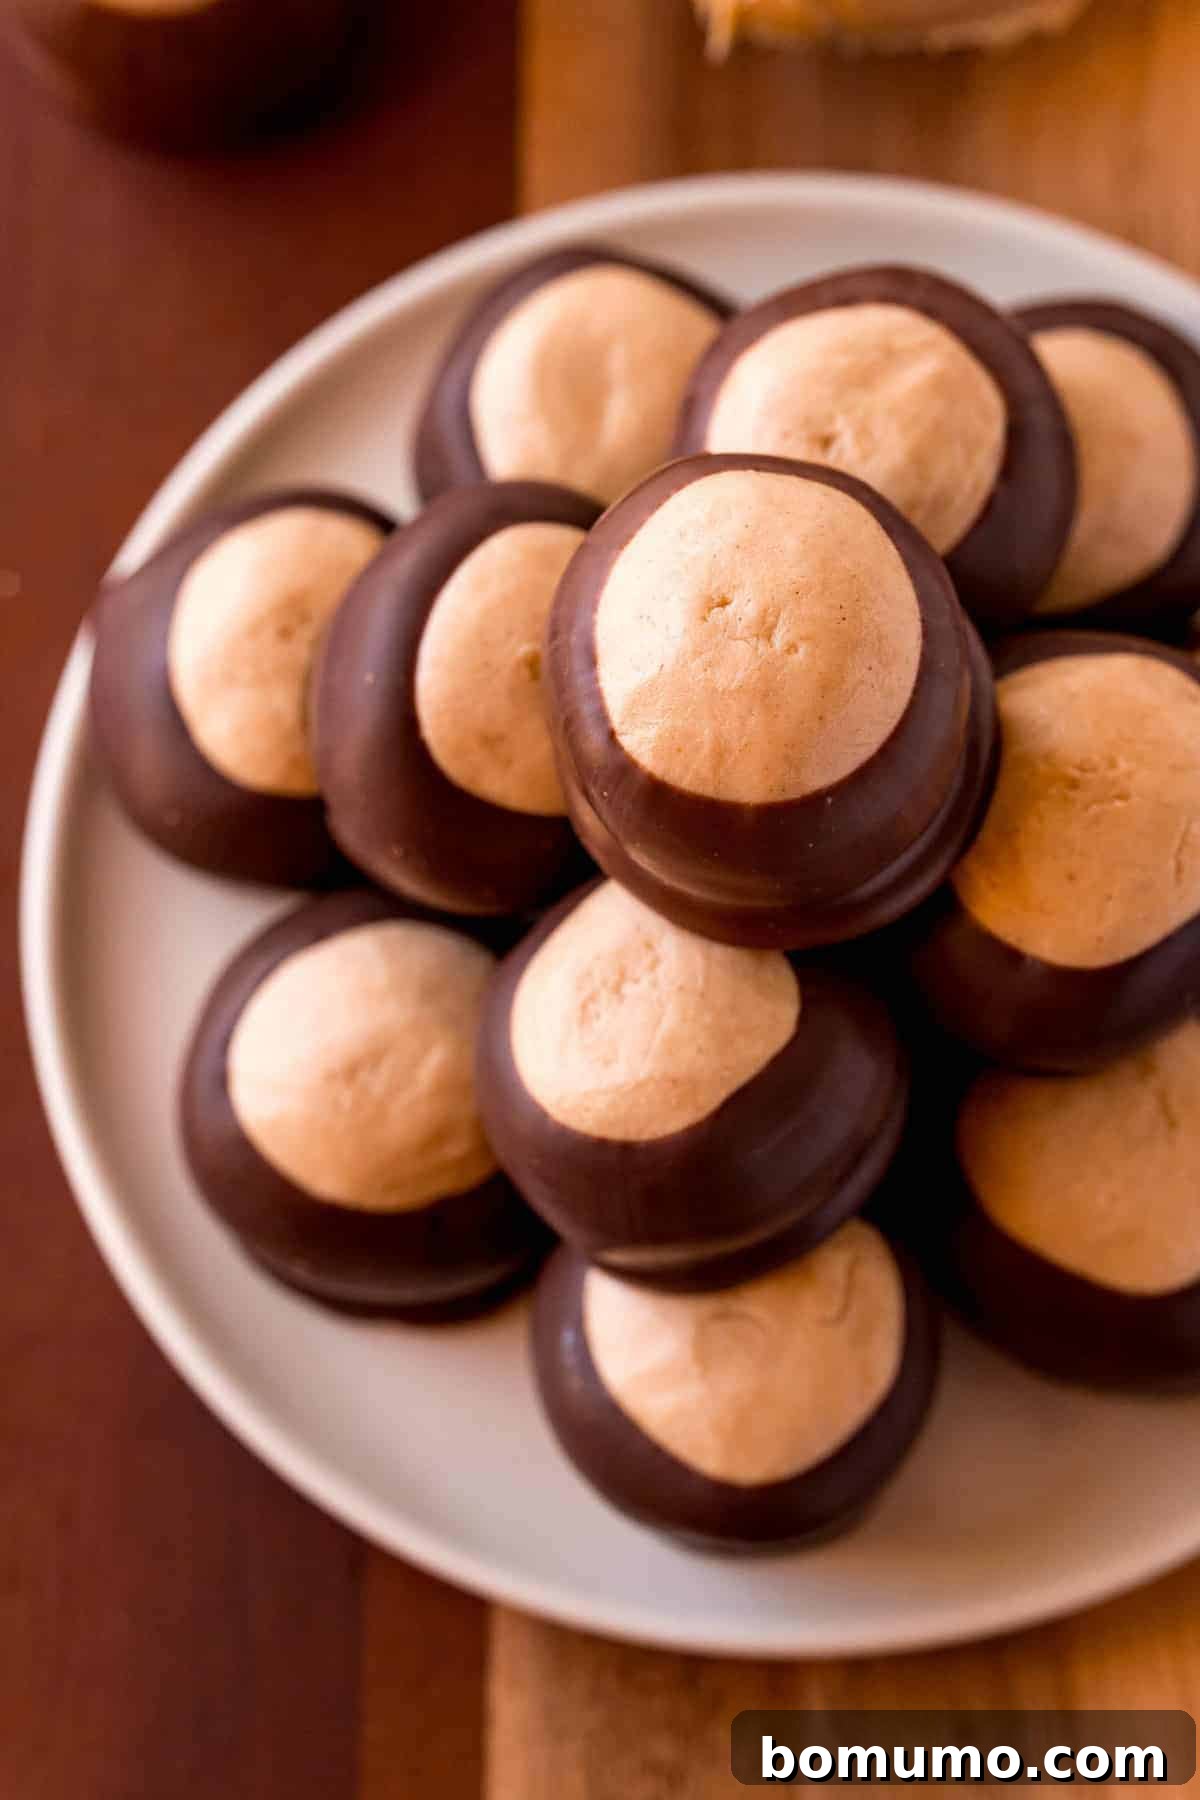
Homemade Buckeye Candies: The Ultimate Peanut Butter and Chocolate Perfection
Is there a more iconic and beloved flavor combination than peanut butter and chocolate? For countless dessert enthusiasts, this duo reigns supreme, an undeniable match made in culinary heaven. If your heart races at the thought of a creamy, rich Reese’s Peanut Butter Cup, then you instinctively grasp the magic embedded within every bite of a homemade Buckeye candy. These simple, yet profoundly satisfying, treats perfectly capture that legendary pairing, offering a delightful experience that often surpasses their store-bought counterparts.
The universal appeal of peanut butter-based desserts is evident in many home kitchens. Throughout the years, my own recipe collection has celebrated this versatile ingredient, yielding popular delights such as no-bake peanut butter bars (reminiscent of Reese’s), a decadent chocolate peanut butter pie (another effortless no-bake sensation), and even a luscious peanut butter hot fudge sauce. While circumstances within my family shifted due to severe nut allergies in my children, leading to a pause in these specific creations, the joy and delicious memories they represent remain vibrant. It underscores how certain flavor profiles become treasured staples, deeply woven into our culinary traditions.
Beyond their sensational taste, Buckeye candies are a visual delight, making them an excellent choice for any festive occasion. Their distinctive appearance, with a dark chocolate base and a peek of golden peanut butter, makes them instantly recognizable. They shine beautifully on a Christmas cookie plate, adding a touch of rustic elegance to your holiday spread. However, be prepared for them to disappear at an alarming rate! These sweet morsels have a legendary ability to vanish in the blink of an eye (yes, the pun is absolutely intended and well-deserved!). If you’re seeking more inspiration for your holiday baking, be sure to explore our extensive collection of 30+ Christmas Cookie Recipes for more delightful ideas.
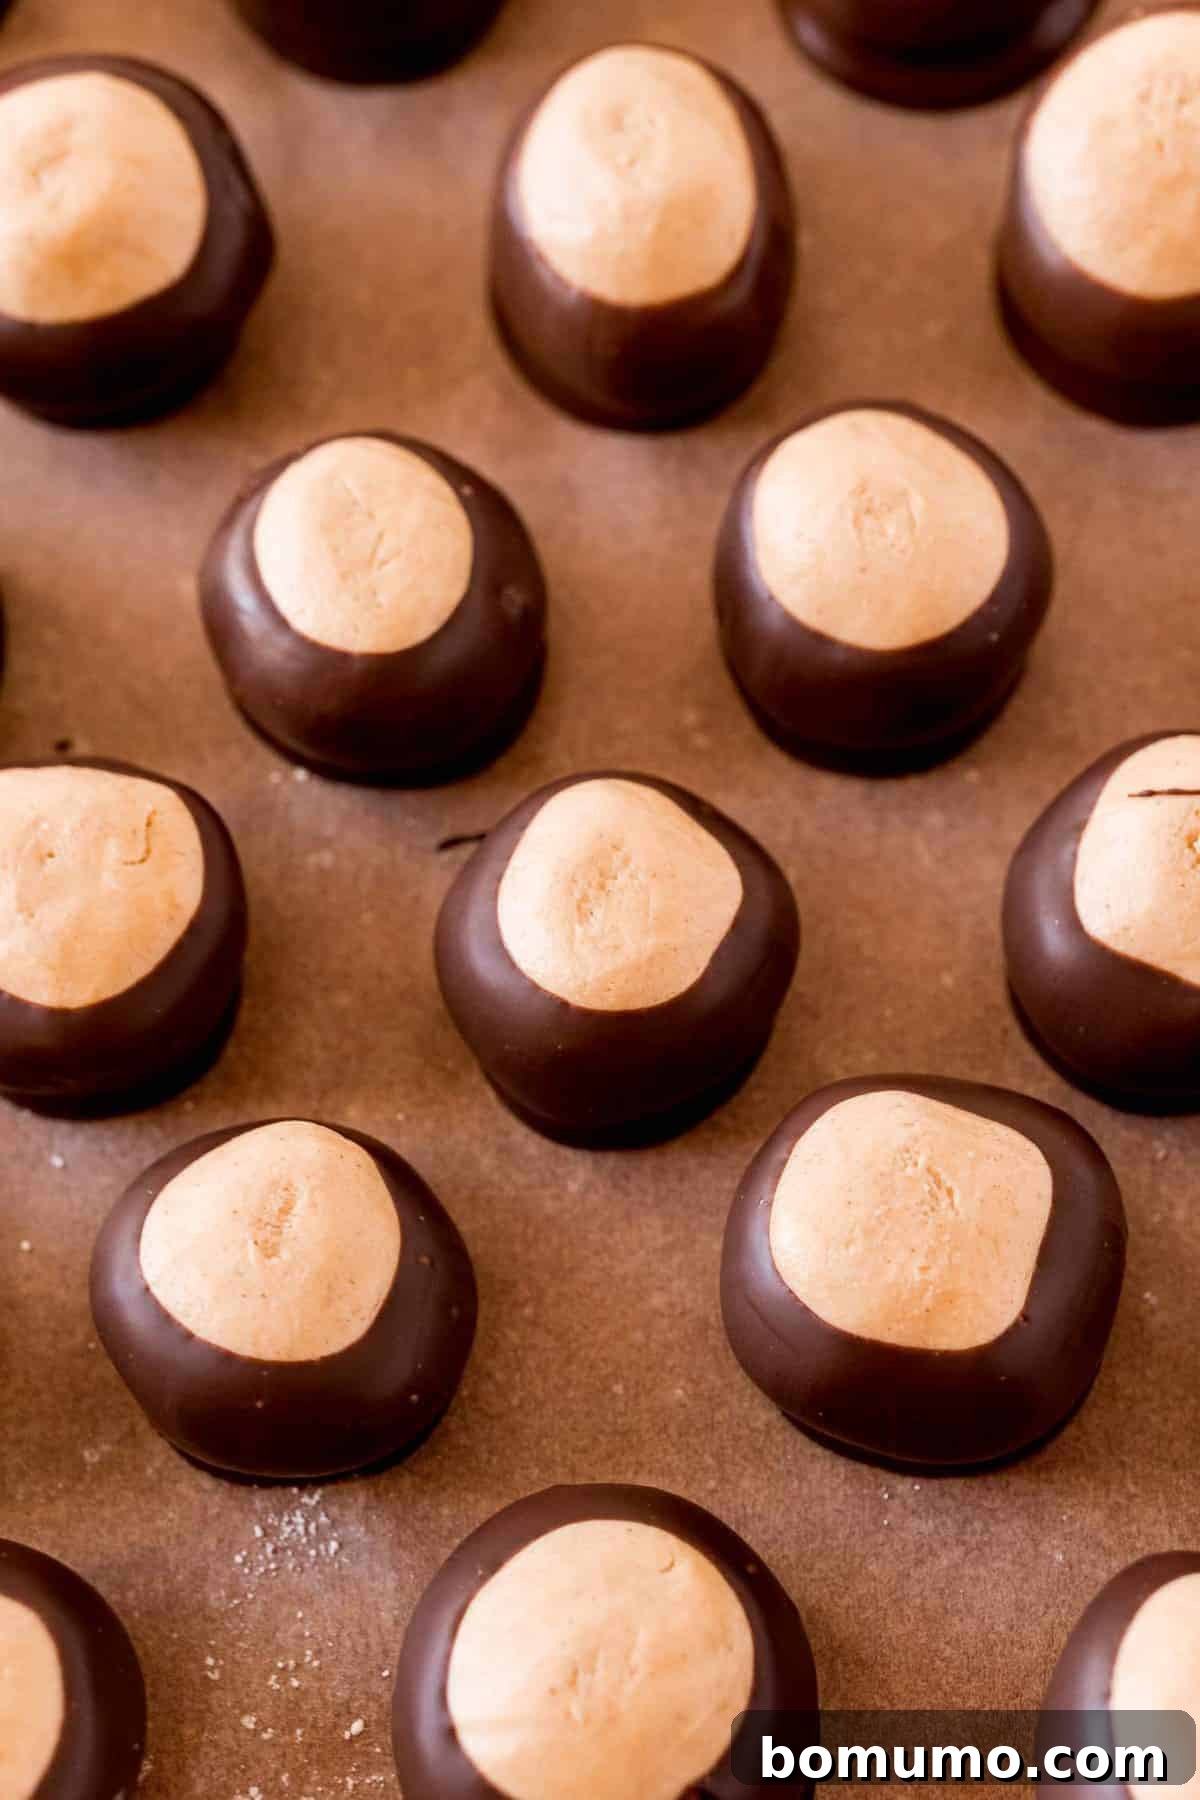
One of the most appealing features of Buckeye candies is their remarkable ease of preparation. As a beloved no-bake treat, they eliminate the need for an oven, making them accessible to even the most inexperienced bakers and a fantastic option for warmer months. This straightforward process also creates a wonderful opportunity for a fun, shared family experience. Gather your loved ones to assist with rolling the creamy peanut butter mixture into perfectly round spheres and carefully dipping them into the melted chocolate. The collaborative effort culminates in a truly rewarding experience, resulting in a batch of homemade chocolate peanut butter balls that are not only delicious but also carry the warmth of shared memories.
Key Ingredients for Perfect Buckeyes: A Detailed Selection Guide
The success of your Buckeye candies hinges on the quality and type of ingredients you choose. While the list is delightfully short, understanding the nuances of each component will ensure you achieve that coveted creamy texture and rich, balanced flavor.
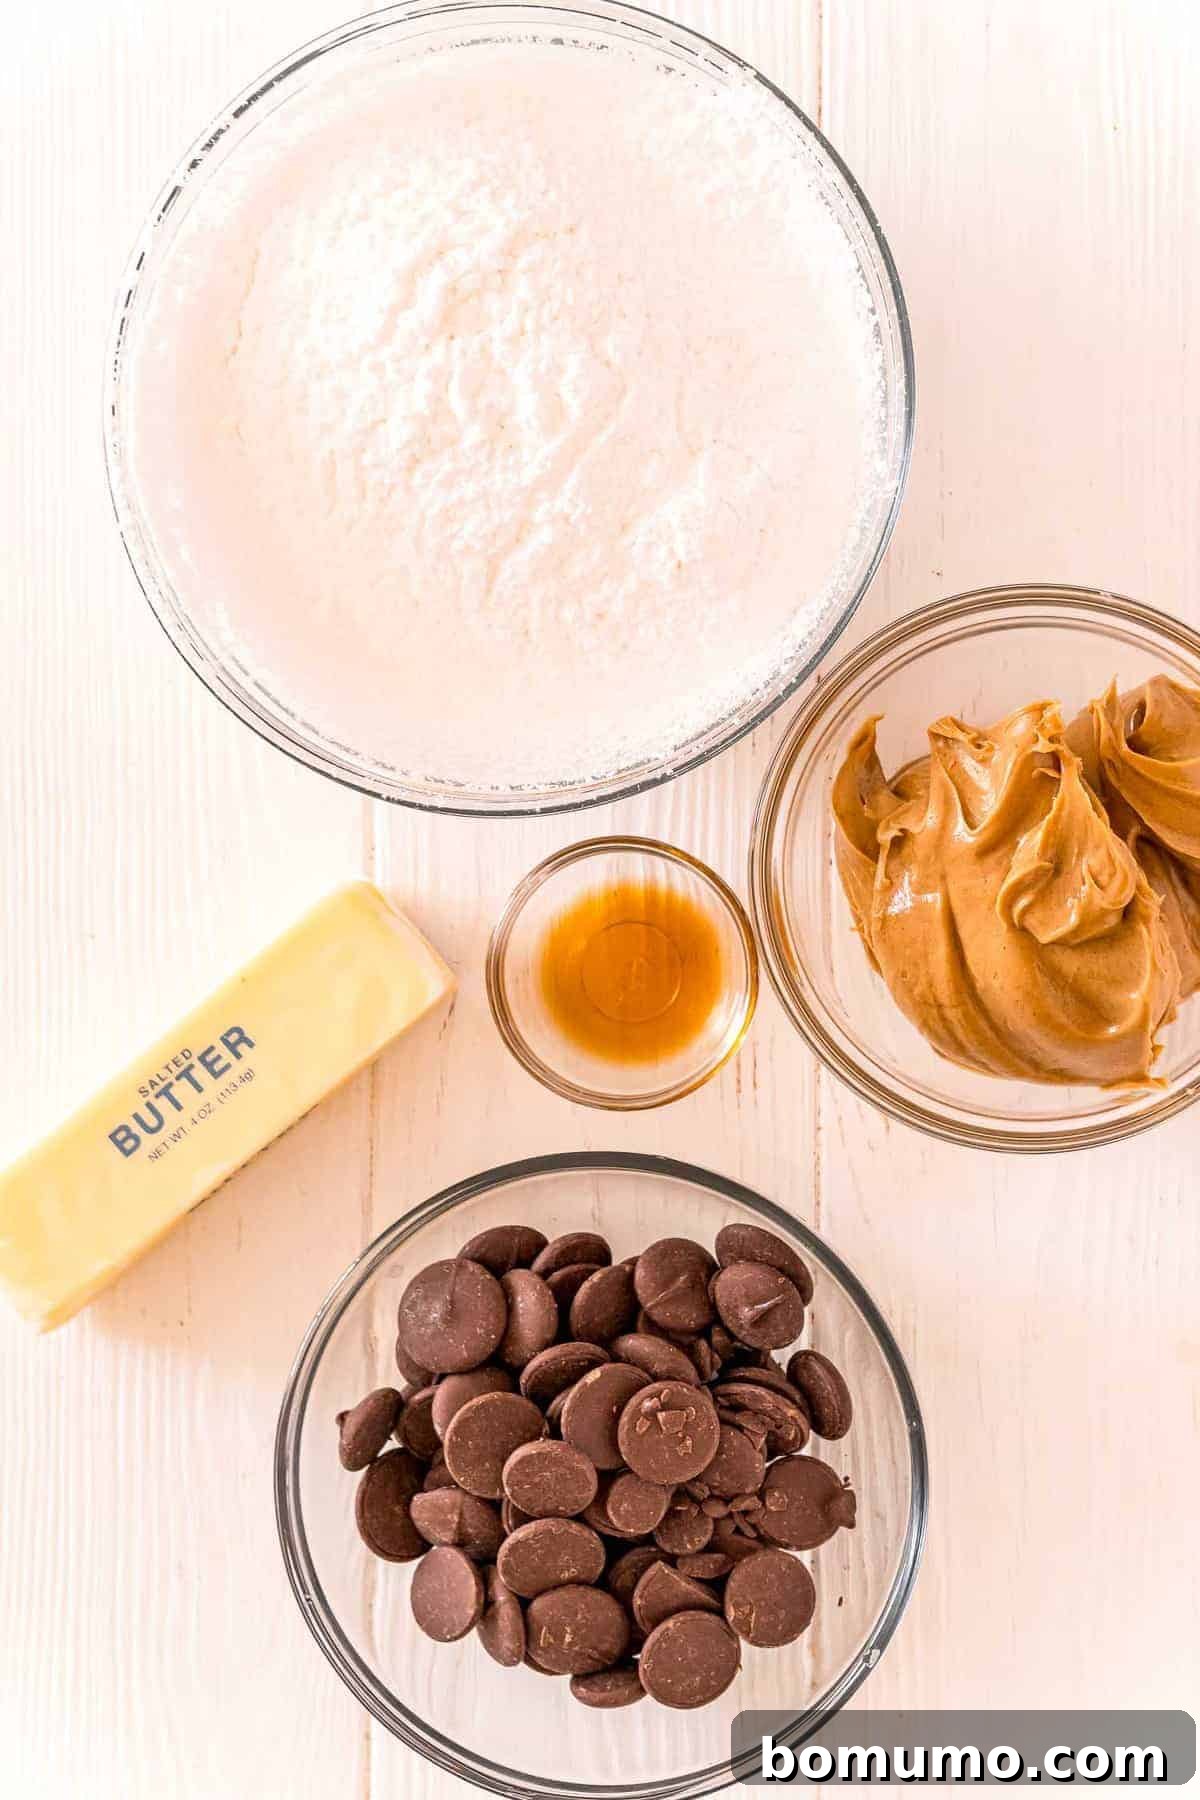
- Creamy Peanut Butter: For this particular recipe, the consistency of your peanut butter is paramount. We strongly recommend using a smooth, processed creamy peanut butter, such as widely available brands like Jif or Skippy. These varieties offer a stable, uniform texture that blends effortlessly and maintains its shape beautifully during rolling and chilling. Natural peanut butters, which typically separate and require stirring, tend to be thinner and can result in a less firm filling, potentially requiring you to add significantly more powdered sugar to achieve the correct consistency.
- High-Quality Butter: Butter serves a dual purpose in Buckeyes, contributing significantly to both their rich flavor and the structural integrity of the peanut butter filling. Always opt for real butter, and ensure it is softened to true room temperature before you begin. This pliability is essential for smooth incorporation with the peanut butter. Margarine, with its different fat composition and water content, will fundamentally alter both the taste and texture of your Buckeyes, and therefore, should not be used as a substitute.
- Pure Vanilla Extract: A small but mighty addition, pure vanilla extract elevates the overall flavor profile of these candies. It introduces a subtle warmth and aromatic depth that beautifully complements both the nutty peanut butter and the sweet chocolate. Do not underestimate the impact of this seemingly minor ingredient!
- Fine Powdered Sugar (Confectioners’ Sugar): This ingredient is key to both the sweetness and the firm, moldable texture of the peanut butter filling. To ensure a perfectly smooth, lump-free filling, it is crucial to sift your powdered sugar before adding it. The precise amount of powdered sugar can vary slightly, depending on the specific brand and inherent consistency of your peanut butter. Therefore, be prepared to adjust by adding a little more or less until the mixture achieves a desirable “play-dough-like” texture – firm enough to roll, but still pliable.
- Premium Chocolate Melting Wafers: To achieve that enviable, glossy, and quick-setting chocolate coating, melting wafers (often sold as candy melts or dipping chocolate) are highly recommended. These are specially formulated to melt smoothly and harden efficiently without seizing, providing a professional-looking finish with minimal fuss. While good quality chocolate chips can be used as an alternative, they often benefit from the addition of a small amount of coconut oil or shortening (about ½ teaspoon per cup) to improve their melting properties and ensure a smooth, crisp set.
Crafting Buckeye Candies: A Simple Step-by-Step Guide to Perfection
Making homemade Buckeye candies is a truly rewarding experience, producing delicious results with minimal effort. While the process itself is simple, paying close attention to the chilling stages is key to achieving that perfectly firm peanut butter center and a flawless chocolate coating. Patience during these cooling periods will ensure your Buckeyes are a resounding success!
Crucial Preparation Reminder: Proper chilling is non-negotiable for perfectly formed Buckeyes. Allocate at least 30 minutes for the peanut butter filling to chill in the refrigerator before shaping, and another 20-30 minutes for the rolled balls to firm up in the freezer before dipping. These steps are vital for easy handling and a pristine finish.
Step 1: Prepare the Irresistibly Creamy Peanut Butter Filling
To begin, measure out your creamy peanut butter, softened butter, and pure vanilla extract into a large mixing bowl. For ease and efficiency, a stand mixer is ideal here, but a reliable handheld electric mixer will also work wonderfully. Beat these ingredients together on medium speed for about 30 seconds, or until the mixture is beautifully smooth, uniform, and completely creamy, ensuring all the butter is fully incorporated without any lumps.
Next, it’s time to introduce the powdered sugar. For the silkiest texture and to prevent any grainy bits in your final product, we highly recommend sifting the powdered sugar directly into your peanut butter mixture. Start beating on a low speed to gradually incorporate the sugar, then increase the speed to medium and continue mixing until the sugar is fully integrated. As you add more powdered sugar, the mixture will become quite dense and thick. It’s common for your electric mixer to struggle towards the end; at this point, switch to a sturdy spoon or a firm spatula to hand-stir in the remaining powdered sugar until it’s thoroughly combined.
The perfect consistency for your peanut butter filling should be akin to soft yet firm play-dough: it should hold its shape well, be fairly solid, and crucially, not be excessively sticky. If, after adding all the recommended sugar, your mixture still feels too tacky to handle comfortably, gradually mix in an additional tablespoon or two of powdered sugar until you achieve the desired firmness. Bear in mind that the mixture will continue to firm up significantly during the chilling process.
Step 2: The Initial Chill for Optimal Firmness
Once your peanut butter filling has reached the ideal play-dough-like consistency, cover the mixing bowl tightly with plastic wrap. Transfer the bowl to the refrigerator and allow it to chill for a minimum of thirty minutes. This initial cooling period is a critical step, as it allows the fats in the peanut butter and butter to solidify slightly, transforming the mixture into a much more manageable and less sticky dough, which will be considerably easier to roll into neat, uniform balls.
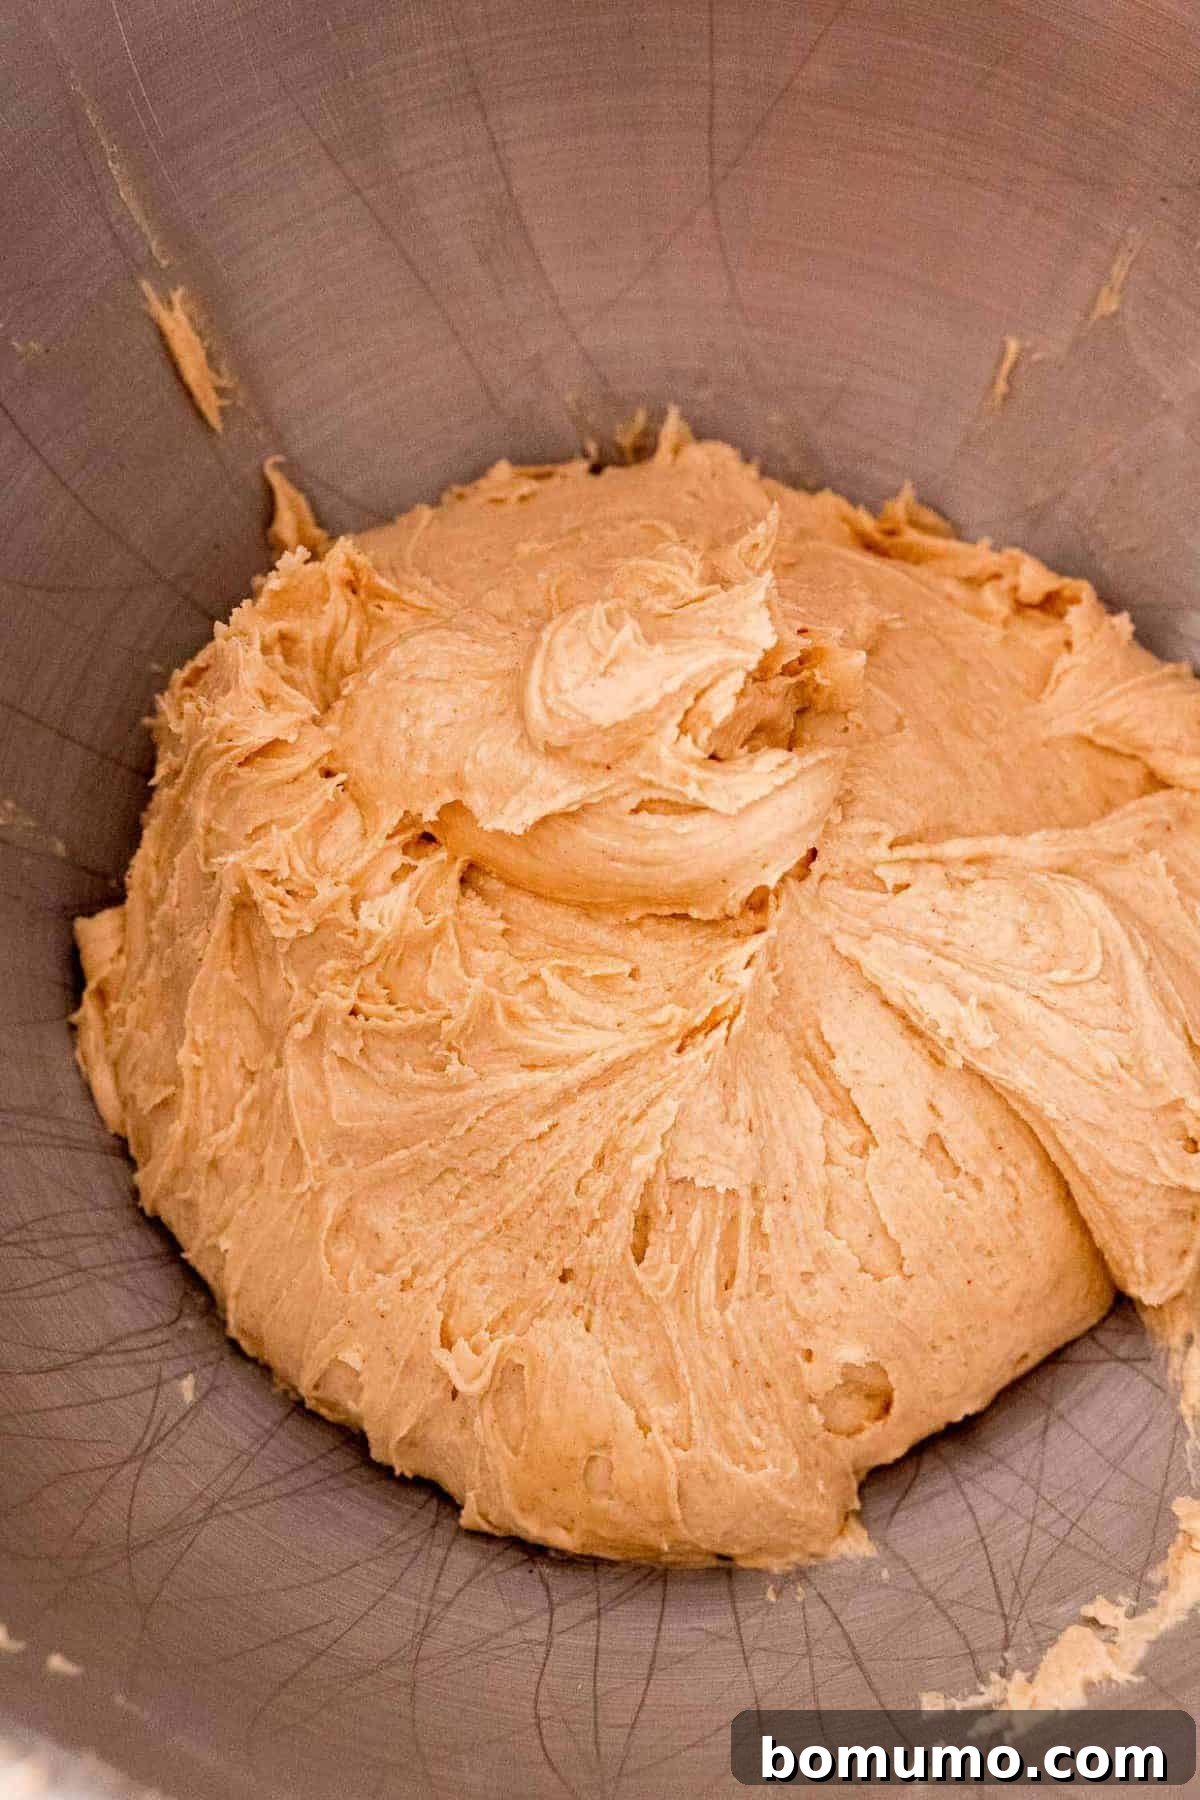
Step 3: Roll and Shape the Signature Buckeye Balls
After the initial chilling, remove the firm peanut butter mixture from the refrigerator. Prepare a large baking sheet or tray by lining it with parchment paper; this will prevent the balls from sticking and make transfer much easier later. Using a small cookie dough scoop (typically a 1-tablespoon size) or a simple measuring tablespoon, scoop out consistent portions of the peanut butter filling. Working quickly to prevent the mixture from becoming too warm, roll each portion between your palms into a smooth, perfectly round ball. Place each finished ball onto the prepared cookie sheet, ensuring they are not touching. This recipe typically yields around 40 to 42 buckeye balls, though the exact number can vary slightly depending on their size.
Step 4: The Crucial Freezer Chill Before Dipping
With all your peanut butter balls neatly shaped and arranged on the cookie sheet, it’s time for their final, vital chill. Carefully transfer the entire tray of peanut butter balls to the freezer for a duration of 20 to 30 minutes. This quick freeze is essential as it hardens the balls sufficiently, allowing them to maintain their shape and integrity when dipped into the warm melted chocolate, preventing them from crumbling or losing form. **It is important not to freeze them for longer than 30 minutes** prior to dipping, as excessive freezing can make them too hard for the chocolate to adhere properly. If you find yourself not ready to proceed with dipping after 30 minutes, simply move the tray from the freezer to the refrigerator until you are prepared to continue with the next step.
Step 5: The Art of Dipping in Decadent Chocolate
As the peanut butter balls approach the end of their freezer chilling time, begin preparing your chocolate coating. Place the chocolate melting wafers in a wide, microwave-safe bowl or a sturdy glass. Microwave them in short bursts of 30 seconds, stirring thoroughly after each interval, until the chocolate is completely smooth and lusciously melted. Exercise caution to avoid overheating the chocolate, as this can cause it to seize (become thick and unworkable) or burn.
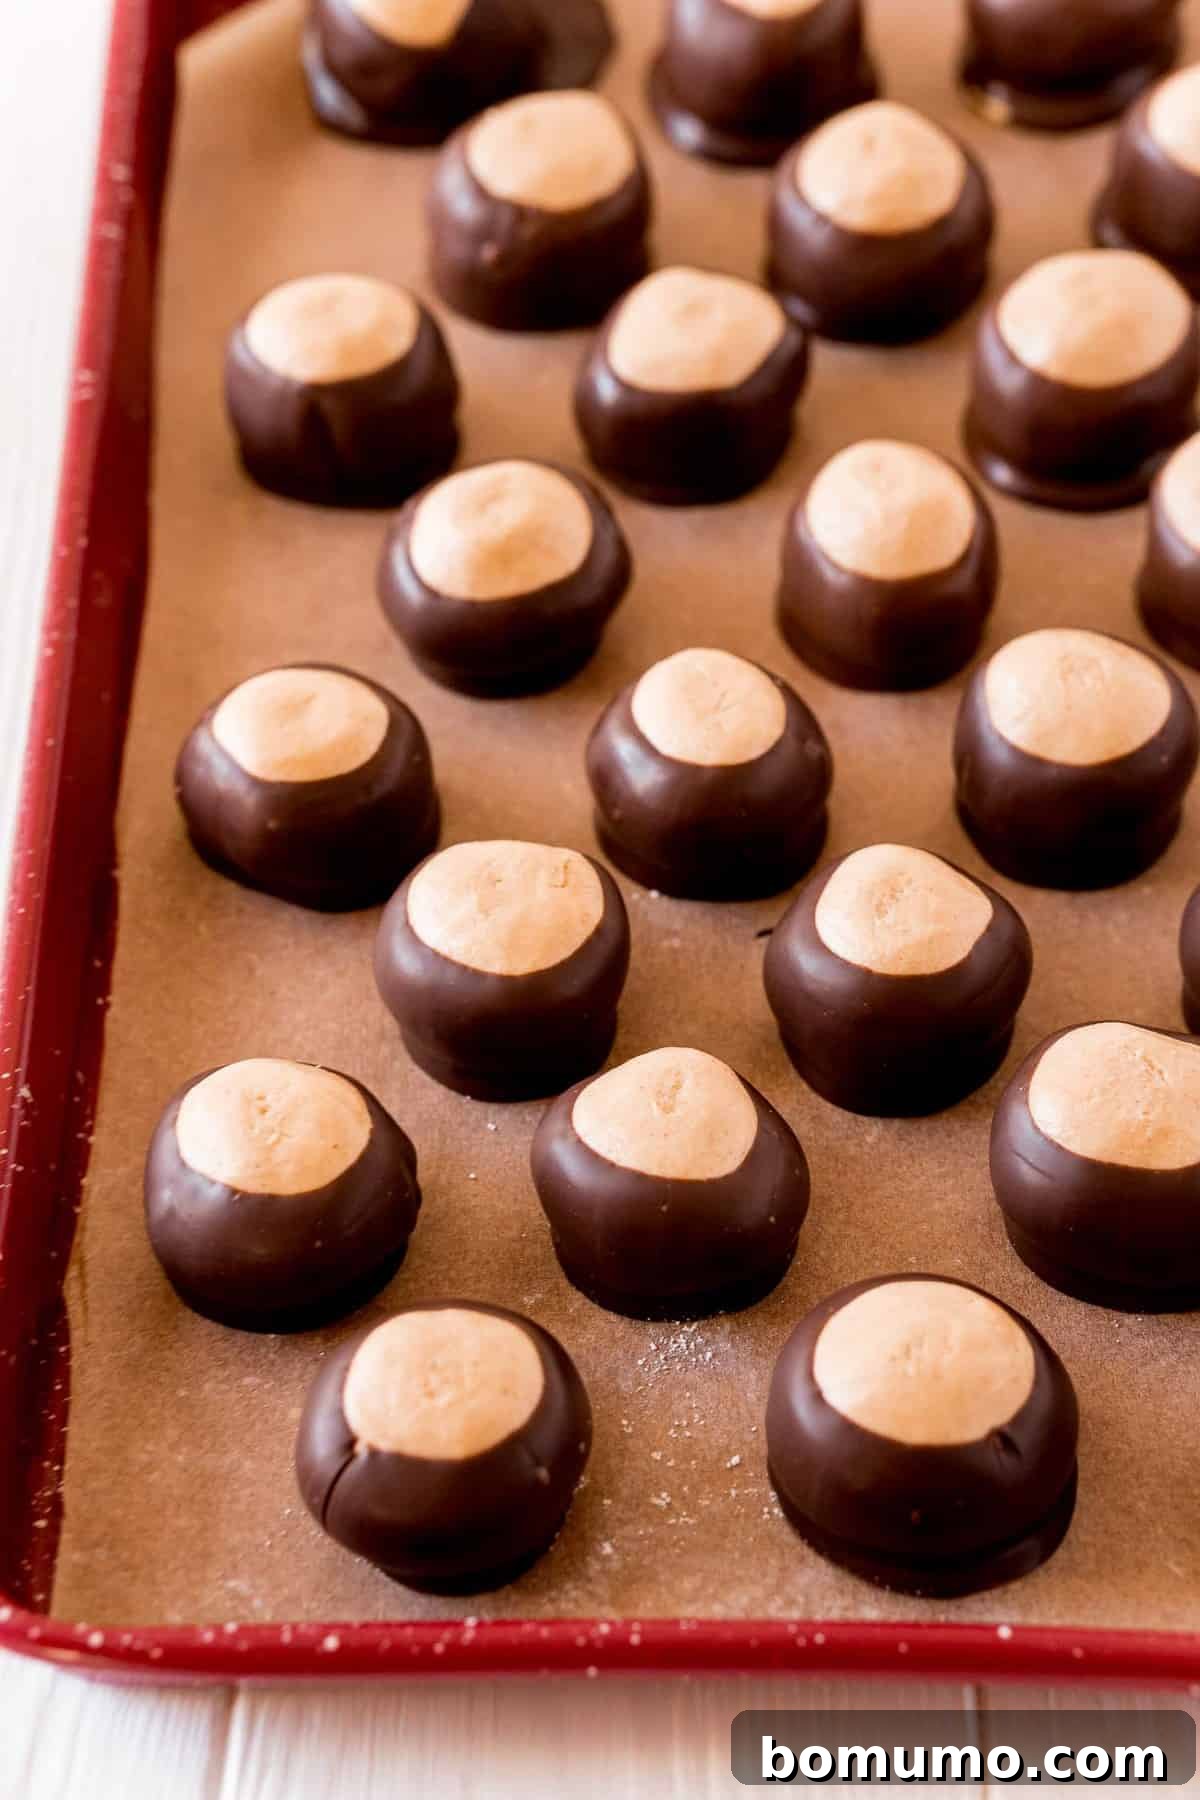
Once your chocolate is perfectly melted, retrieve the chilled peanut butter balls from the freezer. Working efficiently, gently insert a toothpick into the top center of a peanut butter ball. Carefully dip the ball into the melted chocolate, rotating it to coat most of the surface, but intentionally leaving a small, distinctive circle of peanut butter exposed at the very top. This exposed peanut butter creates the signature “eye” of a buckeye nut, giving the candy its unique name and appearance. Lightly tap the toothpick against the edge of the bowl to allow any excess chocolate to drip away. Then, using a fork, carefully dislodge the chocolate-dipped ball off the toothpick and back onto the parchment-lined cookie sheet. For a perfectly polished finish, you can gently smooth over the tiny hole left by the toothpick using your finger or the tip of a small paring knife. Allow the chocolate coating to set completely at room temperature or, for faster results, in the refrigerator before serving. The contrast of the firm, cold peanut butter with the crisp chocolate shell is what makes these treats truly spectacular.
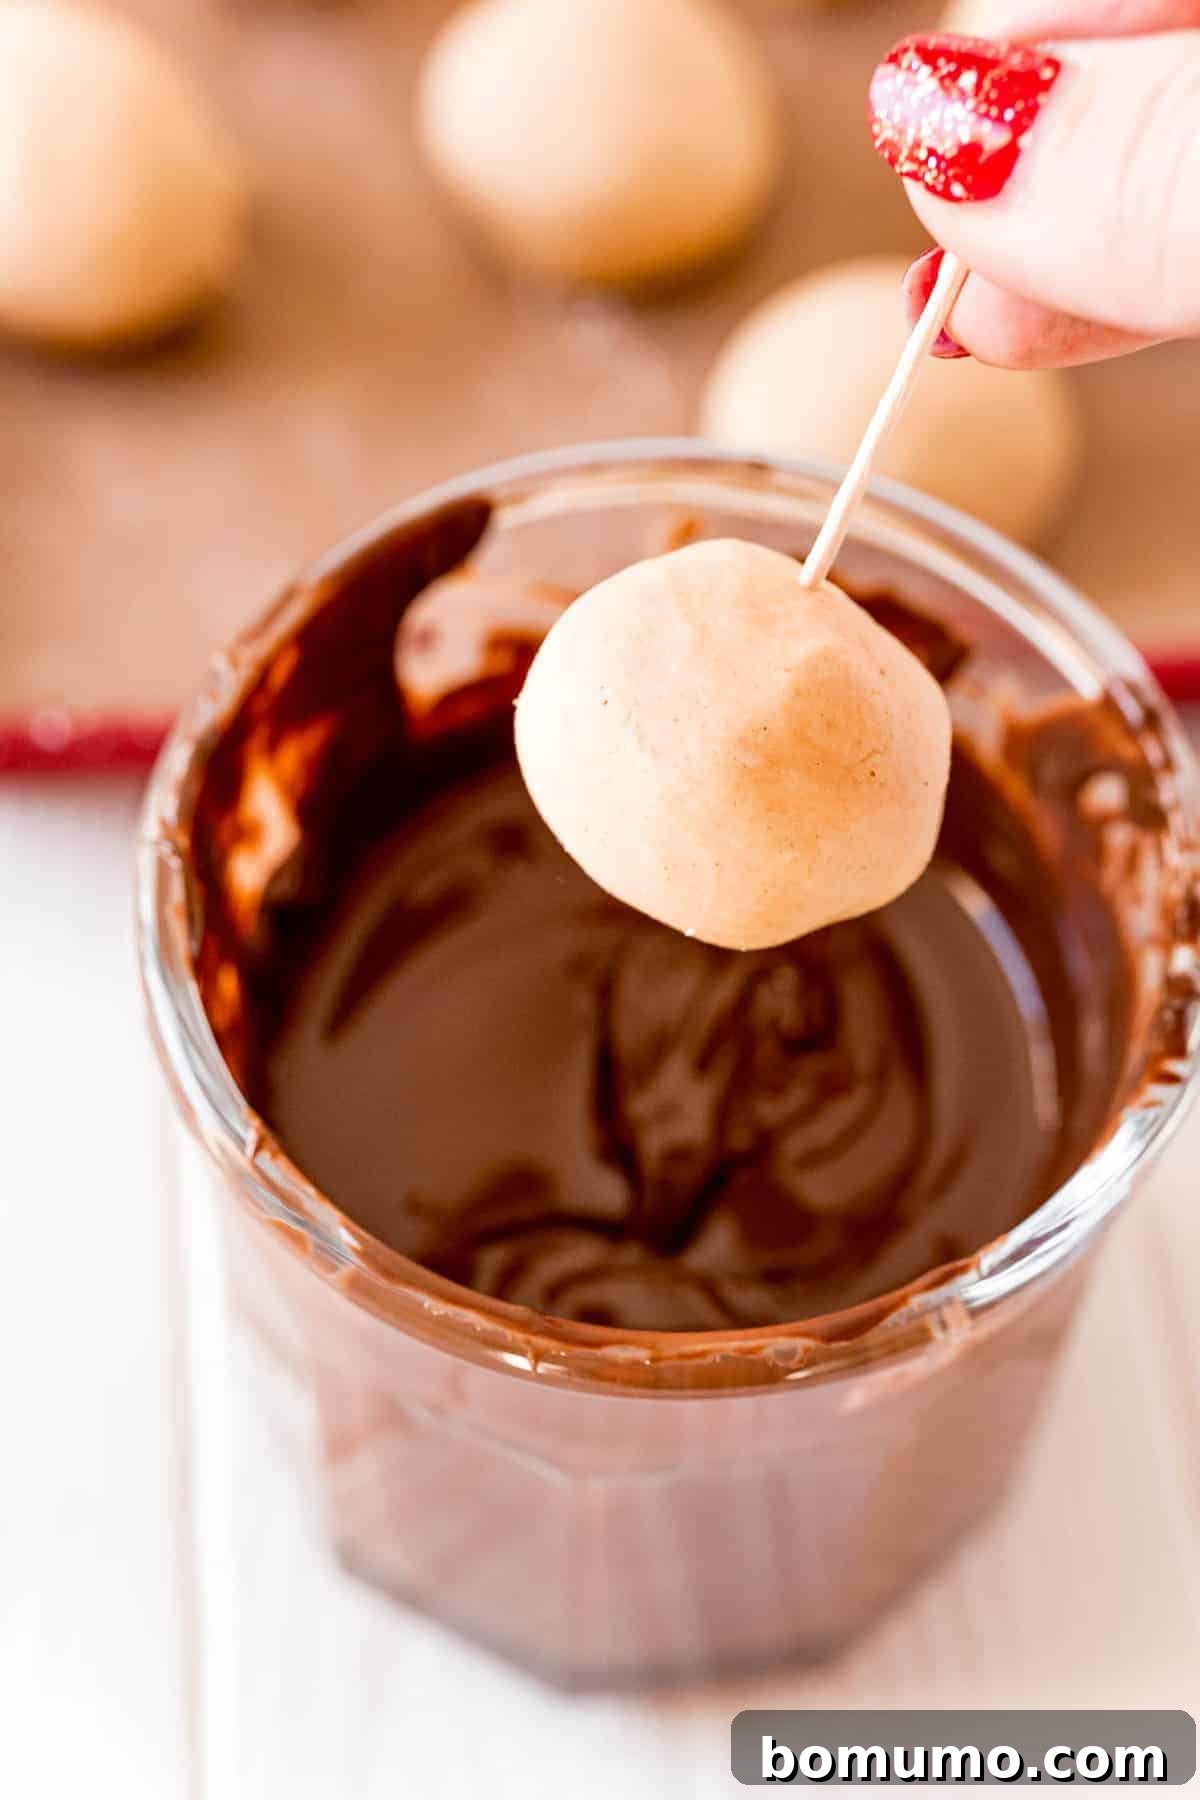
The Fascinating Origin: Why These Candies Bear the Name Buckeyes
The distinctive name “Buckeye” often piques curiosity, leading many to wonder about its origins. While the candy’s partial chocolate coating and visible peanut butter center might indeed bring to mind the dark, observant eye of a male deer, the true inspiration for this beloved confection comes from an entirely different source: the unique nut produced by the buckeye tree.
The buckeye nut itself, with its glossy, dark reddish-brown casing and a prominent lighter tan “eye,” bears an uncanny resemblance to the finished candy. This natural similarity is what led to the naming of these delightful treats. The buckeye tree, scientifically known as *Aesculus glabra*, holds deep cultural significance, particularly in the state of Ohio, where it proudly serves as the official state tree. This strong regional connection has firmly cemented the buckeye nut, and by extension the candy, as a powerful symbol of Ohioan pride and heritage. Fans of Ohio State University sports teams, affectionately known as “the Buckeyes,” will instantly recognize the name and appreciate its profound roots in the state’s identity. This rich cultural backdrop adds an extra layer of charm and storytelling to these already delicious chocolate-peanut butter gems. While some might engage in playful rivalries over team affiliations (as my husband, a dedicated Michigan fan, often does!), there’s one thing everyone can agree on: the undeniable deliciousness of these sweet, iconic candies.
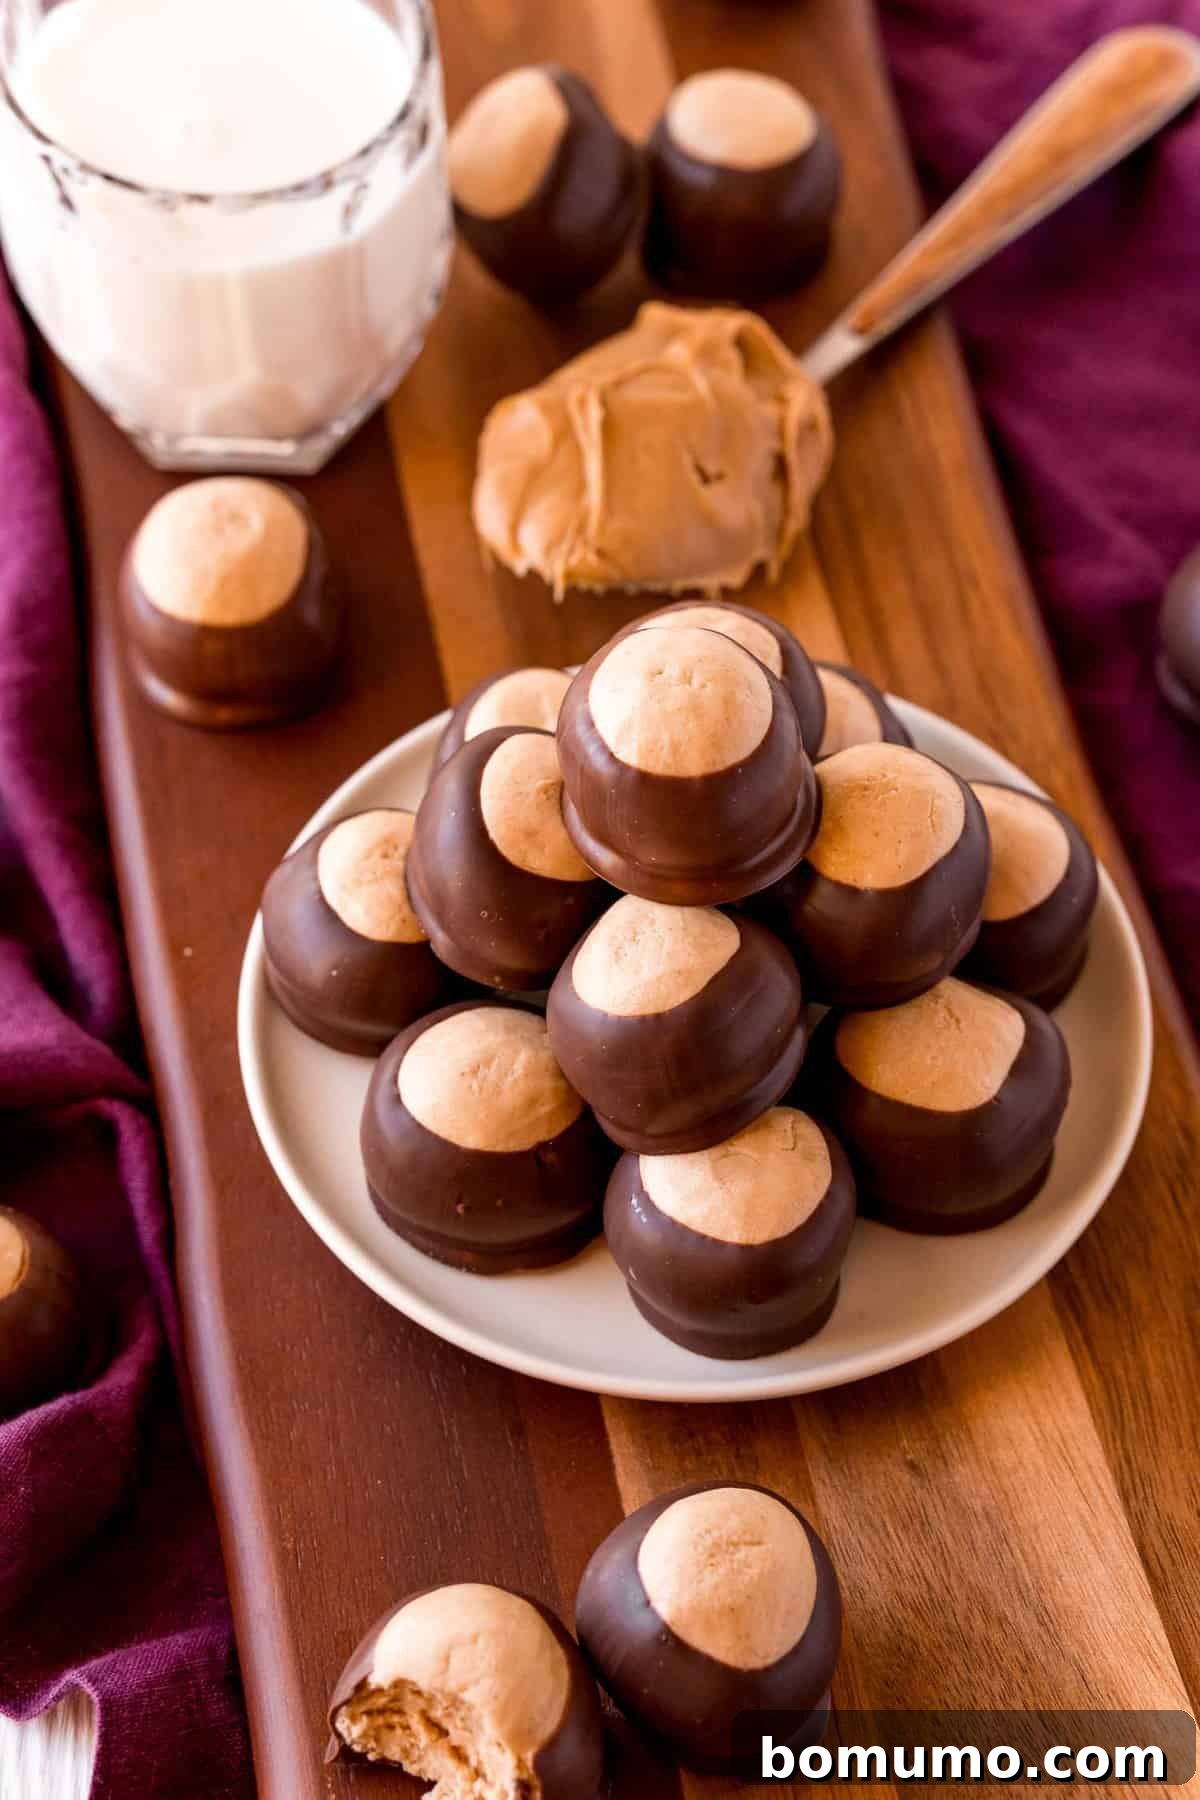
Exciting Recipe Variations and Creative Customization Ideas for Your Buckeyes
While the classic Buckeye recipe is undoubtedly a masterpiece in its own right, the beauty of homemade treats lies in the ability to customize and experiment! These simple variations allow you to tailor your Buckeyes to different preferences, dietary considerations, or unique occasions, making them even more versatile and personal.
- Embrace the Crunch with Chunky Peanut Butter: For those who love an added textural dimension, try swapping the creamy peanut butter for a chunky variety. The resulting Buckeyes will feature delightful bits of peanuts, providing an extra bite and a slightly more rustic appearance that is equally appealing.
- A Thoughtful Nut-Free Option: If you are serving guests with peanut allergies, sunflower butter (commonly known as Sunbutter) makes an excellent and safe nut-free substitute. It’s important to note that sunflower butter often has a thinner consistency compared to traditional peanut butter. To compensate, you will likely need to incorporate an additional ½ cup of powdered sugar to achieve the firm, play-dough-like texture necessary for easy rolling and shaping.
- Explore Diverse Chocolate Coatings: Don’t limit your creativity to standard milk chocolate! Dipping your candies in rich, intense dark chocolate will yield a more sophisticated and less sweet flavor profile, which can be particularly appealing to adult palates. For a strikingly different and elegant presentation, opt for white chocolate. You can even drizzle contrasting chocolate colors over the set coating for a beautiful, artistic flair.
- Indulge in Fully Dipped Peanut Butter Balls: While the traditional Buckeye features an exposed “eye” of peanut butter, some prefer their treats completely enrobed in chocolate. To create a fully chocolate-covered peanut butter ball, simply submerge the entire sphere in melted chocolate. This variation offers an even richer and more intense chocolate experience with every bite.
- Elevate with a Pinch of Sea Salt: For an incredibly addictive sweet and salty combination, sprinkle a tiny pinch of flaky sea salt (such as Maldon) over the wet chocolate coating immediately after dipping, before it has a chance to set. This subtle addition wonderfully enhances the flavors.
- Craft Charming Mini Buckeyes: If you’re looking for smaller, bite-sized delights that are perfect for a party or a delicate dessert spread, use a smaller scoop (e.g., a teaspoon or a mini cookie scoop) to create miniature Buckeye balls. Adjust the chilling times slightly, but the overall preparation process remains the same.
- Opt for Effortless Buckeye Bars: If the thought of individually rolling and dipping numerous candies seems a bit too time-consuming, you can easily transform this recipe into convenient bars! Simply press the entire peanut butter mixture evenly into a parchment-lined baking dish, chill until firm, then pour a layer of melted chocolate over the top and chill again until set. Once firm, cut into squares for all the deliciousness with significantly less fuss. For a dedicated bar recipe, check out our Buckeye Brownies, a fantastic way to enjoy these flavors in an easier format.
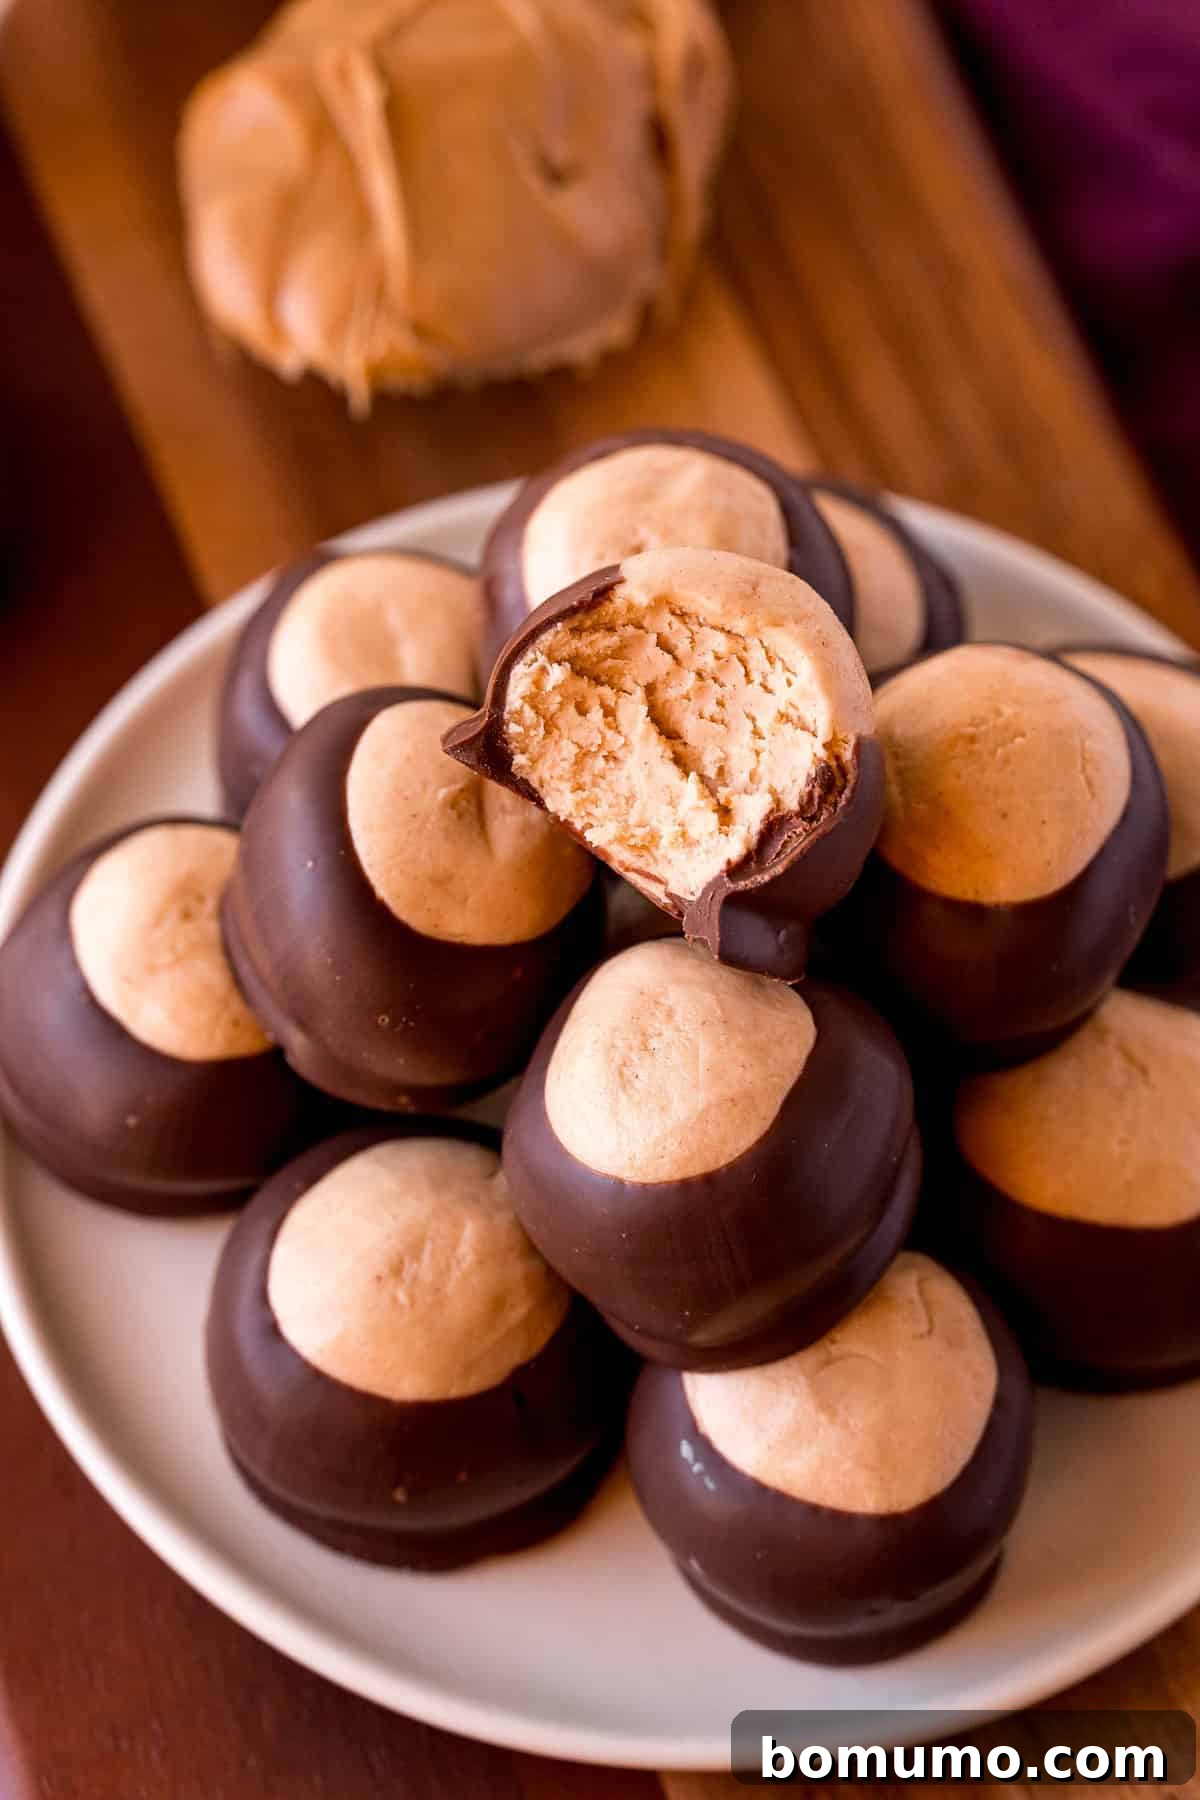
Optimal Storage for Your Buckeye Candies
Proper storage is essential to maintain the freshness, texture, and beautiful appearance of your homemade Buckeye candies. Due to their rich, creamy peanut butter center, these delightful treats thrive in cool conditions.
Do Buckeyes need to be refrigerated? Yes, absolutely! Once the chocolate coating has completely hardened and set, it is crucial to store your Buckeyes in an airtight container in the refrigerator. This cool environment is vital for several reasons: it helps the candies retain their firm shape, prevents the peanut butter filling from becoming too soft or gooey, and significantly extends their shelf life. When stored correctly in the fridge, your Buckeyes will remain wonderfully delicious for up to 7 days, ready for whenever a craving strikes.
For those looking to prepare ahead or enjoy these treats over a longer period, Buckeyes freeze exceptionally well. To freeze them, first arrange the completely hardened candies in a single layer on a parchment-lined baking sheet and flash freeze them for about an hour, or until they are solid. Once frozen, transfer the Buckeyes to a freezer-safe bag or an airtight container, ensuring you place layers of parchment paper between them to prevent sticking. They can be safely stored in the freezer for up to 3 months without compromising their quality. When you’re ready to indulge, simply remove them from the freezer and allow them to thaw in the refrigerator for a few hours, or at room temperature for approximately 30 minutes, until they reach your desired soft and creamy consistency. Enjoying them slightly chilled offers a fantastic textural contrast!
Discover More Irresistible No-Bake Treats!
If you’ve fallen in love with the simplicity and deliciousness of these no-bake Buckeye candies, you’re in for a delightful journey! Our comprehensive collection of no-bake desserts is brimming with easy, incredibly flavorful recipes that demand minimal effort and absolutely no oven time. They are perfect for whipping up quick snacks, creating impressive last-minute party desserts, or simply satisfying your sweet tooth without heating up your kitchen. Explore these other fantastic and effortless options:
Colorful Fruity Pebbles Treats
Brighten your day and delight your taste buds with these fun and chewy no-bake bars. Bursting with the vibrant, fruity flavor of your favorite breakfast cereal, they’re a nostalgic delight that comes together incredibly fast!
Sweet & Spicy Cinnamon Toast Crunch Bars
Indulge in the beloved flavor of Cinnamon Toast Crunch cereal reimagined into a convenient and chewy bar form. These gooey, marshmallow-laced treats are a quick, satisfying, and nostalgic snack perfect for cereal lovers of all ages.
Classic Puppy Chow Recipe (Muddy Buddies)
A timeless and utterly addictive snack, this Puppy Chow recipe (also known as Muddy Buddies) features a delightful mix of cereal, rich peanut butter, melted chocolate, and a generous coating of powdered sugar. It’s incredibly easy to make and impossible to stop munching on!
Decadent No-Bake Chocolate Peanut Butter Pie
For a dessert that tastes incredibly gourmet but comes together with minimal fuss, this no-bake chocolate peanut butter pie is an absolute dream. Rich, incredibly creamy, and utterly satisfying, it’s a guaranteed crowd-pleaser for any special occasion or a simple weeknight treat.
Buckeyes Recipe: The Ultimate Peanut Butter & Chocolate Perfection
Print Recipe
Buckeyes are the ultimate chocolate and peanut butter delight! These sweet, no-bake peanut butter balls, partially dipped in melted chocolate, are incredibly simple to make and universally loved. Get ready to impress with this classic confection.
Want to save this recipe for later? Bookmark this page or print the recipe card above! We’re always adding new delicious ideas, so check back often for more culinary inspiration.
Equipment
-
Insulated Cookie Sheet
-
Parchment Paper Sheets
-
Stand Mixer (Optional, Hand Mixer also works)
-
Large Mixing Bowl
-
Toothpicks
-
Cookie Dough Scoop (1-tablespoon)
Ingredients
- 1 ⅓ cups creamy peanut butter (such as Jif or Skippy)
- ½ cup (one stick) salted butter, softened
- 1 teaspoon pure vanilla extract
- 3 cups powdered sugar (sifted, spooned into measuring cup – see notes)
- 3 cups chocolate melting wafers (or good quality chocolate chips with ½ tsp coconut oil per cup)
Instructions
-
In a large bowl or the bowl of a stand mixer, combine the creamy peanut butter, softened salted butter, and vanilla extract. Cream these ingredients together for about 30 seconds until the mixture is smooth and well-combined.
-
Gradually sift the powdered sugar into the peanut butter mixture. Begin beating on low speed, then increase to medium, continuing until the sugar is fully incorporated and the mixture is smooth. It will become very thick; you might need to finish mixing by hand with a sturdy spoon or spatula. The final consistency should resemble firm play-dough, not too sticky. If it feels too wet, add a little more powdered sugar until desired firmness is achieved.
-
Cover the bowl and chill the peanut butter mixture in the refrigerator for at least 30 minutes. This step is crucial for making the mixture easy to roll.
-
While the mixture chills, line a large cookie sheet with parchment paper. Once chilled, scoop out the peanut butter mixture using a one-tablespoon scoop. Quickly roll each portion into smooth, uniform balls and place them on the prepared cookie sheet. You should yield about 42 buckeye balls. Transfer the tray to the freezer and chill for 20 to 30 minutes. Do not freeze for more than 30 minutes prior to dipping. If you’re not ready to dip, move them to the refrigerator after 30 minutes.
-
Just before removing the balls from the freezer, melt the chocolate melting wafers. Place them in a wide, microwave-safe bowl. Microwave in 30-second intervals, stirring thoroughly after each, until the chocolate is completely smooth and melted. Avoid overheating. Work efficiently when dipping, as the cold peanut butter balls can cause the chocolate to set quickly.
-
Carefully insert a toothpick into the top of a chilled peanut butter ball. Dip the ball into the melted chocolate, leaving a small portion of the peanut butter exposed at the top to create the “buckeye” effect. Gently tap the toothpick against the rim of the bowl to allow any excess chocolate to drip off. Use a fork to gently push the chocolate-dipped ball off the toothpick back onto the parchment paper. If desired, smooth the small hole left by the toothpick with your finger or a small knife for a pristine finish.
-
Refrigerate the finished Buckeyes until the chocolate has fully hardened, which usually takes about 15-30 minutes. Once set, store them in an airtight container in the refrigerator for up to 7 days, or freeze them in a freezer bag for up to 3 months for longer storage.
Notes for Success
- Accurate Powdered Sugar Measurement: For best results, spoon your powdered sugar lightly into the measuring cup without packing it down. Level the top with a straight edge, such as a knife, to ensure you have the correct amount and avoid a too-dense filling.
- Peanut Butter Choice Matters: This recipe was developed using creamy, processed peanut butter (like Jif). Using natural peanut butter (the kind that separates) may require adjustments to the powdered sugar amount due to its thinner, oilier consistency. You might need to add an extra ¼ to ½ cup of powdered sugar to achieve the firm, moldable texture.
- Chocolate Dipping Tips: While melting wafers are ideal for their smooth melt and quick set, you can use good quality chocolate chips. If using chocolate chips, add about ½ teaspoon of coconut oil or shortening per cup of chocolate chips to help it melt more smoothly and harden with a nice sheen. There will likely be excess melted chocolate, which is necessary to allow for proper dipping without fully submerging the “eye” of the candy.
Recipe Video
For a visual guide to mastering these delicious candies, watch this helpful video walkthrough!

Watch the Buckeye Candies Recipe Video on YouTube
Nutrition Information
Calories: 137kcal,
Carbohydrates: 15g,
Protein: 2g,
Fat: 8g,
Saturated Fat: 4g,
Polyunsaturated Fat: 1g,
Monounsaturated Fat: 3g,
Trans Fat: 1g,
Cholesterol: 6mg,
Sodium: 64mg,
Potassium: 54mg,
Fiber: 1g,
Sugar: 14g,
Vitamin A: 68IU,
Calcium: 4mg,
Iron: 1mg
Please note: Nutrition information is an automatic calculation and should be used as an approximation. Actual values may vary based on specific ingredient brands and preparation methods.