
Crostini: Your Ultimate Appetizer Guide
Why you’ll adore this recipe: Discover the art of making crostini, and you’ll unlock a world of culinary possibilities! These delightful “little toasts” are incredibly versatile, serving as the perfect foundation for an endless array of toppings. Whether you choose to bake, grill, or fry them, crostini consistently steal the show at any gathering. Their crisp texture and accommodating nature make them an effortless choice for both casual snacking and elegant entertaining.
Preparation Time: Approximately 10 minutes (for basic bread preparation)
Essential Equipment: Varies depending on your chosen cooking method (oven, grill, or stovetop)
Yield: Produces 20 to 24 perfectly crisp crostini, ideal for sharing or personal enjoyment.
Mastering Easy Crostini: A Comprehensive Guide
Welcome to the captivating world of crostini! This comprehensive guide is designed to equip you with all the knowledge needed to craft these perfect, crunchy little bases, suitable for both classic crostini and its larger cousin, bruschetta. From understanding the core ingredients to mastering various preparation techniques, we’ll ensure your homemade crostini are always a resounding success.
Once you’ve perfected the crispy bread base, the real fun begins: exploring an array of delectable toppings. As passionate food enthusiasts, we know that toppings elevate any dish, and crostini are no exception. While the crispy bread is undeniably delightful, the imaginative and flavorful toppings are what truly transform these simple toasts into unforgettable culinary experiences.
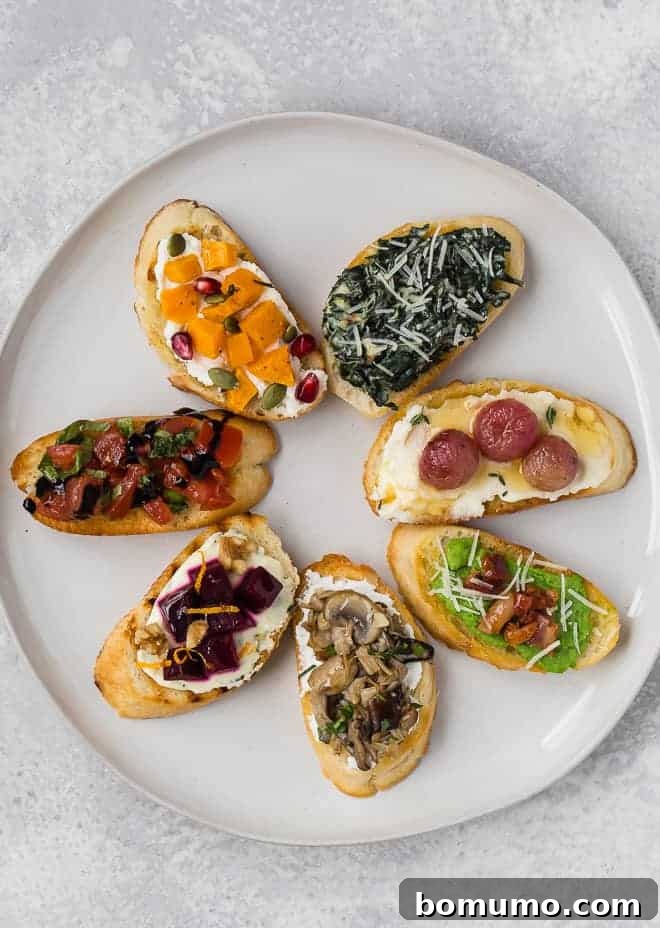
To inspire your culinary adventures, we’re sharing a curated collection of six unique crostini recipes, perfectly timed for the upcoming holiday season. You can find these tempting ideas towards the end of this post. However, remember that crostini aren’t just for special occasions. They make fantastic appetizers year-round, ideal for impromptu gatherings, and pair wonderfully with everyday meals, especially hearty soups and comforting stews. Let’s dive into the fundamentals and prepare to impress!
Crostini or Bruschetta? Understanding the Delicious Distinction
The terms “crostini” and “bruschetta” are often used interchangeably, leading to some culinary confusion. While both refer to toasted bread, there are distinct differences that set them apart. Understanding these nuances will not only enhance your appreciation for Italian appetizers but also guide you in choosing the perfect base for your desired toppings.
Bruschetta: The Rustic Roasted Toast
- The name “bruschetta” originates from the Italian word “bruscare,” meaning “to roast over coals.” This etymology speaks to its rustic origins and traditional preparation method.
- Bruschetta typically features larger, thicker slices of bread, often from a rustic loaf like sourdough, country bread, or a classic Italian artisan loaf. This robust size makes it a more substantial appetizer.
- Traditionally, bruschetta is grilled or toasted over an open flame or under a broiler, imparting a distinctive smoky flavor and charred texture.
- Due to its larger size, a single serving of bruschetta usually consists of just one slice, often generously adorned with toppings.
- It’s a common misconception that “bruschetta” refers specifically to the tomato-basil topping. In reality, bruschetta is the toasted bread itself, which can be topped with a variety of ingredients. The classic tomato topping is simply the most famous rendition.
Crostini: The Elegant “Little Toasts”
- “Crostini” literally translates to “little toasts” in Italian, a fitting description for these delicate bite-sized appetizers.
- They are typically smaller than bruschetta, made from thinly sliced baguette. Their petite size makes them reminiscent of French canapés, perfect for sophisticated finger food.
- Crostini are often cut on a bias to create a larger oval surface area for toppings, but round slices are also common.
- Their versatility is unmatched. Crostini can be topped with an endless array of ingredients, from savory spreads and cheeses to sweet fruit concoctions. They also make excellent crunchy croutons for soups and salads.
In this comprehensive guide, we’ll delve into three distinct methods for preparing crostini. While our focus remains on these delightful “little toasts,” rest assured that these very techniques can be easily adapted for preparing larger slices of bread for bruschetta. All the exquisite topping recipes we’ll share throughout this week are perfectly suited for both crostini and bruschetta alike. We’ve chosen to highlight crostini for their elegance and ease of serving, but always feel empowered to select the bread size that best fits your culinary vision!
Clever Cooking Tip: The Magic of Stale Bread
Before you toss that slightly stale baguette or loaf of bread, consider its true potential! Slightly dried-out bread is actually perfect for making crostini. Why? Because its reduced moisture content allows it to crisp up more quickly and evenly, resulting in a superior crunchy texture that fresh bread often struggles to achieve. This is a fantastic way to minimize food waste while creating a delicious base for your appetizers.
If you’re not quite ready to transform your stale bread into crostini right away, simply slice it thinly as you would for crostini and freeze the slices in a freezer-safe bag. They’ll keep beautifully and be ready to toast whenever inspiration strikes. Beyond crostini, day-old bread is also the ideal ingredient for crafting homemade croutons to elevate your salads or making fresh homemade bread crumbs, adding a gourmet touch to your cooking.
Three Proven Methods for Perfect Crostini
Achieving the ideal crispy crostini requires a keen eye and a bit of flexibility. The exact cooking times will naturally vary depending on several factors: the specific type of bread you’re using, how dry or fresh it is, the thickness of your slices, the amount of olive oil applied, and the heat intensity of your cooking surface. This guide offers excellent starting points, but remember to keep a close watch on your bread as it cooks to prevent any unwelcome burning. Always adjust timings as needed to achieve that coveted golden-brown crispness.
1. Baking Crostini: The Consistent Crowd-Pleaser
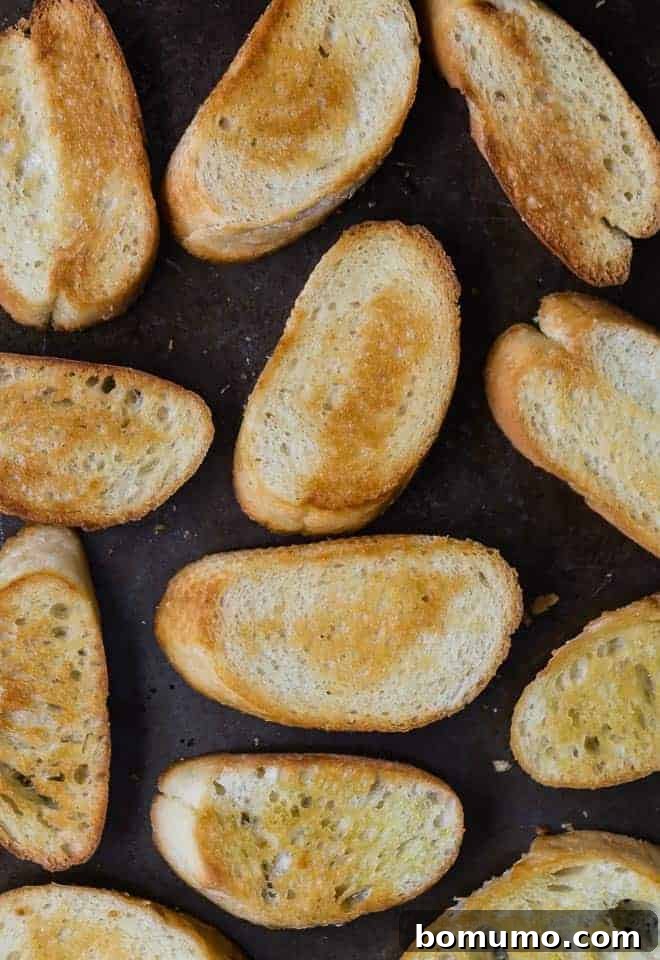
Baking is arguably the most reliable method for making crostini, consistently delivering evenly toasted, golden-brown results. It’s especially ideal when you’re preparing a large batch for a party or gathering, as you can easily fill one or even two sheet pans with sliced bread, allowing for hands-off cooking. After testing various techniques, we’ve found this approach to be the most effective for achieving uniformly crisp crostini. (Refer to the detailed recipe card below for step-by-step instructions).
- Begin by preheating your oven to a precise 400ºF (200ºC). This ensures even heat distribution from the start.
- Carefully slice your baguette into uniform quarter-inch (approx. 0.6 cm) slices. Consistency in thickness is key for even toasting.
- Lightly brush or spray both sides of each bread slice with high-quality olive oil. The oil not only adds flavor but also promotes crispness and a beautiful golden color.
- Arrange the oiled bread slices in a single layer on a baking sheet. Avoid overcrowding the pan to allow for proper air circulation and even toasting. For easier cleanup, you can line your baking sheet with parchment paper.
- Bake for approximately 7 minutes. Then, using tongs, carefully flip each crostini over and continue baking for another 6 to 7 minutes, or until they are lightly browned and feel completely dry and crisp to the touch. It’s crucial to watch them closely during the final minutes, as they can go from perfectly golden to burnt very quickly.
- Once toasted to perfection, remove the crostini from the baking sheet and transfer them to a wire rack to cool completely. Cooling on a rack prevents condensation, which can make them soggy.
2. Grilling Crostini: Infusing Smoky Flavor and Aesthetic Charm
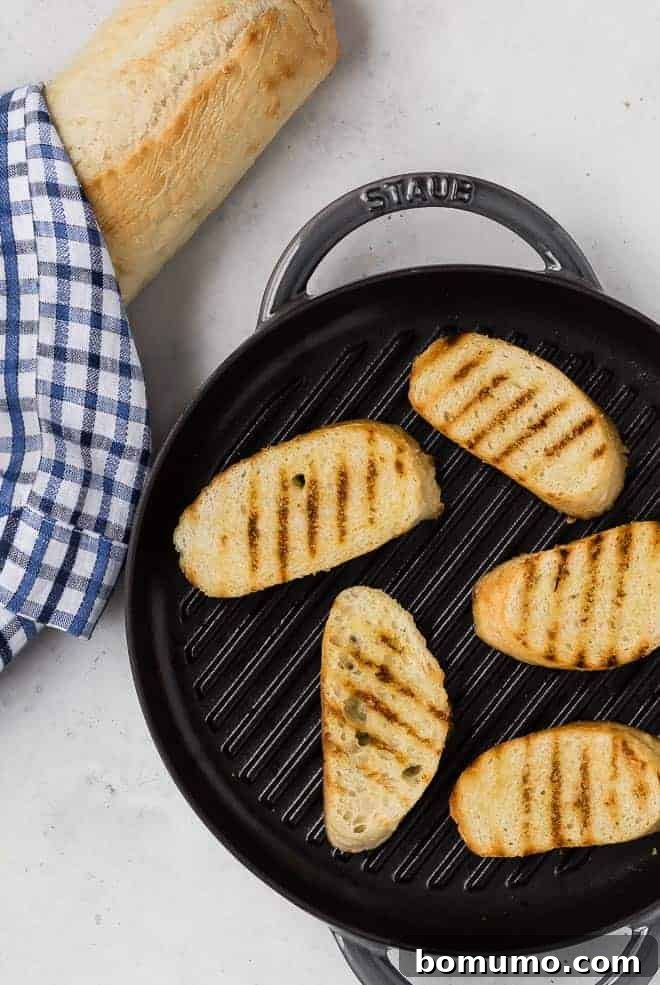
Grilling is often my preferred method for preparing crostini, primarily for two compelling reasons. First, I absolutely adore the distinctive grill marks it leaves on the bread, which adds a professional and appetizing visual appeal, especially when I’m serving the toppings separately in elegant bowls alongside the crostini toasts. This presentation allows guests to customize their bites. Second, and perhaps more importantly, grilling imparts a unique, subtle smoky-charred flavor that elevates the bread, adding an extra layer of complexity. Whether you use a grill pan indoors or an outdoor barbecue, the enhanced taste is truly remarkable.
- Preheat your grill pan or outdoor grill to a medium-high heat setting. Ensure it’s hot enough to create those desirable grill marks.
- Slice your chosen bread (typically a baguette) into uniform quarter-inch (approx. 0.6 cm) slices.
- Lightly brush or spray both sides of each bread slice with olive oil. This not only prevents sticking but also helps achieve a beautiful golden crust and enhances flavor.
- Carefully place the oiled bread slices directly onto the preheated grill or grill pan.
- Grill for approximately 3 to 5 minutes per side, or until the bread is lightly browned and distinctly marked with attractive grill lines. Keep an eye on them to prevent over-charring.
- Once grilled to your liking, remove the crostini from the heat and transfer them to a wire rack to cool. This ensures maximum crispness.
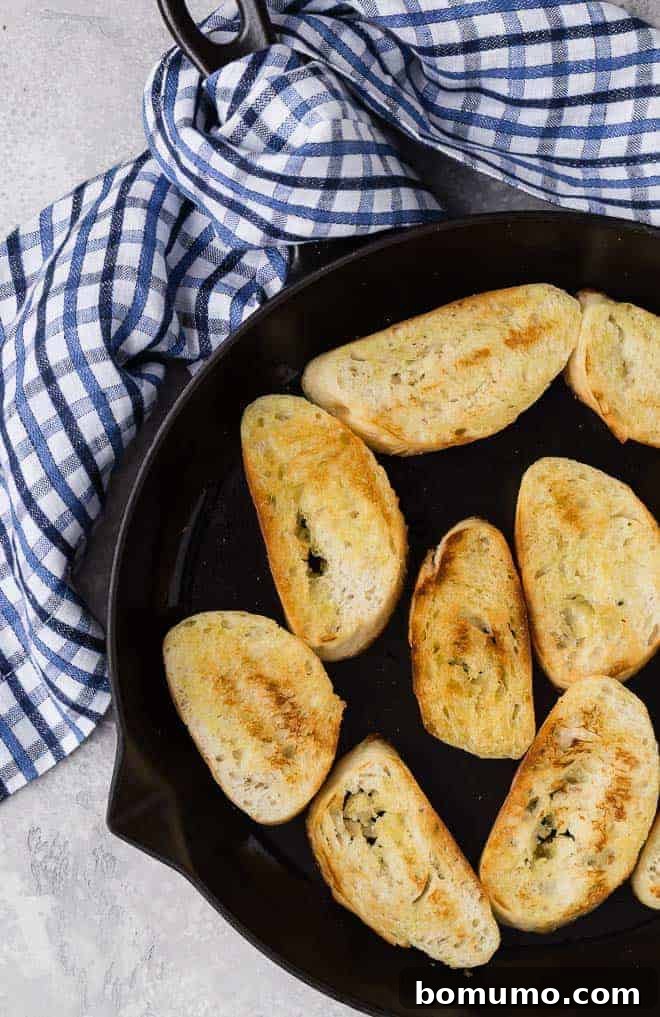
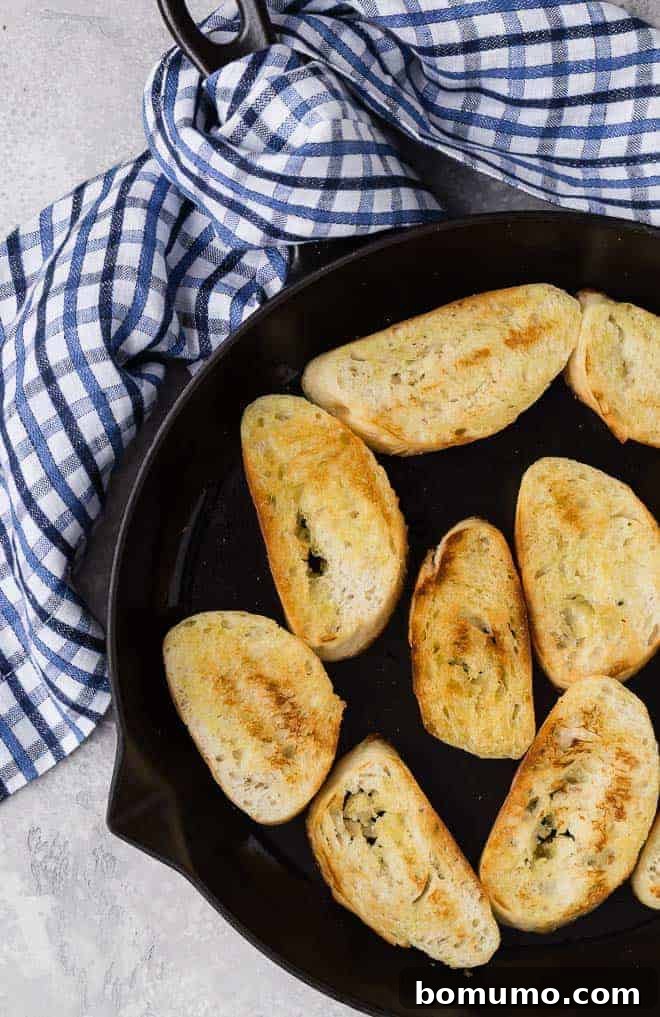
3. Stovetop Crostini: The Speedy Solution for Smaller Batches
For those times when you need a quick batch of crostini or are only making a small quantity, the stovetop method is an excellent choice. It’s fast and convenient, though it does require a bit more active attention – or “babysitting” – to ensure they don’t burn. However, this level of attentiveness is generally a good practice for all three methods to achieve perfectly golden results.
- Heat a heavy-bottomed skillet, such as a cast-iron pan, over medium-high heat. A cast-iron skillet is particularly effective due to its excellent heat retention and even distribution.
- Slice your bread into consistent quarter-inch (approx. 0.6 cm) slices.
- Add about 2 tablespoons of olive oil to the heated pan. Allow it to shimmer slightly before adding the bread.
- Using tongs, very carefully place a portion of the bread slices into the hot oil, ensuring not to overcrowd the pan. As you place each slice, immediately flip it over to coat both sides lightly with the olive oil in the pan. Add more oil as needed between batches.
- Cook for approximately 3 to 5 minutes on each side, or until the crostini achieve a beautiful golden-brown color and are crisp. It’s vital to monitor them continuously, as the pan’s temperature can fluctuate, and they can quickly transition from perfectly toasted to burnt. Adjust heat as necessary.
- Once cooked, remove the crostini from the pan and let them cool on a wire rack to maintain their crispness. Repeat the process for any remaining bread slices, adding more oil as needed for subsequent batches.
Essential Tools for Crafting Perfect Crostini
While crostini are inherently simple to make, having the right tools on hand can significantly streamline the process and help you achieve professional-level results every time. Here’s a list of helpful equipment:
- Sheet Pans: Indispensable for baking large batches of crostini evenly in the oven. Look for heavy-duty, rimmed baking sheets.
- Grill Pan or Heavy Frying Pan: A grill pan is perfect for achieving those beautiful char marks and smoky flavor indoors. A cast-iron or other heavy frying pan is ideal for the stovetop method, providing consistent heat.
- Olive Oil Sprayer or Silicone Brush: Essential for applying a light, even layer of olive oil to your bread slices, ensuring consistent crispness without excess grease.
- Tongs: A good pair of tongs is crucial for safely flipping bread slices, especially on a hot grill or stovetop, and for handling the hot crostini.
- Wire Rack for Cooling: Allowing your crostini to cool on a wire rack is vital. It promotes air circulation, preventing the bottoms from becoming soggy due to trapped steam, thus preserving their desired crispness.
Common Crostini Troubleshooting
Common Crostini Troubleshooting
Even with simple recipes, minor issues can arise. Here are solutions to common crostini dilemmas:
How do you keep crostini from getting soggy? This is a frequent challenge, as many delicious toppings contain moisture that can quickly saturate and soften your crisp crostini. The key is to create a protective barrier. Start by spreading a creamy, thicker base onto the crostini before adding juicier toppings. Excellent choices include cream cheese, softened goat cheese, ricotta, hummus, mayonnaise, or pesto. This creamy layer acts as a shield, preventing liquid-rich ingredients like chopped tomatoes or fresh fruit from making the bread soggy too quickly. For more relaxed gatherings, consider offering a “build-your-own” crostini station. Provide a basket of freshly toasted crostini alongside small bowls of various toppings, allowing guests to assemble their creations just before eating, ensuring optimal crispness.
How do you soften hard crostini? Overcooked crostini can become excessively hard, making them difficult to bite into and potentially uncomfortable for the roof of your mouth. They also tend to crumble too easily upon the first bite. To prevent this, always monitor your bread closely during cooking and remove it from the heat as soon as it’s lightly golden and crisp, not overly browned. If you find your crostini have become too hard after cooling, a simple trick is to apply your chosen toppings a few minutes in advance of serving. The moisture from the toppings will be absorbed by the bread, gently softening it to a more pleasant texture without making it completely soggy.
Smart Make-Ahead Strategies for Crostini
Smart Make-Ahead Strategies for Crostini
Preparing crostini can be a breeze, and with a few make-ahead tips, you can reduce stress, especially when entertaining. Here’s how to best store your crostini, whether toasted or un-toasted, for optimal results:
Storing Toasted Crostini: While crostini are undoubtedly at their best when freshly toasted, you can certainly prepare the toasted bread bases up to 3 to 4 days in advance. This is a fantastic time-saver for party planning! After cooking, allow your crostini to cool completely on a wire rack until they reach room temperature. Then, transfer them to an airtight container. Store them at room temperature in a cool, dry place. Be aware that over time, they might become slightly more crunchy or harder, but they will still serve as a wonderful base. The most important rule for make-ahead crostini is to add your chosen toppings immediately prior to serving. Applying toppings too early will inevitably lead to soggy crostini, compromising their delightful crisp texture.
Freezing Crostini (Un-toasted): If you’re looking to extend the shelf life even further or prefer to prepare your bread far in advance, freezing is an excellent option. However, for the best quality and crunch, we highly recommend slicing the bread (baguette) thinly and freezing the raw slices *before* toasting or cooking them. Simply arrange the slices in a single layer on a baking sheet, freeze until solid, then transfer them to a freezer-safe bag or container. This method preserves the bread’s texture far better than freezing already-cooked crostini. When you’re ready to use them, you can toast the frozen slices directly, adjusting the cooking time slightly, for results almost as good as fresh.
Inspiring Topping Ideas for Your Crostini Creations
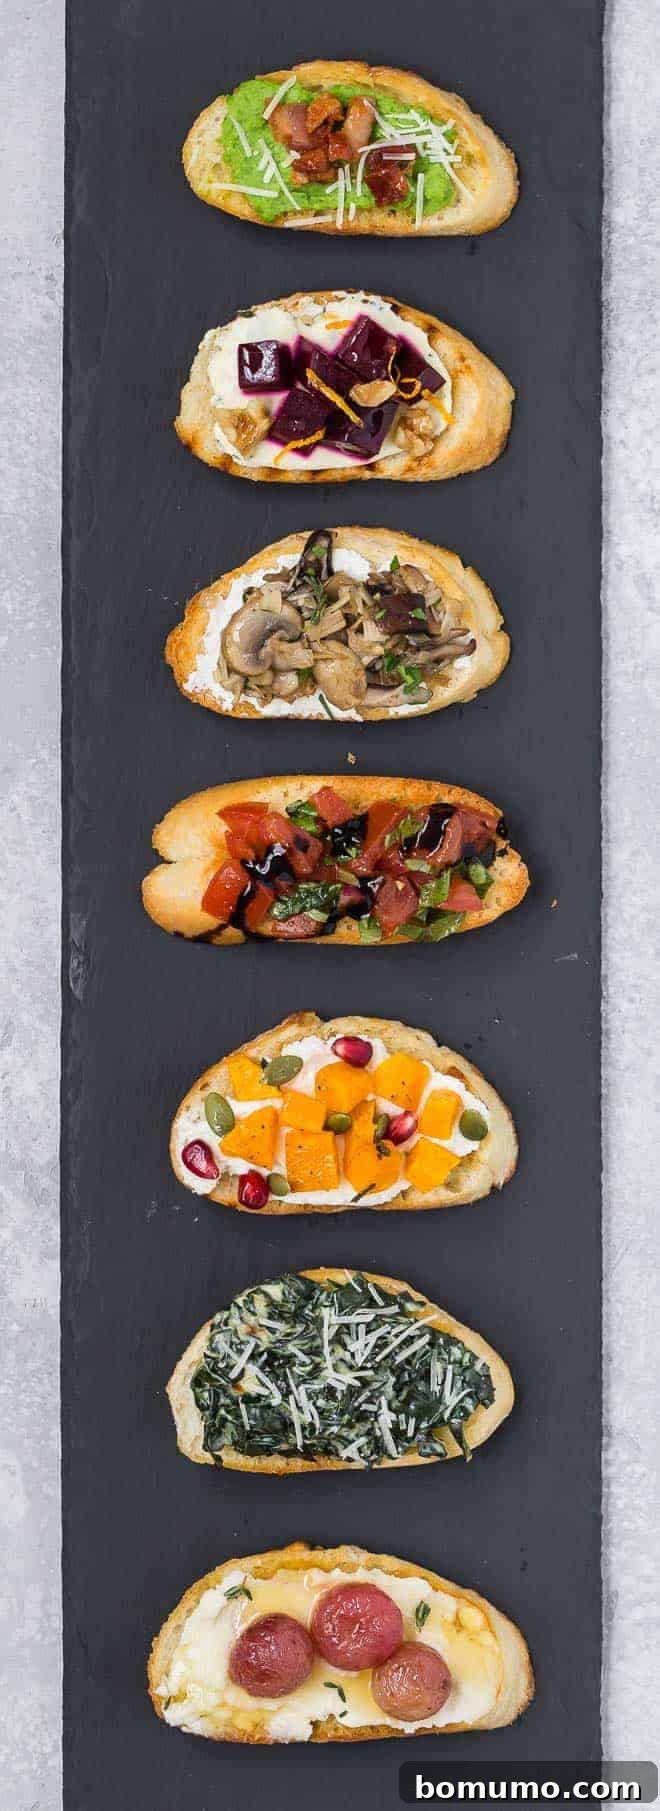
Once you’ve mastered the art of making perfectly crisp crostini, the real adventure begins with choosing your toppings! The possibilities are virtually endless, ranging from savory to sweet, simple to sophisticated. Crostini are truly a blank canvas for your culinary imagination. Here are some of our favorite recipes and ideas to get you started on your delicious journey:
- Roasted Grape and Ricotta Crostini: If you’ve never experienced the magic of roasted grapes, you’re in for a treat! The exquisite combination of naturally sweet, caramelized grapes, fresh ricotta, aromatic savory thyme, and a delicate drizzle of honey creates an out-of-this-world flavor profile that’s both unique and incredibly satisfying.
- Roasted Tomato and Ricotta Crostini: A delightful recipe inspired by family tradition, this has quickly become a beloved favorite. The sweetness of slow-roasted tomatoes paired with creamy ricotta cheese offers a comforting yet elegant bite.
- Basil Pesto Crostini: A classic for a reason! Spread vibrant basil pesto generously onto your crostini, then top with either sweet roasted tomatoes or fresh, juicy chopped tomatoes. Don’t stop there – explore other exciting variations like our zesty cilantro pesto or the peppery notes of arugula pesto. For an extra layer of indulgence, start with a base of spreadable cream cheese or rich ricotta before adding the pesto and tomatoes.
- Beet Bruschetta with Orange Tarragon Goat Cheese: An unexpected yet harmonious blend of earthy beets and tangy goat cheese, brightened by orange and tarragon. This recipe offers a sophisticated twist.
- Creamy Pea Crostini with Crispy Pancetta: A delightful textural contrast, combining the smooth sweetness of pureed peas with the salty crunch of crispy pancetta.
- Butternut Squash Crostini with Ricotta: Perfect for autumn and winter, this crostini features roasted butternut squash and creamy ricotta, often enhanced with a hint of sage or maple.
- Wild Mushroom Crostini with Goat Cheese: Earthy sautéed wild mushrooms are paired with the pungent tang of goat cheese for a savory and sophisticated appetizer that’s always a hit.
- Creamy Kale Bruschetta: A fresh and healthy option, featuring vibrant kale cooked into a creamy spread, often with garlic and Parmesan.
- Classic Tomato Bruschetta: The quintessential Italian appetizer, featuring ripe, diced tomatoes, fresh basil, garlic, and a drizzle of balsamic glaze. Simple, fresh, and always a crowd-pleaser.
- Baked Goat Cheese Dip: Serve warm, creamy baked goat cheese on crostini, perhaps topped with herbs, honey, or a fruit compote for a luxurious treat.
- For ultimate simplicity, keep it light and easy with a smear of sweet, mellow roasted garlic, a dollop of creamy homemade hummus, or a scoop of fresh, vibrant guacamole. These options are quick to prepare and universally loved.
How to Make Crostini: The Essential Guide
★
★
★
★
Rachel Gurk
5
10
15
24 Crostini
Equipment
-
Sheet Pans
-
Grill Pan or Heavy Frying Pan
-
Olive Oil Sprayer or Silicone Brush
-
Wire Rack for Cooling
-
Tongs
Ingredients
- 1 French baguette, cut into ¼-inch (approx. 0.6 cm) slices (yielding about 24 slices)
- 3 tablespoons olive oil, more as needed for frying
Instructions
Method 1: Baking Crostini (Recommended for Large Batches)
-
Preheat your oven to 400ºF (200ºC). Lightly brush or spray both sides of the sliced baguette with olive oil. Arrange the slices in a single layer on a baking sheet, ensuring they do not overlap. Place the baking sheet on the center rack of the preheated oven.1 French baguette, cut into ¼-inch slices, 3 tablespoons olive oil, more as needed
-
Bake for 7 minutes. Carefully flip each crostini over, then continue baking for another 6 to 7 minutes, or until the edges are lightly browned and the crostini are completely crisp and dry. Monitor closely to prevent them from becoming too dark or burnt.
-
Remove the crostini from the baking sheet and transfer them to a wire rack to cool completely.
-
Top with your desired spreads and ingredients immediately prior to serving for the best texture and flavor.
Method 2: Grilling Crostini (For Smoky Flavor and Grill Marks)
-
Preheat your grill pan or outdoor grill to medium-high heat. Ensure the surface is hot.
-
Brush or spray both sides of your sliced bread lightly with olive oil. Place the slices onto the preheated grill or grill pan. Grill for 3 to 5 minutes per side, or until they are lightly browned and show distinct grill marks. Continue grilling in batches until all slices are done.
-
Remove from the grill or grill pan and cool on a wire rack.
-
Top with your chosen toppings and serve without delay to enjoy maximum crispness.
Method 3: Stovetop Crostini (Quick for Small Batches)
-
Preheat a heavy skillet (cast iron works exceptionally well) over medium-high heat.
-
Add 2 tablespoons of olive oil to the hot pan. Carefully place half of the bread slices into the pan, ensuring not to overcrowd. As you add each slice, immediately flip it over to lightly coat both sides with the olive oil. Add more oil as needed between batches to maintain even cooking.
-
Sauté for approximately 3 to 5 minutes per side, or until the crostini are beautifully golden brown and crisp. Continuously check the underside to monitor the browning and remove each piece as it reaches perfection, as they can burn quickly.
-
Remove the finished crostini from the pan and cool them on a wire rack. Repeat this process for any remaining bread slices, adding more olive oil if necessary for subsequent batches.
-
Add your preferred toppings just before serving to prevent the crostini from becoming soggy.
Notes
- Storage/Make Ahead: For the freshest taste and crunch, crostini are best enjoyed immediately after toasting. However, you can prepare the plain crostini toasts up to 3 to 4 days in advance. Ensure they are completely cooled before storing them in an airtight container at room temperature. Remember to apply toppings only just before serving to maintain crispness.
- Toppings: Dive into the section above for a wealth of creative topping ideas and links to specific recipes to inspire your crostini creations.
- Nutrition: The provided nutrition information pertains solely to the plain crostini bread base and does not include any added toppings.
Nutrition Information
Calories: 85 kcal
Carbohydrates: 10 g
Protein: 2 g
Fat: 4 g
Saturated Fat: 1 g
Polyunsaturated Fat: 1 g
Monounsaturated Fat: 3 g
Sodium: 129 mg
Potassium: 26 mg
Fiber: 0.4 g
Sugar: 1 g
Calcium: 22 mg
Iron: 1 mg
Nutrition information is automatically calculated and should only be used as an approximation.
Did You Make This Recipe?
We’d love to hear your thoughts! Share a comment and rating below to let us know how it turned out.
With these methods and tips, you’re well on your way to creating perfectly crisp, delicious crostini every time. Whether for a festive holiday party, a casual weeknight gathering, or a delightful accompaniment to a simple meal, homemade crostini are a versatile and impressive addition to any table. Don’t hesitate to experiment with different breads, oils, and an endless array of toppings to discover your new favorite combinations. Happy toasting!