
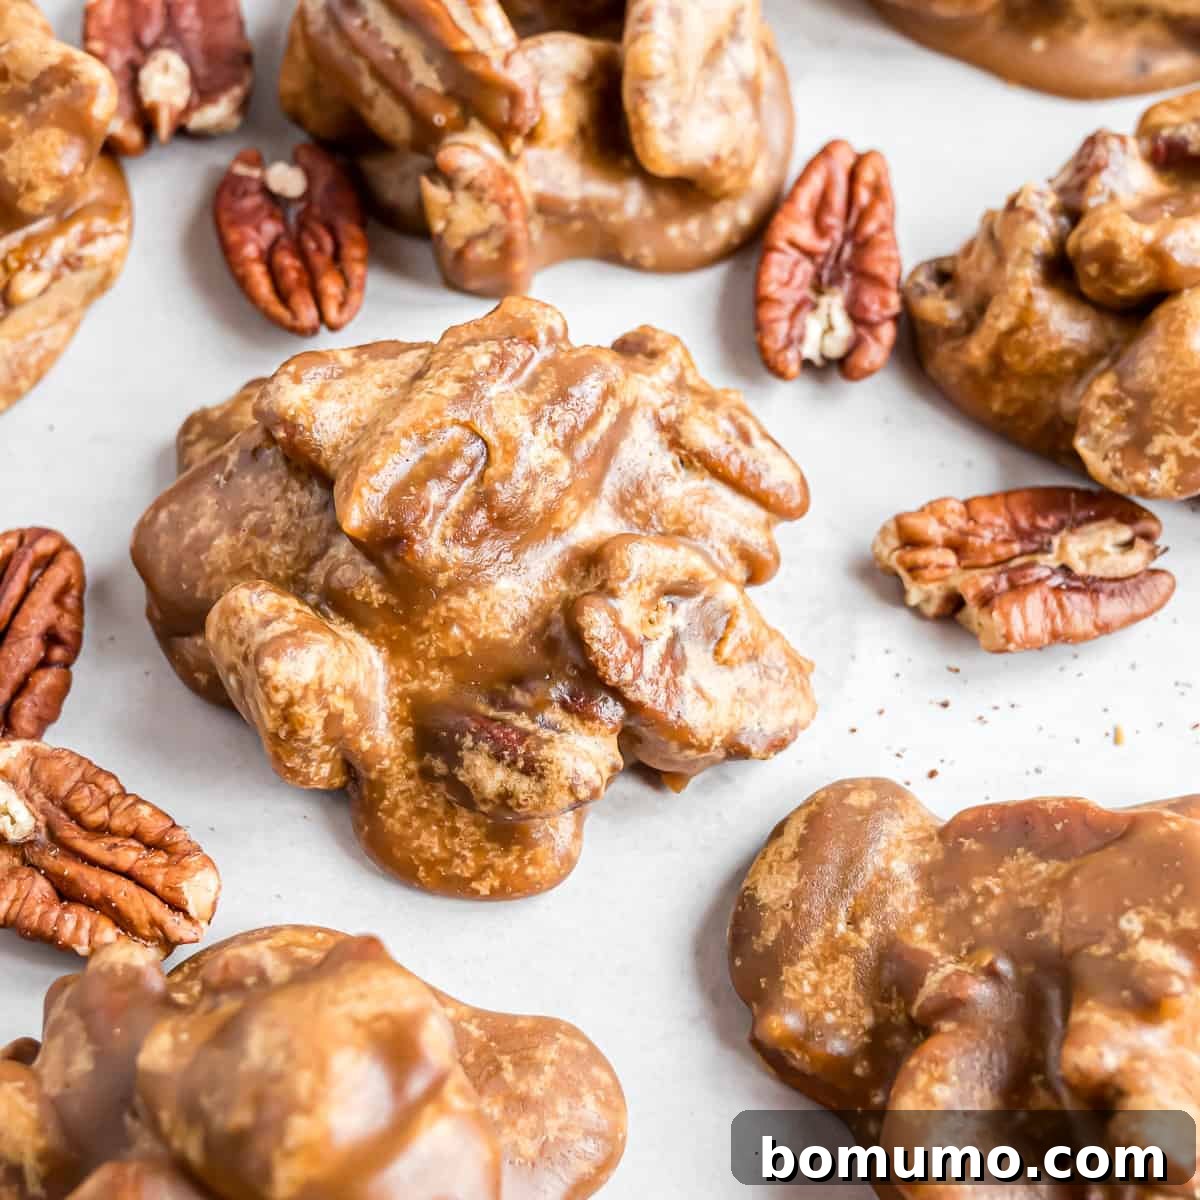
Pecan pralines are a confectionery masterpiece, an irresistible blend of contrasting textures and tastes. Imagine the satisfying crunch of toasted pecans giving way to a creamy, melt-in-your-mouth caramel, all infused with rich, buttery, and caramelized notes. This delightful candy strikes a perfect balance between sweet and salty, making every bite a truly memorable experience.
Recipe Overview
Why you’ll love it: Achieve authentic, creamy, and crunchy pecan pralines with surprising ease!
How long it takes: Approximately 1 hour and 5 minutes, including cooling time.
Equipment you’ll need: A reliable candy thermometer and a heavy-bottomed saucepan are essential.
Servings: This recipe yields about 24 delectable pralines.
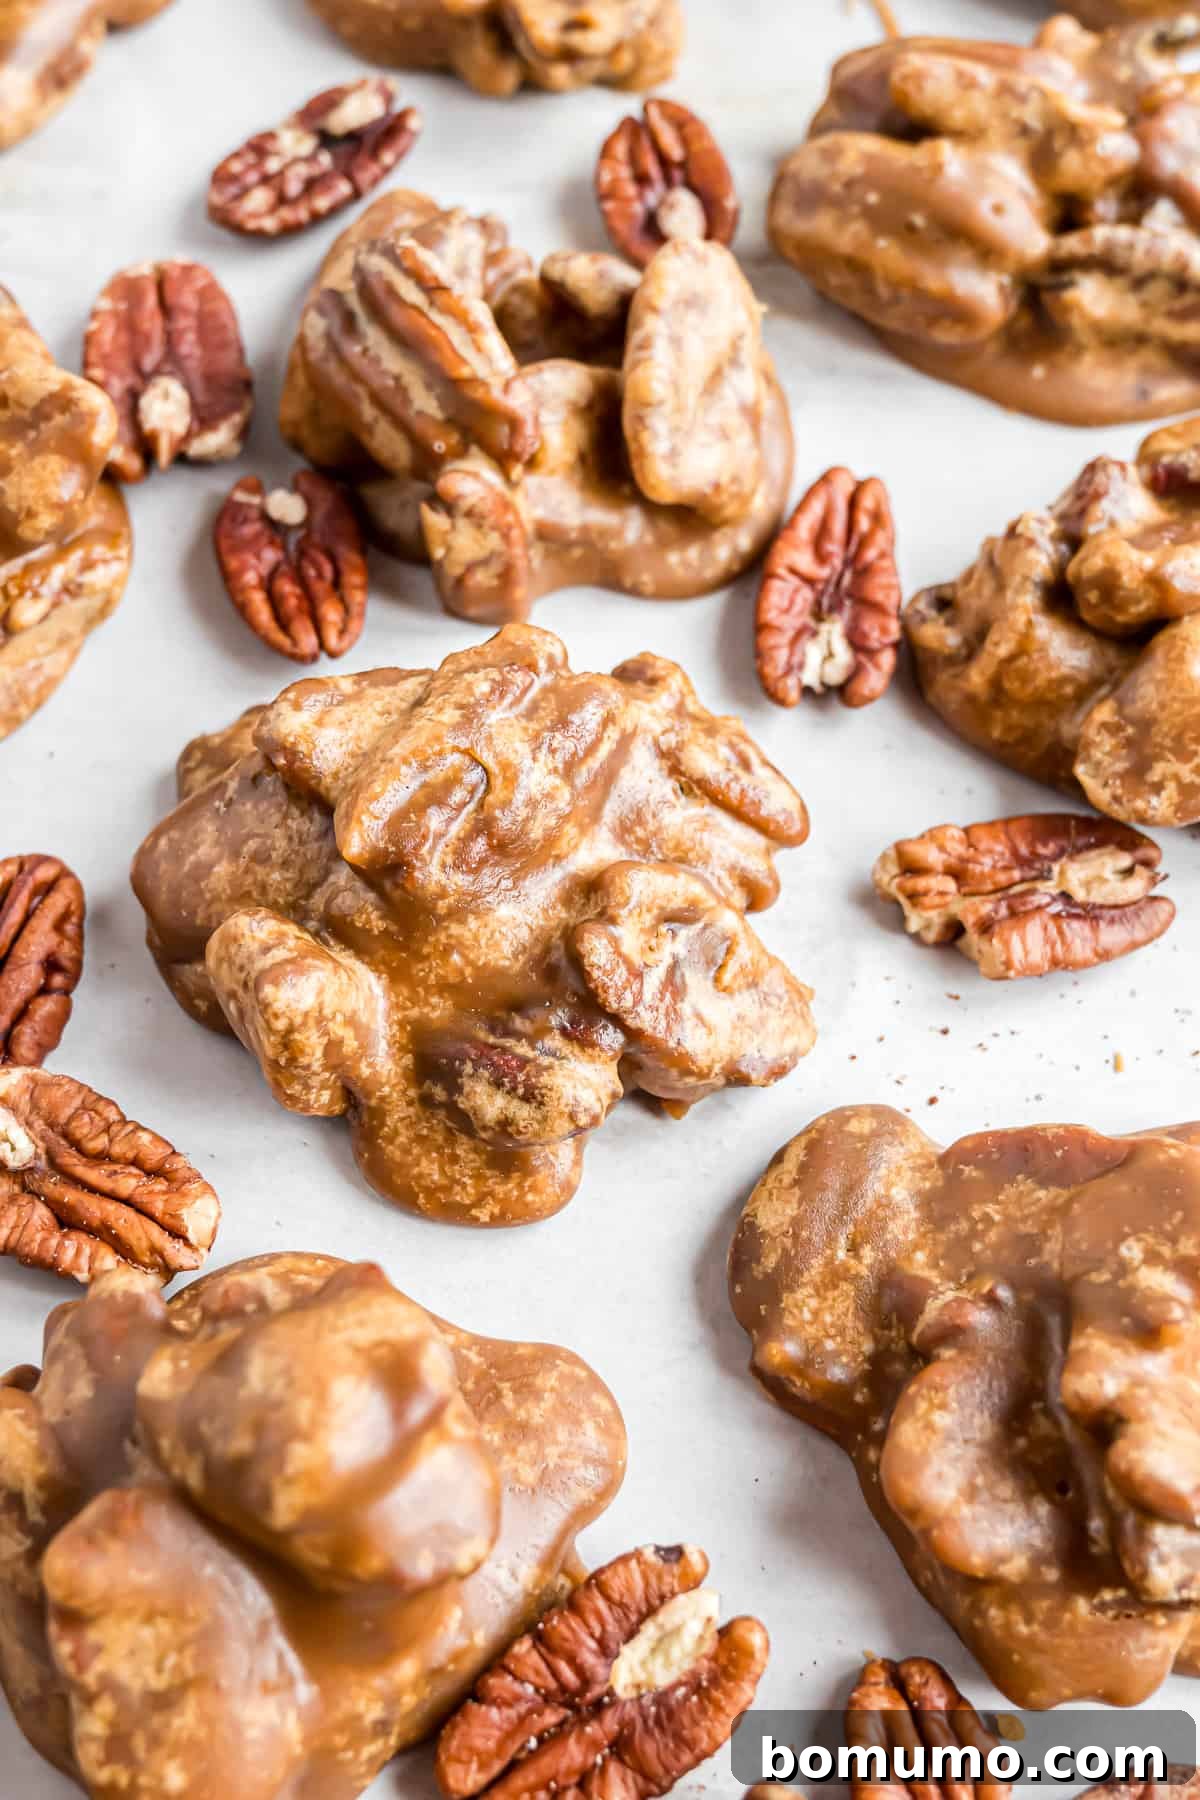
Ah, pralines – a beloved confectionery that evokes images of Southern charm, hospitality, and rich culinary traditions. These delightful treats are a must-try for any nut lover and a popular souvenir for tourists exploring the American South. Imagine bringing back a box of these sweet, nutty morsels as the perfect gift for a friend or neighbor. They’re more than just candy; they’re a taste of history and comfort in every bite.
If you’ve ever considered delving into the art of candy making, this pecan praline recipe offers an excellent starting point. Despite their sophisticated appearance and name, pralines are surprisingly straightforward to create at home. Those familiar with making homemade caramels or other classic candies will recognize many of the steps involved, especially the crucial role of a candy thermometer. This essential tool ensures your mixture reaches the precise temperature needed for that perfect, creamy consistency.
Once you’ve successfully whipped up a batch of these glorious pecan pralines, you might find yourself pondering some interesting historical and linguistic questions. Do you pronounce it “pray-leen” or “prah-leen”? And where do these delectable candies truly belong – are they distinctly Southern, quintessentially Texan, or proudly Creole? The fascinating truth is that while closely associated with the Southern United States, the origin of pralines traces back to France. As for the pronunciation, regional variations abound, adding to the charm and mystique of this timeless confection. Ultimately, the best way to settle the debate is to enjoy their rich flavor, regardless of how you say their name!
Why You’ll Fall in Love with This Pecan Pralines Recipe
Discover the irresistible allure of homemade pecan pralines and why this recipe is destined to become a cherished favorite in your kitchen:
- A Treat for Every Nut Lover: While some appreciate the simplicity of straight-up salted nuts, many find joy in a sweetened, more elaborate nut preparation. Think of indulgent vanilla bean candied walnuts or the rich complexity of candied bourbon pecans. Pecan pralines elevate this experience, offering a perfect harmony of robust pecan flavor enveloped in a luscious, caramelized candy coating. They cater not only to devoted nut enthusiasts but also to anyone who appreciates fine candy craftsmanship.
- Surprisingly Simple to Master: Don’t let the elegant French name intimidate you. Pecan pralines are remarkably accessible for home cooks, even those new to candy making. This recipe serves as an excellent introduction to more advanced confectionery techniques, building confidence with clear steps and reliable results. With a few key pieces of equipment and a little patience, you’ll be creating professional-quality pralines in no time.
- The Ultimate Homemade Gift: Few gifts convey warmth and thoughtfulness like homemade treats. Pecan pralines are ideal for any occasion, from festive holiday gatherings to a thoughtful hostess gift. Their impressive presentation and exquisite taste make them universally appreciated. For another popular homemade gift idea, consider whipping up a batch of homemade caramel corn – equally delightful and well-received.
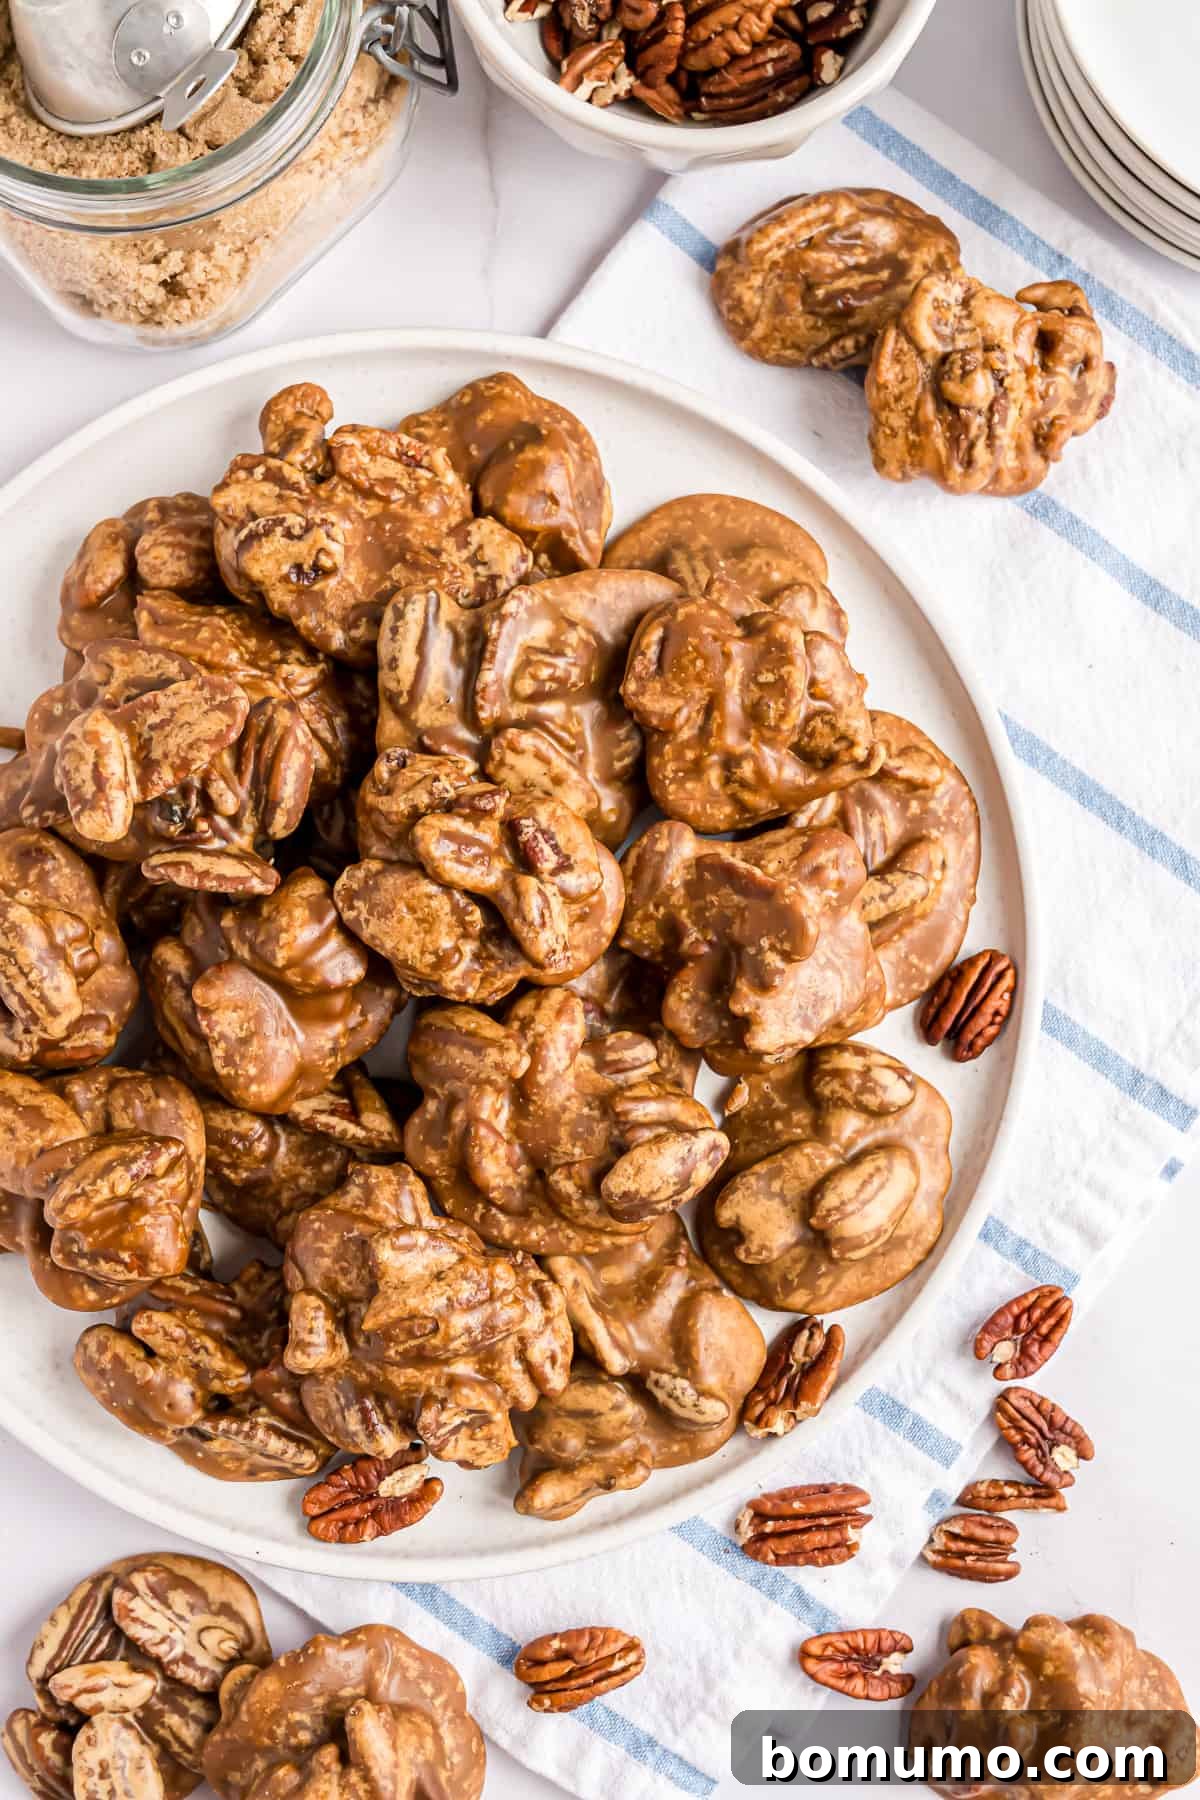
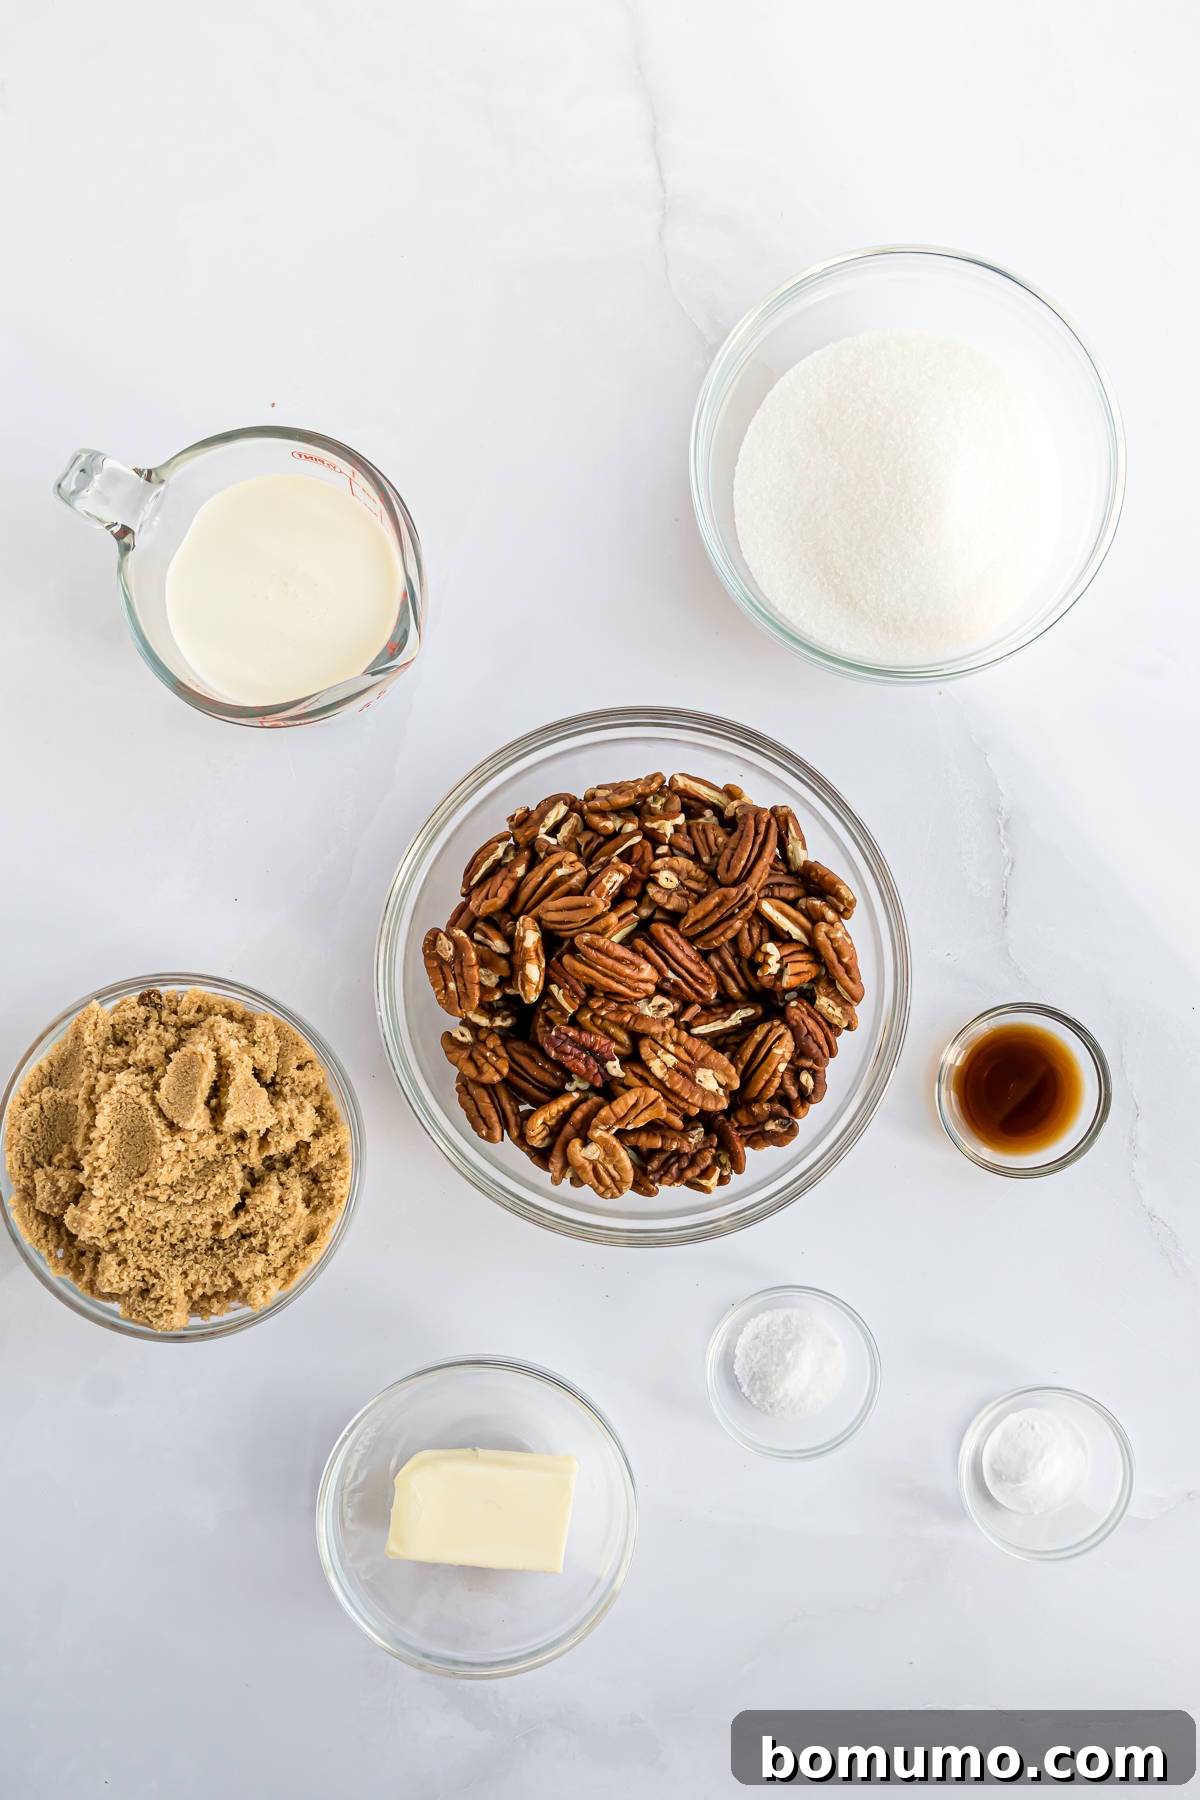
The Essential Ingredients for Perfect Pralines
Crafting the perfect pecan praline begins with understanding the role each ingredient plays. Below are some notes on the key components. For precise measurements and comprehensive instructions, please refer to the full recipe card further down the page.
- Unsalted Butter: The foundation of our praline’s rich, creamy texture and depth of flavor. By using unsalted butter, we maintain complete control over the salt content, allowing us to perfectly balance the sweetness and ensure a harmonious taste profile. Using salted butter could make the final product overly salty.
- Sugar (Granulated and Light Brown): This recipe calls for a combination of both granulated sugar and light brown sugar. Granulated sugar provides the primary sweetness and structure, while light brown sugar, with its natural molasses content, contributes a deeper, more complex caramelized flavor and a softer, chewier texture to the praline. This blend is crucial for the classic praline taste.
- Heavy Whipping Cream: A vital ingredient for achieving the characteristic creamy consistency of pralines. The high fat content of heavy whipping cream emulsifies with the sugars, preventing crystallization and resulting in a smooth, luxurious texture. While some recipes might suggest half-and-half, heavy cream delivers a noticeably richer and more authentic praline experience.
- Baking Soda: While not universally present in all praline recipes, a touch of baking soda here plays a subtle yet important role. It reacts with the acids in the brown sugar and cream, creating tiny air bubbles that contribute to a lighter, slightly airier texture, making the pralines less dense and more pleasant to bite into.
- Salt: Essential for balancing the intense sweetness of the sugar and enhancing all the other flavors. Adding salt directly to the mixture prevents the pralines from being cloyingly sweet. For an elevated sweet-and-salty contrast, consider a light sprinkle of flaky sea salt over the pralines immediately after spooning them onto parchment paper.
- Pure Vanilla Extract: A crucial flavor enhancer that adds warmth, depth, and a classic aromatic touch to the pralines. Choose a high-quality pure vanilla extract for the best results. For a delightful flavor variation, a good quality brandy can be substituted for an adult twist.
- Pecan Halves: The star of the show! Pecans provide the signature nutty flavor and satisfying crunch. While less expensive pecan pieces can be used, pecan halves offer a more attractive presentation, showcasing the natural beauty of the nuts within each praline. Ensure your pecans are fresh for optimal flavor.
- Light Corn Syrup (Optional): This ingredient acts as an anti-crystallization agent. It helps to prevent the formation of large sugar crystals, which can lead to “white spots” or a grainy texture in your pralines. While these minor crystallizations don’t affect the taste, if you desire perfectly smooth and visually flawless pralines for gifting or entertaining, incorporating a tablespoon of light corn syrup is highly recommended.
Pro Tip: The Power of a Heavy-Bottomed Pan
When a recipe specifically calls for a heavy-bottomed pan, it’s for a very good reason: ensuring uniform cooking. Thin-bottomed saucepans can create hot spots, leading to uneven heating and potential scorching, especially with sugar-based mixtures. A heavy pan, typically made of cast iron or thick stainless steel, absorbs and distributes heat far more evenly across its surface. This consistent heat distribution is paramount for candy making, preventing the sugar from burning in one area while remaining undercooked in another. For this praline recipe, we recommend a 3-quart heavy-bottomed pan to comfortably accommodate the boiling mixture.
Mastering the Art of Homemade Pecan Pralines: A Step-by-Step Guide
Before you begin, a quick safety note: when working with hot sugar, it’s wise to protect yourself. Roll your sleeves down or wear long sleeves to guard your arms from any potential spatters of the molten candy mixture. Now, let’s dive into creating these irresistible homemade pralines.
-
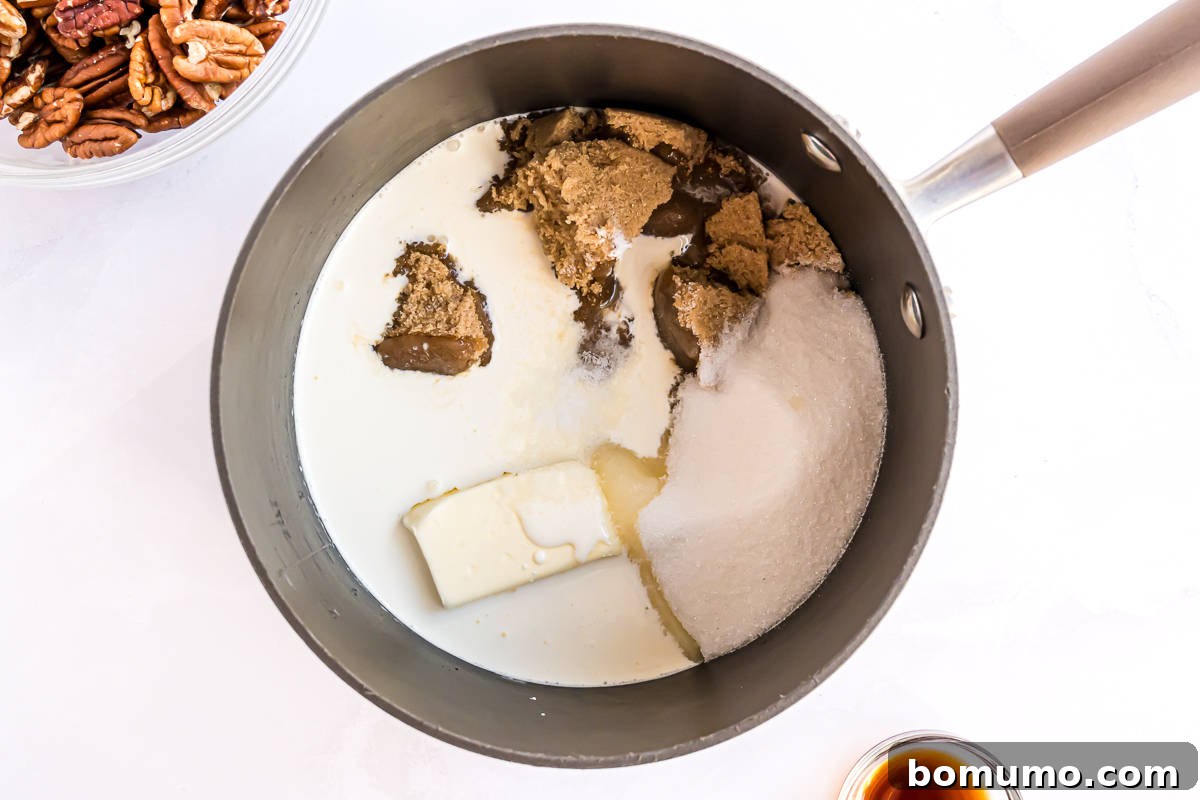
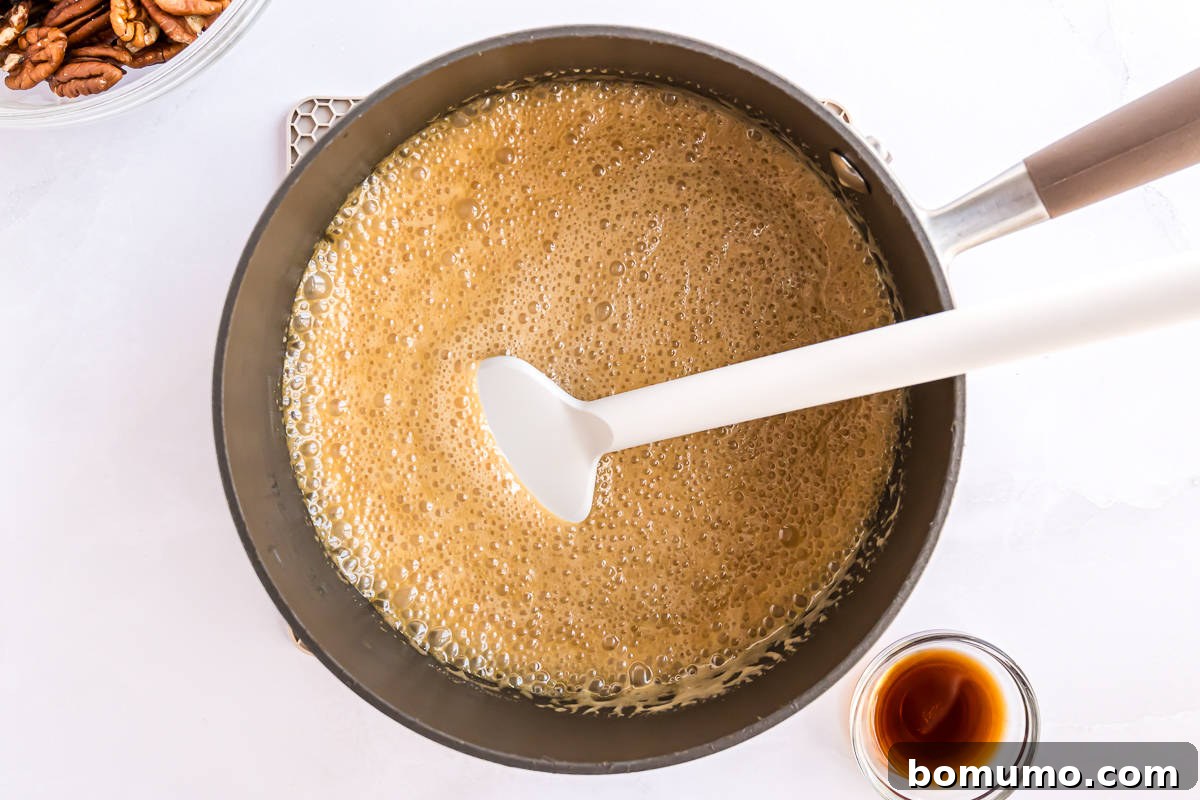
Initiate the Praline Mixture’s Boil: Begin by combining the unsalted butter, granulated sugar, light brown sugar, heavy whipping cream, baking soda, salt, and the optional light corn syrup in your large, heavy-bottomed saucepan. Place the pan over medium-high heat. Stir the mixture continuously, ensuring all ingredients are well combined and dissolving. This constant stirring is crucial until the mixture reaches a robust, rolling boil, a process that typically takes about 5 to 6 minutes.

-
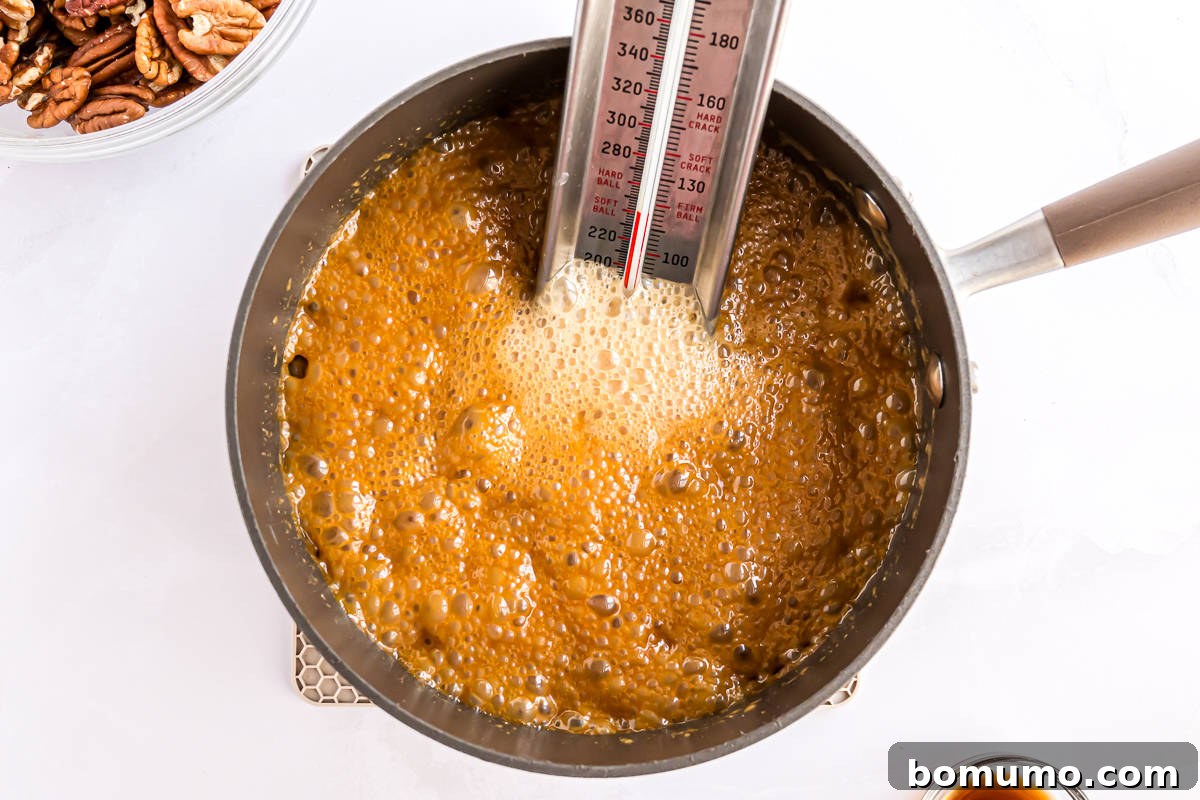
Achieve the Soft Ball Stage: Once the mixture has reached a rolling boil, cease stirring. Carefully insert your candy thermometer into the boiling mixture, ensuring the tip does not touch the bottom of the pan. Continue to boil the mixture without stirring until the thermometer registers between 235℉ and 240℉. This critical temperature range signifies the “soft ball” stage, where a small amount of the syrup dropped into cold water forms a soft, pliable ball. During this phase, the mixture will become quite foamy and bubble vigorously. It’s essential to resist any urge to stir, as this can encourage sugar crystallization.
-
Initial Cooling Phase: Promptly remove the saucepan from the heat once the soft ball stage is reached. Allow the hot mixture to cool undisturbed for precisely 5 minutes. While it’s cooling, take this opportunity to prepare your workspace: line a clean counter surface or two large baking sheets with parchment paper. This will be the landing spot for your freshly formed pralines.
-
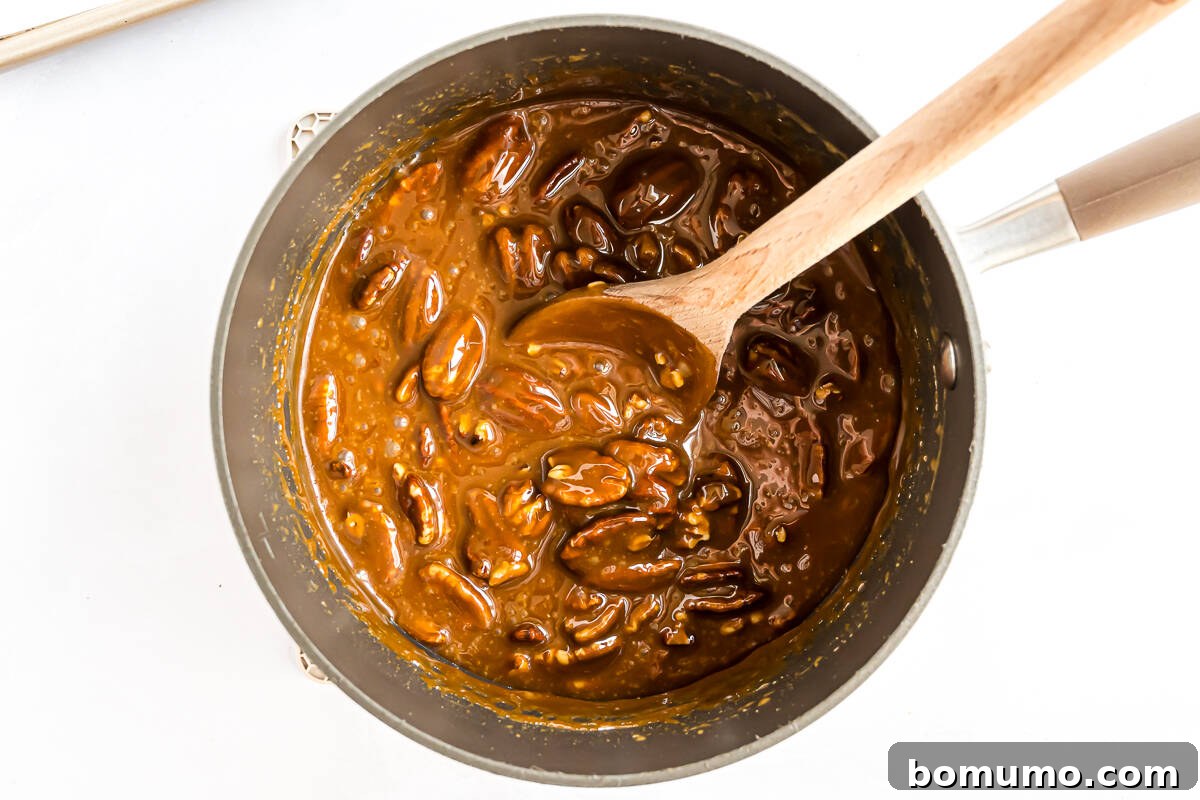
Incorporate Flavor and Nuts: After the initial 5-minute cooling period, stir in the pure vanilla extract and the pecan halves. Now, continue to stir the mixture consistently. You’ll notice it beginning to thicken slightly and lose some of its sheen, becoming a bit more opaque and creamy. This stirring process, lasting about 1 to 2 minutes, is crucial for developing the proper praline texture and preventing separation.
-
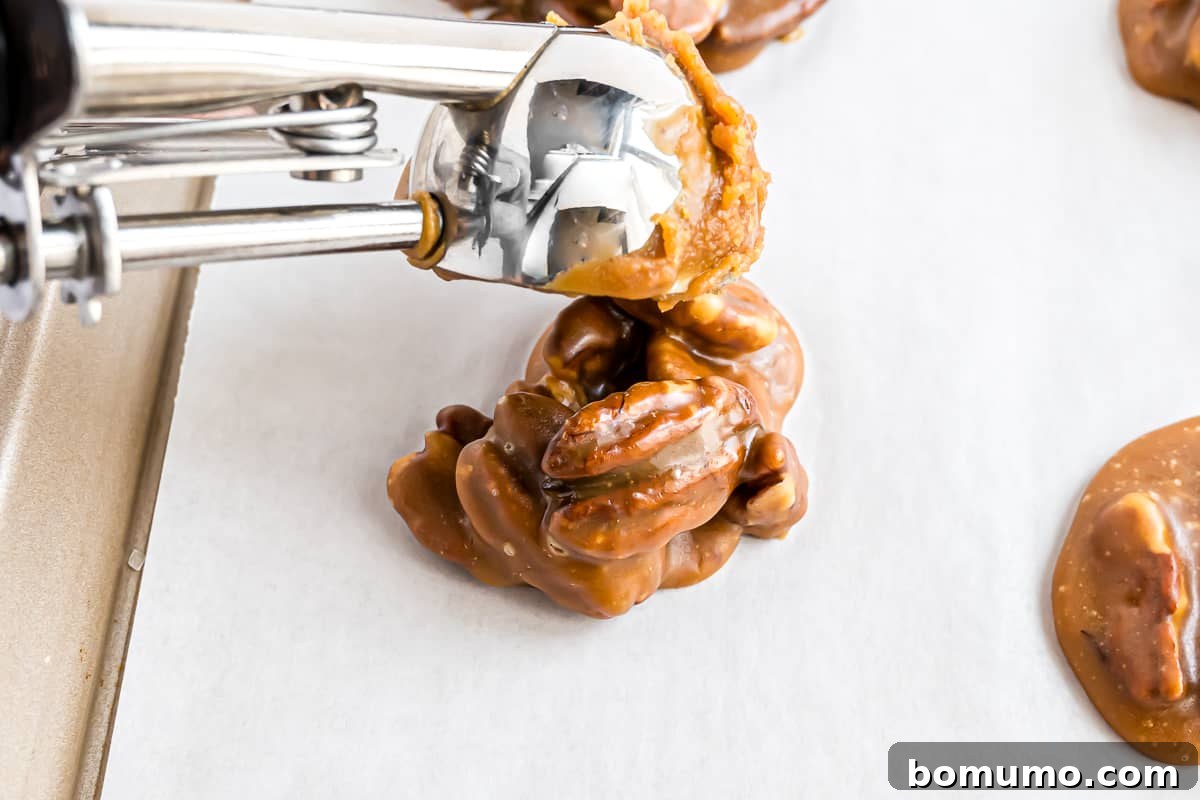
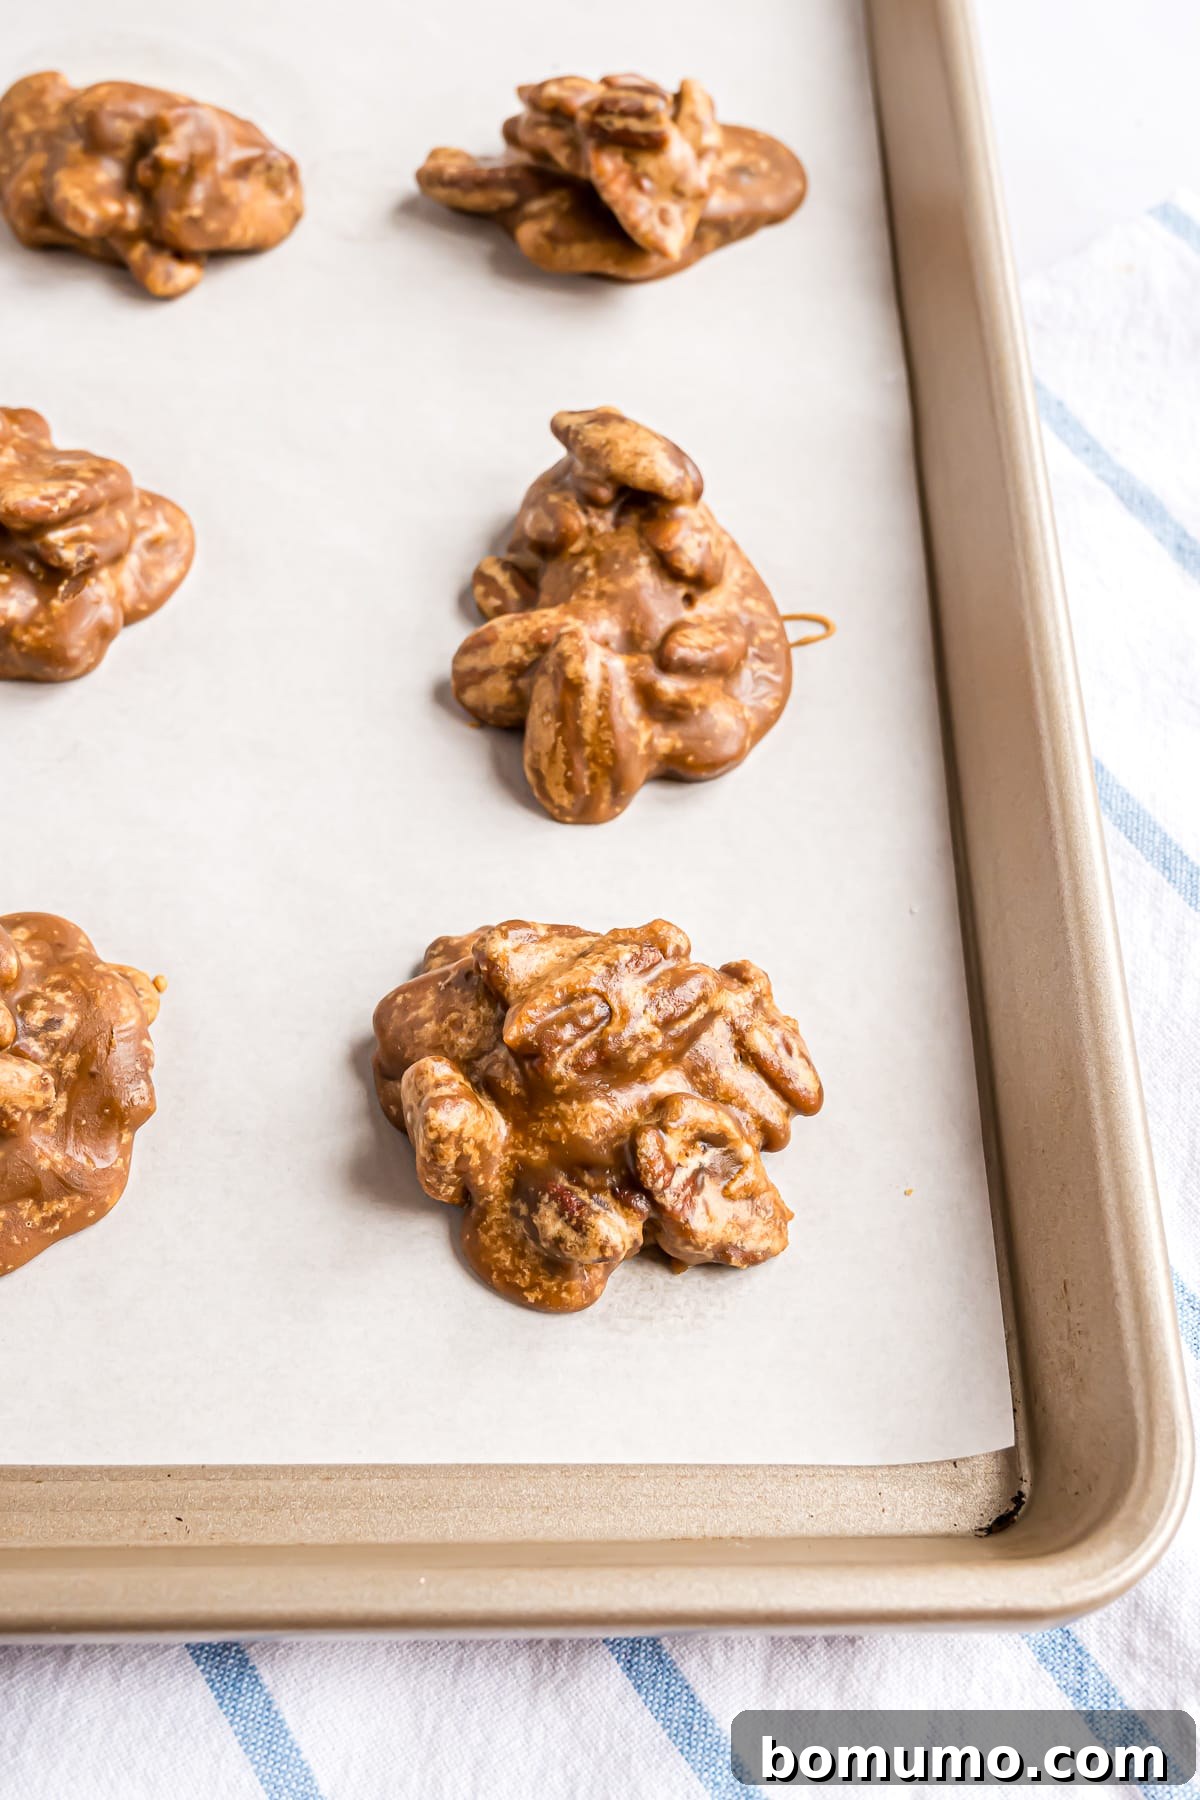
Form the Pralines: Once the mixture has visibly thickened and coats the pecans well (typically after about a minute of stirring), it’s time to form your pralines. Using a 2-tablespoon cookie scoop provides uniform portions and makes the process cleaner. Drop scoops of the nutty mixture onto the prepared parchment paper. If your first few attempts spread out too much and fail to hold a distinct shape, continue stirring the mixture for another 30-60 seconds, then try again. The mixture sets quickly, so work efficiently. If you don’t have a cookie scoop, two spoons can also work effectively: one to scoop the mixture and the other to push it off onto the parchment.
-
Final Cooling and Setting: Allow the freshly formed pecan pralines to cool and set on the parchment paper. They will need at least 15 minutes to firm up sufficiently for handling. You can enjoy them slightly warm for a gooey, fresh-from-the-pan experience, or for optimal texture and firmness, let them cool completely for approximately 45 minutes before indulging. The waiting is the hardest part!
Tips for Praline Perfection: Insights on Pecans & Process
Achieving outstanding pralines involves attention to detail, especially concerning the pecans and the candy-making process. Here are some key tips for success:
- Toasting Pecans (Optional, but Recommended): While the recipe doesn’t strictly require pre-toasting, doing so can significantly deepen the nutty flavor of the pecans. Lightly toasting them in a dry pan or oven for a few minutes before adding them to the mixture enhances their aroma and taste, adding another layer of complexity to your pralines. Even without pre-toasting, the heat from the hot candy mixture will gently warm the pecans, releasing some of their natural oils and nutty essence.
- Maintaining Pecan Integrity: For that desirable crunchy texture and attractive appearance, it’s best to keep the majority of your pecan halves intact. Avoid chopping more than half of the pecans into smaller pieces. Over-chopping can result in a different, less substantial texture, diminishing the satisfying crunch that is a hallmark of a great praline.
- Room Temperature Pecans Are Best: If you store your pecans in the freezer to preserve their freshness, ensure they are brought to room temperature before incorporating them into the hot praline mixture. Adding ice-cold pecans can drastically lower the temperature of your candy base, potentially disrupting the crystallization process and affecting the final texture of your pralines.
- The Utility of a Cookie Scoop: While not strictly mandatory, a 2-tablespoon cookie scoop is an invaluable tool for forming uniform pralines with ease. Its release mechanism helps cleanly deposit the sticky mixture onto the parchment paper. If a scoop isn’t available, employing two spoons—one for scooping and another for gently pushing the mixture off—is an effective alternative.
- The Golden Rule: Do Not Stir Post-Boil: Once your sugar mixture has reached a rolling boil and you’ve inserted the candy thermometer, resist the urge to stir it. Stirring after this point can initiate premature sugar crystallization, leading to a grainy or crumbly texture rather than the smooth, creamy consistency pralines are celebrated for. Allow the sugars to caramelize undisturbed until the soft ball stage is achieved.
- The Critical “Set” Test: When it’s time to scoop your pralines, perform a small test first. Drop a tiny amount of the mixture onto parchment paper. If it spreads into a puddle and doesn’t hold its shape, the mixture hasn’t thickened enough yet; continue stirring for a short while longer. Conversely, if it hardens too quickly and crumbles, it might be slightly overcooked, and salvaging the batch can be challenging. The window for perfect consistency is relatively short, so don’t be discouraged if it takes a batch or two to perfect your technique.
- Combatting Crystallization with Corn Syrup: To minimize the appearance of “white spots” or a grainy texture caused by sugar crystallization, the optional addition of 1 tablespoon of light corn syrup is highly effective. Corn syrup acts as an invert sugar, preventing the formation of large sugar crystals. While minimal crystallization is normal and doesn’t impact flavor, corn syrup ensures a picture-perfect, smooth finish.
- Embrace Batch Variations: It’s important to understand that even with the same recipe, each batch of homemade pralines can exhibit slight variations. Factors such as ambient humidity, precise cooking times, and even minor differences in ingredient temperatures can influence the final color (some might be a bit browner), texture, or degree of crystallization. Rest assured, regardless of these minor visual differences, your homemade pralines will always taste wonderfully delicious!
Essential Equipment: The Candy Thermometer
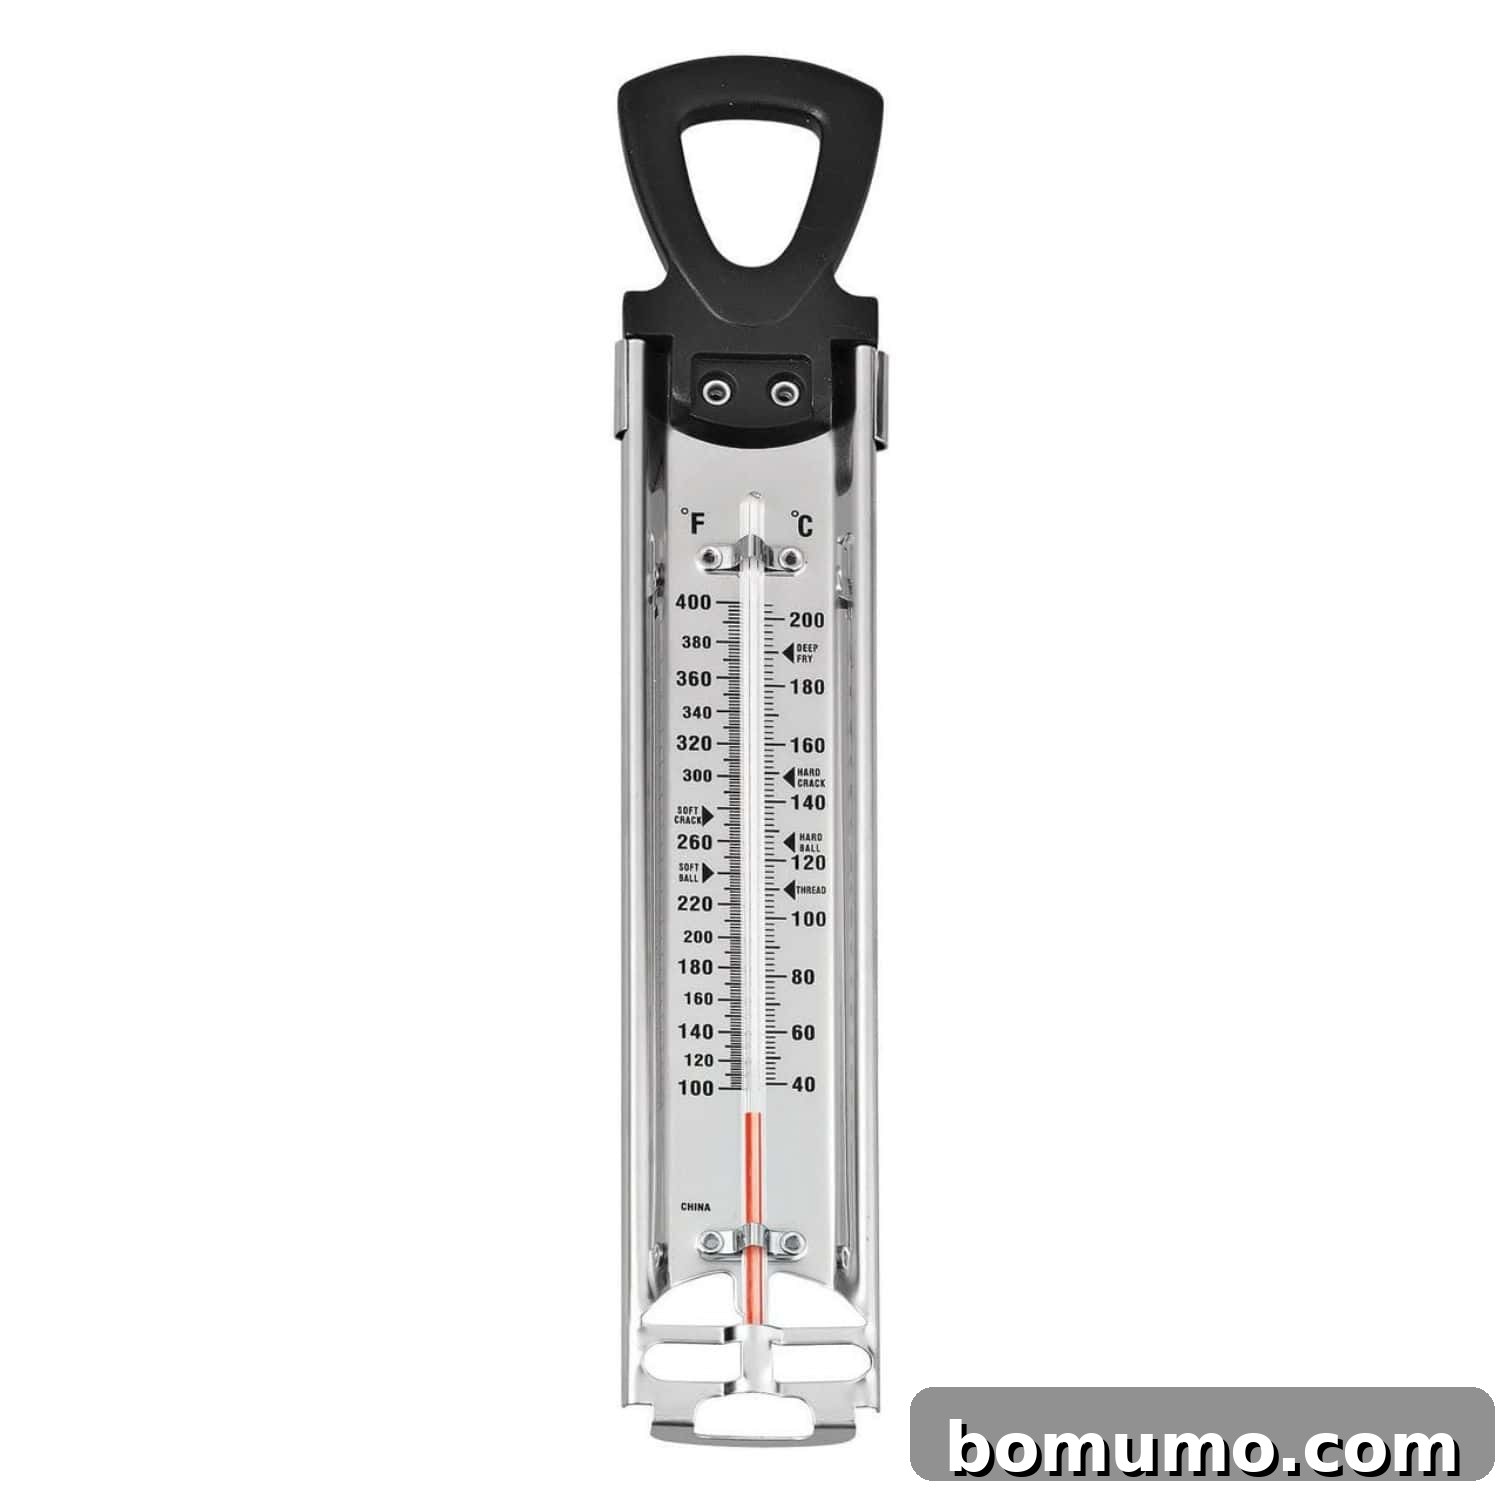
A candy thermometer is not just a recommendation; it is an indispensable tool for achieving consistent success in candy making, especially for recipes like pecan pralines that rely on precise temperature control. Unlike instant-read thermometers, candy thermometers are designed with a longer probe and are built to withstand prolonged exposure to the high temperatures required for sugar syrups. They typically feature a clip that attaches securely to the side of your saucepan, allowing you to constantly monitor the rising temperature of the boiling mixture without having to hold it. This constant vigilance ensures you hit the crucial “soft ball” stage accurately, which is the key to perfectly textured pralines.
How To Store Pralines
Proper storage is key to maintaining the freshness and deliciousness of your homemade pecan pralines. Once they have completely cooled and firmed up, transfer them to an airtight container or a freezer-safe bag. At room temperature, stored in a cool, dry place, your pralines will remain fresh and flavorful for 1 to 2 weeks.
For extended enjoyment, pecan pralines freeze exceptionally well. Place them in a single layer in a freezer-safe container or bag, separating layers with parchment paper if stacking. They can be frozen for up to 2 months. Thaw them at room temperature before serving for the best taste and texture.
Frequently Asked Questions (FAQ) About Pecan Pralines
Here are some common questions and helpful answers to ensure your praline-making journey is a sweet success:
- Can I substitute other nuts for pecans? Absolutely! While pecans are traditional, you can certainly experiment with other nuts. Walnuts, almonds, or even cashews can create delightful variations. Keep in mind that different nuts may have slightly different oil contents and flavors, which could subtly alter the final taste and texture.
- Why did my pralines turn out grainy? Grainy pralines are often a result of sugar crystallization. This can happen if the mixture is stirred too much after it starts boiling, or if sugar crystals form on the sides of the pan and fall back into the mixture. To prevent this, avoid stirring after the boil, and occasionally wipe down the sides of the pan with a wet pastry brush to dissolve any stray sugar crystals. Using light corn syrup also helps prevent graininess.
- My pralines are too soft and don’t set. What went wrong? Pralines that don’t set properly usually indicate the mixture didn’t reach a high enough temperature. The “soft ball” stage (235-240℉) is crucial for the sugar to concentrate sufficiently. Ensure your candy thermometer is accurate and that the mixture holds at the correct temperature for long enough. High humidity can also affect setting; try making pralines on a dry day if possible.
- My pralines are too hard or crumbly. How can I fix this? This means the mixture was likely cooked to too high a temperature, past the soft ball stage. Overcooking caramelizes the sugar too much, making it brittle. There’s no way to reverse this in the current batch, but next time, be extra vigilant with your candy thermometer and remove the mixture from heat immediately once it hits 240℉.
- Can I double or halve this recipe? For candy making, it’s generally best to stick to the given recipe amounts, especially when you’re first learning. Doubling the recipe can change cooking times and temperatures significantly, making it harder to reach the correct consistency. Halving it might be less problematic but still requires careful observation.
- How do I clean sticky candy from my saucepan? The easiest way to clean a saucepan after making candy is to fill it with water and bring it to a boil. The boiling water will dissolve any hardened sugar residue, making it much easier to clean.
More Sweet Delights
Brigadeiros (Brazilian Fudge Balls)
Buckeyes Recipe (Peanut Butter & Chocolate Perfection)
Walnut Brittle
Classic Pecan Pralines
Rachel Gurk
5
15
45
1 5
24 pralines
Sweet and salty pecan pralines offer an irresistible mix of crunchy and melt-in-your-mouth textures. You’ll adore these surprisingly easy-to-make, rich, buttery, and perfectly caramelized treats!
Ingredients
- 4 tablespoons unsalted butter
- 1 cup granulated sugar
- 1 cup light brown sugar, packed
- ¾ cup heavy whipping cream
- ½ teaspoon baking soda
- ½ teaspoon salt
- 1 tablespoon light corn syrup (optional)
- 1 teaspoon pure vanilla extract
- 2 cups pecan halves
Instructions
-
In a 3-quart heavy saucepan, combine butter, granulated sugar, brown sugar, cream, baking soda, salt, and corn syrup if using (refer to notes below for details). Cook this mixture over medium-high heat, stirring constantly, until it achieves a vigorous rolling boil. This step typically takes approximately 5 to 6 minutes.
-
Once the mixture is at a rolling boil, stop stirring. Carefully insert a candy thermometer into the center of the mixture, ensuring it does not touch the bottom of the pan. Continue to heat the mixture, without stirring, until the thermometer registers 235℉ to 240℉, which is known as the “soft ball” stage. During this process, the mixture will become quite bubbly and foamy. Reaching this stage usually takes about 4 minutes from the start of the boil.
-
Promptly remove the saucepan from the heat. Allow the hot praline mixture to cool undisturbed for exactly 5 minutes.
-
While the mixture is undergoing its initial cooling period, prepare your cooling surface: cover either a clean counter or two large baking sheets completely with parchment paper. This will prevent sticking and make for easy removal.
-
After the 5-minute cooling interval, stir in the pure vanilla extract and the pecan halves. Continue stirring the mixture vigorously until it visibly thickens slightly and begins to lose its glossy appearance, becoming more opaque and creamy. This crucial stirring phase should last about 1 to 2 minutes.
-
Once the mixture has thickened (typically after about 1 minute of stirring), use a cookie scoop (approximately 2 tablespoons in size) to drop individual portions of the nutty mixture onto the prepared parchment paper. If the mixture spreads out too much and fails to hold its shape, it indicates it’s not quite ready; continue stirring for a little longer, then try again. (If you don’t possess a cookie scoop, you can use two spoons: one to scoop the mixture and the other to gently push it off onto the parchment.)
-
Allow the freshly formed pralines to cool and set for at least 15 minutes. You can enjoy a warm, slightly soft praline, or for a fully set, classic texture, let them cool completely for approximately 45 minutes.
Notes
- Adding corn syrup: To significantly reduce the chance of sugar crystallization (which can appear as white spots or a grainy texture), add 1 tablespoon of light corn syrup along with the other ingredients in step 1. This is an optional ingredient, as minimal crystallization is a normal occurrence in homemade candy and does not impact the delicious flavor of the pralines.
- Storage: Once your pecan pralines are completely cool and firm, store them in an airtight container or bag. They will maintain their freshness and flavor at room temperature for 1 to 2 weeks. For longer preservation, pralines can be frozen in a freezer-safe container or bag for up to two months. Thaw at room temperature before serving.
- Nut Substitution: If you prefer, feel free to substitute the 2 cups of pecan halves with an equal amount of walnuts, almonds, or another nut of your choice for a delightful variation.
Nutrition Information
Calories: 169kcal,
Carbohydrates: 19g,
Protein: 1g,
Fat: 11g,
Saturated Fat: 3g,
Polyunsaturated Fat: 2g,
Monounsaturated Fat: 5g,
Trans Fat: 0.1g,
Cholesterol: 13mg,
Sodium: 77mg,
Potassium: 54mg,
Fiber: 1g,
Sugar: 18g,
Vitamin A: 172IU,
Vitamin C: 0.1mg,
Calcium: 19mg,
Iron: 0.3mg
Nutrition information is automatically calculated and should only be used as an approximation.
Did You Make This?
Share a comment and rating below! I love hearing what you think!