

Recipe Overview: Delicious Homemade Hot Pockets
Why You’ll Love This Recipe: Homemade Hot Pockets are an incredibly versatile and flavorful alternative to traditional pizza night. They offer a delightful surprise for lunchboxes and are perfect for a quick, satisfying snack. This recipe shines with its customizability; you can easily adapt the sauces, cheeses, and fillings to suit any palate. Plus, it’s simple enough for children to get involved in the kitchen, making it a wonderful family activity!
Preparation & Cook Time: This recipe is designed for efficiency, requiring only 15 minutes of active preparation time, followed by a quick 15-minute baking period. In just about 30 minutes, you can have warm, cheesy, and delicious hot pockets ready to enjoy.
Essential Equipment: To make these pizza pockets, you’ll need a standard baking sheet to ensure even cooking and a pastry brush for applying the egg wash, which gives them a beautiful golden finish.
Yields: This recipe generously yields 8 individual homemade hot pockets, making it ideal for family meals, party appetizers, or preparing ahead for lunches throughout the week.

Step back in time to your favorite childhood snack, but with a grown-up twist and unparalleled freshness! While I haven’t personally enjoyed a store-bought Hot Pocket since my middle school days, I can confidently say that these homemade pizza pockets are a fantastic and wholesome alternative. Forget the questionable silver and cardboard microwave tubes; our version delivers a burst of flavor with a perfectly golden, crispy crust, all from the comfort of your own oven.
Unleash the Joy of Homemade Hot Pockets: A Kid-Friendly Pizza Delight
This delightful homemade hot pocket recipe was crafted with busy families and eager little chefs in mind. Just like any kid (and many adults!), mine adore anything and everything related to pizza. My goal was to create a recipe that was not only delicious but also simple enough for us to prepare together, fostering fun memories in the kitchen. It’s a fantastic way to introduce kids to cooking, letting them take ownership of their meal creation.
Now, let’s be clear: “homemade” in this context embraces convenience without sacrificing quality or taste. To ensure this recipe remains incredibly easy, highly kid-friendly, and boasts a short, manageable ingredient list, we’re leveraging the wonders of store-bought pizza dough and your favorite jarred pizza sauce. This clever shortcut means you spend less time on complex prep and more time enjoying the process and the delicious results. These homemade hot pockets are essentially miniature, portable calzones – compact, satisfying, and bursting with the flavors you love, making them perfect for on-the-go enjoyment.
The Ultimate Family-Friendly Meal or Snack: Why Homemade Hot Pockets Are a Must-Try
- Engaging for All Ages: One of the greatest joys of this recipe is its family-friendly nature. Get your kids actively involved in the creation process! They’ll love the tactile experience of rolling out the dough, carefully adding their chosen fillings, and pressing the edges together with a fork. This hands-on experience not only makes mealtime more exciting but also encourages them to try new foods. Beyond hot pockets, other kid-approved and fun-to-make recipes include these delightful air fryer bagel bites or our popular air fryer hand pies.
- A Guaranteed Hit, Even for Picky Eaters: Let’s face it, very few can resist the allure of pizza! These homemade hot pockets are a proven winner, even among the most discerning palates. Similar to other family favorites like my stuffed pizza bites, the incredibly easy and single-pan pizza pasta, and classic English muffin pizzas, homemade hot pockets are destined to become a staple in your household, bringing smiles to every family member.
- Effortless Preparation for Busy Lives: The term “homemade” often conjures images of extensive culinary endeavors. However, with this recipe, that couldn’t be further from the truth! We’re talking just 15 minutes of active preparation, combined with a concise list of readily available ingredients. Once assembled, the oven does the heavy lifting, allowing you to relax while your delicious hot pockets bake to golden perfection. It’s the perfect solution for busy weeknights or a spontaneous weekend treat.
- Limitless Customization at Your Fingertips: This recipe empowers you to be the culinary artist! Since you’re making them from scratch, the filling possibilities are truly endless. While the recipe is initially designed for a classic pepperoni pizza hot pocket, we’ll delve into a plethora of exciting ways to switch up the fillings, ensuring every batch can be a unique and delightful experience tailored to individual tastes. From savory breakfast options to robust veggie combinations, your creativity is the only limit!

Essential Ingredients for Perfect Pizza Pockets: Quality & Substitutions
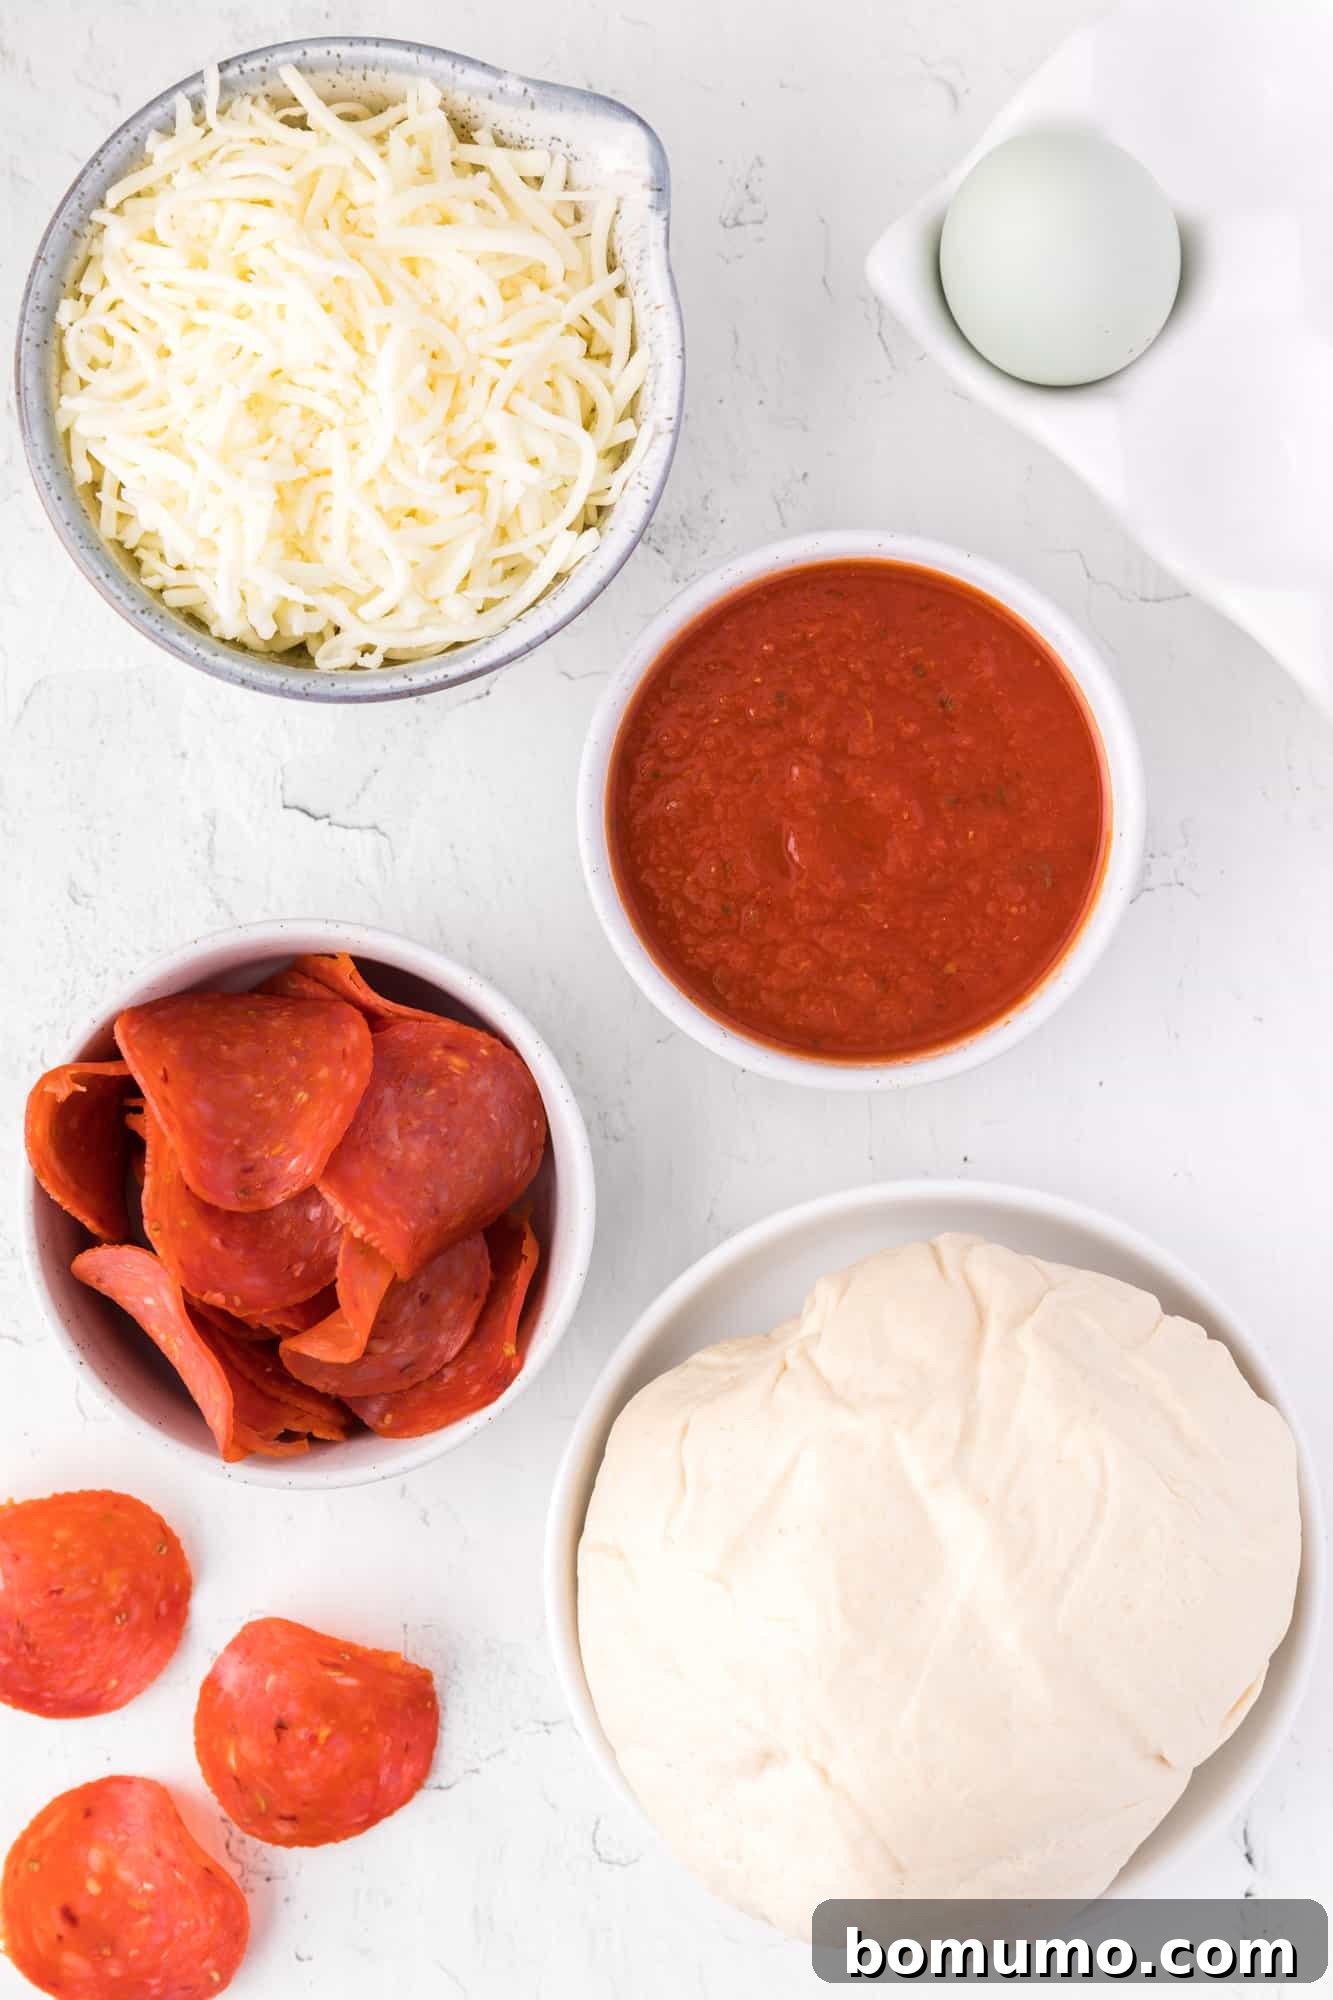
Crafting the perfect homemade hot pocket starts with a selection of simple yet high-quality ingredients. Here’s what you’ll need, along with some helpful tips and substitution ideas:
- Store-Bought Pizza Dough: For ultimate convenience, a 16 oz. ball of refrigerated pizza dough from your local grocery store is ideal. If frozen, ensure it’s fully thawed before use. Feeling ambitious and have extra time? A batch of your favorite homemade pizza dough will undoubtedly take these hot pockets to the next level with its superior texture and flavor. The key is a dough that’s easy to roll and work with.
- Flavorful Pizza Sauce: Choose a pizza sauce that you genuinely love. Whether it’s a zesty, robust marinara or a sweeter, milder variety, the sauce forms the delicious base of your hot pockets. If you don’t have pizza sauce on hand, a good quality marinara sauce or any other smooth pasta sauce will work beautifully. This is definitely no time for “pizza purism” – use what you have and what your family enjoys!
- Shredded Mozzarella Cheese: Mozzarella is the classic choice for its incredible melt and mild flavor. It delivers that satisfying cheese pull everyone loves. For a more complex flavor profile, a pre-shredded Italian cheese blend, which often includes mozzarella, provolone, and parmesan, is also an excellent option and melts just as well.
- Mini Pepperoni: These small pepperoni pieces are perfect for distributing evenly within your hot pockets, ensuring a savory bite in every corner. If you can’t find mini pepperoni, don’t fret! Simply purchase regular-sized pepperoni and give it a rough chop before adding it to your filling. This ensures the pieces aren’t too large, preventing them from poking through the dough.
- One Large Egg: A single large egg, lightly beaten, serves a crucial purpose in this recipe. It’s brushed over the tops of the hot pockets before baking, acting as a natural glue to help any optional crust toppings adhere beautifully. More importantly, it contributes to a gorgeous, glossy, and golden-brown crust, making your homemade hot pockets as appealing to the eye as they are to the palate.
- Optional Toppings for the Crust: To add an extra layer of flavor and visual appeal, consider sprinkling your hot pockets with various seasonings after applying the egg wash. Grated Parmesan cheese will add a salty, umami kick. Dried Italian seasoning, oregano, or a touch of garlic salt can enhance the classic pizza flavors. Feel free to leave them plain for a simpler taste, or experiment with your favorite herbs and spices.
Step-by-Step Guide to Crafting Your Perfect Homemade Hot Pockets
Creating these delectable hot pockets is a straightforward and enjoyable process. Follow these detailed steps for a perfect batch:
-
Begin by preheating your oven to a steady 400°F (200°C). This ensures your hot pockets bake evenly and quickly. While the oven preheats, prepare a large baking sheet by lining it with parchment paper. Parchment paper is essential here as it prevents the dough from sticking and makes for an incredibly easy cleanup after baking.
-
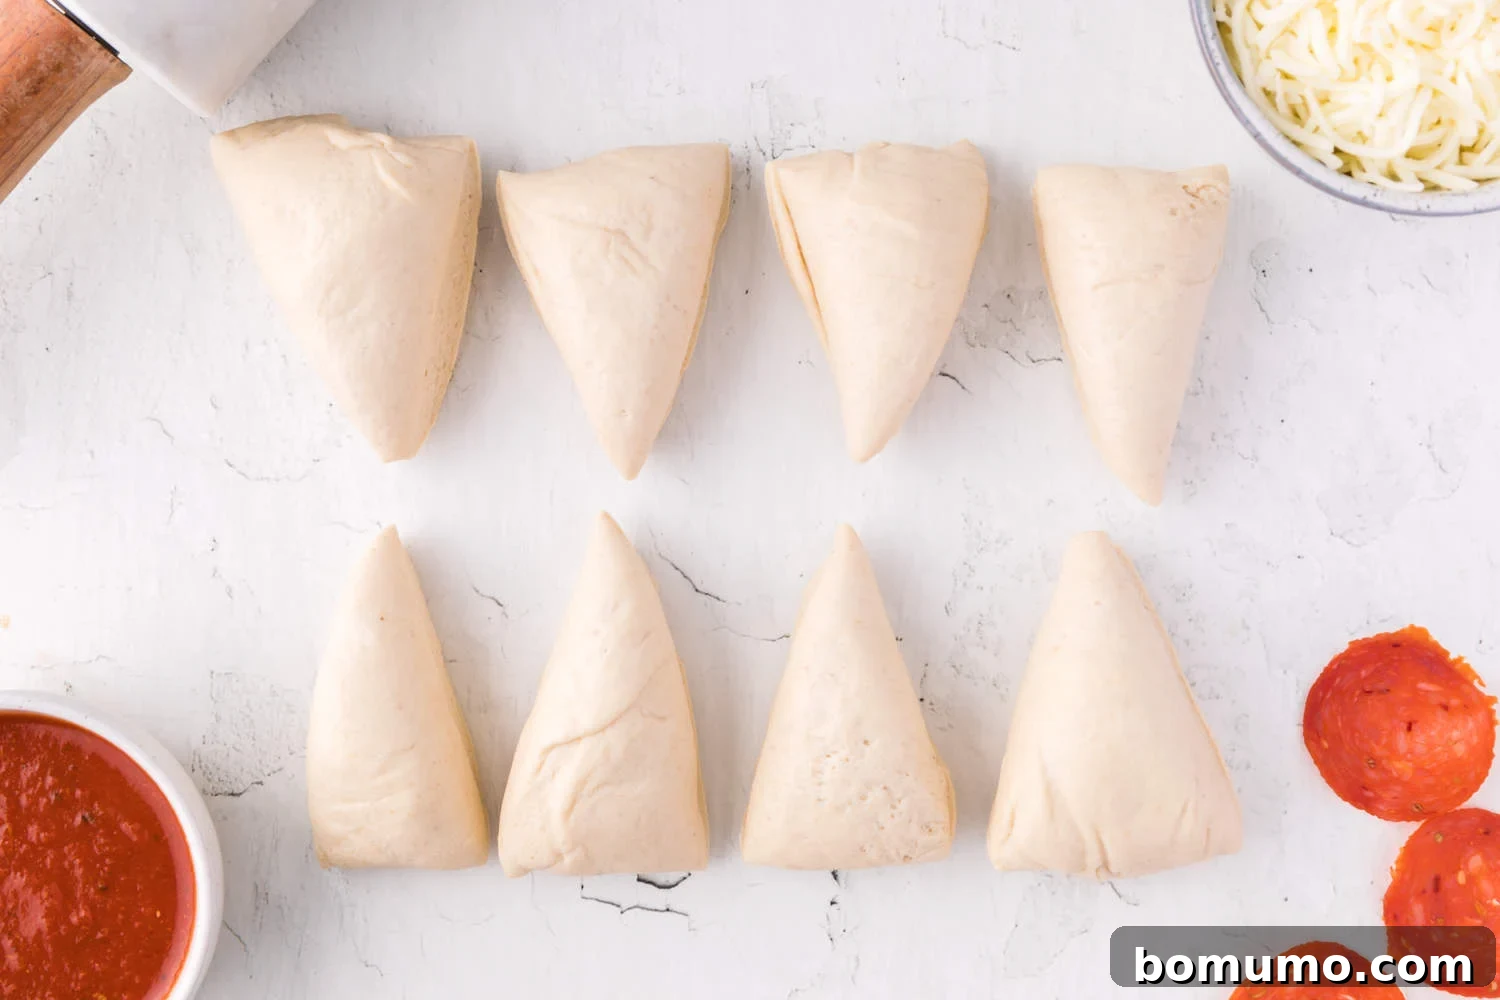
On a lightly floured countertop or a clean working surface, take your pizza dough. Divide the entire ball of dough into 8 equal portions. This measurement is key to achieving uniformly sized hot pockets that cook at the same rate. You can eyeball it or use a kitchen scale for precision if you prefer.
-
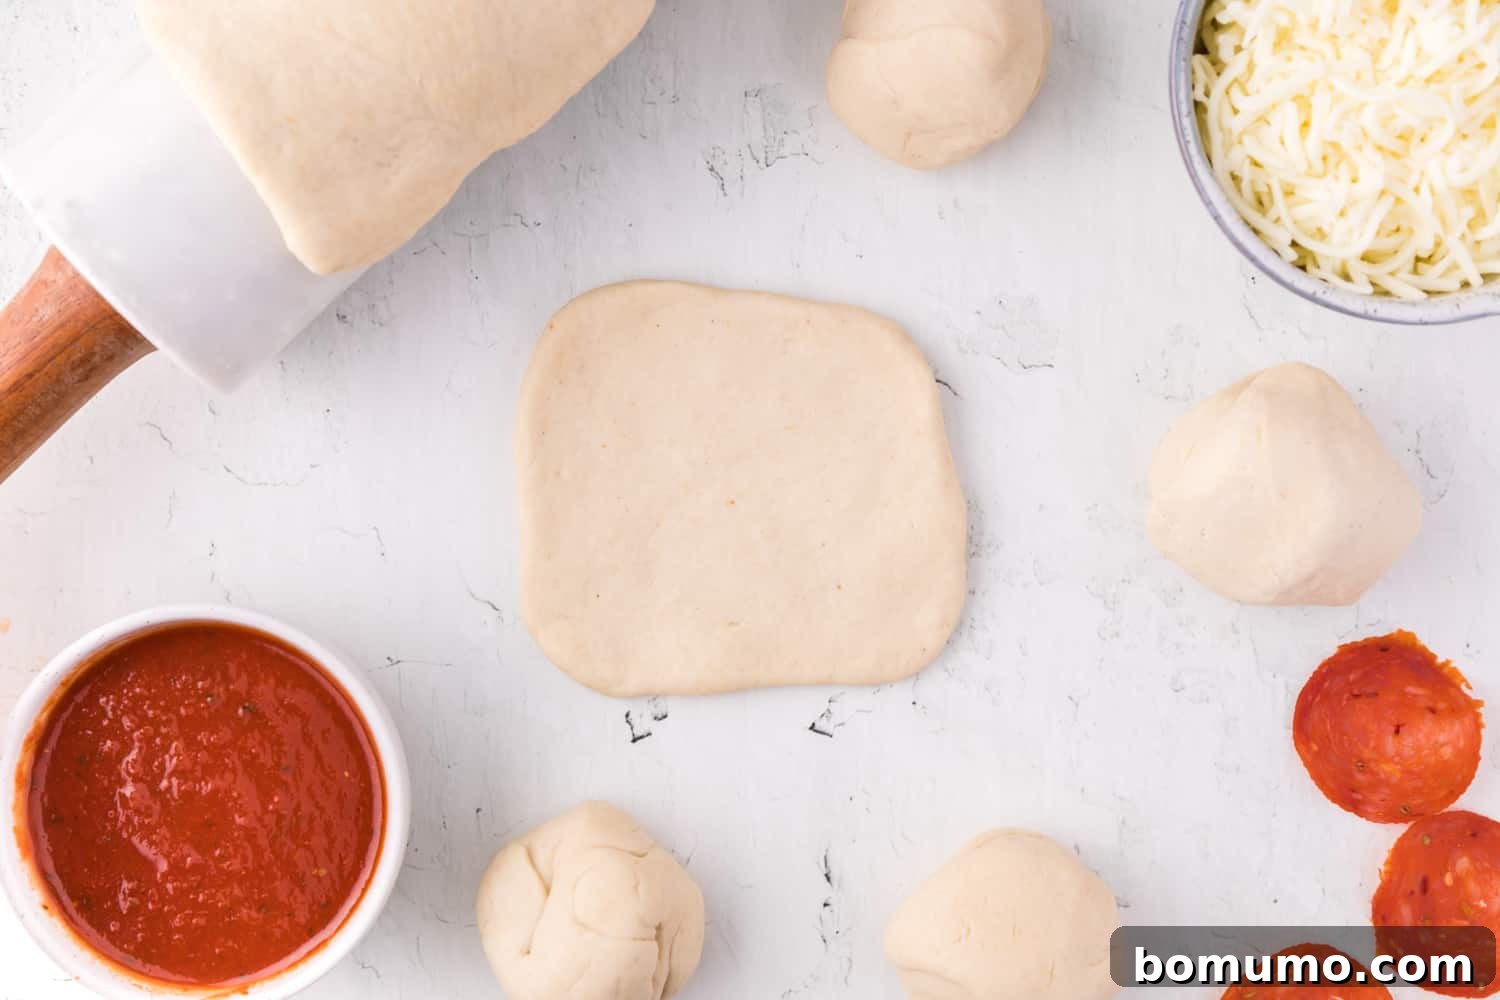
Roll out one of the dough portions. Using a rolling pin, flatten it into a square or round shape that is approximately 4 to 5 inches in diameter. The thickness should be even, not too thin that it tears, nor too thick that it becomes bready.

-
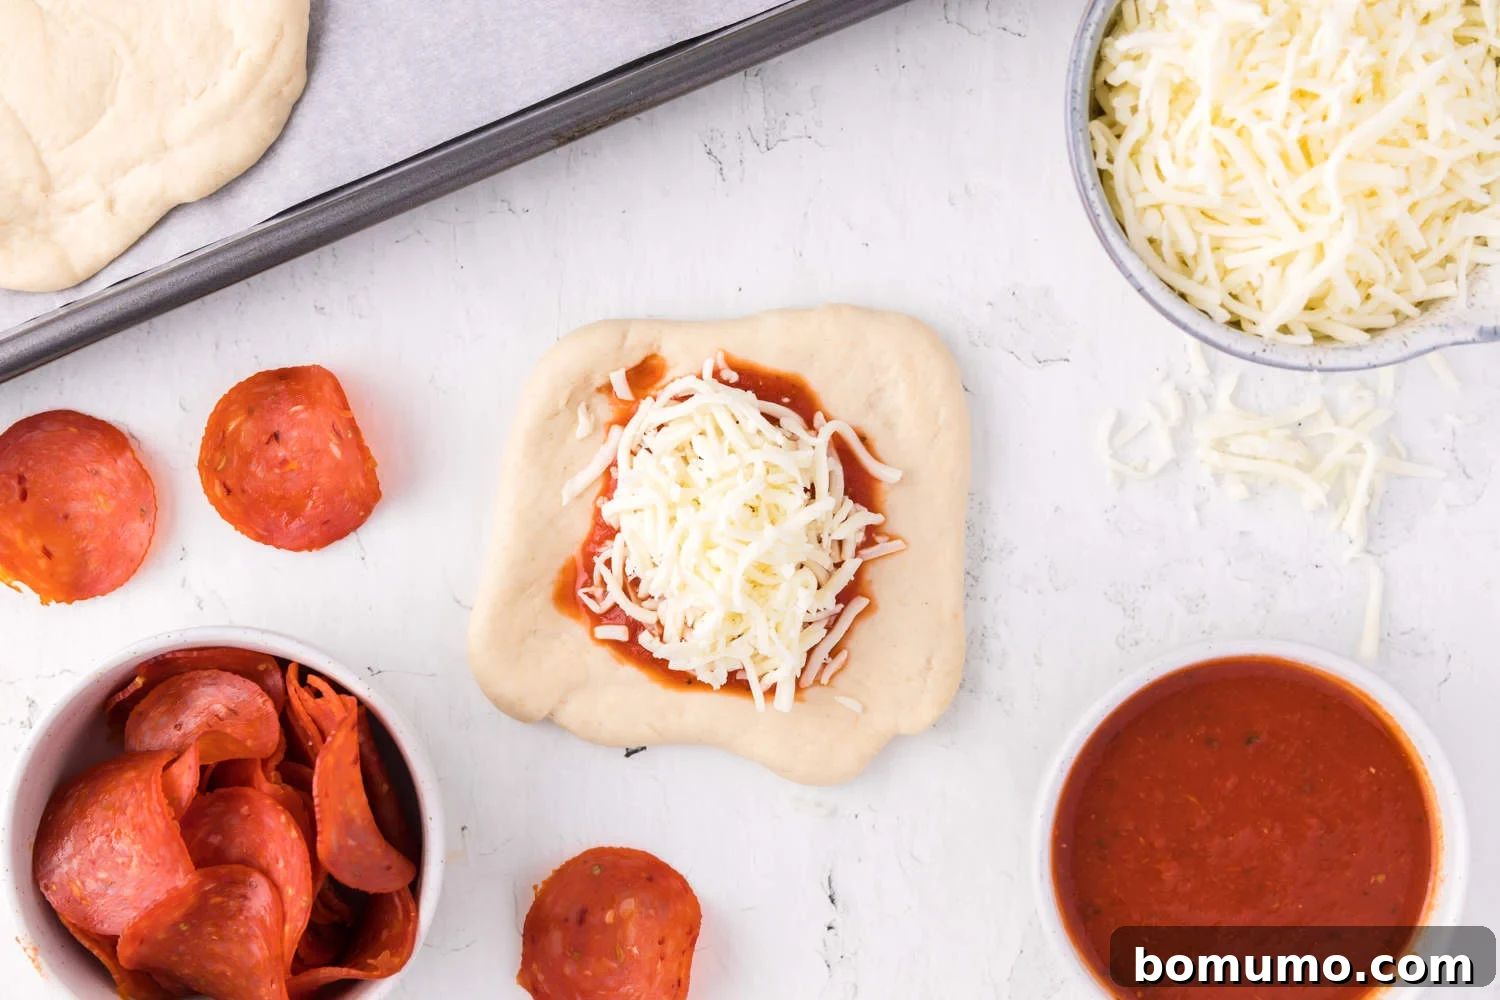
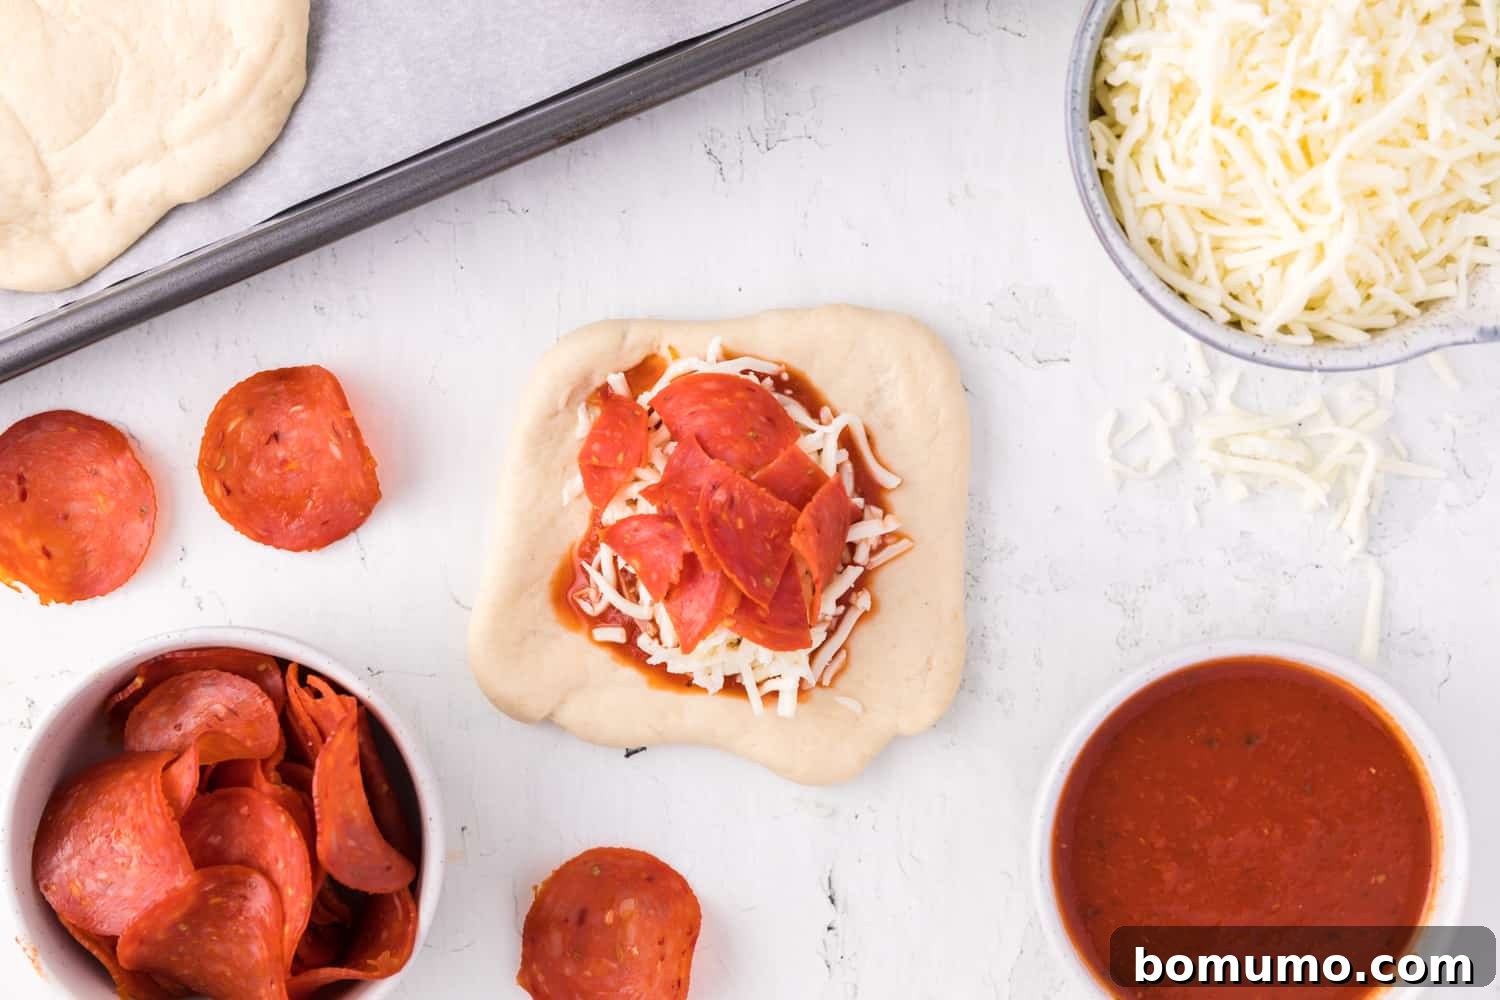
Now it’s time for the delicious filling! In the middle of your rolled-out dough, carefully spread 2 teaspoons of your chosen pizza sauce. Over the sauce, sprinkle 2 tablespoons of shredded mozzarella cheese, followed by 1 tablespoon of mini pepperoni. It might be tempting to pile on more cheese and meat, but experience shows that limiting the filling is crucial to prevent excessive oozing and bursting during the baking process. A moderate amount ensures everything stays neatly inside its dough pocket.
-
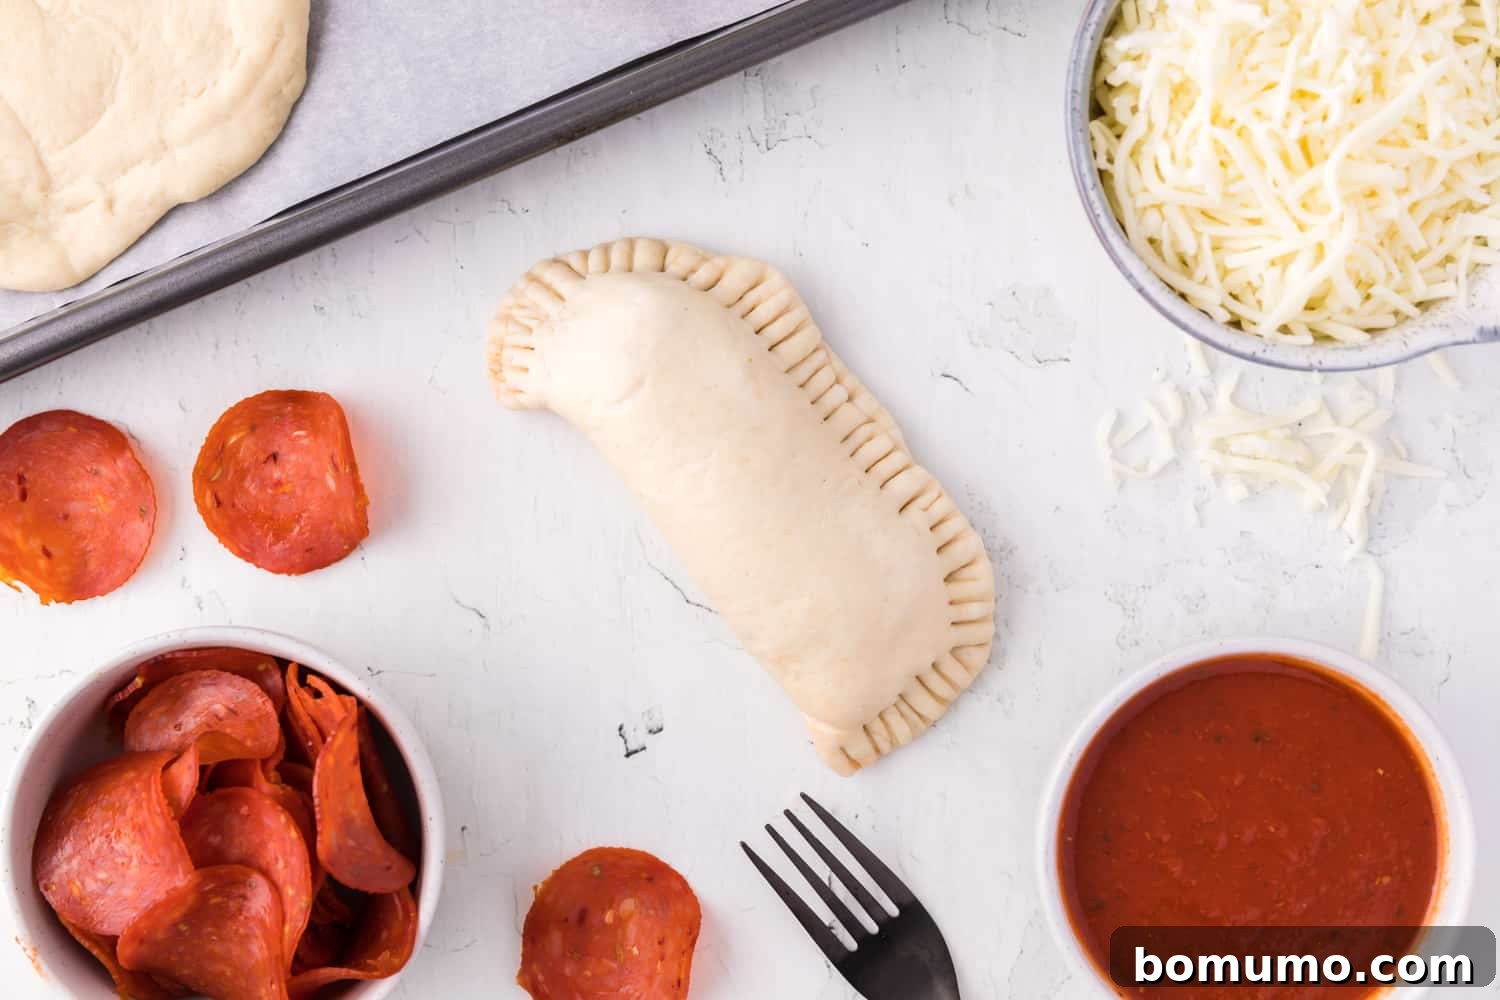
Gently fold one half of the dough over the filling to meet the other side, forming a pocket. Then, firmly crimp the edges together using the tines of a fork. This creates a secure seal that keeps all the delicious filling inside. Don’t worry if they don’t look perfectly uniform or machine-made like store-bought versions; the charm of these hot pockets lies in their rustic, homemade appearance! Place the finished homemade hot pocket onto your prepared baking sheet.
-
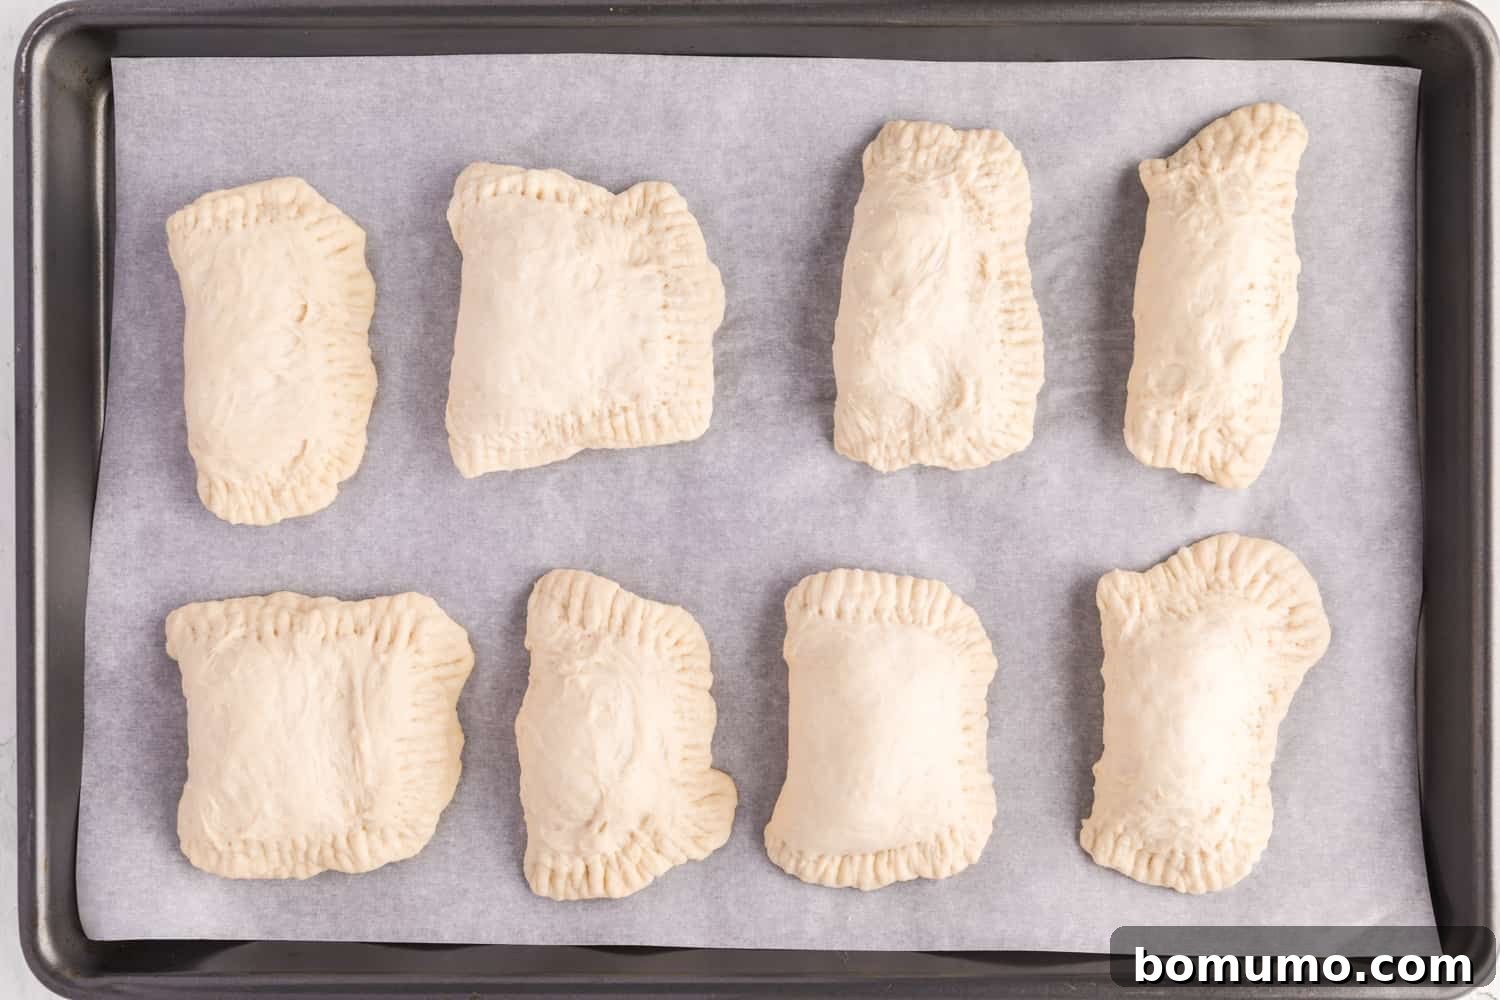
Repeat the rolling, filling, folding, and crimping process with the remaining dough portions and fillings until you have 8 beautifully assembled pepperoni pizza pockets resting on your baking sheet. Ensure there’s a little space between each one to allow for even cooking.
-
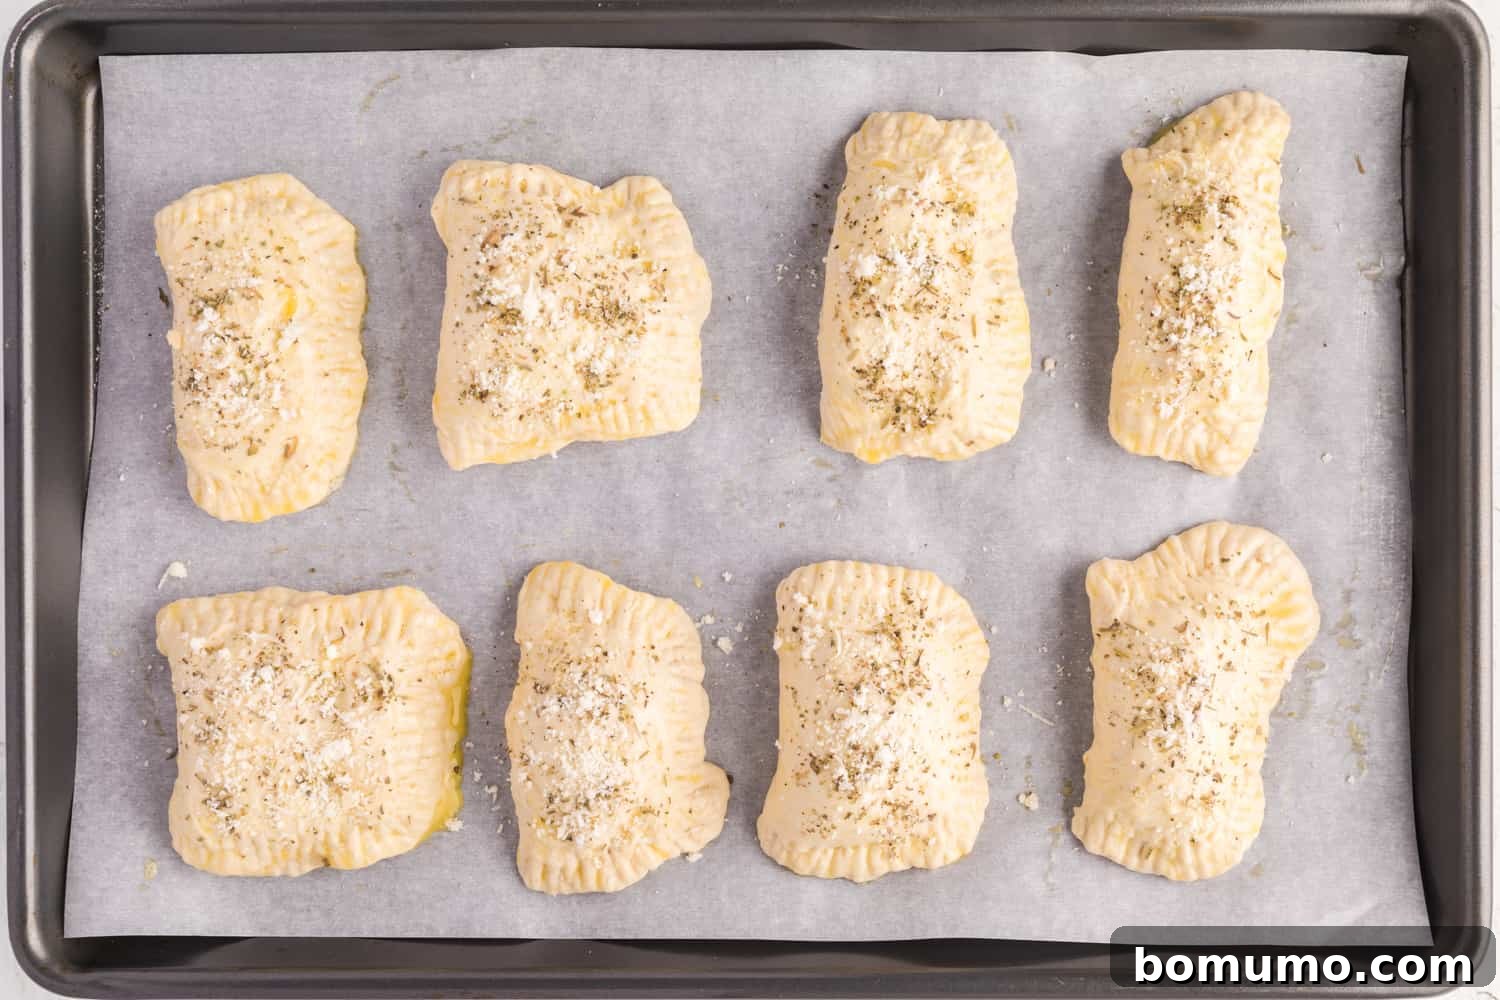
Before baking, brush the top surface of each hot pocket generously with the lightly beaten egg. This egg wash will give your crust a beautiful golden color and a slight sheen. If you desire, sprinkle on any additional toppings like grated Parmesan cheese, dried Italian seasoning, oregano, or a touch of garlic salt at this stage. These toppings will adhere perfectly to the egg wash. Finally, transfer the baking sheet to your preheated oven and bake for 15 to 18 minutes, or until the hot pockets are puffed up, the crust is a rich golden brown, and the filling is bubbly and heated through. Serve immediately and enjoy the warm, savory goodness!
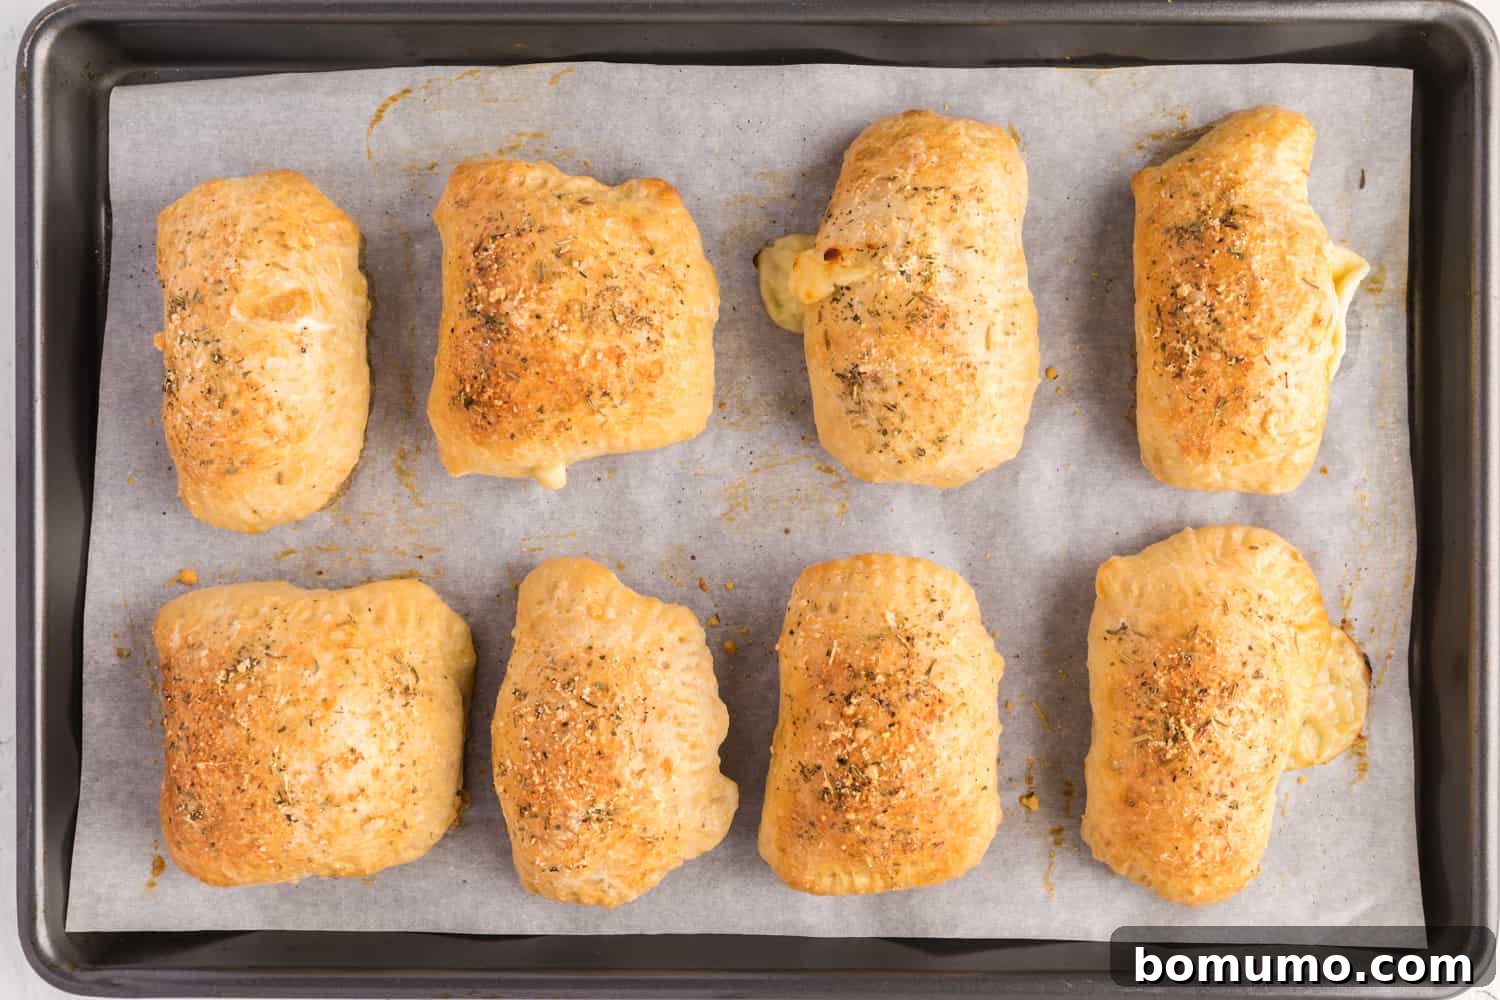
Endless Creativity: Customizable Fillings for Your Pizza Pockets
The beauty of homemade hot pockets lies in their incredible versatility. Beyond the classic pepperoni, you can fill them with virtually anything your heart (and pantry) desires. Here are some fantastic ideas to spark your culinary imagination:
- Classic Ham and Cheese Hot Pockets: For a delicious non-pizza twist, simply omit the pizza sauce entirely. Instead, fill your dough pockets with ½ cup of finely diced cooked ham (even leftover crockpot ham works wonderfully!) and 1 cup of shredded cheddar cheese. You can also experiment with other cheeses like Swiss or provolone for different flavor profiles.
- Vibrant Veggie Pizza Hot Pockets: Load up your hot pockets with a medley of colorful and nutritious vegetables. Consider adding sautéed mushrooms, thinly sliced red onion, finely chopped bell peppers, small broccoli florets, or sliced black olives. Remember, for watery vegetables like mushrooms and broccoli, it’s crucial to sauté them first to release excess moisture. This step prevents your hot pockets from becoming soggy and ensures a perfectly crisp crust.
- Hearty Meat Lovers’ Delight: For those who crave more protein, combine classic pepperoni with other savory meats. Try adding crispy cooked crumbled bacon (or store-bought bacon bits for convenience) and your favorite cooked sausage. Ensure all meats are fully cooked before adding them to the dough.
- Comforting Meatball and Mozzarella Hot Pockets: Transform leftover meatballs into a delightful hot pocket filling. Chop your meatballs into small, manageable pieces and use them in place of the pepperoni, alongside your pizza sauce and mozzarella. It’s a fantastic way to repurpose leftovers!
- Savory Chicken Bacon Ranch: This popular flavor combination works incredibly well in a hot pocket. Fill your pockets with tender shredded chicken, crispy cooked bacon pieces, and a drizzle of creamy ranch dressing. This creates a rich, satisfying meal-in-a-pocket.
- Zesty Buffalo Chicken: For a kick of spice, stuff your hot pockets with a spoonful of flavorful crockpot Buffalo chicken (ensure it’s shredded and well-drained) and a sprinkle of blue cheese or mozzarella. Serve these zesty pockets with a side of ranch dressing or blue cheese dressing for dipping to complete the experience.
- Wholesome Breakfast Hot Pockets: Don’t limit these to lunch or dinner! Start your day with a savory breakfast hot pocket. Fill them with fluffy scrambled eggs, shredded cheddar cheese, and your choice of cooked breakfast meat like crumbled bacon or sausage. They’re perfect for a quick, grab-and-go morning meal.

Air Fryer Magic: For Crispy Homemade Hot Pockets
For an extra crispy crust and quicker cooking time, your air fryer is an excellent tool for preparing these homemade hot pockets. Simply place them in your air fryer basket in a single layer, ensuring they don’t overcrowd the basket for optimal air circulation. Cook them at approximately 350ºF (175°C) for about 10 minutes, or until they achieve a beautiful golden exterior and the dough is thoroughly cooked through. The air fryer method results in an irresistibly crunchy crust that perfectly complements the warm, gooey filling.
Common Challenges and Simple Solutions for Perfect Pizza Pockets
Even the simplest recipes can present small hurdles. Here are some common troubleshooting tips to ensure your homemade hot pockets turn out perfectly every time:
Dough Shrinking While Rolling? If you find your pizza dough resisting your efforts and shrinking back after you roll it out, it’s a common issue related to gluten elasticity. The gluten strands can become tight and springy, causing the dough to retract. To remedy this, simply cover the dough and allow it to rest at room temperature for an additional 5 to 10 minutes. This resting period allows the gluten to relax, making the dough much more pliable and easier to roll to your desired size and shape. Patience is key here!
Filling Oozing Out? It can be frustrating when your delicious filling escapes during baking, though rest assured, it won’t impact the taste! This often happens if the edges aren’t sealed tightly enough or if the pockets are overfilled. To minimize oozing, ensure you press the edges together very well with a fork, creating a strong, secure crimp all around. We’ve experimented with poking small holes in the top to vent steam, but unfortunately, this often allows more filling to escape than it helps. The most effective strategy is to create a super-tight seal from the start. Also, remember to limit the amount of filling as suggested in the instructions to prevent excess pressure from building up inside the pocket.
Make Ahead & Reheating Tips for Convenient Meals
Prepare Ahead & Freeze: These homemade hot pockets are fantastic for meal prepping! Once they’re completely baked and have cooled to room temperature, wrap each hot pocket individually in plastic wrap, followed by a layer of aluminum foil. This double-wrapping method protects them from freezer burn. Place the wrapped hot pockets in a freezer-safe container or a heavy-duty freezer bag. They can be stored in the freezer for up to 1 month, ready for a quick meal whenever you need one.
Reheating Instructions (Two Methods):
For the best texture and taste, reheating in the oven is highly recommended:
- Oven Reheating (Preferred): Unwrap a frozen hot pocket and place it directly on a baking sheet. (For even easier cleanup, you can line the baking sheet with foil.) Preheat your oven to 350°F (175°C). Bake for 18 to 20 minutes, or until the hot pocket is thoroughly heated through and the crust has regained its crispness. This method ensures a beautifully crunchy exterior.
- Microwave Reheating (Quick Option): If you’re short on time, you can use the microwave. Unwrap a frozen hot pocket and cover it loosely with a damp paper towel. Microwave from frozen for approximately 1 minute and 20 seconds. While this method gets the job done quickly, be aware that the crust may become softer rather than crispy.

Unlock Your Free Meal Plan Today!
Are you interested in simplifying your weekly meal planning with a comprehensive guide that includes this fantastic recipe? Take a moment to explore Meal Plan #61! Each plan provides a wholesome, easy-to-follow recipe for every weekday, along with a conveniently categorized grocery list designed to streamline your shopping trips. We continuously update our collection, adding a fresh new meal plan every single week to keep your culinary journey exciting and effortless.
Discover More Irresistible Pizza Recipes for Every Occasion
Pizza Sliders: A Crowd-Pleasing Appetizer
Zesty BBQ Chicken Pizza: A Flavorful Twist
Pizza Stuffed Spaghetti Squash: A Healthy Indulgence
Flavorful Pizza Burgers (Turkey-Based)
Homemade Hot Pockets: The Ultimate Family Meal
Rachel Gurk
15
15
30
8

Print Recipe
Ingredients
- 16 oz. ball pizza dough, thawed if frozen (store-bought or homemade for convenience)
- ½ cup pizza sauce (your favorite brand or a simple marinara)
- 1 cup shredded mozzarella cheese (or an Italian cheese blend for extra flavor)
- ½ cup mini pepperoni (roughly chopped regular pepperoni works just as well)
- 1 large egg, beaten (for a golden crust and toppings adhesion)
Instructions
-
Preheat your oven to 400°F (200°C). Prepare a large baking sheet by lining it with parchment paper; this will prevent sticking and make cleanup a breeze.
-
On a lightly floured surface, divide your pizza dough into 8 equal portions. This ensures uniform hot pockets.
-
Take one portion of dough and roll it out into a square or round shape, approximately 4 to 5 inches in diameter. In the very center of the rolled dough, spread about 2 teaspoons of pizza sauce. Layer with 2 tablespoons of shredded mozzarella cheese, followed by 1 tablespoon of mini pepperoni. Be careful not to overfill, as this can lead to oozing during baking. Fold the dough over to create a pocket, then firmly crimp the edges together with a fork to seal completely. This rustic, homemade look is part of their charm! Place the sealed hot pocket onto your prepared baking sheet and repeat the process with the remaining dough and fillings.
-
Once all eight pizza pockets are assembled and arranged on the baking sheet, brush the top of each one evenly with the beaten egg. This egg wash will help achieve a beautiful golden-brown crust and allow any optional toppings to adhere perfectly. For an extra touch of flavor, sprinkle with grated Parmesan cheese, dried Italian seasoning, oregano, or a pinch of garlic salt before baking.
-
Bake your homemade hot pockets in the preheated oven for 15 to 18 minutes, or until the crust is puffed up and beautifully golden brown. Serve warm and enjoy!
Recipe Notes & Expert Tips
- Homemade Elements: For an even more homemade touch, consider preparing your own pizza dough from scratch. A batch of homemade pizza sauce can also elevate the flavors significantly.
- Ham and Cheese Hot Pocket: Transform these into a classic ham and cheese delight by omitting the pizza sauce. Instead, use ½ cup of finely diced cooked ham and 1 cup of cheddar cheese (or your preferred cheese like Swiss or provolone) in place of the pepperoni and mozzarella.
- Creative Flavor Combinations: Expand beyond the classic pepperoni! Experiment with thinly sliced red onion, colorful bell peppers, sautéed mushrooms (ensure they are cooked first to remove excess moisture), finely chopped broccoli florets, savory ground sausage, tender shredded chicken, or crispy bacon bits. Remember, any meat added should be fully cooked, and watery vegetables should be pre-sautéed to prevent a soggy hot pocket. For more exciting ideas, refer to the “Customizable Fillings” section above.
- Freezing Instructions: To enjoy these delicious hot pockets later, allow them to cool completely after baking. Individually wrap each hot pocket tightly in plastic wrap, then an additional layer of aluminum foil. Place them in a freezer-safe container or bag and freeze for up to 1 month.
- Reheating from Frozen (Two Methods):
- Oven Method (Recommended for Crispy Crust): Preheat your oven to 350ºF (175°C). Unwrap a frozen hot pocket and place it directly on a baking sheet (lined with foil for easier cleanup, if desired). Bake for 18 to 20 minutes, or until thoroughly heated through and the crust is crisp again.
- Microwave Method (Quick & Convenient): For a faster option, unwrap a frozen hot pocket and wrap it loosely in a damp paper towel. Microwave for approximately 1 minute and 20 seconds. While quicker, note that the crust may become softer rather than crispy with this method.
- Recipe Update: This recipe was last revised in August 2023 to bring you the best possible homemade hot pocket experience.
Nutritional Information (Approximate)
Calories: 230kcal,
Carbohydrates: 28g,
Protein: 10g,
Fat: 9g,
Saturated Fat: 4g,
Polyunsaturated Fat: 1g,
Monounsaturated Fat: 3g,
Trans Fat: 0.1g,
Cholesterol: 41mg,
Sodium: 691mg,
Potassium: 84mg,
Fiber: 1g,
Sugar: 4g,
Vitamin A: 195IU,
Vitamin C: 1mg,
Calcium: 78mg,
Iron: 2mg
Note: Nutrition information is automatically calculated and should be considered an approximation. Exact values may vary based on specific ingredients and brands used.
Tried This Recipe?
We’d love to hear your thoughts! Share a comment and rating below. Your feedback helps us grow!